node 使用版本號16.14.0
npm init
1
2
| npm init
npm init -y //產生一個空白的 package.json (懶人專用)
|
基本上結束後,你可以看到這個資料夾底下,新增了一個 Package.json
內容如下:
package name: 你這個 Project 要叫什麼名字
version: 你決定這個 Project 現在該是第幾版
description: Project 基本介紹
entry point: 進入點,如果要跑你的 Project 應該要執行哪個檔案
author: 作者
license: 你這個 Project 是採用什麼授權的
test command:
啟動指令node
新增server.js
console.log(‘Hello’)
修改啟動指令為npm run server
在package.json內scripts新增”server”: “node server.js”
1
2
3
| "scripts": {
"server": "node server.js"
},
|
npm
搜尋 express
express.js 官網
Express 是最小又靈活的Node.js Web 應用程式架構,為Web 與行動式應用程式提供一組健全的特性。
安裝express
1
| npm install express --save
|
在server.js內容下新增
1
2
3
4
5
6
7
8
9
10
11
12
13
| 載入express
const express = require('express')
const app = express()
//client req=> Node App
//client res<= Node App
app.get('/', (req, res) => {
res.send('Hello Node Api!')
})
const PORT = process.env.PORT || 3030;
app.listen(PORT, () => console.log(`Server Port ${PORT}`));
|
insomnia Api
使用nodemon此工具是如Postman功能相同
安裝nodemon
安裝於全域
1
| npm install nodemon -g //安裝於全域
|
nodemon 功能
自動重啟應用程式,持續偵測你的預設程式,默認支持 node&coffeescript,但是易於運行任何可執行文件(比如python,make等)可以忽略特定文件或目錄,觀察指定的目錄資料夾,與服務器應用程序或一次運行公用程序和 REPLs 一起使用,可在 node 中被存取使用
nodemon
修改自動重啟應用程式為npm run dev
在package.json內scripts新增”server”: “nodemon server.js”
1
| "dev": "nodemon server.js",
|
連結MongoBD
Mongoose 是MongoDB 的前端,MongoDB 是一個使用面向文檔數據模型的開源NoSQL 數據庫。
npm 官網=>搜尋 mongoose
mongoose
安裝mongoose
MongoDB官網
//如圖
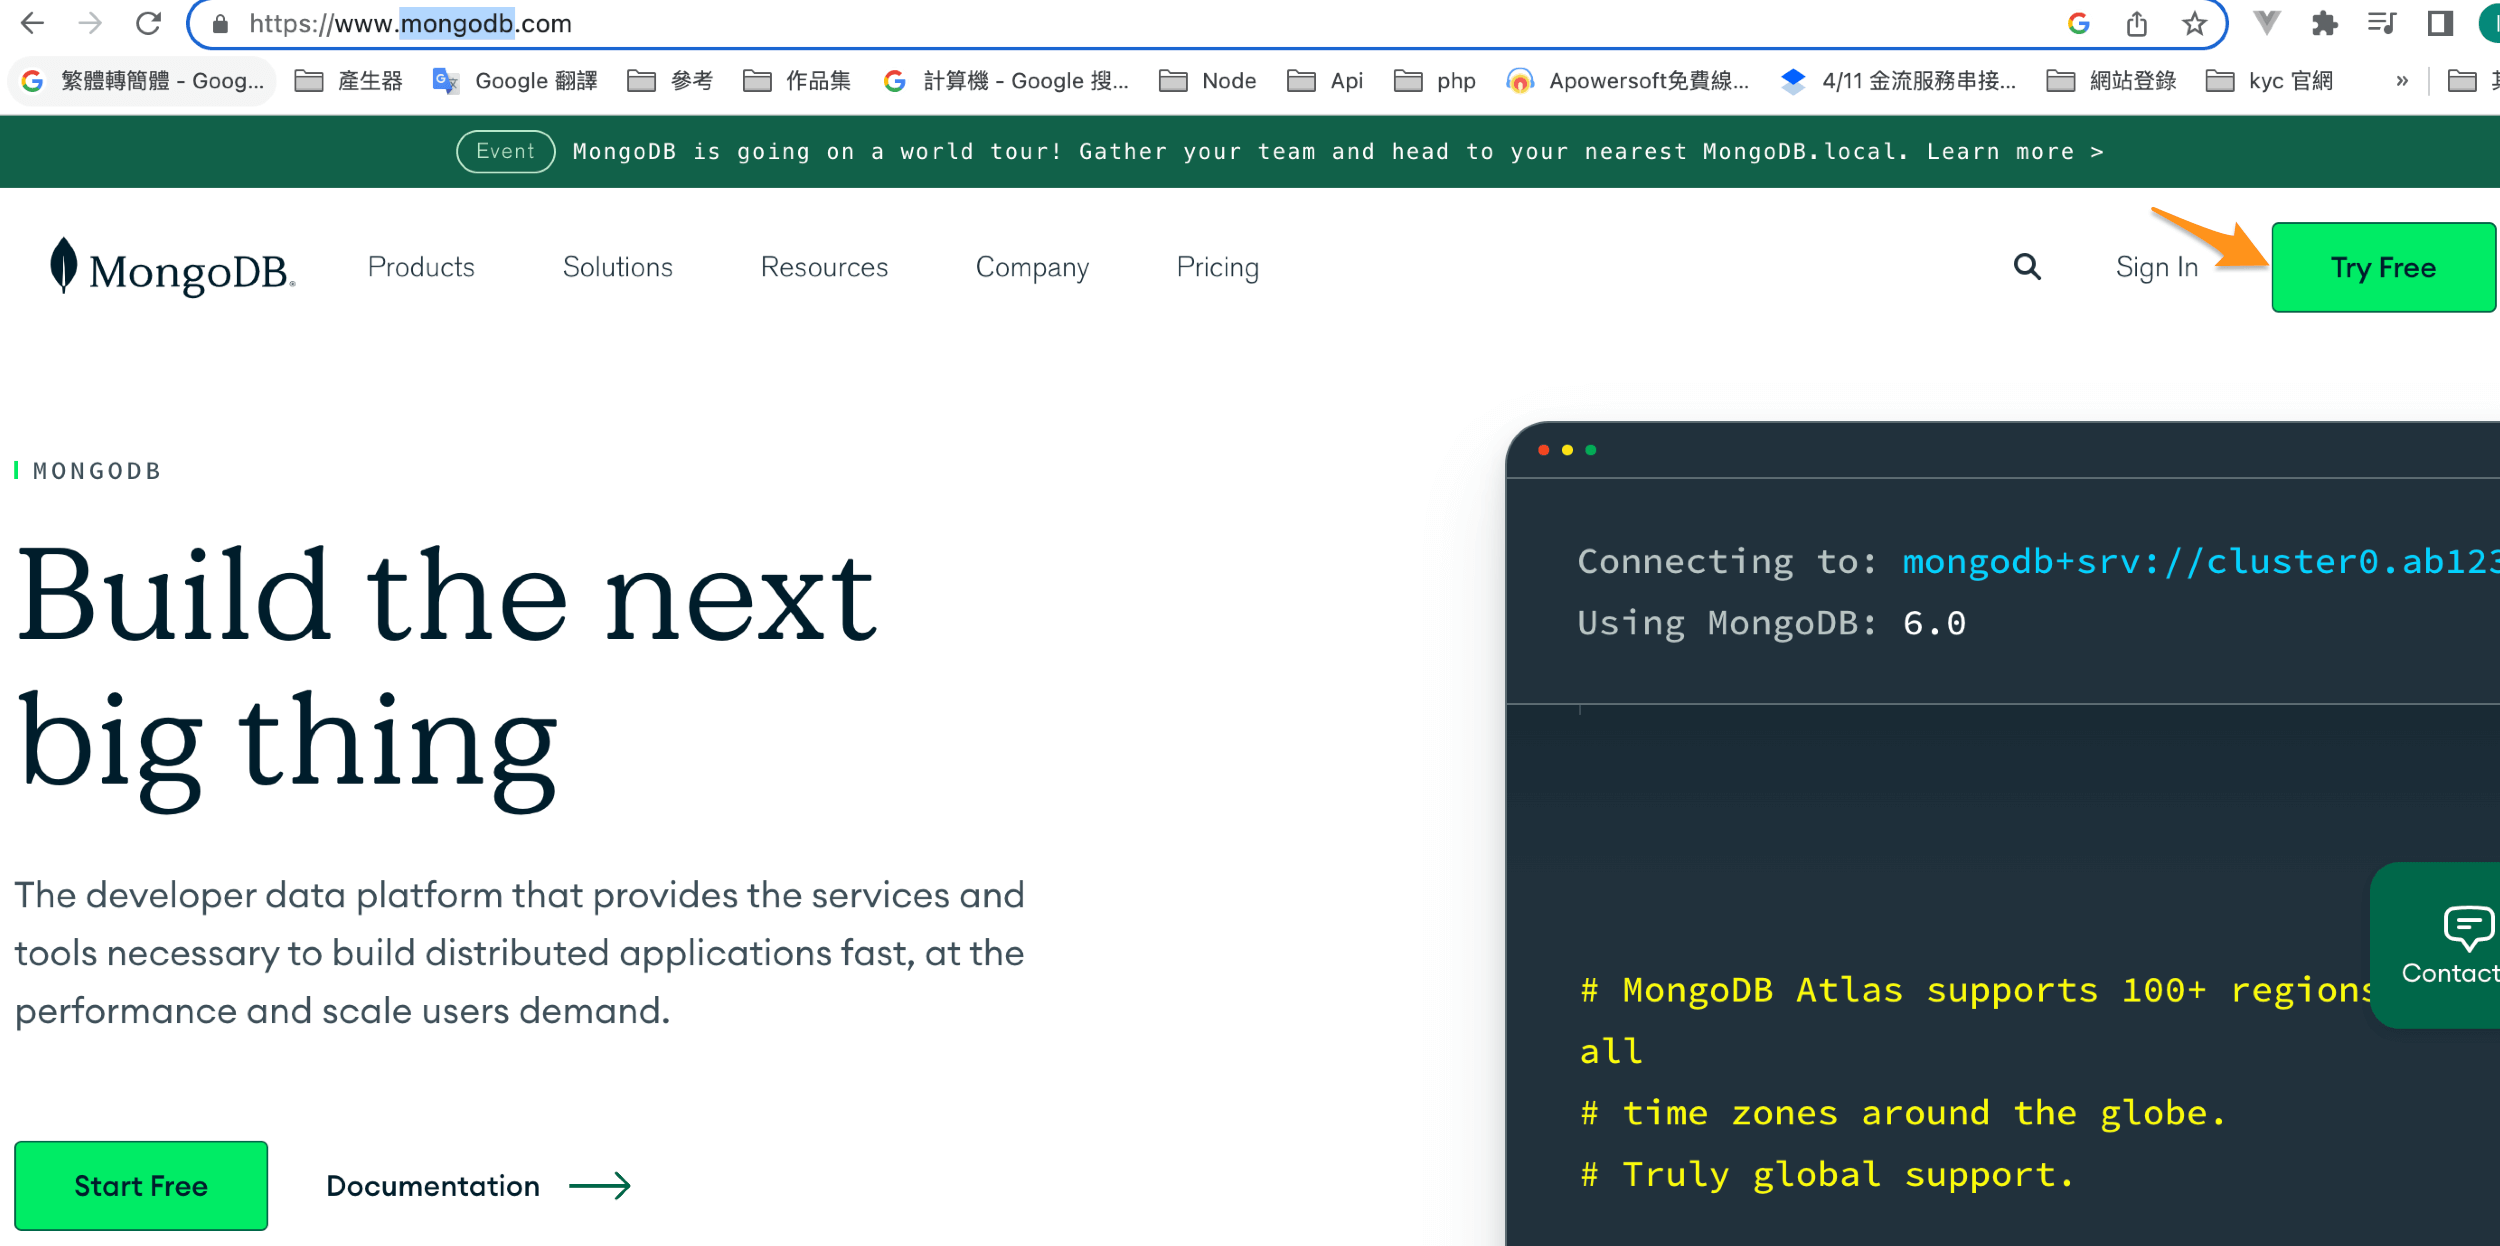
Accept Privacy Policy & Teams of Service
譯:接受隱私政策和服務條款
點選

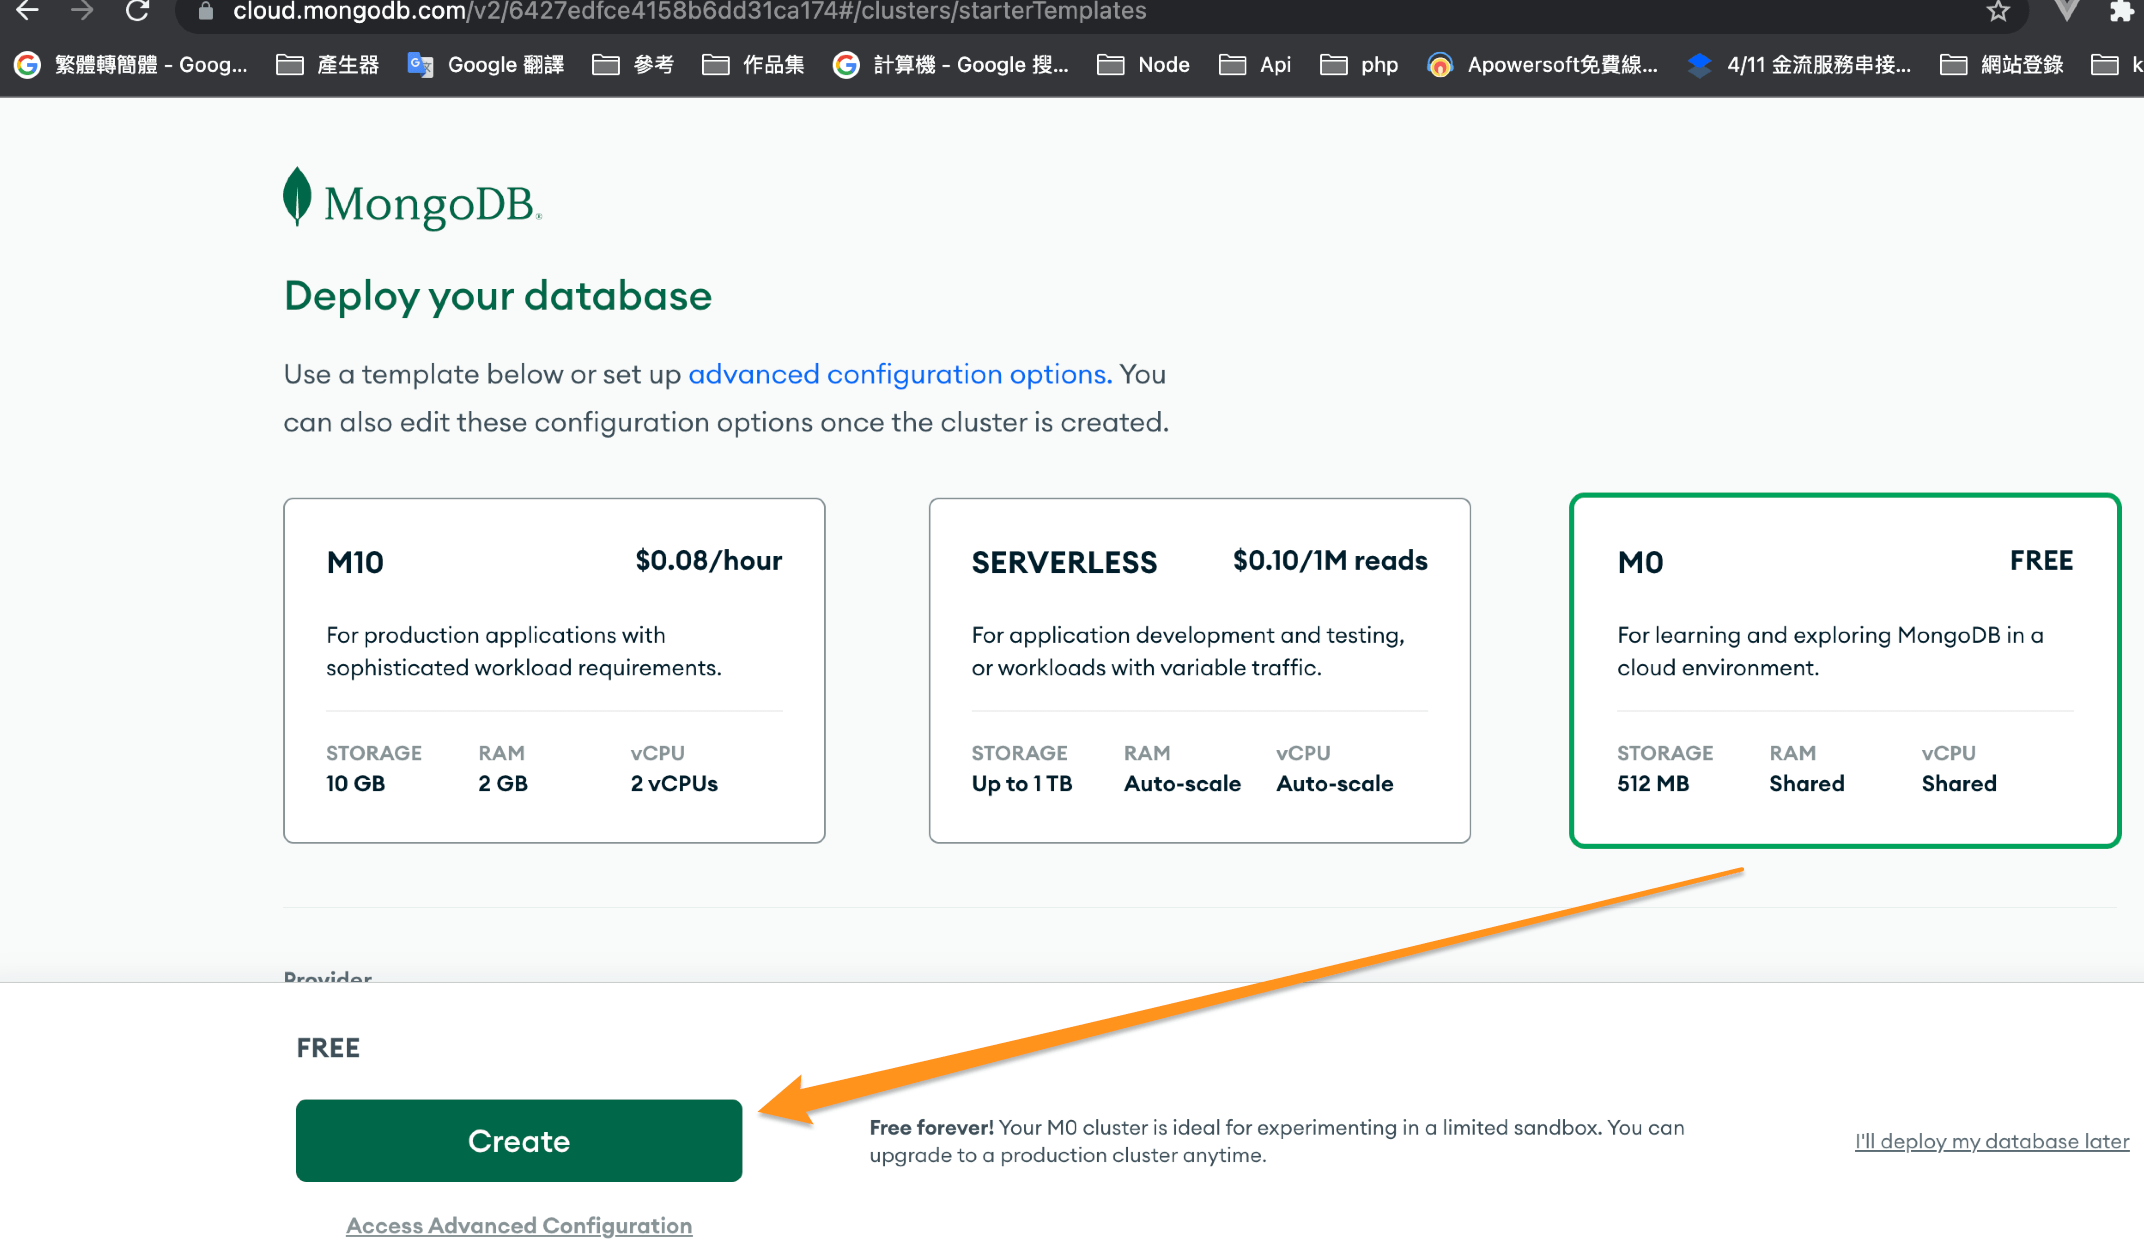
點選建立資料庫Build the DataBase

選擇Free 免費,選擇地區並創建
取得使用者帳號與密碼
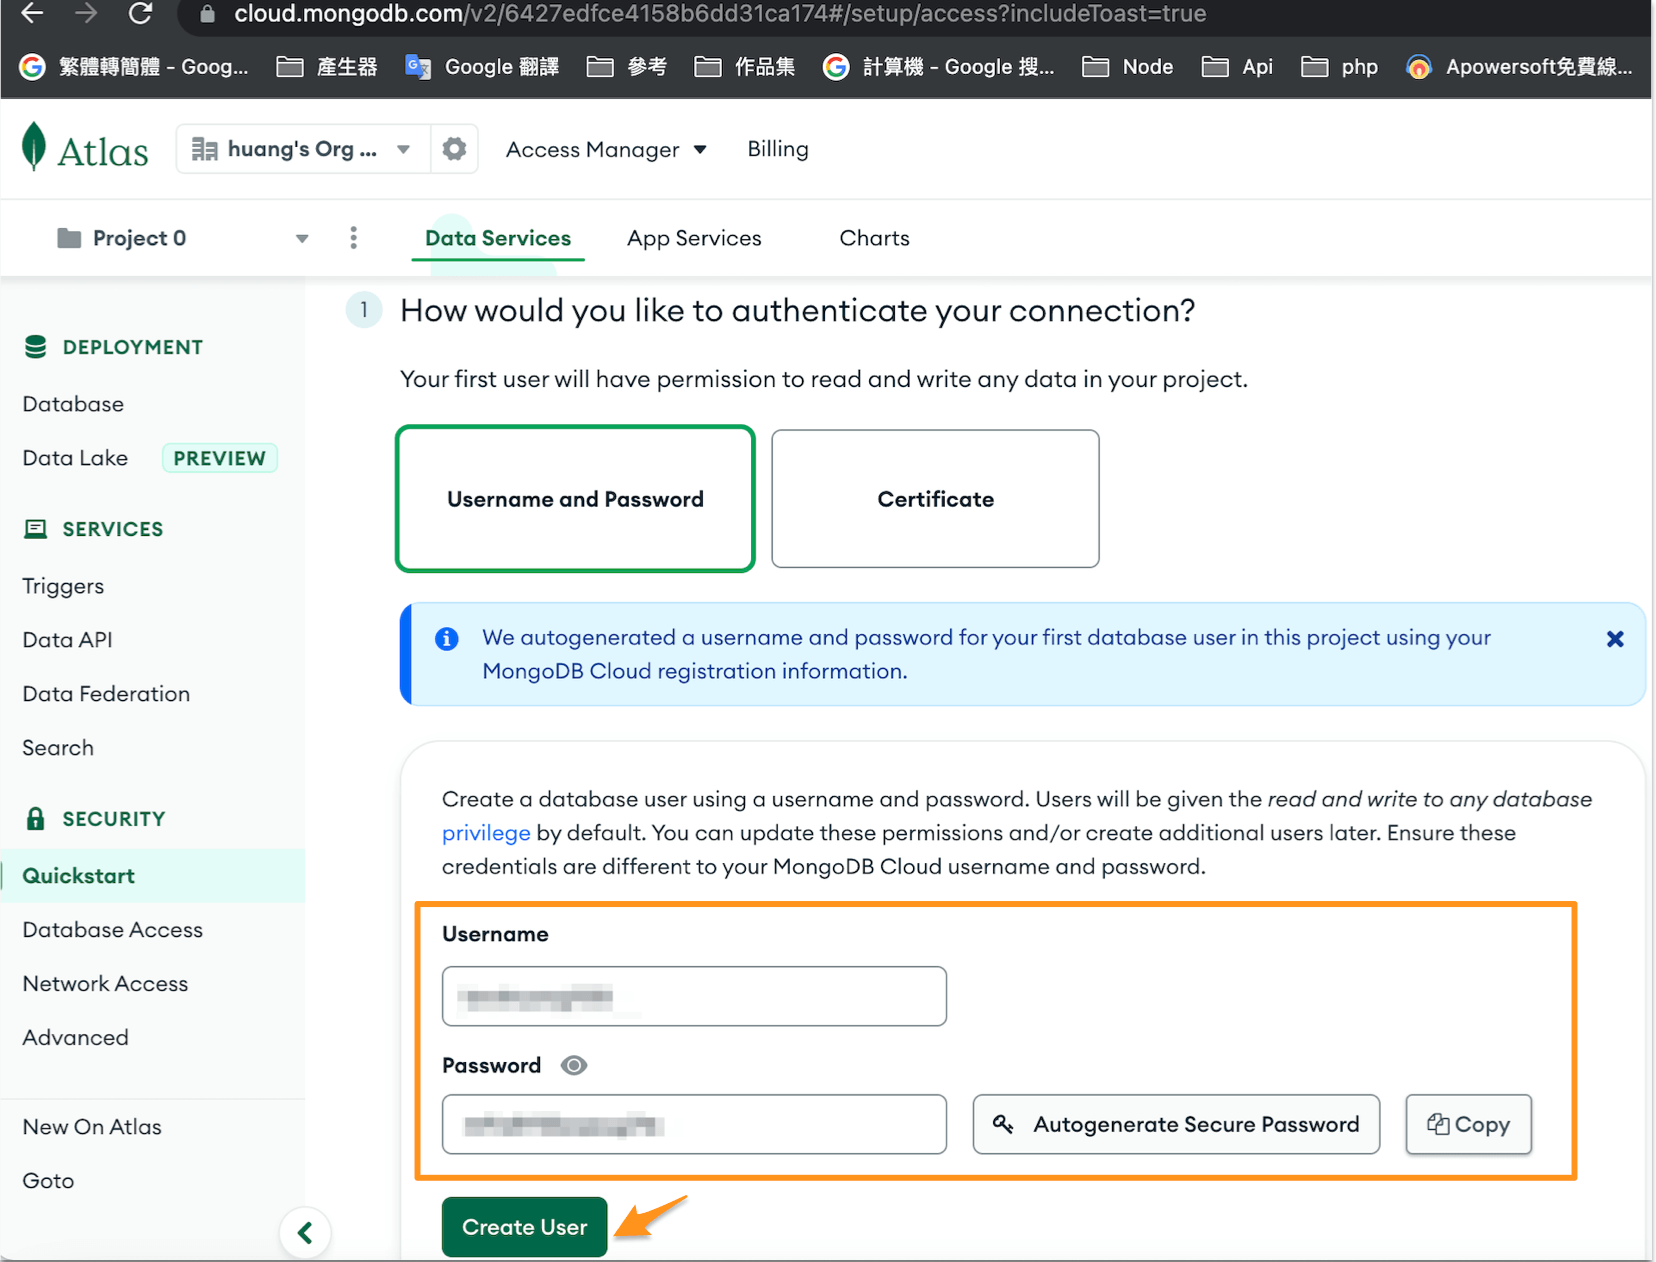
你想從哪裡連接?
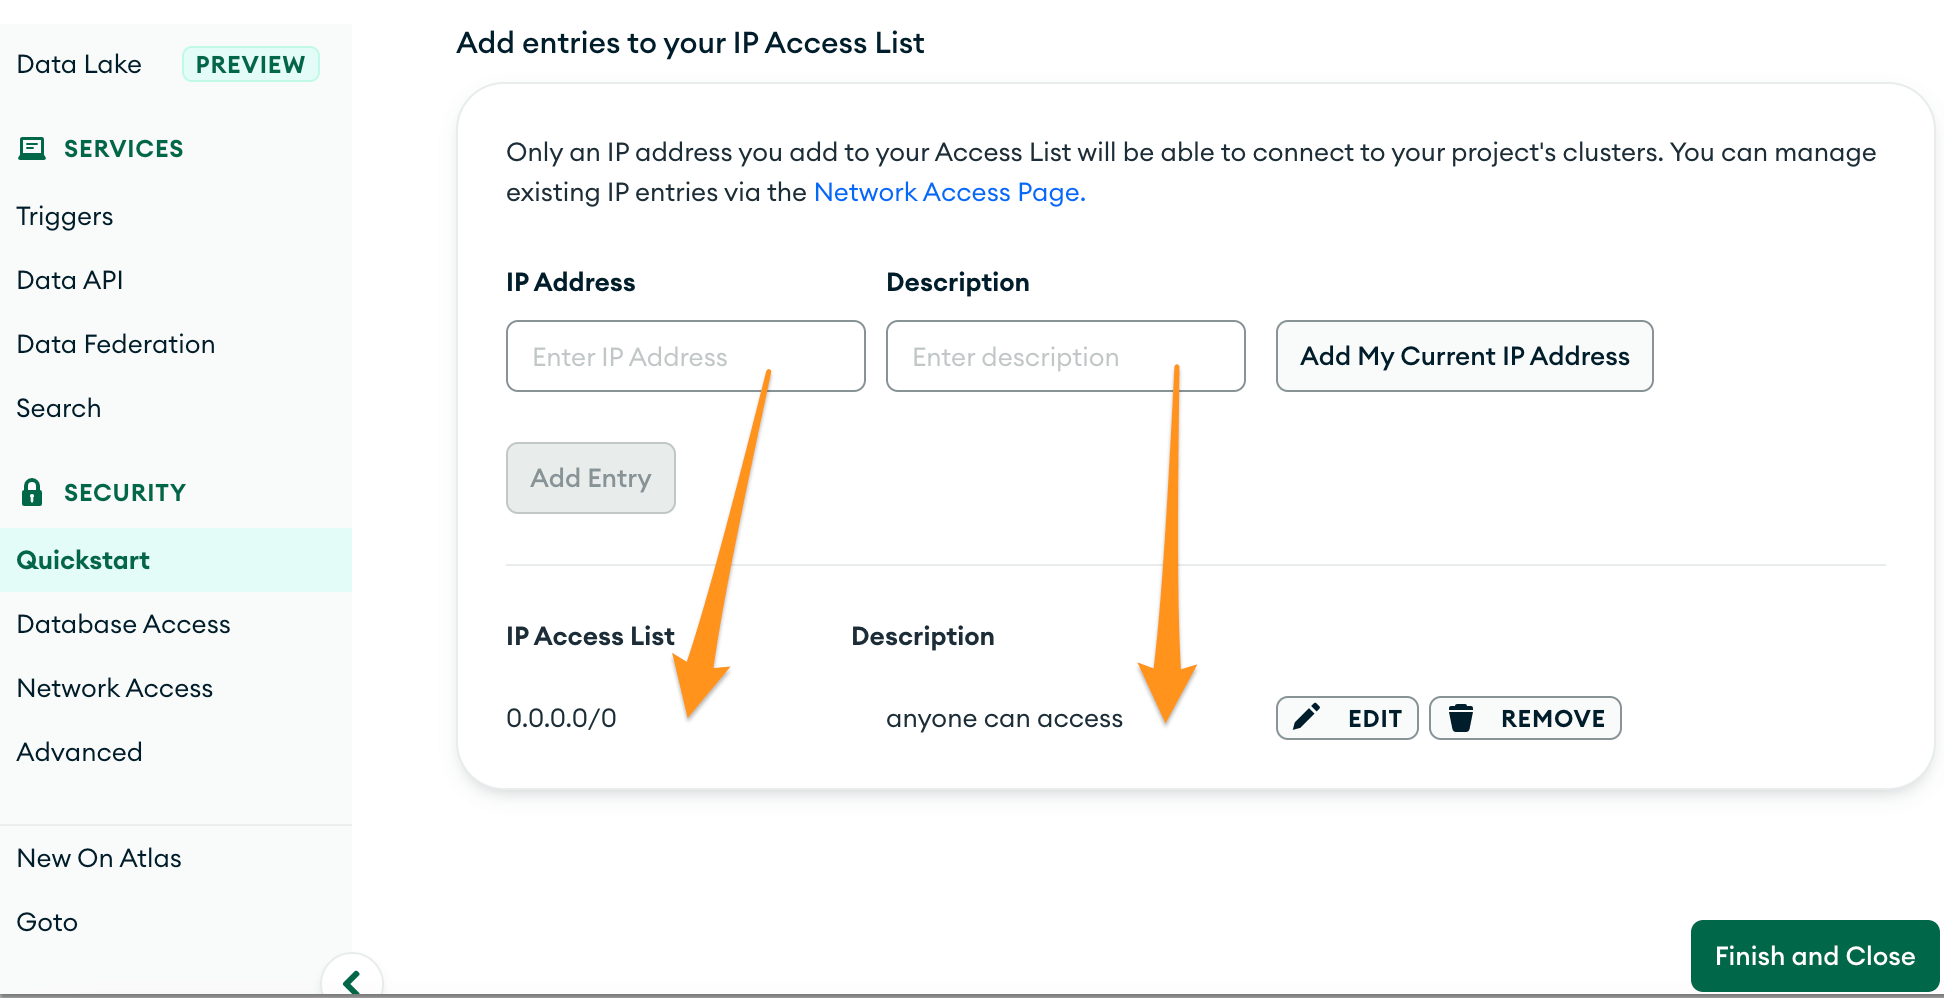
將條目添加到您的 IP 訪問列表
IP地址 / 描述
0.0.0.0/0 / anyone can access
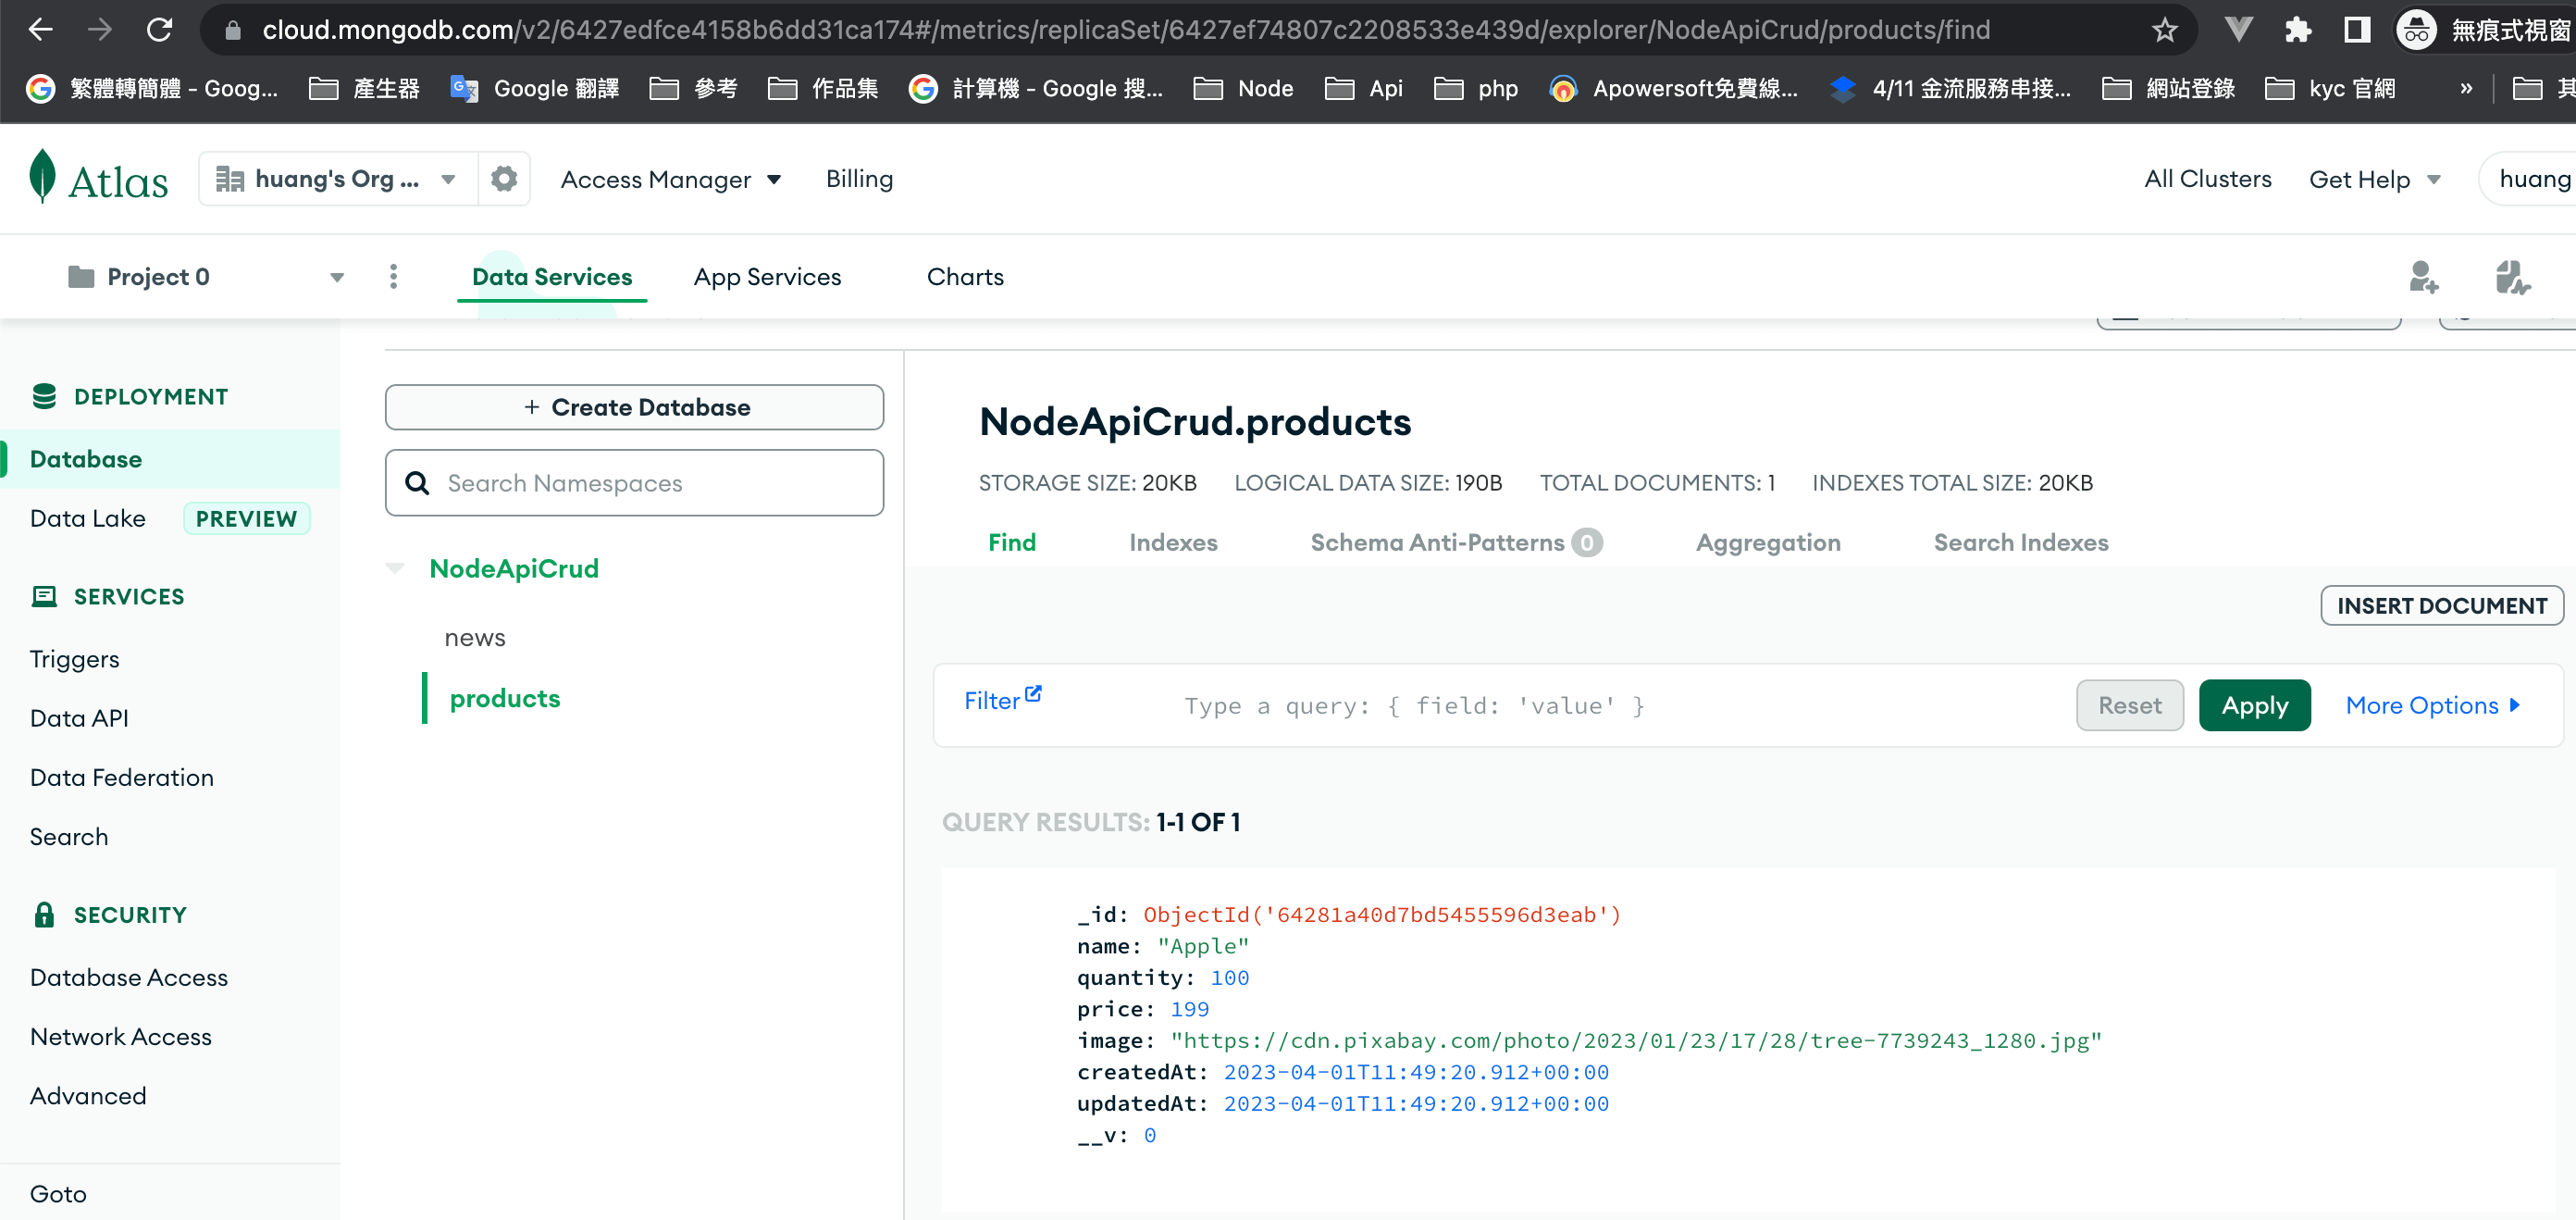
Connect DataBase 連接資料庫
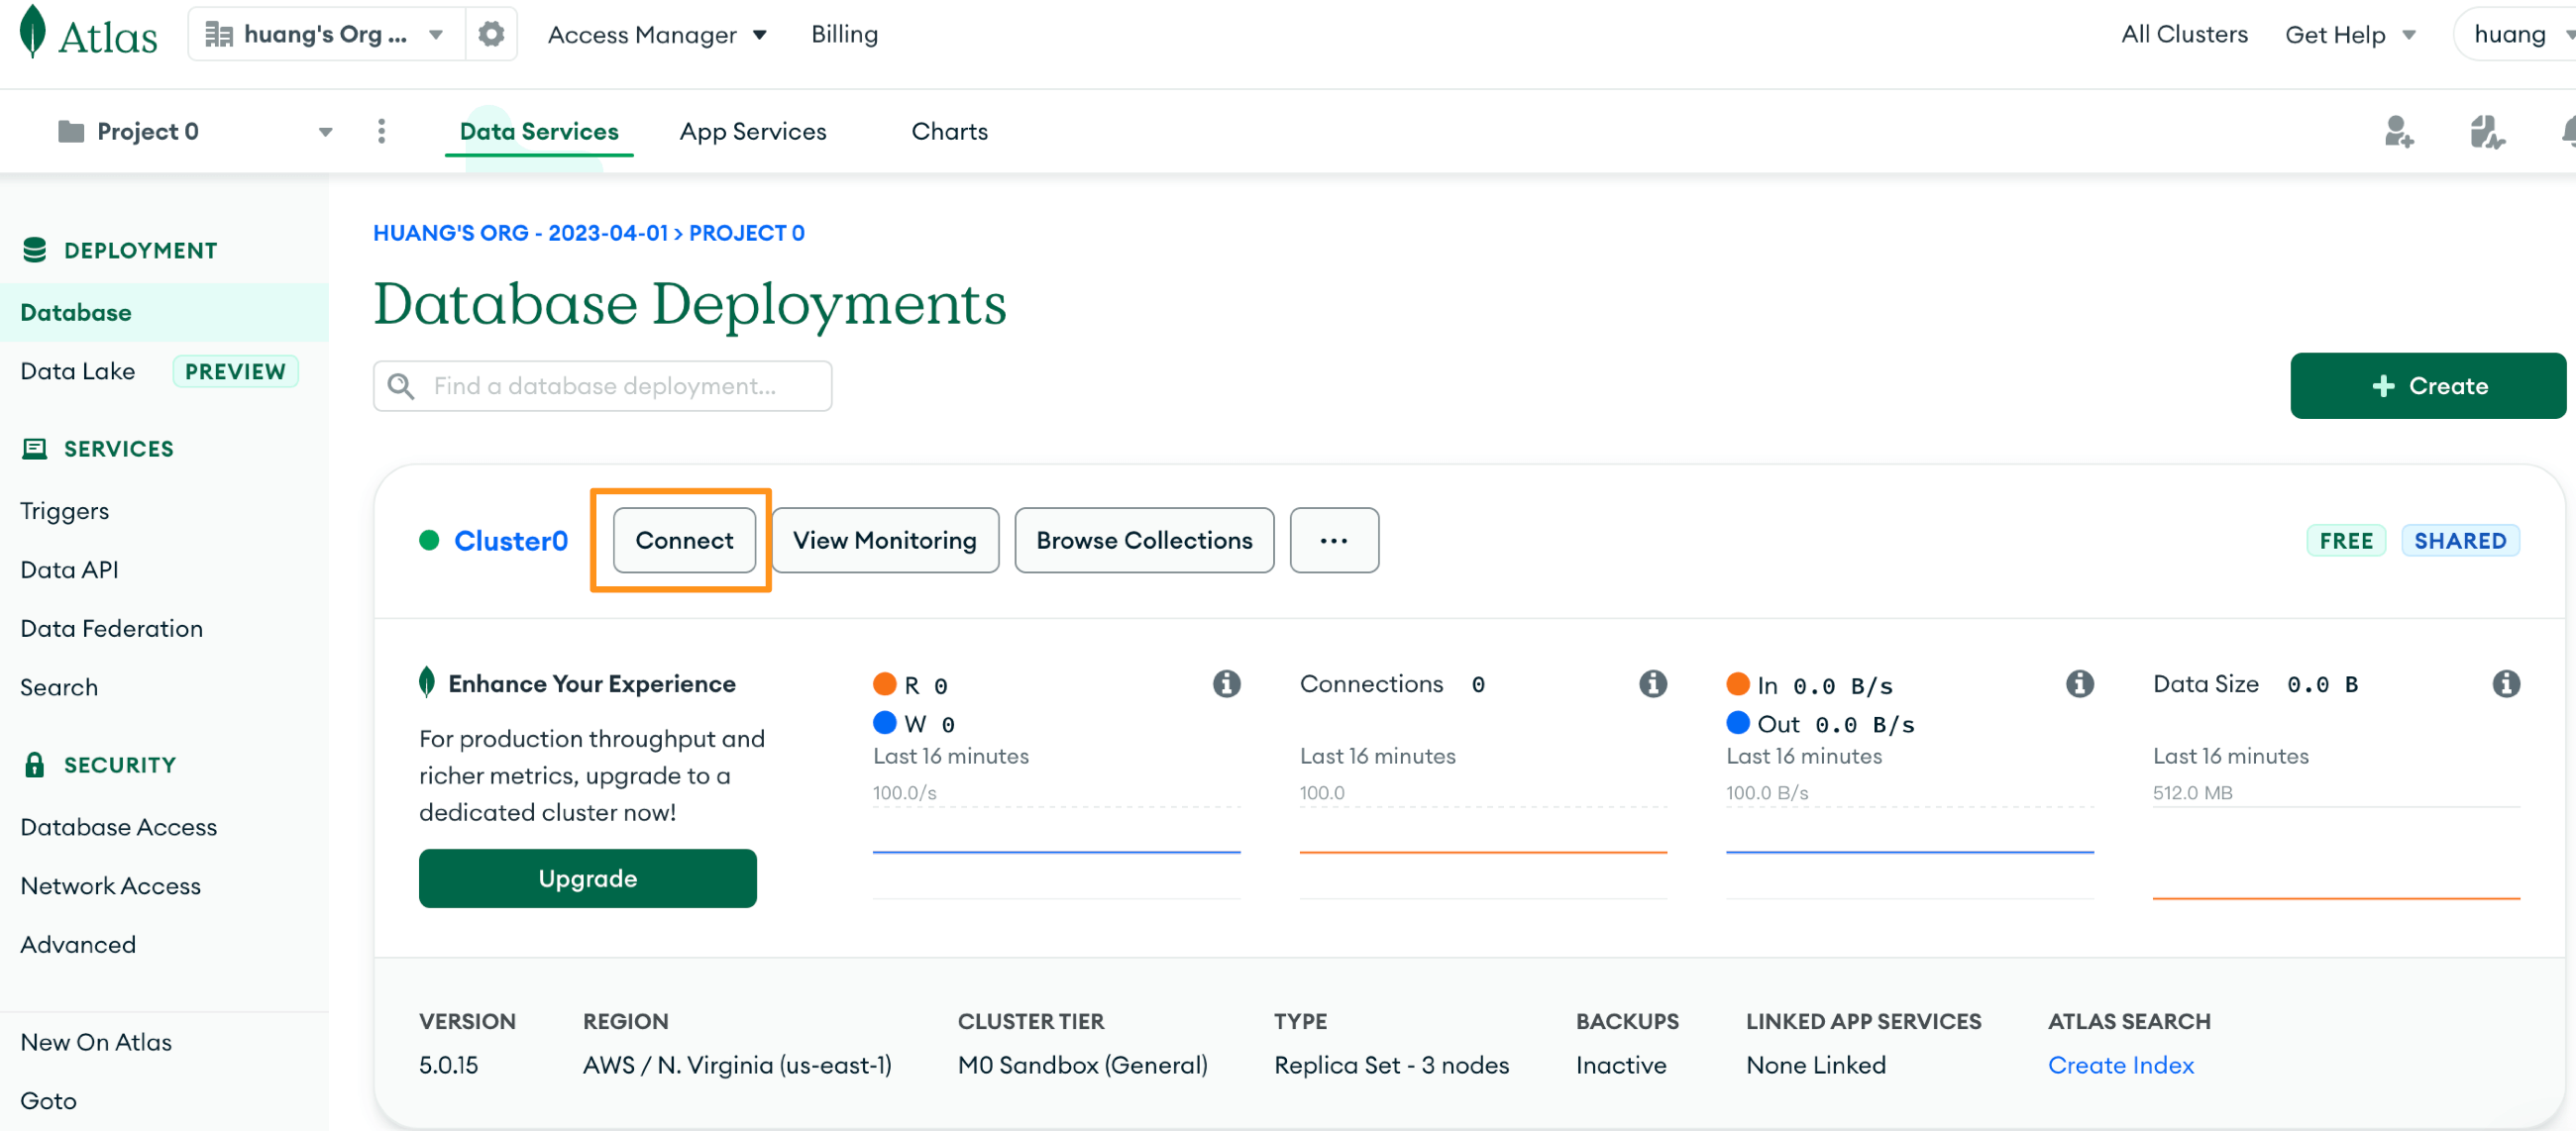
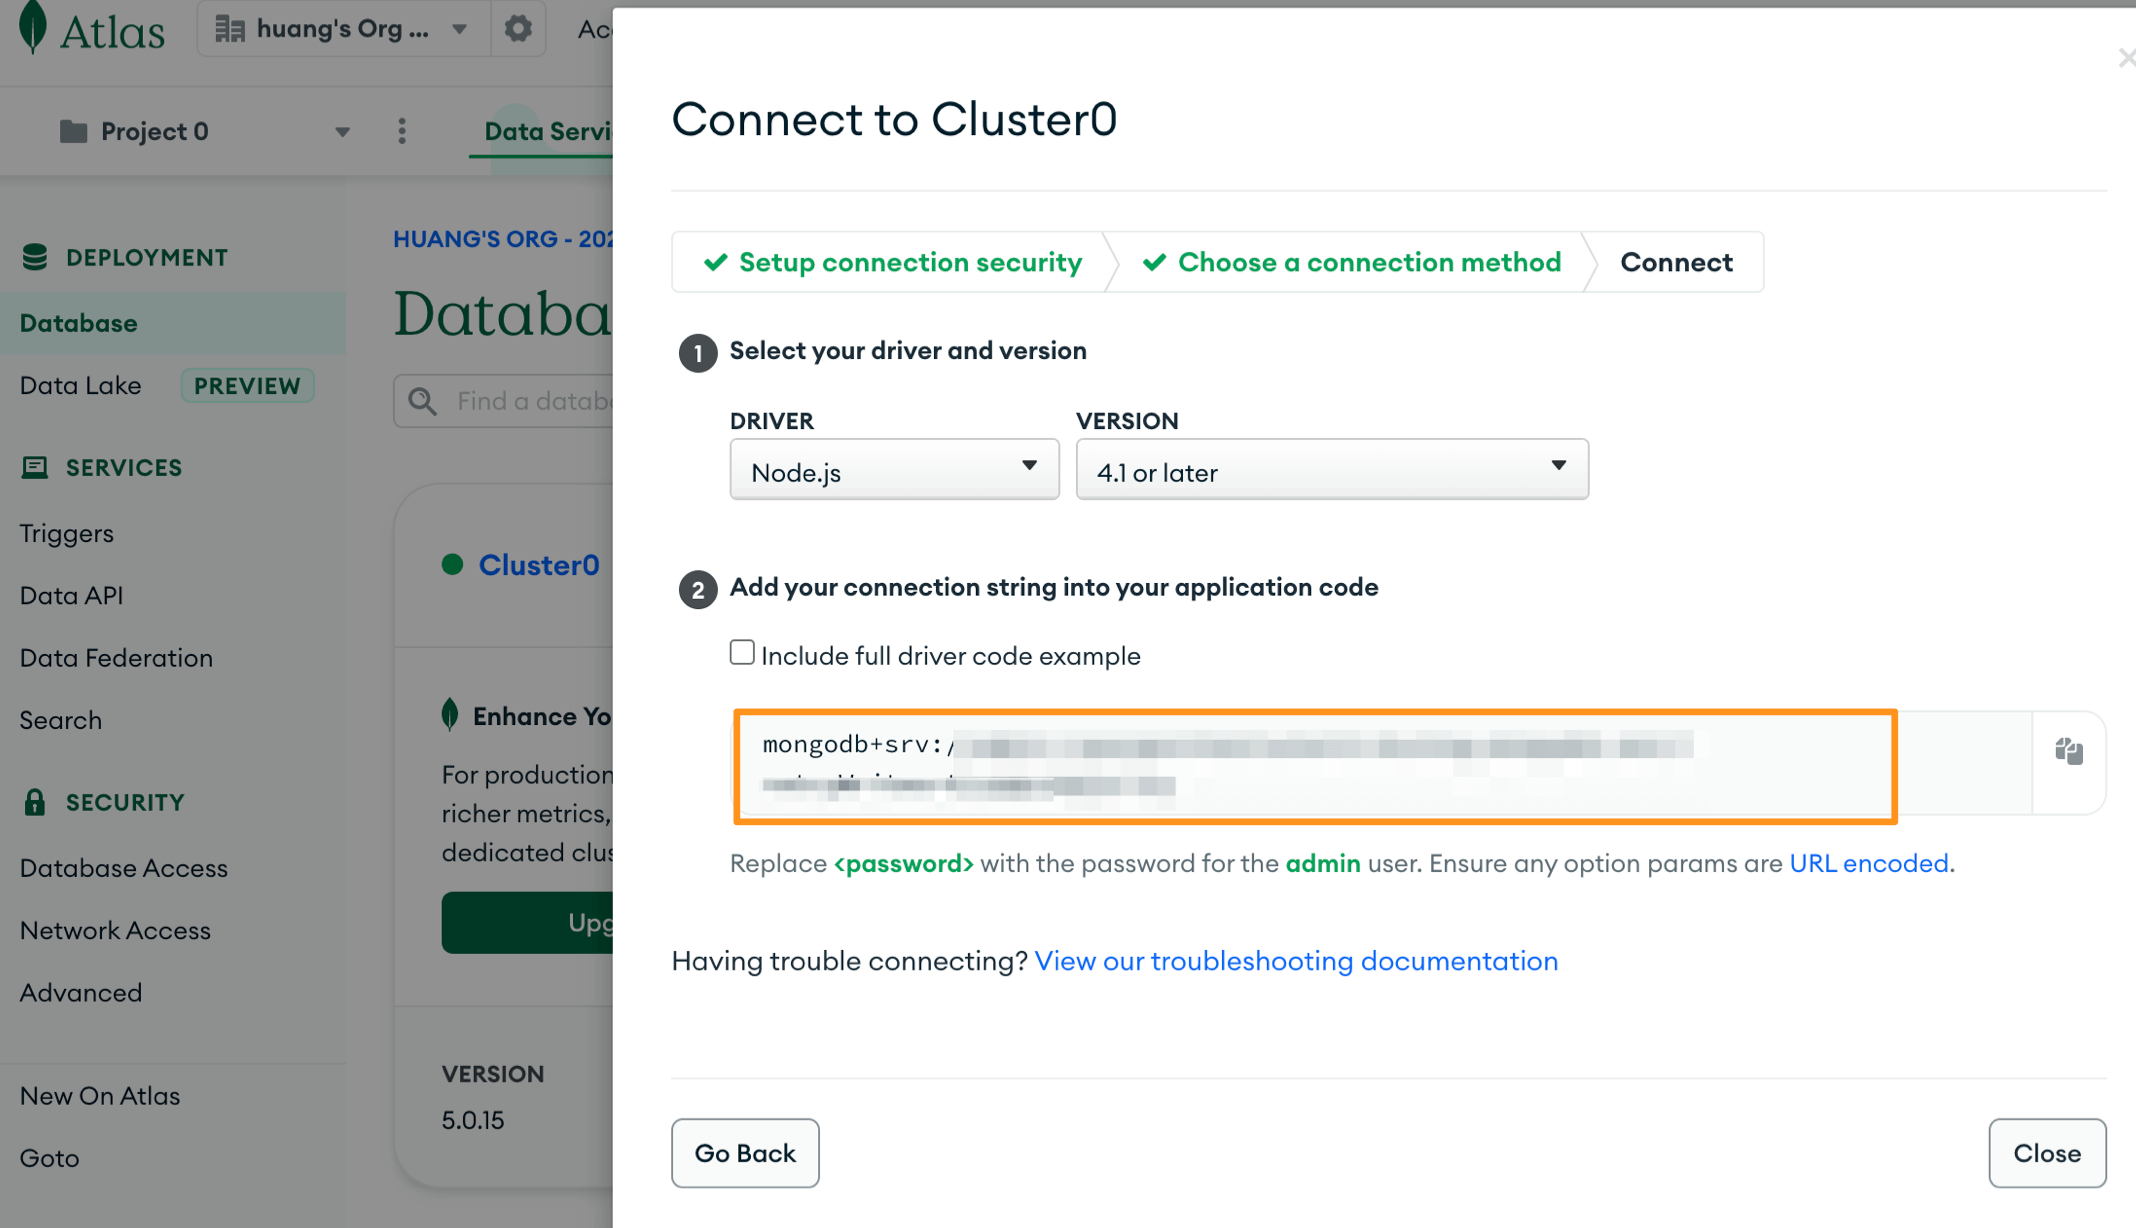
選取Drivers

取得資料庫連結網址:
mongodb+srv://
使用者帳號:
此專案密碼@網址/?retryWrites=true&w=majority
安裝dotenv與環境變數設定
dotenv
建立 .env 檔 (不要加入 git)
1
| npm install dotenv --save
|
新增 .env 檔,全大寫
1
2
3
4
5
| DB_USER=user
DB_PASS=xxxxxxx
DB_HOST=xxxxxxxx.xxxxxxx.mongodb.net
MONGO_PROJECT=xxxxxxx
MONGO_RETRY_WRITES=true
|
環境變數:在程式剛啟動時,就可以載入require(‘dotenv’).config();
新增db/mongoDb.js
1
2
3
4
5
6
7
8
9
10
11
12
13
14
15
16
17
| const mongoose = require('mongoose')
require('dotenv').config()
const user = process.env.DB_USER;
const password = process.env.DB_PASS;
const host = process.env.DB_HOST;
const project = process.env.MONGO_PROJECT;
const retryWrites = process.env.MONGO_RETRY_WRITES;
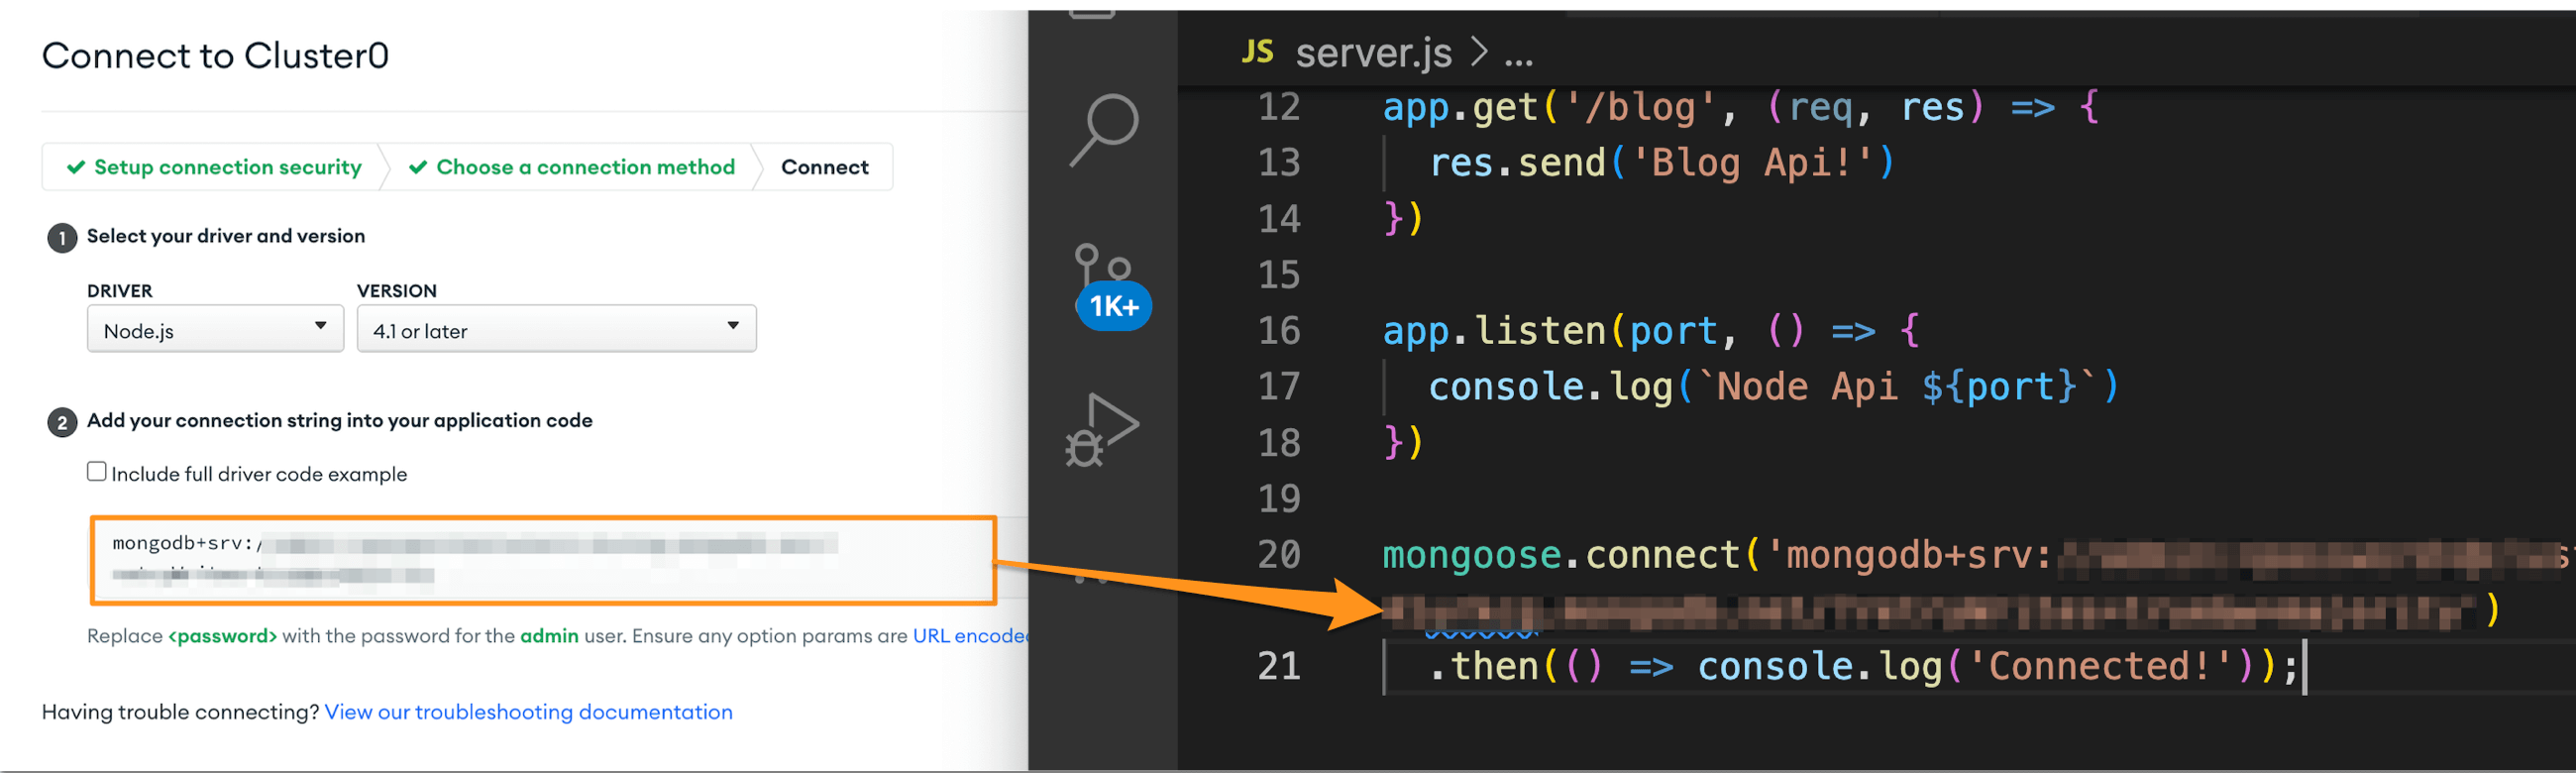
const connectionString = `mongodb+srv://${user}:${password}@${host}/${project}?retryWrites=${retryWrites}&w=majority`;
mongoose.set("strictQuery", false)
mongoose.connect(connectionString,{serverSelectionTimeoutMS: 5000})
.then(() => {
console.log('連結mongoose');
})
.catch((err) => {
console.log(err.message);
});
|
server.js
1
2
3
4
5
6
7
8
9
10
11
12
13
14
15
16
17
18
19
20
21
22
23
24
25
26
27
28
29
30
31
32
33
34
35
36
37
| //express
const express = require('express')
// 引入資料庫
require('./db/mongoDb')
const app = express()
app.all('/*',function(req,res,next){
res.header('Access-Control-Allow-Origin','*');
res.header('Access-COntrol-Allow-Headers','X-Requested-With');
next();
});
app.use(express.json())
// express 網址編碼 中內置的一種方法,用於將傳入的 Request Object 識別為strings 或 arrays; extended=>廣大的。
app.use(express.urlencoded({ extended: false }))
const api = require('./routes/api')
app.use('/api', api)
const auth = require('./routes/auth')
app.use('/auth', auth)
app.get('/', (req, res) => {
res.send('Hello Node Api!')
})
const PORT = process.env.PORT || 8080;
app.listen(PORT, () => console.log(`server port ${PORT}`));
module.exports = app;
|
Node Express.js MongoDB CRUD
一.新增models/newModel.js
Mongoose對MongoDB的操作涉及三個層面:Schema, Model與Entity
定義Schema
Schema是資料文件的骨架,本身不影響資料庫,用來產生Model
Schema主要用於定義MongoDB中集合Collection里文檔document的結構,可以理解為mongoose對錶結構的定義(不僅僅可以定義文檔的結構和屬性,還可以定義文檔的實例方法、靜態模型方法、複合索引等 ),每個schema會對應到mongodb中的一個collection,schema不具備操作資料庫的能力
| Schema 類型 |
| 類型 |
解釋名詞 |
| String |
字符串 |
| Number |
數字 |
| Date |
日期 |
| Buffer | 二進位 |
| Boolean | 布林值 |
| Mixed | 混合型 |
| ObjectId | 對象id |
| Array | 數組 |
<<注意>> 建立Schema物件時,聲明欄位類型有兩種方法,一種是首字母大寫的欄位類型,另一種是引號包含的小寫欄位類型
//Model是用Schema產生的模型。
//Entity是用Model創建的實作。
//Model與Entity的操作會影響資料庫。
1
2
3
4
5
6
7
8
9
10
11
12
13
14
15
16
17
18
19
20
21
22
23
24
25
26
27
28
29
30
31
32
33
34
35
36
37
38
39
40
41
42
| const mongoose = require('mongoose')
const newSchema = mongoose.Schema(
{
subject: {
type: String,
match: [
/^.{2,30}$/,
'Please add a valid subject 2~30',
],
required: [true, "請輸入姓名"],
trim: true,
},
image: {
type: String,
required: false,
},
content: {
type: String,
match: [
/^.{4,500}$/,
'Please add a valid content 4~500',
],
required: [true, "請輸入內容"],
trim: true,
},
createdTime: {
type: String,
},
updatedTime: {
type: String,
}
},
/* {
timestamps: true
}*/
)
const New = mongoose.model('News', newSchema);
module.exports = New;
|
二.index.js,載入newModel
1
2
3
4
5
6
7
8
9
10
11
12
13
14
15
16
17
18
19
20
21
22
23
24
25
26
27
28
29
30
31
32
33
34
35
36
37
38
39
40
41
42
43
44
45
46
47
48
49
50
51
52
53
54
55
56
57
58
59
60
61
62
63
64
65
66
67
68
69
70
71
72
73
74
75
76
77
78
79
80
81
82
83
84
85
86
87
88
89
90
| const express = require('express')
const mongoose = require('mongoose')
const New = require('./models/newModel')
// 引入資料庫
require('./db/mongoDb')
const app = express()
app.all('/*',function(req,res,next){
res.header('Access-Control-Allow-Origin','*');
res.header('Access-COntrol-Allow-Headers','X-Requested-With');
next();
});
// Json格式
app.use(express.json())
// express 中內置的一種方法,用於將傳入的 Request Object 識別為strings 或 arrays。
app.use(express.urlencoded({extended: false}))
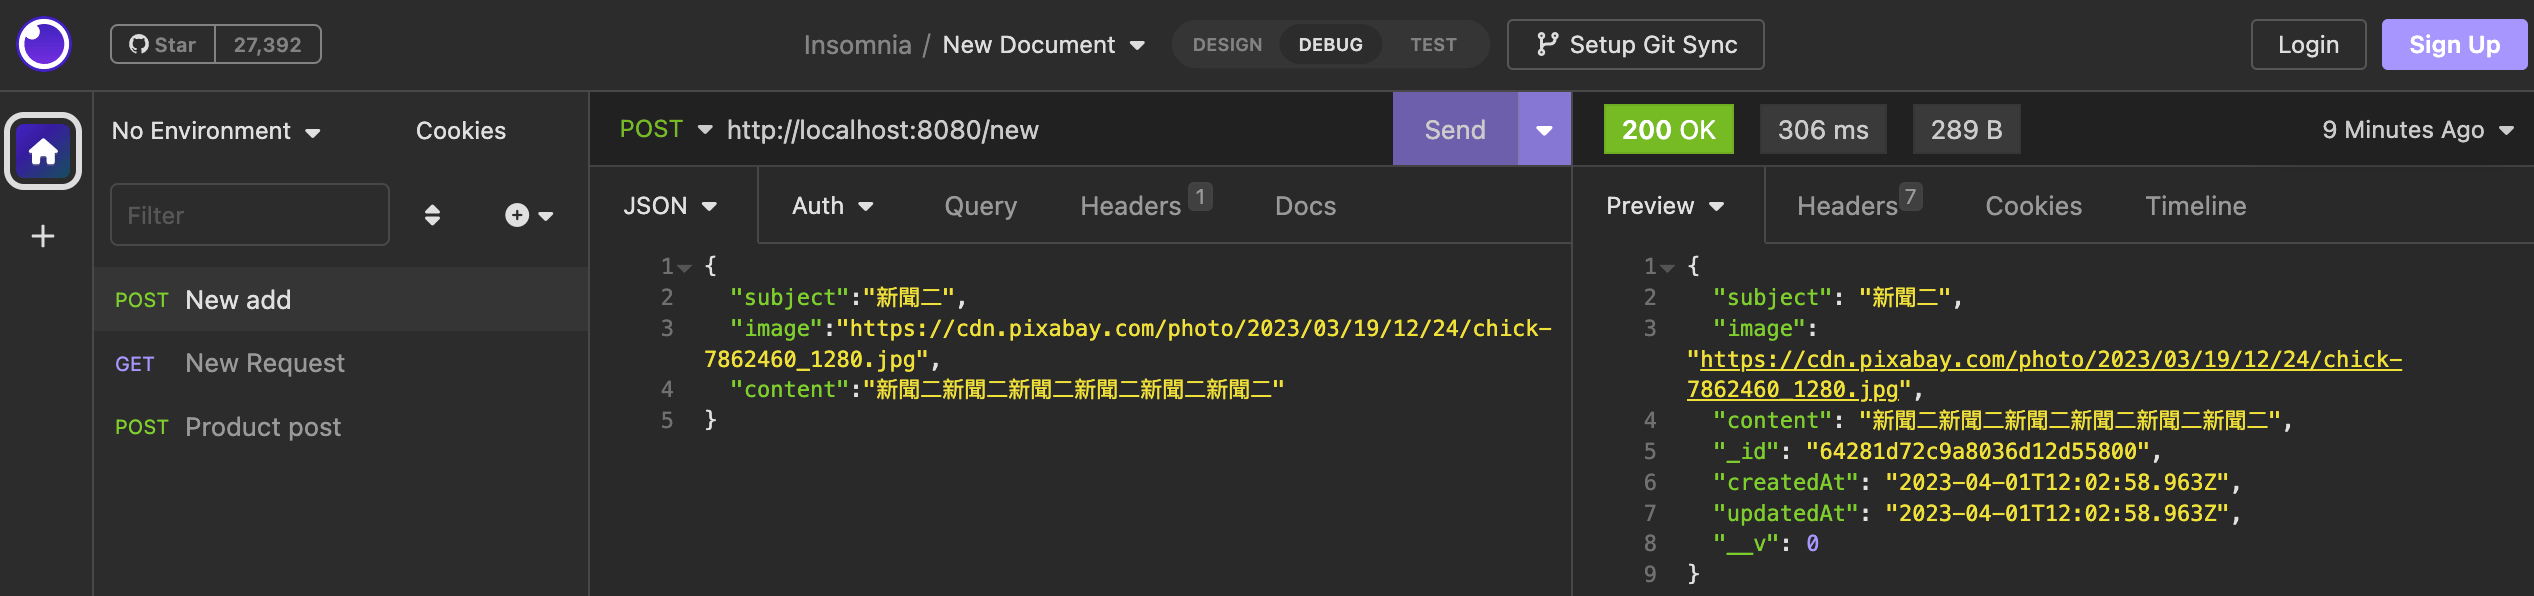
//建立Create =>New.create
app.post('/new', async(req, res) => {
try {
const news = await New.create(req.body)
res.status(200).json(news);
} catch (error) {
console.log(error.message);
res.status(500).json({message: error.message})
}
})
//Read news All =>New.find({})
app.get('/news', async(req, res) => {
try {
const news = await New.find({});
res.status(200).json(news);
} catch (error) {
res.status(500).json({message: error.message})
}
})
//Read news id=> New.findById(id)
app.get('/news/:id', async(req, res) =>{
try {
const {id} = req.params;
const news = await New.findById(id);
res.status(200).json(news);
} catch (error) {
res.status(500).json({message: error.message})
}
})
//updatedNews => New.findByIdAndUpdate(id, req.body)
app.put('/news/:id', async(req, res) => {
try {
const {id} = req.params;
const newR = await New.findByIdAndUpdate(id, req.body);
// we cannot find any news in database
if(!newR){
return res.status(404).json({message: `cannot find any news with ID ${id}`})
}
const updatedNews = await New.findById(id);
res.status(200).json(updatedNews);
} catch (error) {
res.status(500).json({message: error.message})
}
})
//Delete news id =>New.findByIdAndDelete(id)
app.delete('/news/:id', async(req, res) =>{
try {
const {id} = req.params;
const test = await New.findByIdAndDelete(id);
if(!test){
return res.status(404).json({message: `沒有發現任何 News ID ${id}`})
}
res.status(200).json(test);
} catch (error) {
res.status(500).json({message: error.message})
}
})
const PORT = process.env.PORT || 8080;
app.listen(PORT, () => console.log(`服務器正在監聽端口 ${PORT}`));
module.exports = app;
|
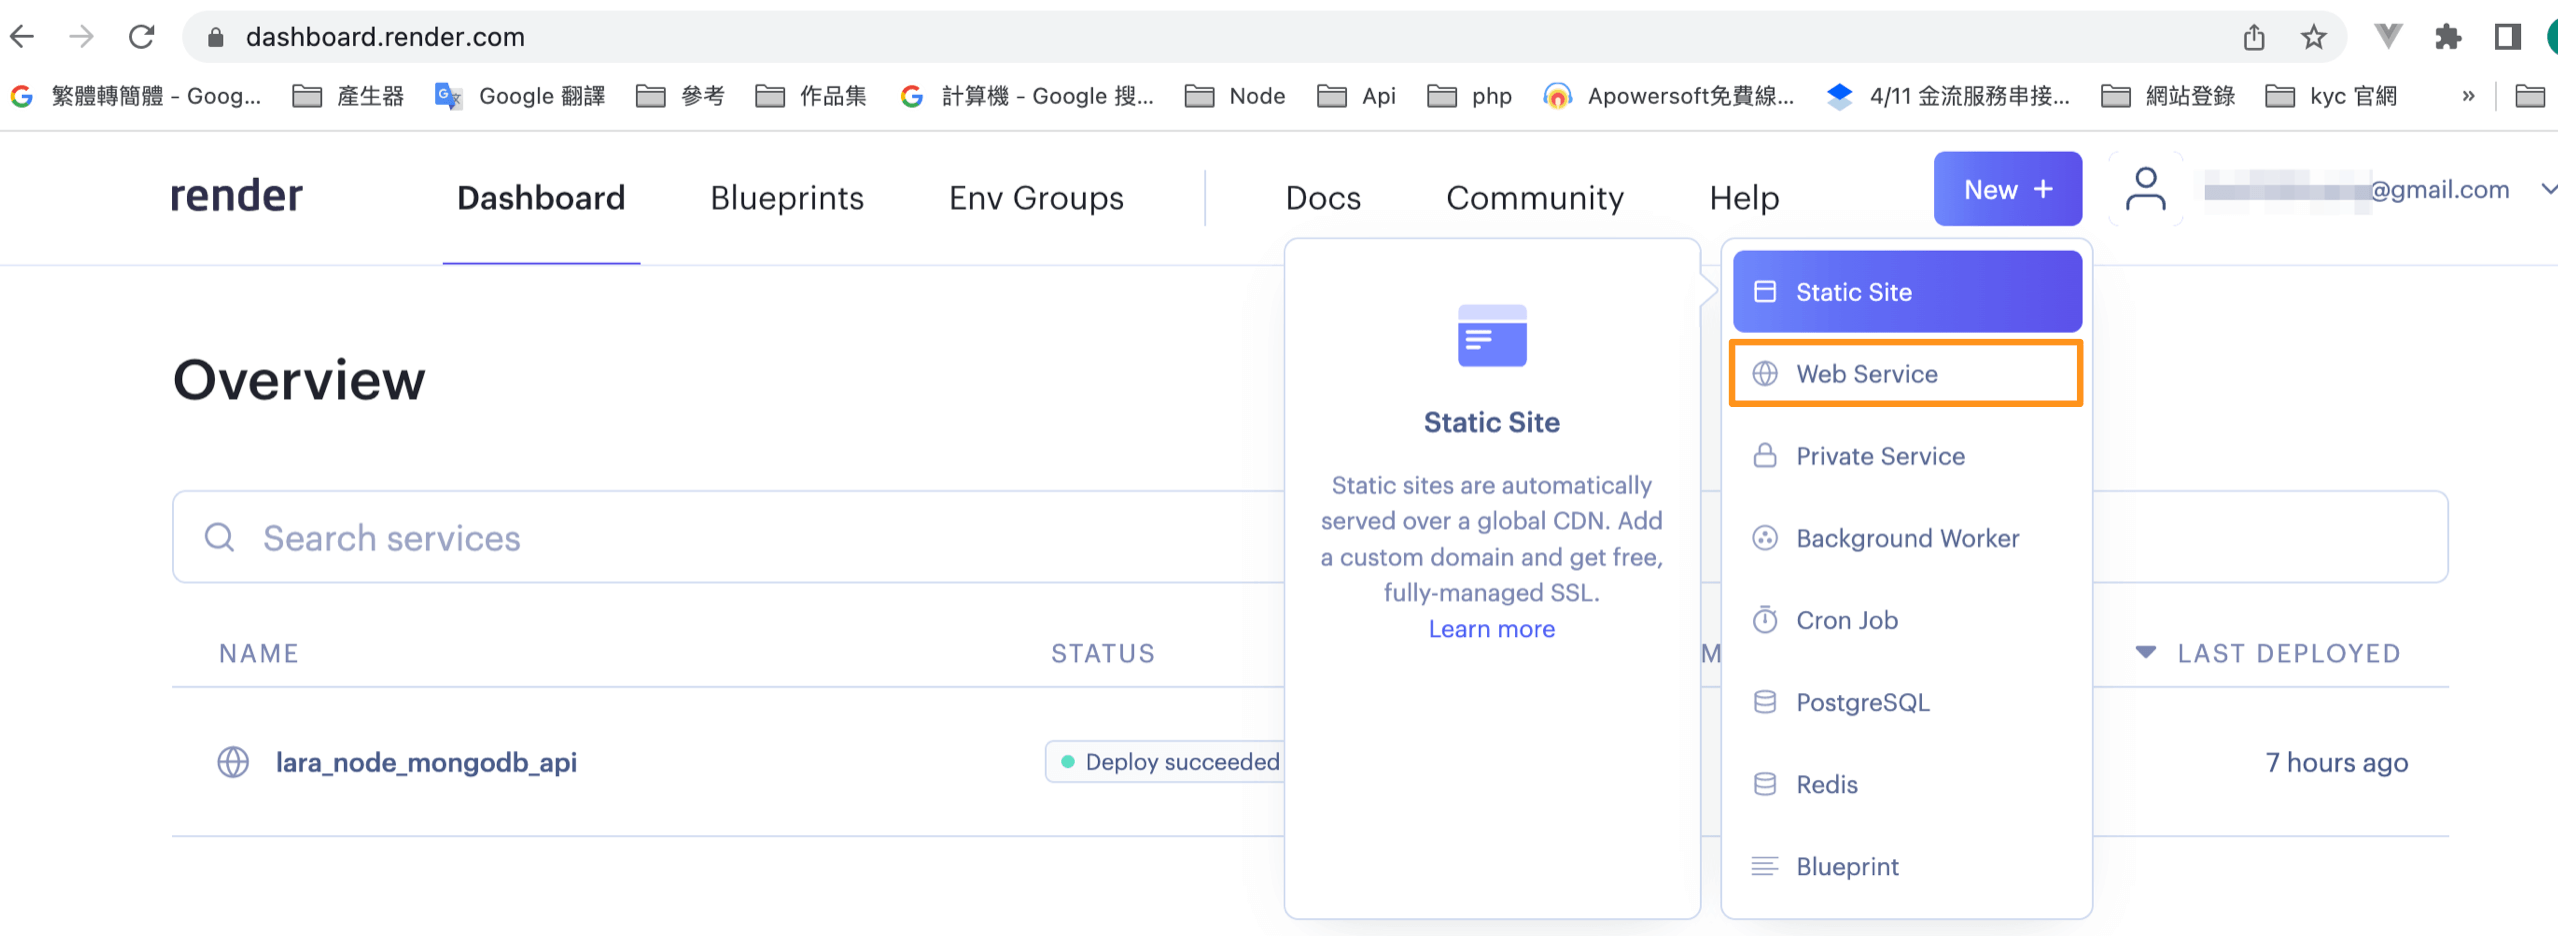
Render部署
Render
選取WebServer
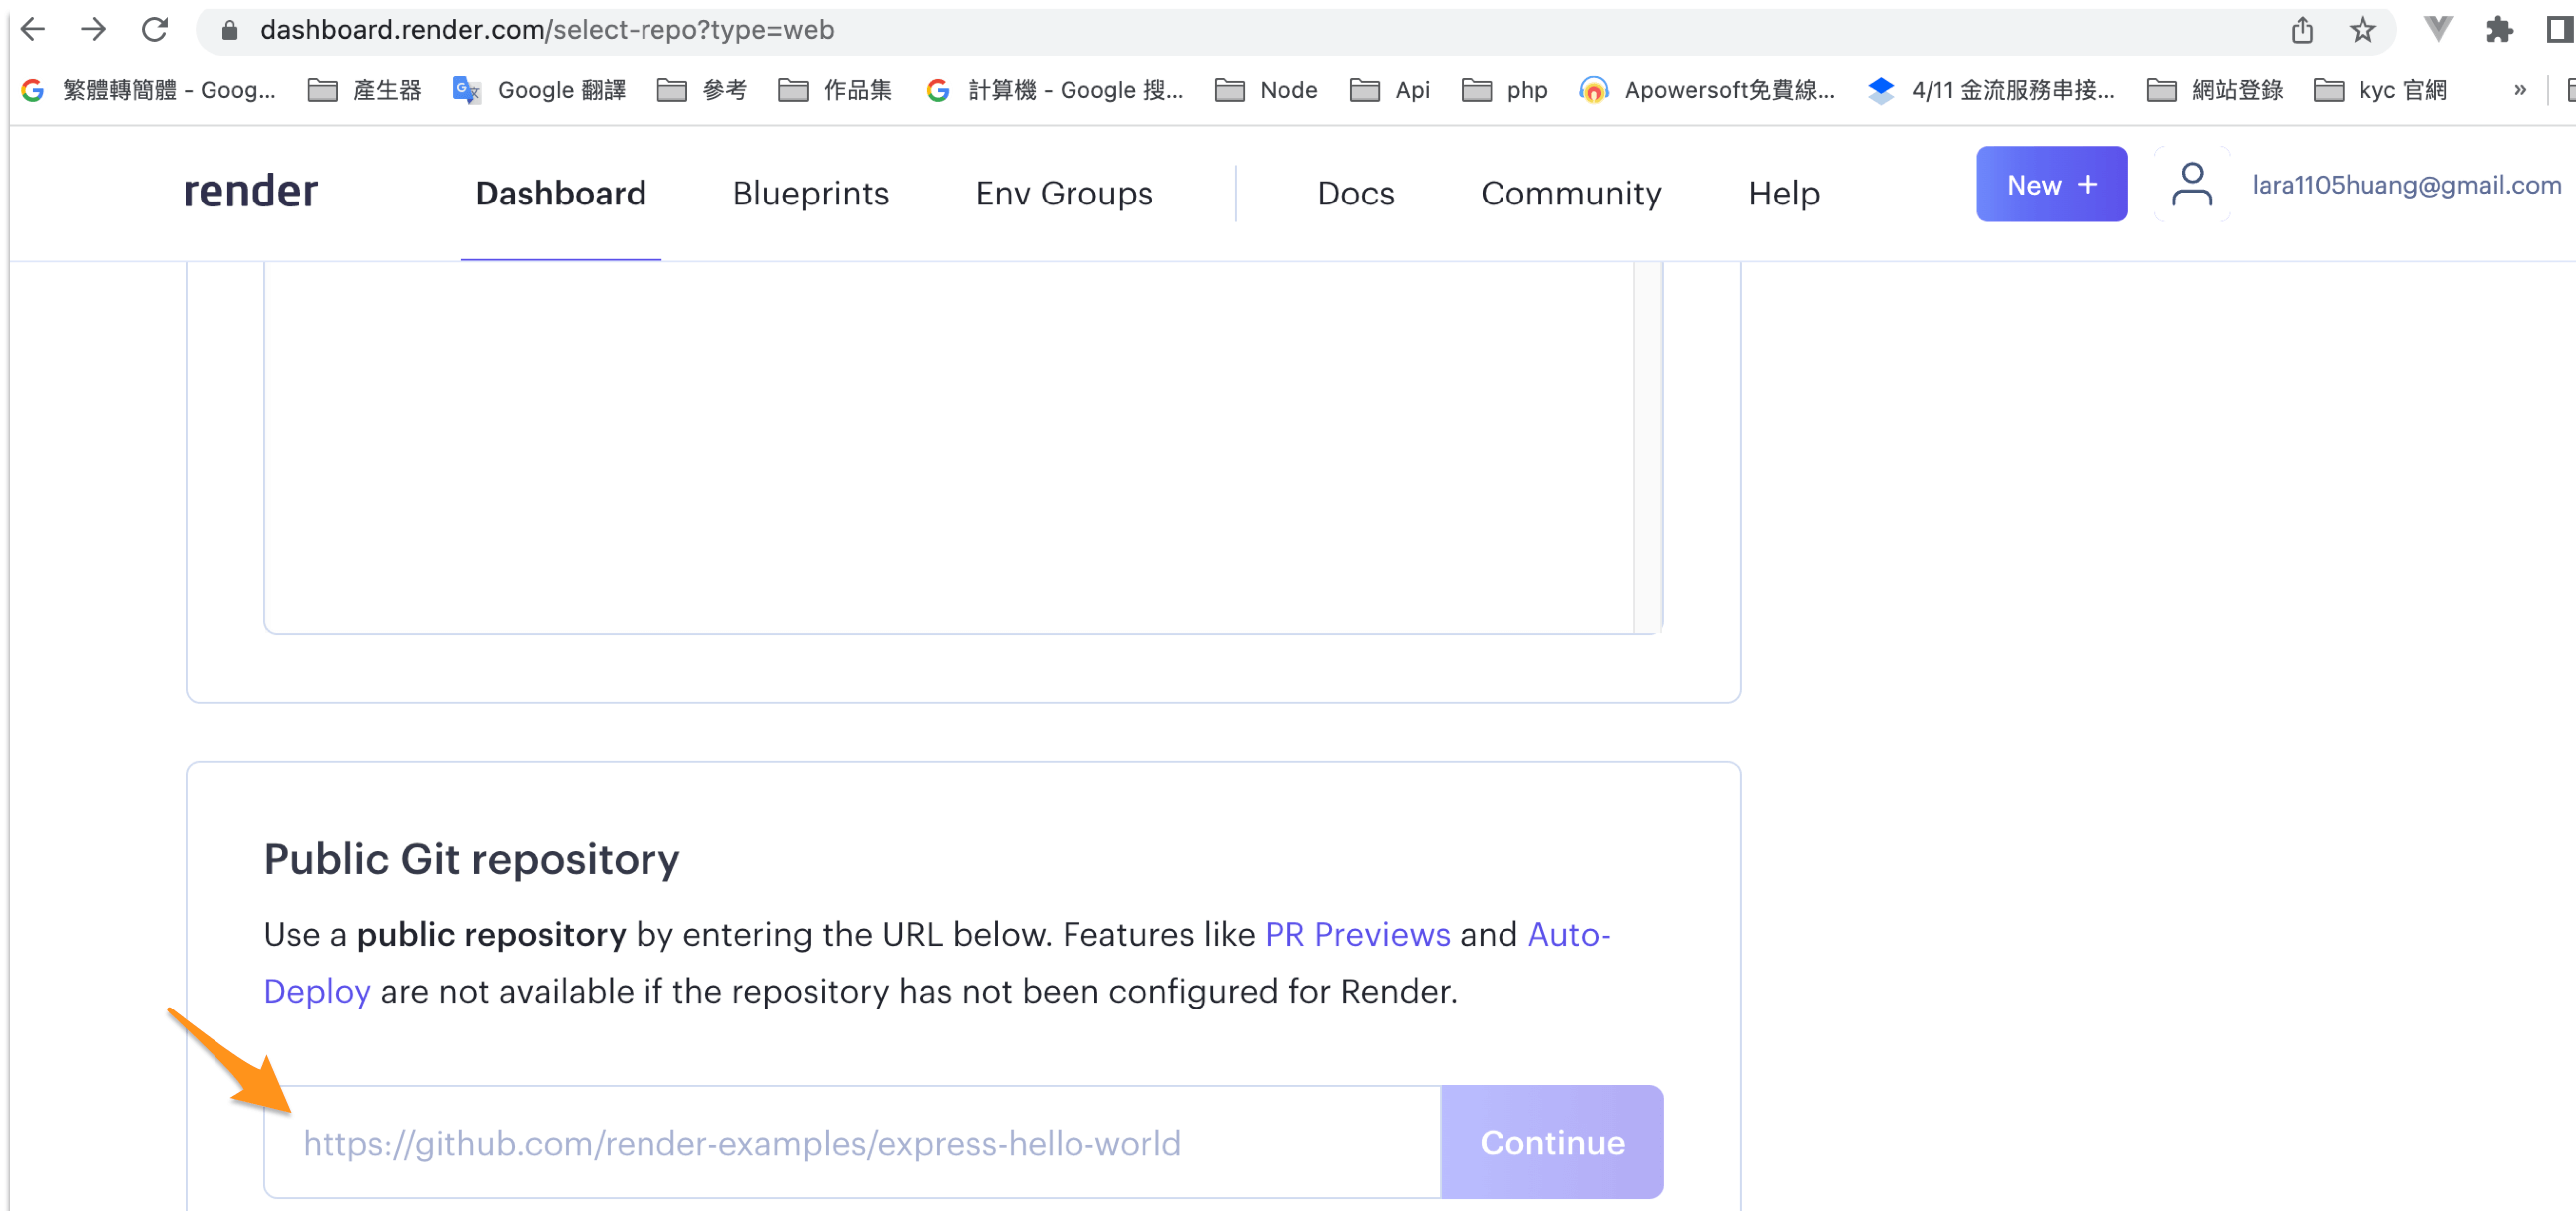
箭頭內貼入Git庫網址
在Name框中,輸入一個簡短的名字來標識你的網站。
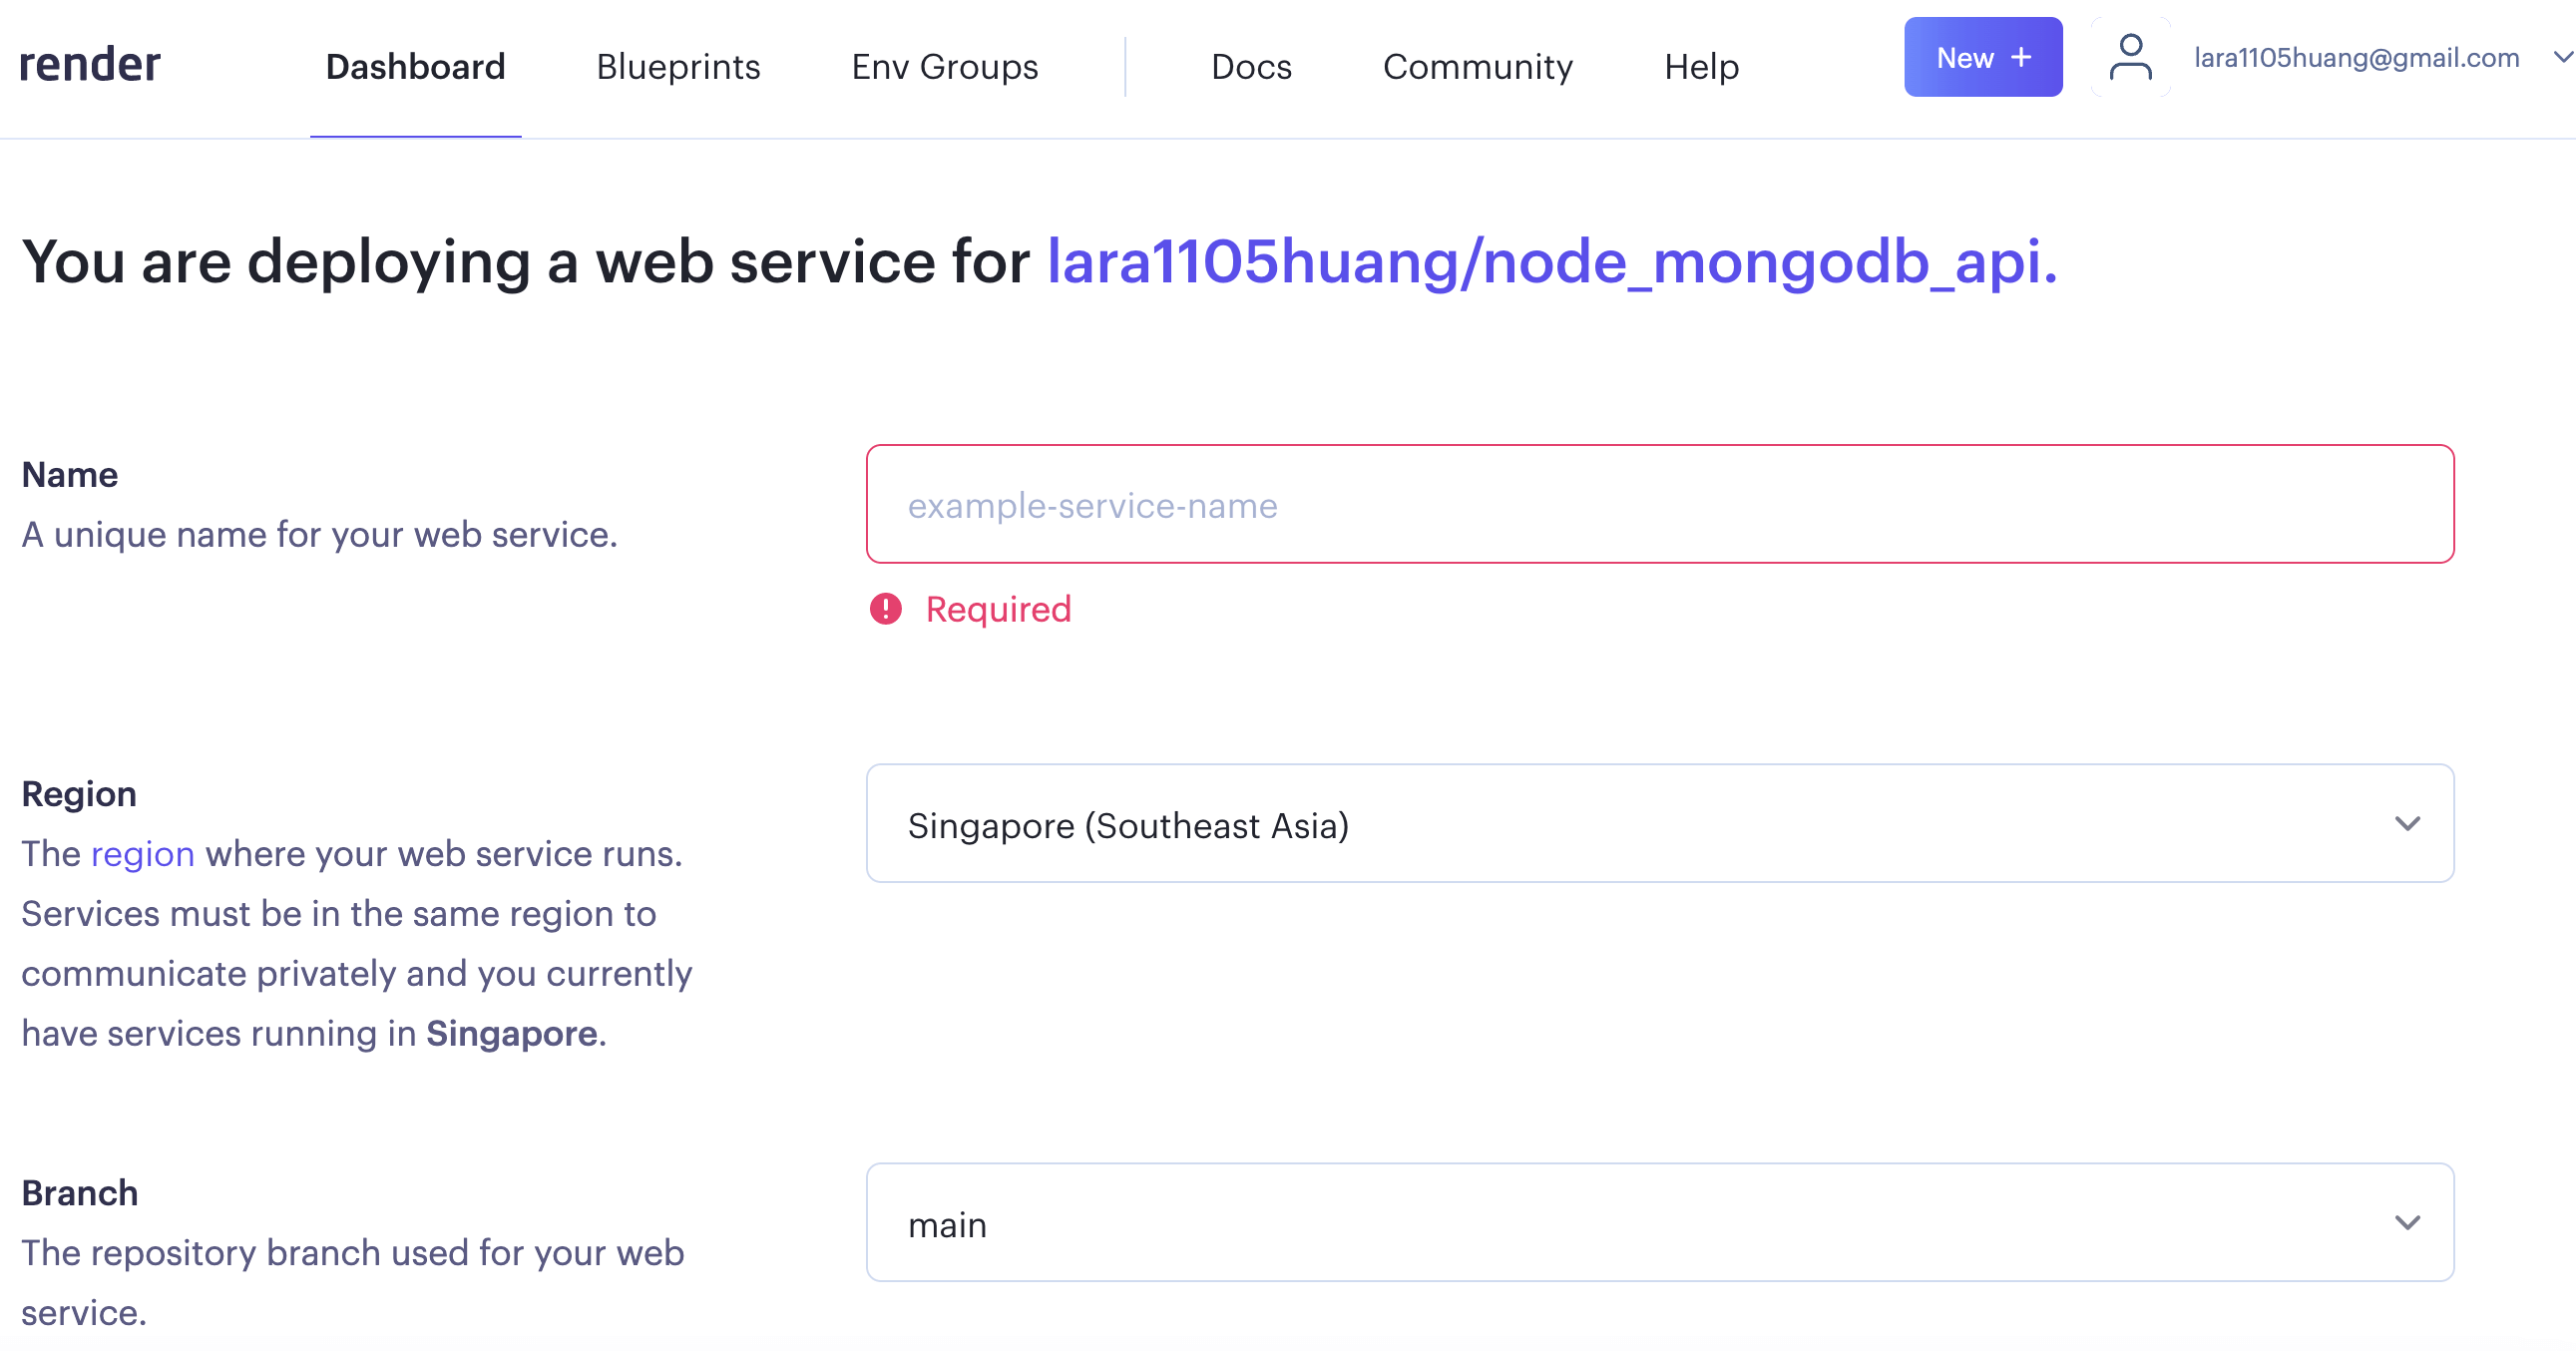
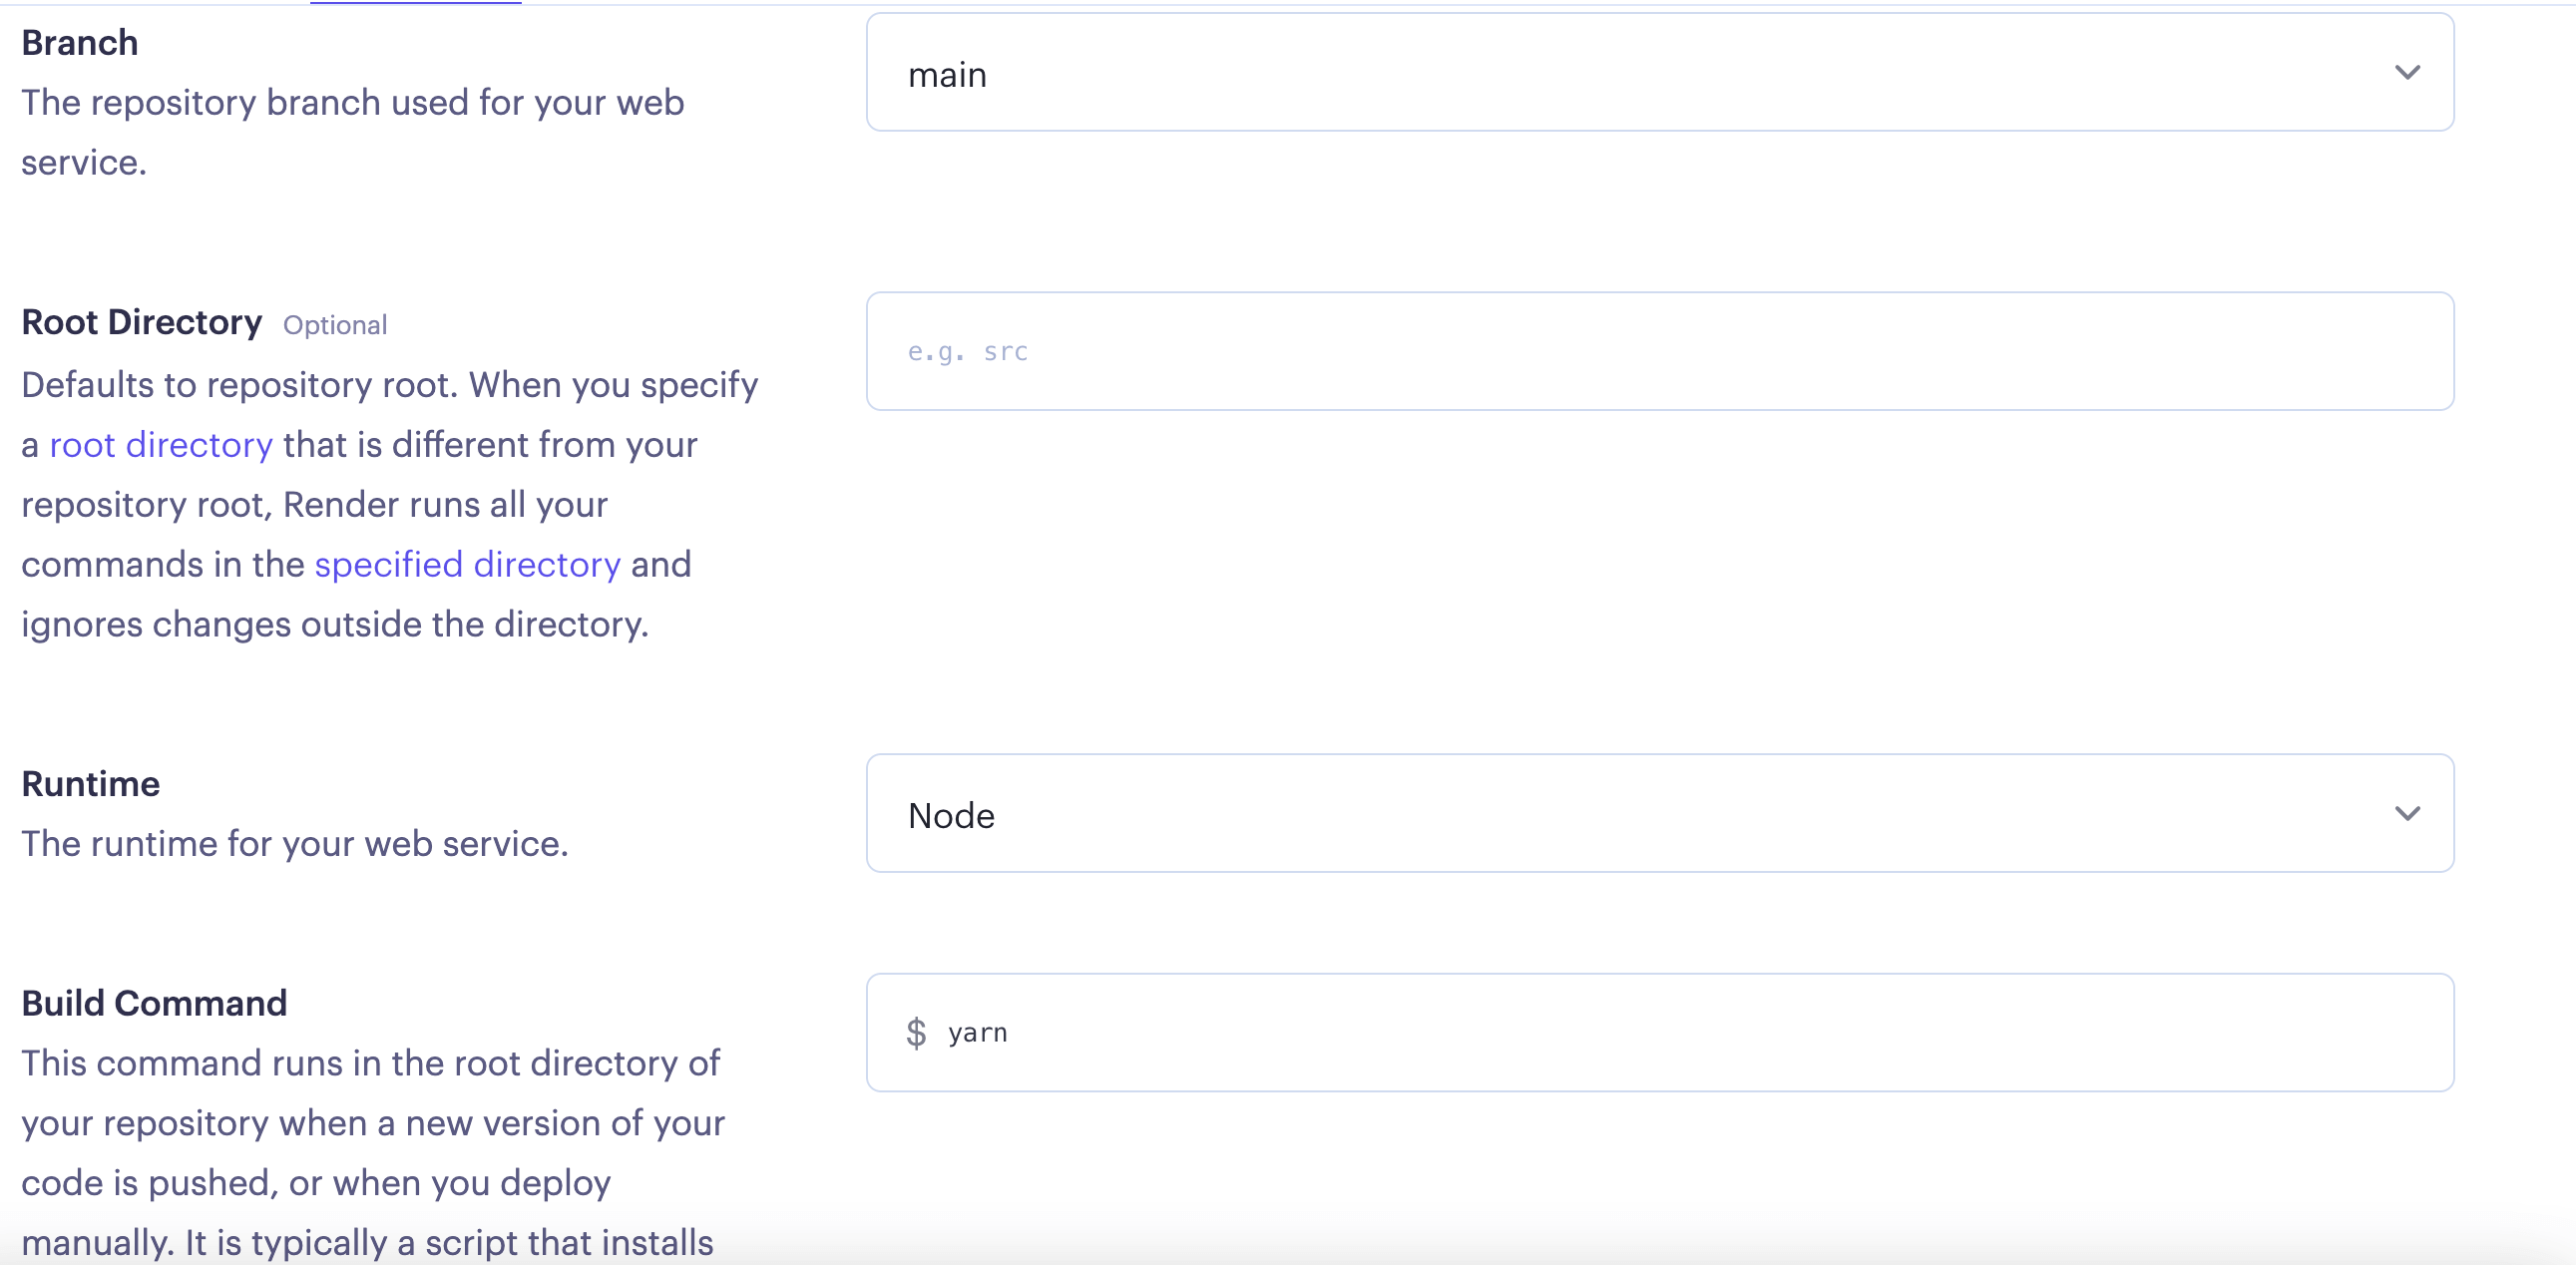
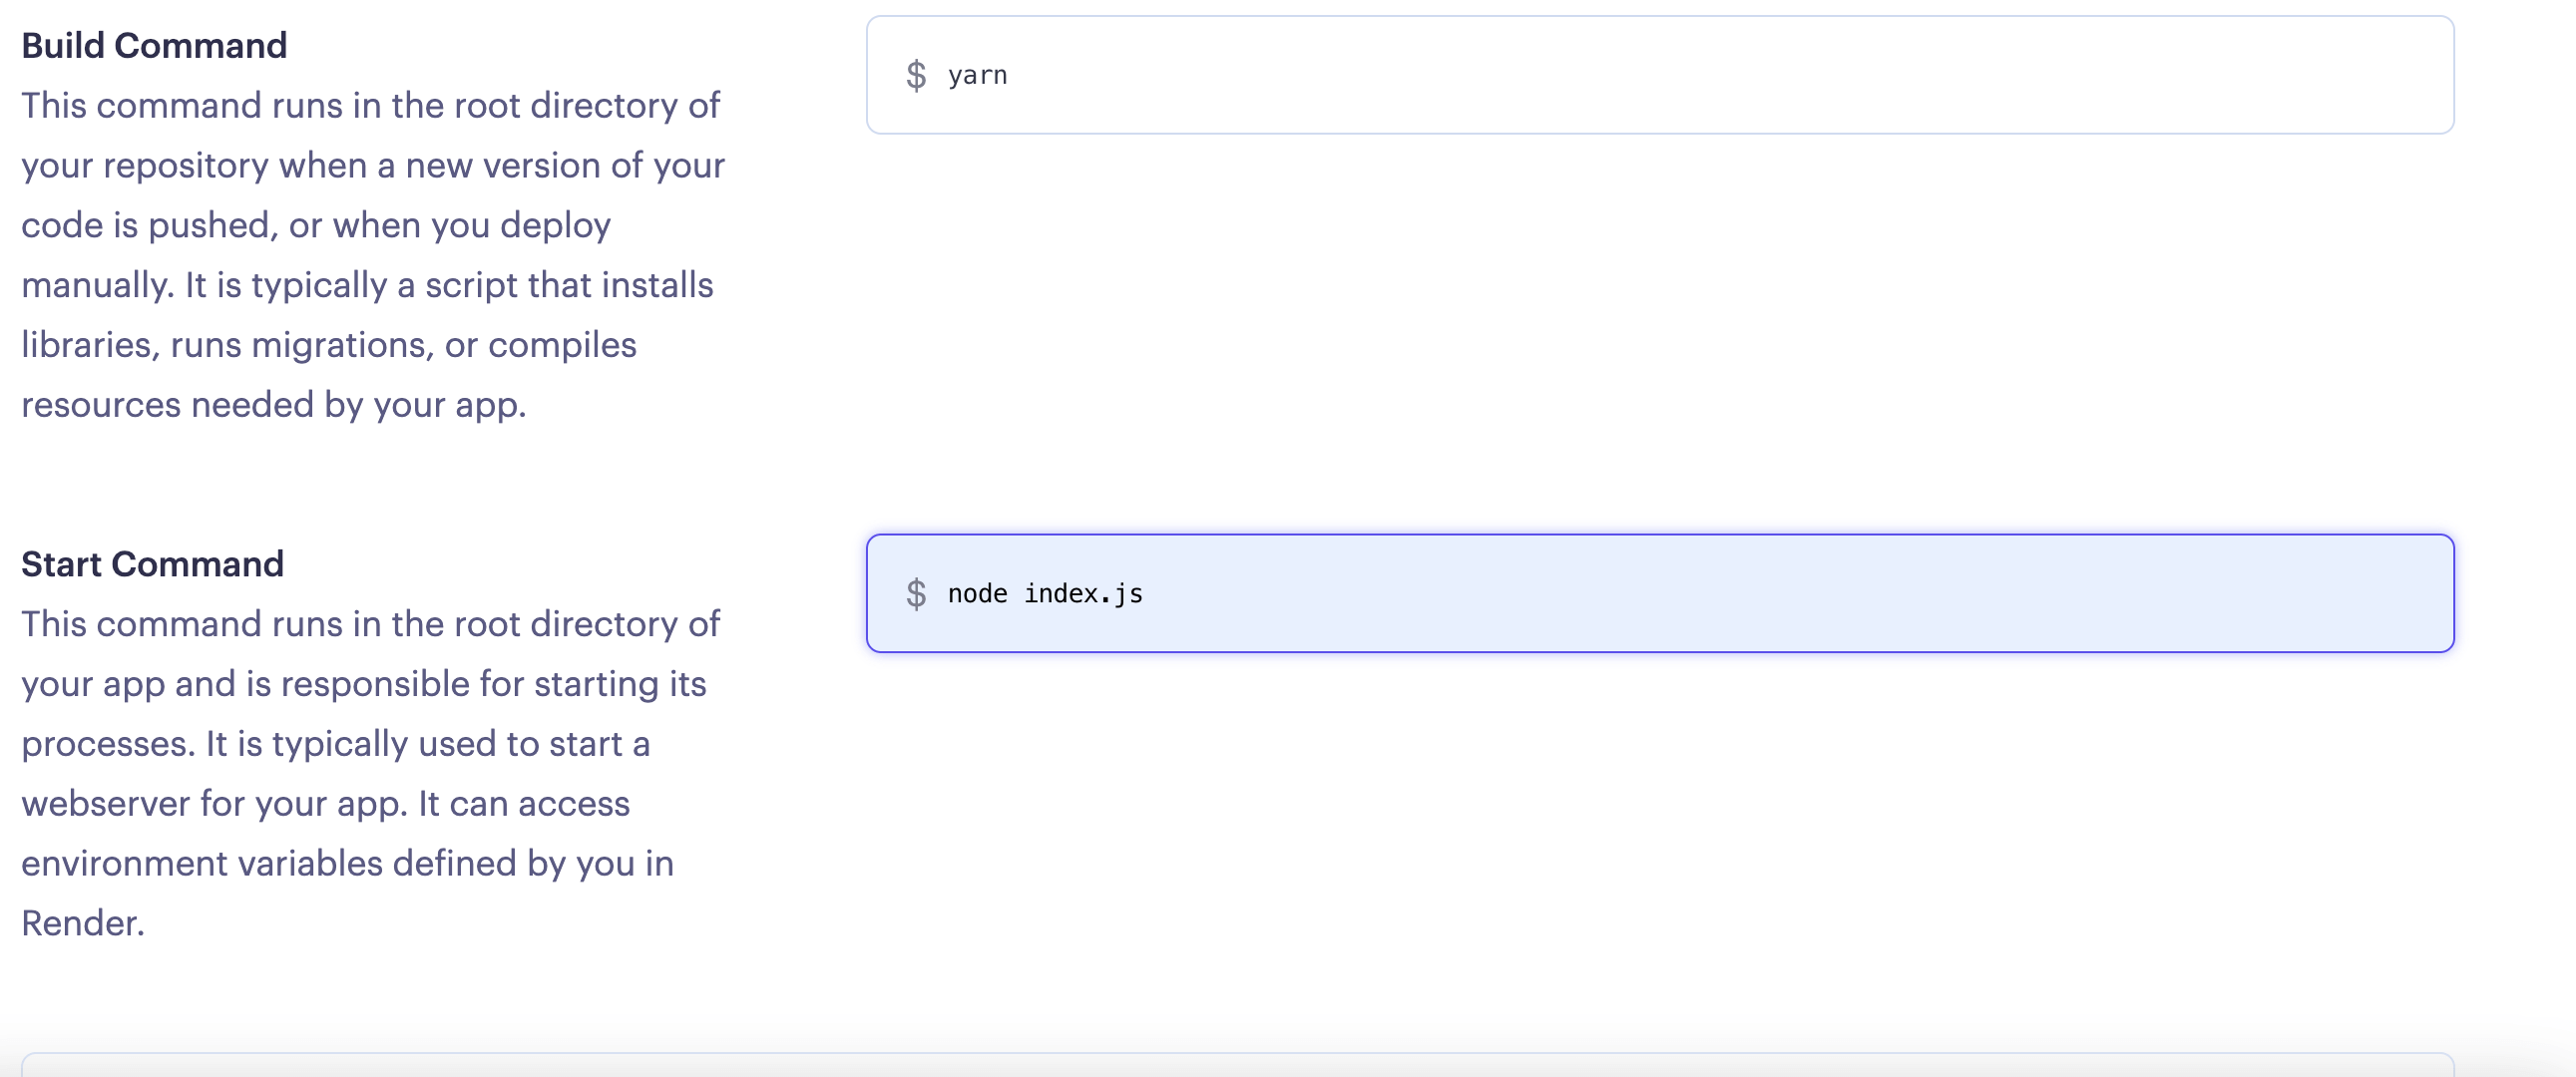
如果你的入口文件是 index.js,在Start Command中填寫node index.js。
如果你的入口是 server.js,在Start Command中填寫node server.js

再向下滑動頁面會看到Advanced按鈕
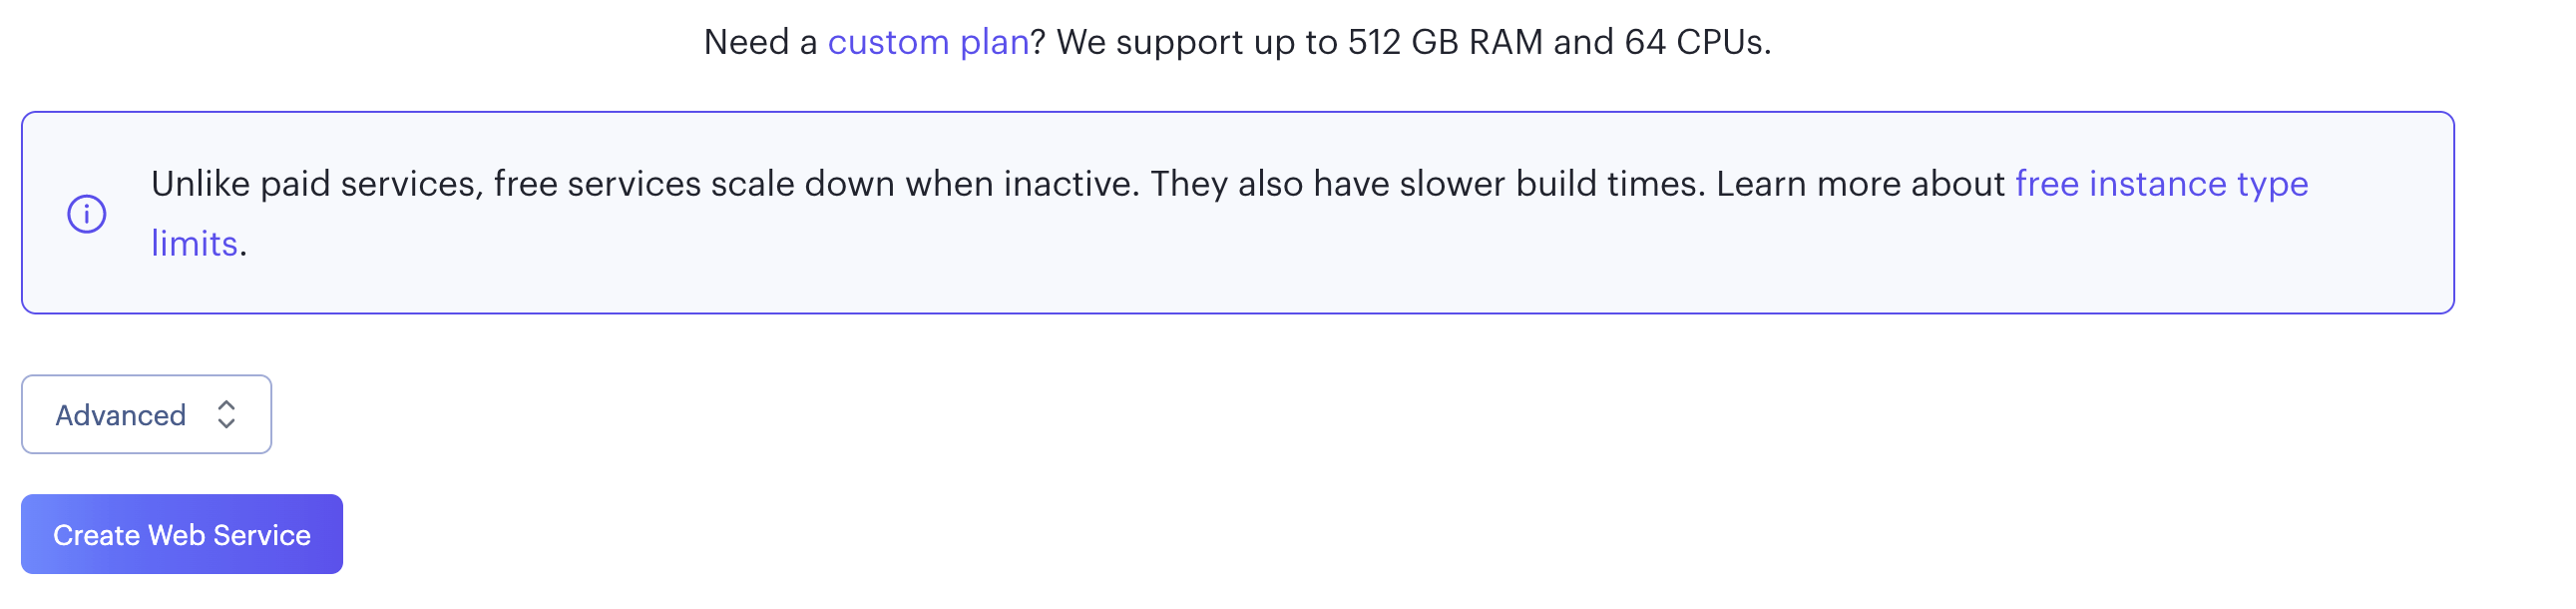
如果你的應用使用了環境變量,你可以在Advanced設置中輸入。也可以在這裡添加 .env文件,這樣就不用你手動一個一個地添加。
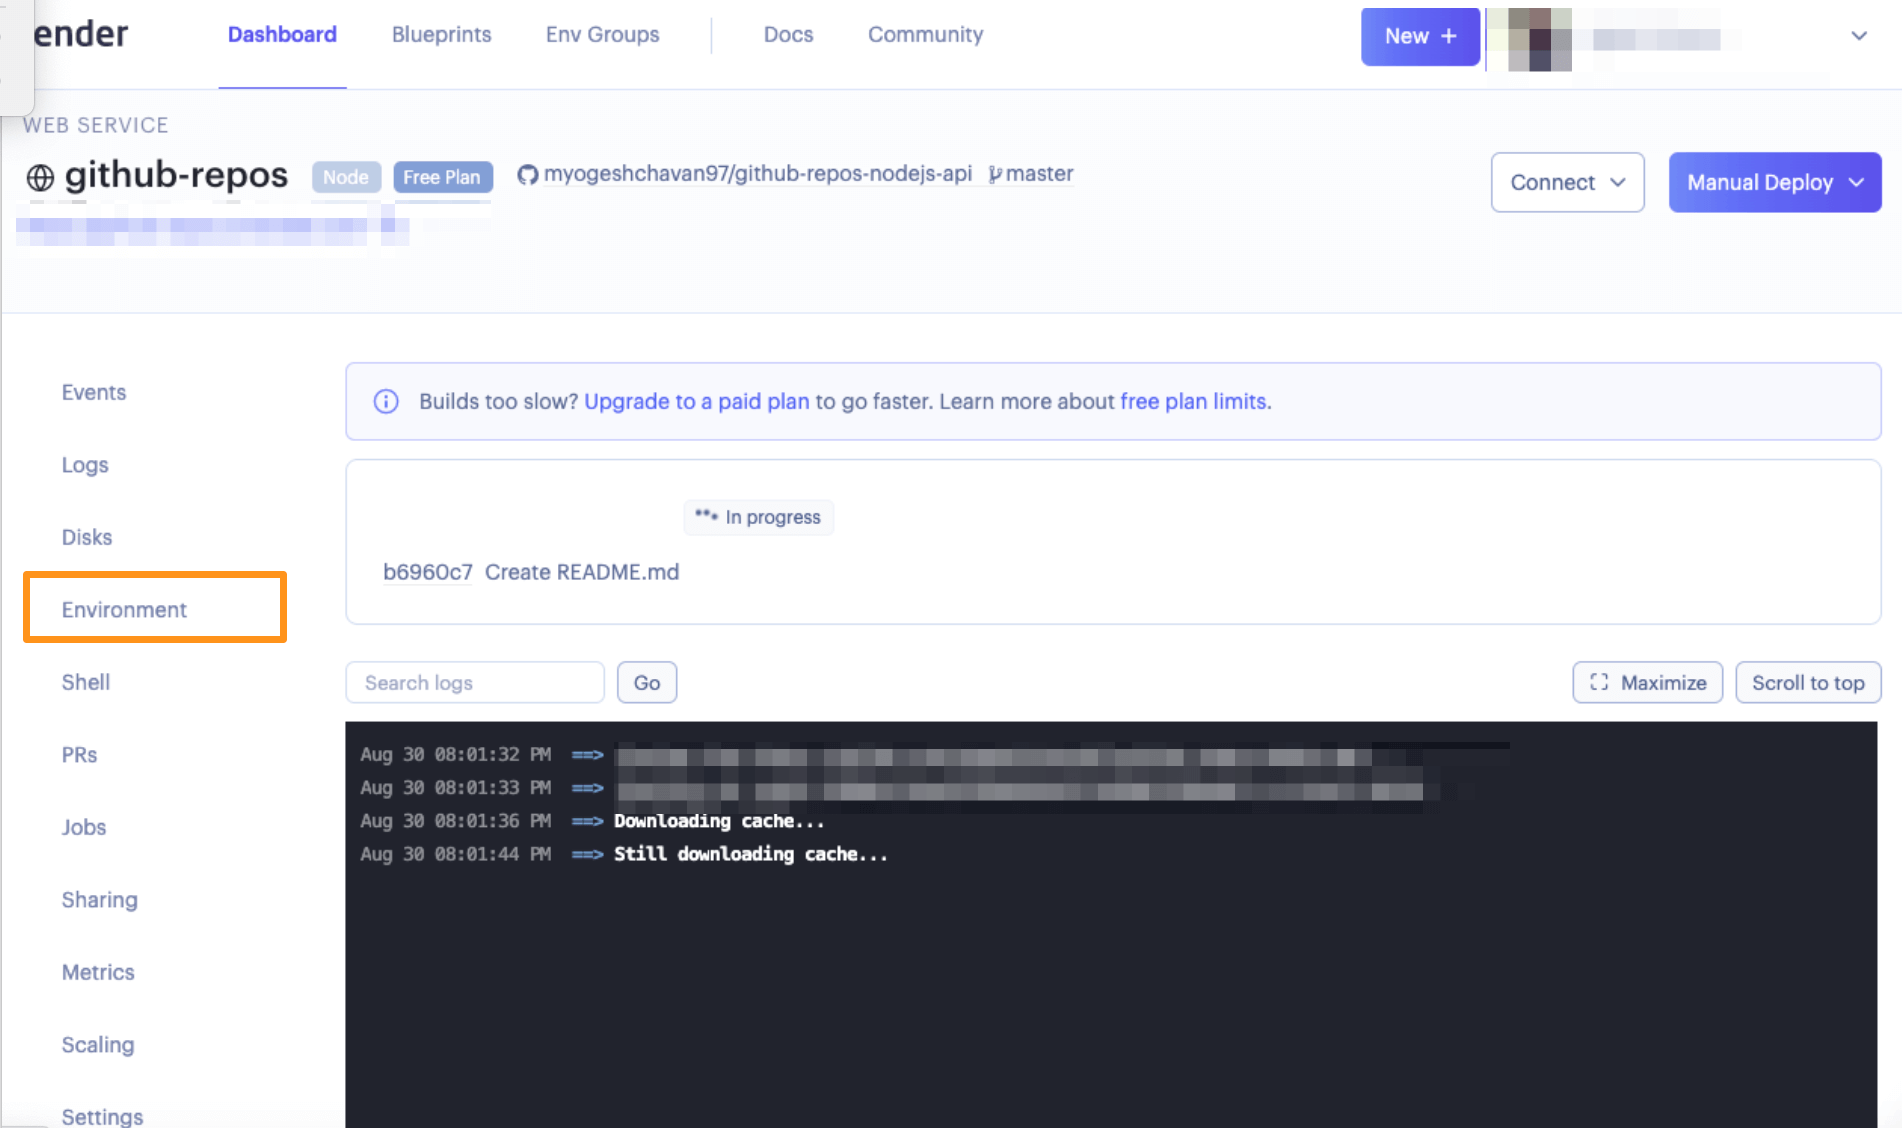
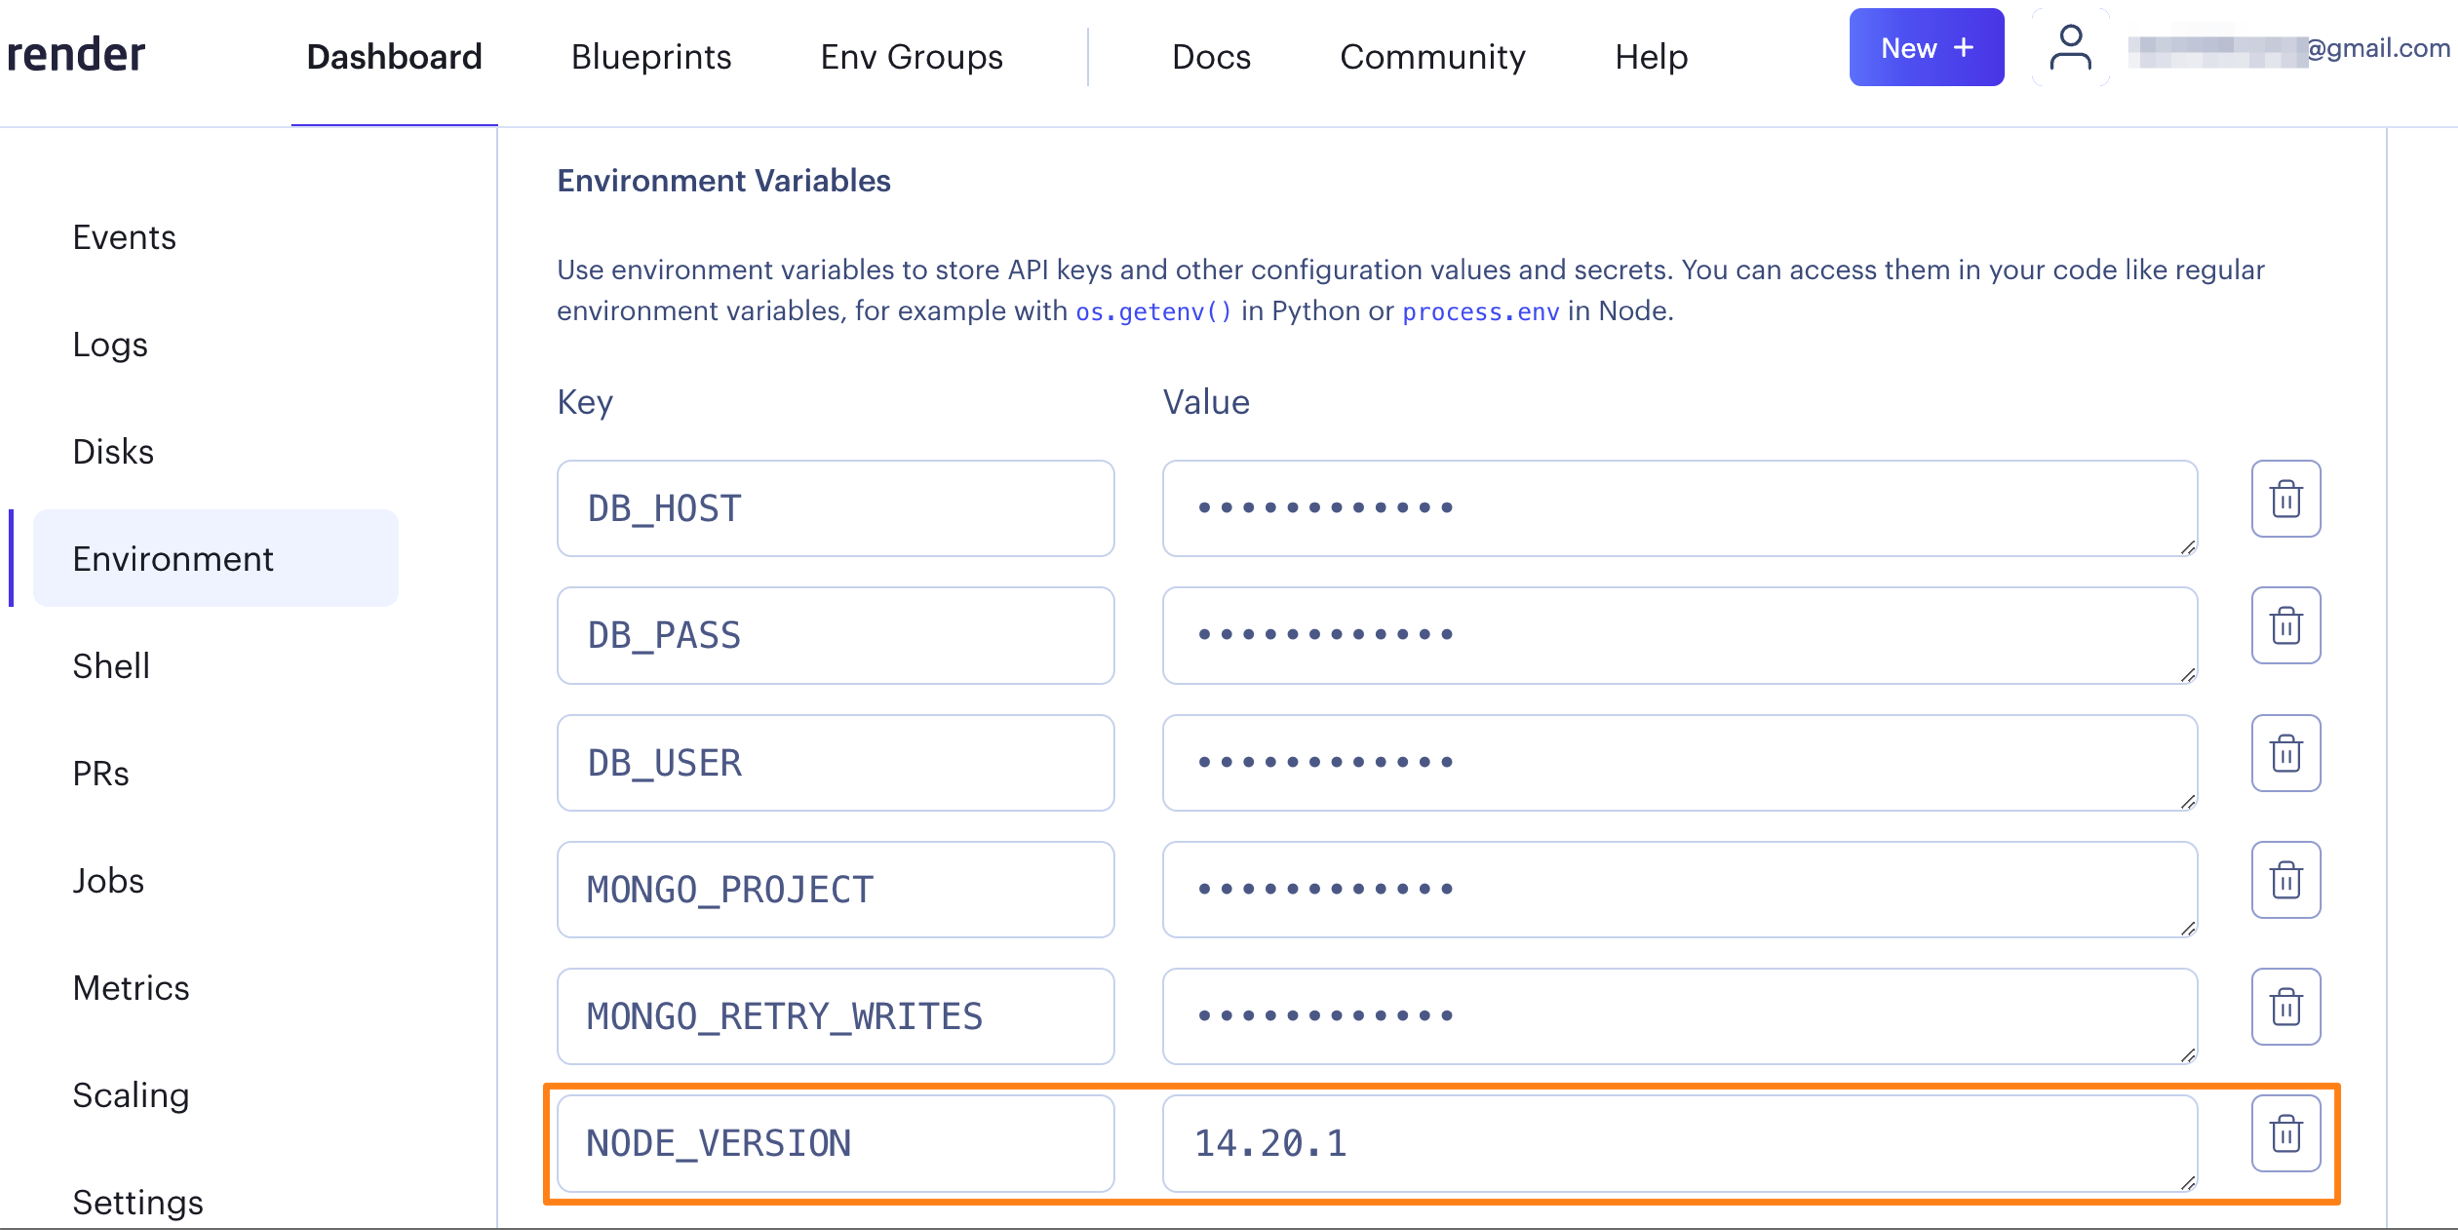
處理Bug
環境變數內新增
NODE_VERSION 14.20.1
Node express mongeoseDb crud 參考資料
Node express mongeoseDb Content & Create save()
Node express mongeoseDb Create create() & insertMany()
使用 create() 和 insertMany() 儲存文件 - NodeJS、Express、Mongoose 和 MongoDB
Node express mongeoseDb Create
Node express mongeoseDb crud
三考
三考