Pinia Composition API(defineStore,storeToRefs)

安裝pinia

1
npm install --save pinia

在main.ts引入pinia

1
2
3
4
5
6
7
8

import { createPinia } from 'pinia'

const pinia = createPinia()

const app = createApp(App)
app.use(pinia)
app.mount('#app')

Vite Ssr 專案 main.ts引入方法

1
2
3
4
5
6
7
8
9
10
11
12
13
import { createSSRApp } from 'vue'
+ import { createPinia } from 'pinia'
import App from './App.vue'
+ const pinia = createPinia()

// SSR requires a fresh app instance per request, therefore we export a function
// that creates a fresh app instance. If using Vuex, we'd also be creating a
// fresh store here.
export function createApp() {
const app = createSSRApp(App);
+ app.use(pinia)
return { app }
}

官方寫法:

stores/counter.ts

1
2
3
4
5
6
7
8
9
10
11
12
13
14
15
16
17
18
19
20
21
22
23
24
25
26
27
28
29
30
31
32
33
34
35
36
37
38
39
40
41
42
43
44
45
46
47
48
49
50
51
52
53
54
55
56
57
58
59
60
61
62
63
64
65
66
67
68
69
70
71
72
73
74
75
76
//引入defineStore
import { defineStore } from 'pinia';

export const useCounterStore = defineStore('counter', {
//state如同data
state: () => {
return {
count: 0,
cardLists:[],
forms: {
email: '',
password:'',
}
}
},
//如同computed
getters: {
doubleCount: (state) => state.count * 2,
},
//如同method=>

actions: {
addCount() {
this.count++
},
async fetchApi() {
try {
const api = 'https://api.coindesk.com/v1/bpi/currentprice.json';
/* let headers = {
"Content-Type": "application/json",
"Accept": "application/json",
// Authentication: 'secret'
// "Authorization": `Bearer ${token}`,
}*/
const res = await fetch(api, { headers: headers, method: "GET" });
// this方法
this.cardLists = await res.json();
console.log('lists.value', this.cardLists)

} catch (error) {
console.log(error)
}

},
async loginIn () {
try {

const api = `${import.meta.env.VITE_API_DEFAULT_URL}/auth/login`

let headers = {
"Content-Type": "application/json",
"Accept": "application/json",
// "Authorization": `Bearer ${token}`,
}
//以下是API文件中提及必寫的主體参數
let body = {
email: this.forms.email,
password:this.forms.password,
}
fetch(api, {
method: "POST",
headers: headers,
body: JSON.stringify(body)//****重點 */
})
.then(res => res.json())
.then(json => {
console.log('login',json)
});
}
catch (error) {
console.log(error)
}
}
},
})

在頁面使用

  • 引入counter的useCounterStore
  • 宣告useCounterStore()

引入

宣告

解構

1
2
3
4
5
6
7
8
9
10
11
12
13
14
15
16
17
18
<template>
<button @click="addCount" class="add_btn">add count</button>
<div>{{counter.count}}</div>
{{ counter.cardLists }}
</template>

<script setup lang="ts">
import { ref, onMounted } from 'vue'
//引入Store
import { useCounterStore } from '../stores/counter'
//宣告
const counter = useCounterStore();
const { addCount,fetchApi } =counter;
onMounted(() => {
fetchApi();
})
</script>

pinia 選項寫法 gitHub
pinia 選項寫法 gitHub

改為 Composition API

*重點:
1.引入vue Composition API
2.改為Function 寫法與Composition API
3.必須 return

1
2
3
4
5
6
7
8
9
10
11
12
13
14
15
16
17
18
19
20
21
22
23
24
25
26
27
28
29
30
31
32
33
34
35
import { defineStore } from 'pinia';
//引入vue Composition API
import { ref,computed } from 'vue';
//改為Function 寫法與Composition API
export const useCounterStore = defineStore('counter', ()=>
{
const count = ref(0);

//computed
const doubleCount = computed(() =>
{
return count.value * 2
})

const addCount = () =>
{
count.value ++
}
const cardLists=ref([])
const fetchApi = async() =>
{
try {
const res = await axios.get('https://api.coindesk.com/v1/bpi/currentprice.json');
cardLists.value = res.data;
} catch (error) {
console.log(error)
}

}
//必須輸出 return
return {
count,addCount,doubleCount,
cardLists,fetchApi
}
})

在頁面使用

  • 引入counter的useCounterStore
  • 宣告useCounterStore()

html 加入 store.命名

使用 store action時 store.addCount()

*重點:
1.store.名稱
2.store.function

1
2
3
4
5
6
7
8
9
10
11
12
13
14
15
16
17
18
19
20
21
22
23
24
<template>
<div>
<p>{{store.count}}</p>
<pre>
{{ store.cardLists }}
</pre>
<button @click="clickAdd">Add</button>
<button @click="store.fetchApi">fetchApi</button>
</div>
</template>

<script setup lang="ts">
//引入Store
import { useCounterStore } from '@/stores/counter.js';

//宣告store = useCounterStore()
const store = useCounterStore();

const clickAdd = () => {
//使用 store action時 store.addCount()
store.addCount()
}
</script>

counter pinia寫法引入Store 方式寫法

解構方式引入

1.引入 import {storeToRefs } from ‘pinia’
2.//解構store,數據取出counter, cardLists
const { counter, cardLists } = storeToRefs(store);
3.function 解構 const { fetchApi } = store;

使用

1
2
3
4
5
6
7
8
9
10
11
12
13
14
15
16
17
18
19
20
21
22
23
24
25
26
27
28
29
30
31
32
33
34
<template>
<div>
<button @click="clickAdd">Add</button>
<h1>{{ counter }}</h1>

<div> {{ cardLists }}</div>
<pre>
{{ cardLists }}
</pre>
</div>
</template>

<script setup lang="ts">
import { ref,onMounted } from 'vue';

//引入 import {storeToRefs } from 'pinia'
import {storeToRefs } from 'pinia';
// @ts-ignore
import { useCounterStore } from '../stores/counter.js';
//宣告store = useCounterStore()
const store = useCounterStore();
//解構store,數據取出counter, cardLists
const { counter, cardLists } = storeToRefs(store);
const { fetchApi, addCount } = store;

const clickAdd = () => {
addCount()
}
onMounted(() => {
fetchApi();
});
</script>


Pinia Composition API

範例

stores/user.ts

  • acceptHMRUpdatePinia 支援熱模組替換,因此您可以直接在您的應用程式中編輯您的商店並與它們進行交互,而無需重新加載頁面,從而允許您保留現有狀態、添加甚至刪除狀態、操作和 getter。
  • 使用$patch修改state 數據
1
2
3
4
5
6
7
8
9
10
11
12
13
14
15
16
17
18
19
20
21
22
23
24
25
26
27
28
29
30
31
32
33
34
35
36
37
38
39
40
41
42
43
44
45
46
47
48
49
// @ts-check 引入pinia的defineStore與acceptHMRUpdate
import { defineStore, acceptHMRUpdate } from 'pinia'

/**模擬登入*/
function apiLogin(a: string, p: string) {
if (a === 'ed' && p === 'ed') return Promise.resolve({ isAdmin: true })
if (p === 'ed') return Promise.resolve({ isAdmin: false })
return Promise.reject(new Error('invalid credentials'))
}

export const useUserStore = defineStore({
id: 'user',
state: () => ({
name: 'Eduardo',
isAdmin: true,
}),

actions: {
logout() {
// 登出以後 =>使用$patch修改state 數據
this.$patch({
name: '',
isAdmin: false,
})

// 我們可以做其他事情,例如重定向用戶
},

/**
* 嘗試登入用戶
*/
async login(user: string, password: string) {
const userData = await apiLogin(user, password)
// 登入以後 =>使用$patch修改state 數據
this.$patch({
name: user,
...userData,

})
console.log(userData,)
},
},
})

if (import.meta.hot) {
import.meta.hot.accept(acceptHMRUpdate(useUserStore, import.meta.hot))
}


stores/cart.ts

1
2
3
4
5
6
7
8
9
10
11
12
13
14
15
16
17
18
19
20
21
22
23
24
25
26
27
28
29
30
31
32
33
34
35
36
37
38
39
40
41
42
43
44
45
46
47
48
49
50
51
52
53
54
55
56
57
58
59
60
// @ts-check 引入pinia的defineStore與acceptHMRUpdate
import { defineStore, acceptHMRUpdate } from 'pinia'
//引入useUserStore
import { useUserStore } from './user'

export const useCartStore = defineStore({
id: 'cart',
state: () => ({
rawItems: [] as string[],
}),
getters: {
items: (state): Array<{ name: string; amount: number }> =>
//https://medium.com/@davelin18yufan/js%E5%AD%B8%E7%BF%92%E7%AD%86%E8%A8%98-%E6%B7%B1%E5%85%A5%E7%90%86%E8%A7%A3reduce%E7%9A%84%E7%94%A8%E6%B3%95-95738c3f9114
state.rawItems.reduce((items, item) => {
//尋找
const existingItem = items.find((it) => it.name === item)
//console.log('現有項目existingItem',existingItem)
if (!existingItem) {
//console.log('19',existingItem)
items.push({ name: item, amount: 1 })
} else {
//console.log('22',existingItem.amount++)
existingItem.amount++
}
//console.log('items',items)
return items
}, [] as Array<{ name: string; amount: number }>),
},
actions: {
//新增Item
addItem(name: string) {
this.rawItems.push(name)
},
//刪除
removeItem(name: string) {
//lastIndexOf搜尋最後一次出現的
//https://www.w3schools.com/jsref/jsref_lastindexof.asp
const i = this.rawItems.lastIndexOf(name)
//splice() 方法可以藉由刪除既有元素並
if (i > -1) this.rawItems.splice(i, 1)
},

async purchaseItems() {
const user = useUserStore()
if (!user.name) return

console.log('購買', this.items)
const n = this.items.length
this.rawItems = []

return n
},
},
})

if (import.meta.hot) {
console.log('import.meta.hot', import.meta.hot);
import.meta.hot.accept(acceptHMRUpdate(useCartStore, import.meta.hot))
}

頁面引用

1
2
3
4
5
6
7
8
9
10
11
12
13
14
15
16
17
18
19
20
21
22
23
24
25
26
27
28
29
30
31
32
33
34
35
36
37
38
39
40
41
42
43
44
45
46
47
48
49
50
51
52
53
54
55
<script setup lang="ts">
//引入Store
import { useCartStore } from '@/stores/cart'
import { useUserStore } from '@/stores/user'
//宣告
const cart = useCartStore();
const user = useUserStore();
const itemName = ref<string>('');

// 新增Item到購物車
const addItemToCart =()=>{
if (!itemName.value) return
cart.addItem(itemName.value)
itemName.value = ''
}
// 清空購物車
const clearCart =()=>{
if (window.confirm('您確定要清空購物車嗎?')) {
cart.rawItems = []
}
}
// 購買
const buy =async()=>{
const n = await cart.purchaseItems()
console.log(`買 ${n} items`)
cart.rawItems = []
}
</script>

<template>
<div>
<input type="text" v-model="itemName" />
<button class="add_btn" @click="addItemToCart">Add</button>
<!--新增的Item-->
<ul>
<li v-for="item in cart.items" :key="item">
{{item.name}}
<!--刪除的按鈕-->
<button class="delete_btn" @click="cart.removeItem(item.name)"
type="button">X</button>
</li>
</ul>
<!--購買按鈕-->
<button class="buy_btn" :disabled="!user.name">Buy</button>
<!--清除購物車按鈕-->
<button
class="delete_btn"
:disabled="!cart.items.length"
@click="clearCart"
type="button"
data-testid="clear"
>Clear the cart</button>
</div>

</template>

github

改Composition API寫法

1
2
3
4
5
6
7
8
9
10
11
12
13
14
15
16
17
18
19
20
21
22
23
24
25
26
27
28
29
30
31
32
33
34
35
36
37
38
39
40
41
42
43
44
45
46
// @ts-check 引入pinia的defineStore與acceptHMRUpdate
import { defineStore, acceptHMRUpdate } from 'pinia'
//引入vue Composition API
import { ref,computed } from 'vue';
//引入useUserStore
import { useUserStore } from './user'
export const useCartStore = defineStore('cart', () => {

const rawItems = ref<any[]>([]);
const items = computed(() =>{
rawItems.value.reduce((items: any[], item: any) => {
const existingItem = items.find((i:any) => i.name === item)
if (!existingItem) {
items.push({ name: item, amount: 1 })
} else {

existingItem.amount++
}
return items
},[] as Array<{ }>)
})

const addItem = (name: string) => {
console.log('新增的input 數據:', name);
rawItems.value.push(name)
}
const removeItem = (name: string) => {
console.log('刪除:',name)
const i = rawItems.value.indexOf(name)
//splice() 方法可以藉由刪除既有元素並
if (i > -1) rawItems.value.splice(i, 1)
}
const purchaseItems = () => {
const user = useUserStore()
if (!user.name) return

console.log('購買', items)
// const n = items.length
rawItems.value = []

//return n
}
return {
rawItems,items,addItem ,removeItem,purchaseItems
}
})

頁面使用

1
2
3
4
5
6
7
8
9
10
11
12
13
14
15
16
17
18
19
20
21
22
23
24
25
26
27
28
29
30
31
32
33
34
35
36
37
38
39
40
41
42
43
44
45
46
47
48
49
50
51
52
53
54
55
56
57
58
59
60
61
62
63
64
65
66
67
68
69
70
71
72
73
74
<template>
<div>
{{title}}
<input type="text" v-model="itemName" />
<button class="add_btn" @click="addItemToCart">Add</button>
<ul>
<li v-for="item in items" :key="item" v-show="items.length!=0">
{{item.name}}
<button class="delete_btn" @click="removeItem(item.name)"
type="button">X</button>
</li>
</ul>
<button class="buy_btn"
@click="buy"
:disabled="!name">Buy</button>
<button
class="delete_btn"
@click="clearCart"
type="button"
data-testid="clear"
>Clear the cart</button>
</div>
</template>

<route>
{
path: '/aboutus',
name: 'AboutUs',
meta: {
layout: 'frontLayout',
}
}
</route>

<script setup lang="ts">
//引入pinia
import {storeToRefs} from 'pinia';
import {ref,onMounted} from 'vue'

//引入Store
import { useCartStore } from '../stores/cartTest'
import { useUserStore } from '../stores/userTest'
const title =ref<string>('關於我們');
//宣告
const cart = useCartStore();
const user = useUserStore();
//解構store
const { rawItems,items } = storeToRefs(cart)
const { addItem ,removeItem,purchaseItems } = cart;
const { name,isAdmin } = storeToRefs(user);
// const { logout,login } = user;

const itemName = ref<string>('');
const addItemToCart =()=>{
if (!itemName.value)
return
cart.addItem(itemName.value)
itemName.value = ''

}
const clearCart =()=>{
if (window.confirm('您確定要清空購物車嗎?')) {
rawItems.value = []
}
}
const buy =async()=>{
const n = await purchaseItems()
console.log(`買 ${n} items`)
rawItems.value = []
}
onMounted(() => {
// getItems()
});
</script>

組合式Api寫法

Cookie &localStorage & sessionStorage

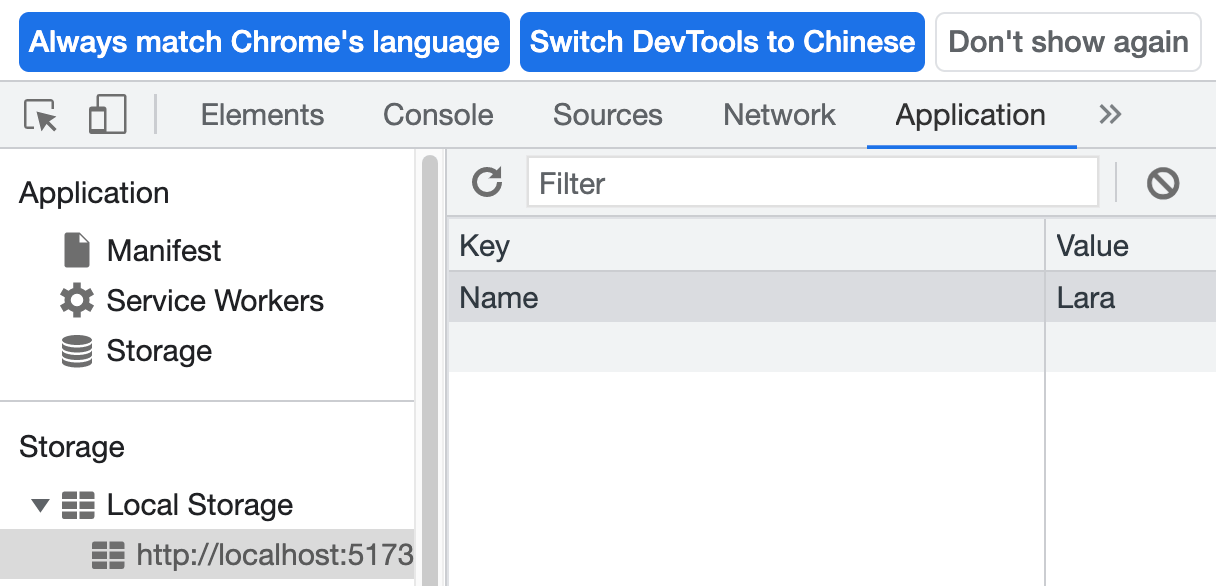
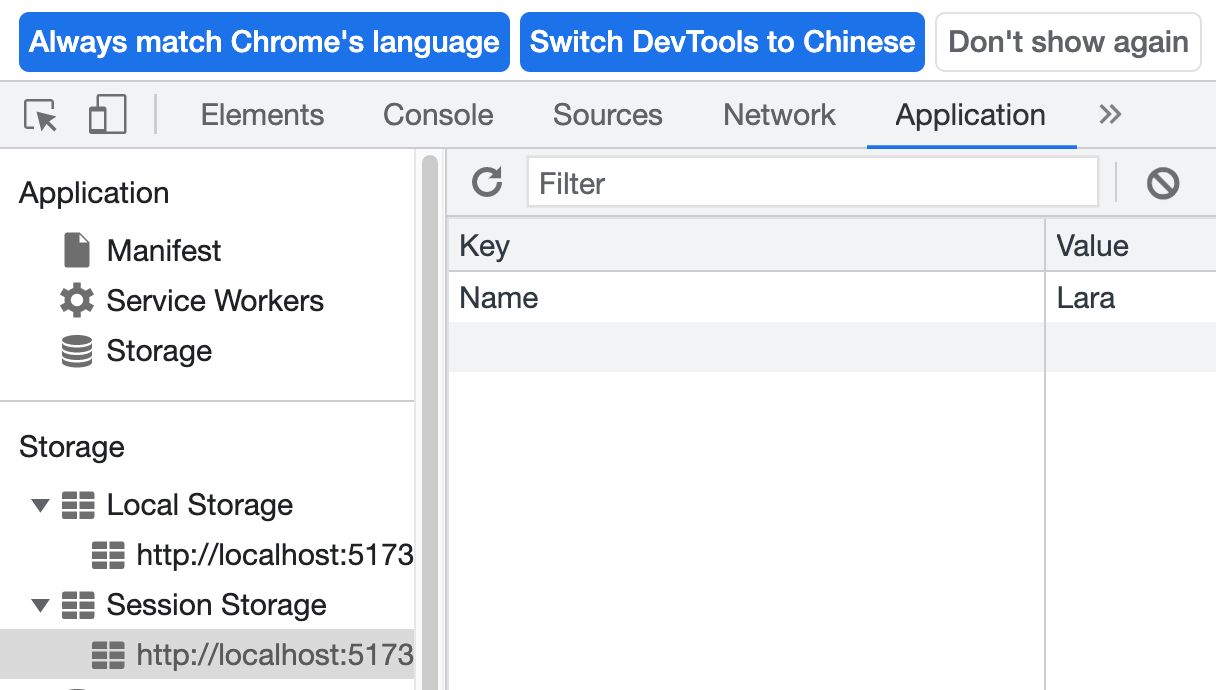
存入資料setItem(‘資料名稱’:資料)

1
localStorage.setItem(‘Name',Lara)

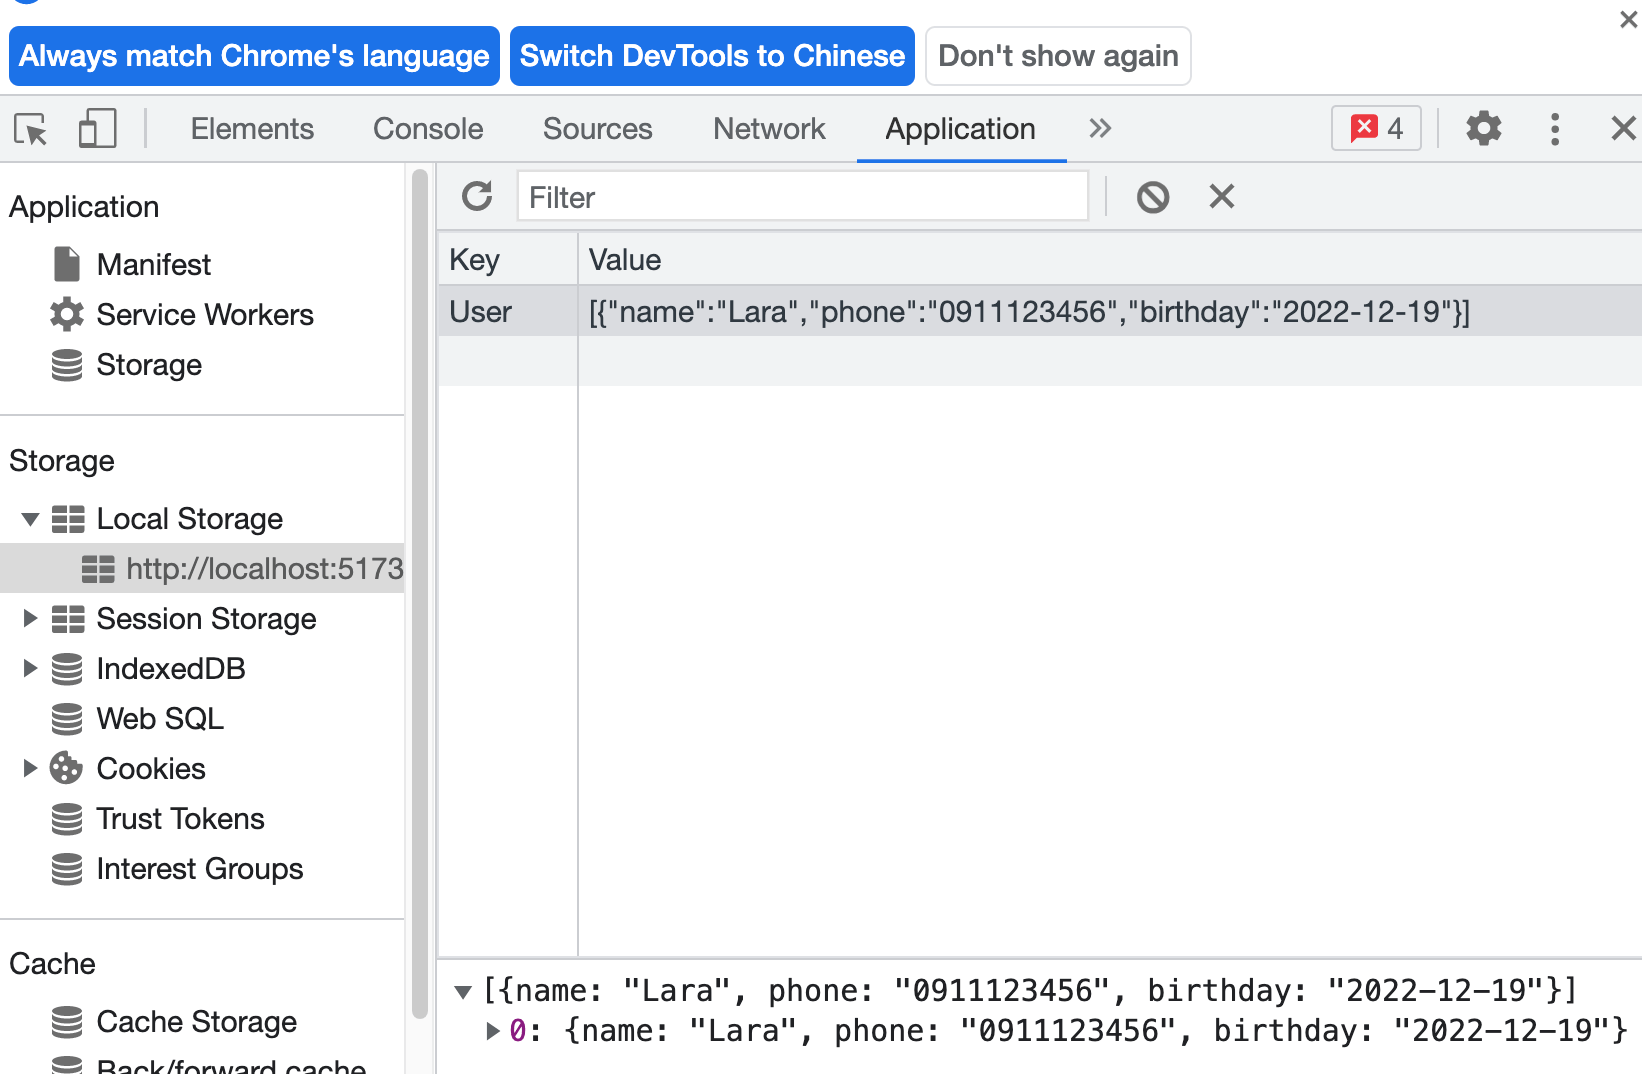
在 DevTools Application 中查看 localStrong

1
sessionStorage.setItem(‘Name',Lara)

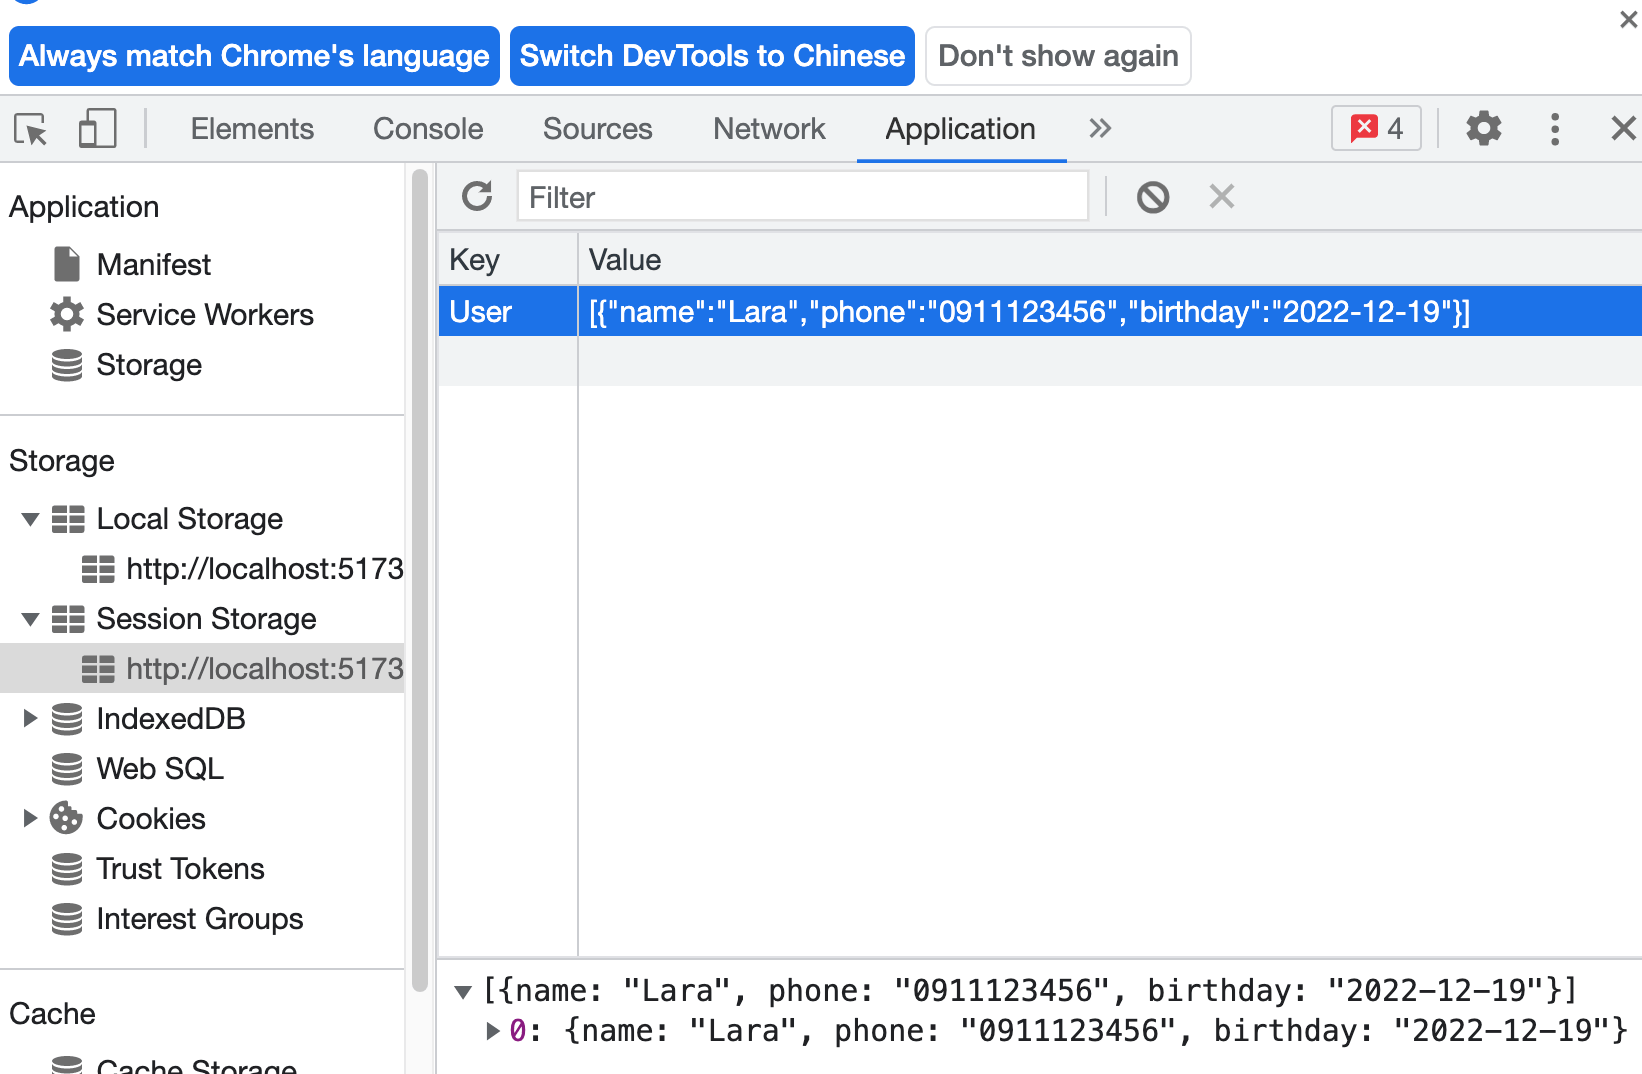
在 DevTools Application 中查看 sessionStrong

取出資料getItem(‘資料名稱’)

1
2
localStorage.getItem(‘Name')
sessionStorage.getItem(‘name')

移除資料removeItem(‘資料名稱’)

1
2
localStorage.removeItem(‘Name')
sessionStorage.removeItem(‘Name')

移除全部 clear()

1
2
localStorage.clear();
sessionStorage.clear();

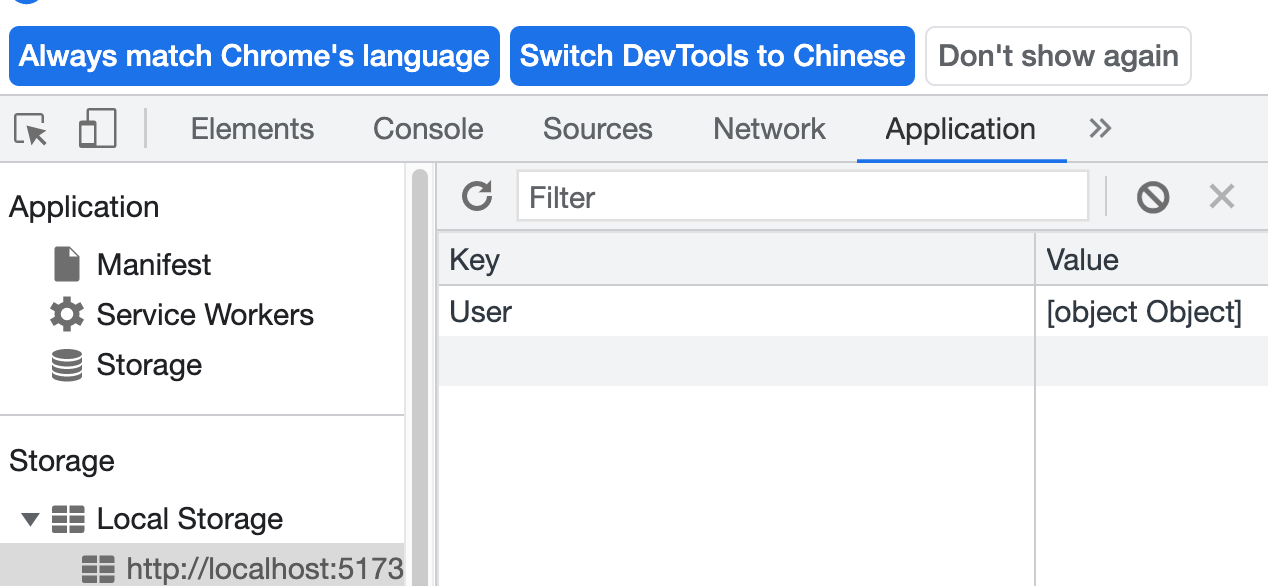
存入localStorage(sessionStorage):必須將陣列轉字串=>JSON.stringify();localStorage.setItem(‘User’, JSON.stringify(數據))

錯誤示範:存入[object,object]

正確必須轉換成:JSON.stringify()才存入setItem

1
2
3
4
5
6
7
8
let user = [
{ name: 'Lara',
phone: '0911123456',
birthday:'2022-12-19'}
]
var userString = JSON.stringify(user)
localStorage.setItem('User', userString);
sessionStorage.setItem('User', userString);

將localStorage(sessionStorage)取出,將資料轉換回原本的格式 JSON.parse()

1
2
JSON.parse(localStorage.getItem('User'))
JSON.parse(sessionStorage.getItem('User'))

localStorage&sessionStorage 資料儲存的格式:皆需要為字串

localStorage:跨瀏覽器分頁做使用,資料無期效限制,資料將永久被保留

使用場景:帳號登入、購物車、遊戲分數,或任何其他伺服器應該記住的資訊
缺點:
1.約 5MB 的容量空間
2.資料儲存的格式 key 和 value 都只能接受「字串 」

sessionStorage:生命週期較短每次分頁或瀏覽器關閉,資料將被清空。

使用場景:判斷用戶是否登錄

安全考慮

並非所有數據都適合儲存在這些其中。
因為網站中存有XSS 風險,打開控制台,就可以隨意修改值,就能對你的localStorage 肆意妄為。
所以不要將敏感數據儲存在這其中。

Firebase 語法整理

ref路徑

1
2
import firebase from "@/config/firebaseConfig.js";
firebase.database().ref('schedules/');

child

讀取 on,once

1
2
3
4
5
6
const teacherLists = ref<any>({})
const getTeachers = () => {
teachers.once('value', (snapshot: { val: () => any; }) => {
teacherLists.value = snapshot.val();
})
}

讀取 on:程式會在背景待命,一旦資料變動的時候,就會重新印出新的結果,即時更新訊息的聊天室

1
2
3
4
myData.on('value', (snapshot)=>{
var data = snapshot.val()
console.log(data)
})

新增 set:直接取代當前路徑中的所有資料(具有破壞性)

1
2
3
4
5
let query = {
id: Math.floor(Date.now() / 1000),
title: scheduleForm.value.title,
}
firebase.database().ref('schedules/' + query.id).set(query);

新增 push:產生了一組隨機key值

1
2
var todos = db.ref('todos');
todos.push({content:'去看電影'});

update:只修改相關資料,不會直接取代路徑中的所有資料

1
2
3
4
5
6
7
8
9
10
11
var Data = {
name: name,
mail:mail,
phone:phone
}
// 分別將資料寫進資料庫'user/'底下
// 也會同時在'uses/'下開啟一個name的子節點,並且寫入相同的data
var updates = {};
updates['/users/' + newPostKey] = postData;
updates['/users/' + name + '/' + newPostKey] = postData;
return firebase.database().ref().update(updates);

remove

1
2
3
const toDelete = (item: any) => {
teachers.child(key).remove();
}

orderByChild 排序

orderByChild()依據資料某一個特定子節點來做排序
orderByKey 排序:不需要帶參數,資料少的排前面,資料大排後面
orderByValue 排序:不需要帶參數,升冪值進行排序

過濾條件:startAt, endAt, equalTo

startAt:比如說我們想要過濾掉,體重60公斤以下的人,可以使用startAt(60)。

1
2
3
4
5
userRef.orderByChild("weight").startAt(60).once("value",  (snapshot)=> {
snapshot.forEach( (item)=> {
console.log(item.val());
});
});

過濾條件endAt:過濾掉,體重80公斤以上的人,可以使用startAt(50)。

1
2
3
4
5
userRef.orderByChild("weight").endAt(80).once("value", (snapshot)=> {
snapshot.forEach(function (item) {
console.log(item.val());
});
});

過濾條件equalTo:等於:體重等於40公斤的人時,就要使用equalTo(50),想要知道是誰的話,可以加上key (item.key)

1
2
3
4
5
6
userRef.orderByChild("weight")
.equalTo(40).once("value", (snapshot)=> {
snapshot.forEach( (item)=> {
console.log(item.val(), item.key);
});
});

limitToFirst, limitToLast 等與限制筆數

limitToFirst:只需要其中第一筆資料,體重70大於公斤的會員第一筆資料

1
2
3
4
5
userRef.orderByChild("weight").startAt(50).limitToFirst(1).once("value",  (snapshot)=> {
snapshot.forEach( (item)=> {
console.log(item.val());
});
});

limitToLast:從最尾端起算的幾筆

Vite fullcalendar安裝與事件

Fullcalendar官網Vue3

安裝fullcalendar/vue3@5.9.0

1
2
npm install @fullcalendar/vue3@5.9.0
npm install --save @fullcalendar/core@5.9.0 @fullcalendar/daygrid@5.9.0 @fullcalendar/interaction@5.9.0 @fullcalendar/timegrid@5.9.0 @fullcalendar/list@5.9.0

src下新增event-utils.ts

設定初始事件

1
2
3
4
5
6
7
8
9
10
11
12
13
14
15
16
17
18
19
20
21
22
23
24
25
26
27
import { EventInput } from '@fullcalendar/vue3'

let eventGuid = 0
let todayStr = new Date().toISOString().replace(/T.*$/, '') // YYYY-MM-DD of today

export const INITIAL_EVENTS: EventInput[] = [
{
id: "001",
title: '週六去旅行',
start: '2022-12-03'+ 'T08:00:00'
},
{
id: "003",
title: '週日去審計新村',
start: '2022-12-04'+ 'T12:00:00'
},
{
id: "002",
title: '週日下午茶',
start: '2022-12-04'+ 'T16:00:00'
},
]

export function createEventId() {
return String(eventGuid++)
}

views/Home.vue

加入點擊物件

為您的活動輸入新標題

1
2
3
4
5
6
7
8
9
10
11
12
13
14
15
16
17
18
19
20
21
22
23
24
25
26
27
28
29
30
31
32
33
34
35
36
37
38
39
40
41
42
43
44
45
46
47
48
49
50
51
52
53
54
55
56
57
58
59
60
61
62
63
64
65
66
67
68
69
70
71
72
73
74
75
76
77
78
79
80
81
82
83
84
85
86
87
88
89
90
91
92
93
94
95
96
97
98
99
100
101
102
103
104
105
106
107
108
109
110
111
112
113
114
115
116
117
118
119
120
121
122
123
124
125
126
127
128
129
130
131
132
133
134
135
136
137
138
139
140
141
142
143
144
145
146
147
148
149
150
151
152
153
154
155
156
157
158
159
160
161
162
163
164
165
166
167
168
169
170
171
172
173
174
175
176
177
178
179
180
181
182
183
184
185
186
187
188
189
190
191
192
193
194
195
196
197
198
199
200
201
202
203
204
205
206
207
208
209
210
211
212
213
214
215
216
217
218
219
220
221
222
223
224
225
226
227
228
229
230
231
232
233
234
235
236
237
238
239
240
241
242
243
244
245
246
247
248
249
250
251
252
253
254
255
256
257
258
259
260
261
262
263
264
265
266
267
268
269
270
271
272
273
274
275
276
277
278
279
280
281
282
283
284
285
286
287
288
289
290
291
292
293
294
295
296
297
298
299
300
301
302
303
304
305
306
307
308
309
310
311
312
313
314
315
316
317
318
319
320
321
322
323
324
<template>

<div class="calendar_area">
<FullCalendar :options='calendarOptions'></FullCalendar>

<!--openScheduleDialog-->
<el-dialog class="openScheduleDialog" v-model="openScheduleDialog" :title="openScheduleDialogTitle">
<!--新增-->
<div>
<el-form ref="ruleFormRef" :model="scheduleForm" :rules="scheduleRules" class="search-ruleForm">
<div class="schedule_info">
<el-form-item label="課程主題" prop="title">
<el-input name="form_name" v-model="scheduleForm.title" placeholder="請輸入你的課程主題" />
</el-form-item>

<el-form-item label="整天" prop="allDay">
<el-radio-group v-model="scheduleForm.allDay">
<el-radio label="true" value="true">是</el-radio>
<el-radio label="false" value="false">否</el-radio>
</el-radio-group>
</el-form-item>

<div class="allDay_area" v-show="scheduleForm.allDay==='true'">
<div class="color_area">
<div class="isAllday">是否整天?</div>
<el-tabs v-model="scheduleForm.thisDay" class="demo-tabs" @tab-click="handleClick">
<el-tab-pane label="是" name="true">
.
</el-tab-pane>
<el-tab-pane label="否" name="false">
<el-form-item label="課程結束時間">
<el-date-picker v-model="scheduleForm.endValue" type="date" placeholder="課程結束時間"
format="YYYY-MM-DD" value-format="YYYY-MM-DD" />
{{ endValue }}
<span style="color:red">{{endValueErrorMessage}}</span>
</el-form-item>
</el-tab-pane>

</el-tabs>
<el-form-item style="display:none" label="當日" prop="thisDay">
<el-radio-group v-model="scheduleForm.thisDay" @click="thisDayClick">
<el-radio label="true" value="true">.</el-radio>
<el-radio label="false" value="false">
<el-date-picker v-model="scheduleForm.endValue" type="date" placeholder="課程結束時間"
format="YYYY-MM-DD" value-format="YYYY-MM-DD" />
{{ endValue }}
<span style="color:red">{{endValueErrorMessage}}</span>
</el-radio>
</el-radio-group>
</el-form-item>

<el-form-item style="display:none" label="課程結束時間" v-show="!allDayShow">
<el-date-picker v-model="scheduleForm.endValue" type="date" placeholder="課程結束時間"
format="YYYY-MM-DD" value-format="YYYY-MM-DD" />
{{ endValue }}
<span style="color:red">{{endValueErrorMessage}}</span>
</el-form-item>
</div>
<div class="color_area">
<el-form-item label="底色">
<el-color-picker v-model="scheduleForm.backgroundColor" show-alpha
:predefine="predefineColors" />
</el-form-item>
<el-form-item label="邊框">
<el-color-picker v-model="scheduleForm.borderColor" show-alpha
:predefine="predefineColors" />
</el-form-item>
<el-form-item label="文字顏色">
<el-color-picker v-model="scheduleForm.textColor" show-alpha
:predefine="predefineColors" />
</el-form-item>
</div>
</div>
<div v-show="scheduleForm.allDay === 'false'">
<el-form-item class="time_area">
<span>開始時間</span>
<el-select v-model="scheduleForm.conversionStartTime" class="startTime" placeholder="Select"
size="large">
<el-option v-for="(startTime,index) in 24" :key="index" :label="startTime +':00'"
:value="startTime + ':00'" @click="getStartTime(startTime)" />
</el-select>
<span>結束時間</span>
<el-select v-model="scheduleForm.conversionEndTime" class="endTime" placeholder="Select"
size="large">
<el-option v-for="(endTime,index) in 24" :key="index" :label="endTime +':00'"
:value="endTime + ':00'" @click="getEndTime(endTime)" />
</el-select>
<span style="color:red">{{ selectTimeErrorMessage }}</span>
</el-form-item>
<el-form-item label="邊框">
<el-color-picker v-model="scheduleForm.borderColor" show-alpha
:predefine="predefineColors" />
</el-form-item>

</div>
<div class="curriculum_content">
<el-form-item label="課程簡介" prop="content">
<el-input v-model="scheduleForm.content" type="textarea" />
</el-form-item>
</div>
<div class="btn_area">
<el-button @click="resetForm(ruleFormRef)">取消</el-button>
<el-button @click="saveSchedule" class="addSave" type="primary">新增</el-button>
</div>
</div>

</el-form>
</div>
</el-dialog>

<!--刪除-->
<el-dialog class="openDelScheduleDialog" v-model="openDelScheduleDialog" :title="openScheduleDialogTitle">

<div class="delDialog">
<div class="sure"><b>你確定要刪除{{ DeleteItem }}課程?</b></div>
<div class="info">
<div><span class="title">課程主題</span>{{ scheduleClickItem.title }}</div>
<div v-show="scheduleClickItem.allDay"><span class="allday">全天</span>是</div>
<div><span class="start">開始時間</span>{{ scheduleClickItem.start }}</div>
<div><span class="end">結束時間</span>{{ scheduleClickItem.end }}</div>
<span>課程描述</span>

<div class="info_content">{{ scheduleClickItem.content }}</div>
</div>
<div class="btn_area">
<el-button @click="openDelScheduleDialog =false">取消</el-button>
<el-button @click="deleteEventClick" class="addSave" type="primary">刪除</el-button>
</div>

</div>
</el-dialog>
</div>
</template>

<script setup lang='ts'>
import { ref, onMounted } from 'vue';

//FullCalendar引入
import '@fullcalendar/core/vdom' // solve problem with Vite
import FullCalendar, { CalendarOptions, EventApi, DateSelectArg, EventClickArg } from '@fullcalendar/vue3'
import dayGridPlugin from '@fullcalendar/daygrid'
import timeGridPlugin from '@fullcalendar/timegrid'
import interactionPlugin from '@fullcalendar/interaction'
import listPlugin from '@fullcalendar/list'
// Fullcalendar 初始化數據 event-utils
// import { INITIAL_EVENTS, createEventId } from '../event-utils'
//element 表單 Type
import type { FormInstance, FormRules } from 'element-plus';
//element 頁籤 Type
import type { TabsPaneContext } from 'element-plus';
//element 成功或失敗警告訊息 Type
import { ElMessage } from 'element-plus';

//firebase資料庫
import firebase from "@/config/firebaseConfig.js";
//moment時間套件
import moment from 'moment';

//element 表單驗證規則
const ruleFormRef = ref<FormInstance>();
const dialogTableVisible = ref<boolean>(false);
//刪除數據
const openEventClick = (clickInfo: EventClickArg) => {
dialogTableVisible.value = true;
// if (confirm(`你確定 '${clickInfo.event.title}'`)) {
// clickInfo.event.remove()
// }
};
//表單Type scheduleFormType
interface scheduleFormType{
id?: number |null |any,
title?: string | null,
start?: any | null,
thisDay?: any,
endValue?: any,
end?: any | null,
startTime?: any ,
endTime?: any,
conversionStartTime?: any,
conversionEndTime?: any,
startDay?: string | null,
allDay?: any | boolean |null,
backgroundColor?: string | null,
borderColor?: string | null,
textColor?: string | null,
content?: string | null,
}
//設置表單
const scheduleForm = ref<scheduleFormType>({
id: null,
title: '',
start: '',
end: '',
allDay: '',
backgroundColor: '#00ced1',
borderColor: '#ddd',
textColor: '#333',
content: '',
})
//顏色套件
const predefineColors = ref<string[]>([
'#333',
'#ffffff',
'#CACFD2',
'#009999',
'#33cccc',
'#33ccff',
'#6699ff',
'#3366ff',
'#6666ff',
'#9966ff',
'#9900cc',
'#cc3399',
'#cc6699',
'#ff6666',
'#ffcc00',
'#009900',
'#006600',
'#006699',
'#3366cc',
])
//scheduleForm 驗證
const scheduleRules = reactive<FormRules>({
title: [
{ required: true, message: '課程主題不能為空!', trigger: 'blur' },
],
thisDay: [
{ required: true, message: '不能為空!', trigger: 'change', },
],
})
//scheduleForm 驗證
const scheduleRules = reactive<FormRules>({
title: [
{ required: true, message: '課程主題不能為空!', trigger: 'blur' },
],
thisDay: [
{ required: true, message: '不能為空!', trigger: 'change', },
],
})


//新增事件
const handleDateSelect = (selectInfo: DateSelectArg) => {
let title = prompt('請為您的活動輸入新標題')
let calendarApi = selectInfo.view.calendar
calendarApi.unselect() //清除日期選擇
if (title) {
calendarApi.addEvent({
id: Math.floor(Date.now() / 1000),
title: scheduleForm.value.title,
start: moment.unix(scheduleForm.value.startTime).format("yyyy-MM-DDTHH:mm"),
end: moment.unix(scheduleForm.value.endTime).format("yyyy-MM-DDTHH:mm"),
backgroundColor: scheduleForm.value.backgroundColor,
borderColor: scheduleForm.value.borderColor,
textColor: scheduleForm.value.textColor,
content: scheduleForm.value.content,
})
}
}

//處理事件
const handleEvents = (events: EventApi[]) => {
//currentEvents = events
};

//獲取數據
const GetCalendar = () => {
calendarOptions.events = [];
//轉為陣列
}
//FullCalendar calendarOptions設置
const calendarOptions = ref<any>({
timeZone: 'UTC',
plugins: [
dayGridPlugin,
timeGridPlugin,
interactionPlugin,
listPlugin,// needed for dateClick
],
// 頭標題
headerToolbar: {
//初始設置 left: 'prev,next today',
left: 'prev',
center: 'title',
right: 'next'
},
//螢幕尺寸767以下顯示
initialView: window.screen.width < 767 ? 'listWeek' : 'dayGridMonth',
//高度設置
height: window.screen.width < 767 ? 800 : 800,
//*****初始化,新增事件初始化改為空值陣列,
initialEvents: [],
//新增以後將獲得的事件陣列數據放回events,
events: scheduleCalendarList.value,
//時間設置
eventTimeFormat: {
hour: '2-digit',
minute: '2-digit',
hour12: false
},
//刪除事件
eventClick: openDeleteEvent,
//新增事件
select: addSchedule,
editable: false,//允許編輯
droppable: false, //允許將事情放到日曆上
selectable: true, //允許選擇
selectMirror: true,//允許選擇鏡像
dayMaxEvents: true,//允許一天最多事件時就顯示彈出窗口
weekends: true,//顯示週末
eventsSet:handleEvents,
drop: dropEvents;
// 更新遠程數據庫
// eventAdd:
// eventChange:
// eventRemove:

})

//onMounted
onMounted(() => {
GetCalendar();
});
</script>

FullCalendar顯示在畫面時必須為陣列

1
2
3
4
5
6
7
8
9
10
11
12
13
14
//Firebase 數據位置
const schedules = firebase.database().ref('schedules/');
//設置 scheduleCalendarList為陣列
const scheduleCalendarList = ref<any[]>([])
//once讀取數據
schedules.once('value', (snapshot: {
forEach(arg0: (item: any) => void): unknown; val: () => any;
}) => {
scheduleLists.value = snapshot.val();
//
snapshot.forEach((item: any) => {
scheduleCalendarList.value.push(item.val());
})
})

時間的轉換:moment.unix(scheduleForm.value.startTime).format(“yyyy-MM-DDTHH:mm”)

Date.parse(selectInfo.startStr) 轉為時間搓(timestamp)

讀取單一事件時必須獲取key

點擊獲取id=>讀取點擊的資料

1
2
3
4
5
6
7
8
9
10
11
12
13
14
const scheduleClickItem = ref<any>({});
const DeleteId = ref<any>('');
const openDeleteEvent = (clickInfo: EventClickArg) => {
DeleteItem.value = clickInfo.event.title;
DeleteId.value = clickInfo.event.id;
console.log('點擊數據id', clickInfo.event.id,'點擊數據title', clickInfo.event.title,'點擊數據',clickInfo.event);
//Firebase 數據位置+DeleteId.value
const scheduleItem= firebase.database().ref('schedules/' + DeleteId.value);
//Firebase讀取此筆資料once
scheduleItem.once('value', (snapshot: { val: () => any; }) => {
scheduleClickItem.value = snapshot.val();
console.log('點擊獲得Key讀取這個點擊的數據', snapshot.val());
})
})

刪除事件

1
2
3
4
5
6
7
8
9
10
11
12
const deleteEventClick = () => {
//clickInfo.event.remove();
//Firebase刪除 remove():資料庫名.child(Key).remove()
schedules.child(DeleteId.value).remove()
//element 成功或失敗警告訊息
ElMessage({
message: '新增成功!',
type: 'success',
})
//刷新
parent.location.reload();
})

安裝fullcalendar/vue3@6.1.10

1
2
npm install @fullcalendar/vue3@6.1.10
npm install --save @fullcalendar/core@6.1.10 @fullcalendar/daygrid@6.1.10 @fullcalendar/interaction@6.1.10 @fullcalendar/timegrid@6.1.10 @fullcalendar/list@6.1.10

使用頁面

  • 獲取數據
1
2
3
4
5
6
7
8
9
10
11
12
13
14
15
16
17
18
19
20
21
22
23
24
25
26
27
28
29
30
31
32
33
34
35
36
37
38
39
40
41
42
43
44
45
46
47
48
49
50
51
52
53
54
55
56
57
58
59
60
61
62
63
64
65
66
67
68
69
70
71
72
73
74
75
76
77
78
79
80
81
82
83
84
85
86
87
88
89
90
91
92
93
94
95
96
97
98
99
100
101
102
103
104
105
106
107
108
109
110
111
112
113
114
115
116
117
118
119
120
121
122
123
124
125
126
127
128
129
130
131
132
133
134
135
136
137
138
139
140
<template>
<div class="title"><b>{{ pageName }}</b></div>
<div class="checkCalendar">
<!--搜尋-->
<div class="checkWorkData_means">
<div class="btns_group">
<!---模糊搜尋 綁定-->
<el-input class="mt-3" placeholder="search" v-model="checkWorkDataCalendarSearch" />
<i class="icon-ym icon-ym-search"></i>

</div>
</div>
<FullCalendar :options="calendarOptions"></FullCalendar>
</div>
</template>

<route lang="yaml">
meta:
layout: frontLayout
</route>

<script setup lang="ts">
import { ref, onMounted, computed } from 'vue';
import {storeToRefs } from 'pinia'
import FullCalendar from '@fullcalendar/vue3';
import { CalendarOptions , EventClickArg } from '@fullcalendar/core';
import dayGridPlugin from '@fullcalendar/daygrid';
import interactionPlugin from '@fullcalendar/interaction';
import timeGridPlugin from '@fullcalendar/timegrid';
import listPlugin from '@fullcalendar/list';
import { usePageStore } from '../../stores/titleTag';

import { workCheckTYpe, getSetGroupType } from '../../types/workCheck'
const storePageTag = usePageStore();
const {btnPrintClose}= storeToRefs(storePageTag);
const {getPageClass,changeTitleTag} = storePageTag;
const headers = {
"Content-Type": "application/json",
"Accept": "application/json",
// "Authorization": 'Bearer ' + getToken
};
const pageClass=ref<string>('pageWorkCalendar');
localStorage.setItem('pageClass',pageClass.value);
const pageName = ref<string>('出勤行事曆');
//模糊搜尋綁定
const checkWorkDataCalendarSearch =ref<string>('');
const scheduleCalendarLists=ref<workCheckTYpe[]>([]);

//獲取所有數據
const allWorkLists = ref<workCheckTYpe[]>([]);
const getAllDayWork = async () => {
try {
const api = `${import.meta.env.VITE_API_DEFAULT_URL}/api/workChecks`;
const res = await fetch(api, { headers: headers, method: "GET" });
if (res.status === 200) {
allWorkLists.value = await res.json();
}
}
catch (err:any) {
ElMessage.error(err)
}
}

//過濾
const filterCheckWorkDataCalendar = computed(() =>{
let postList_array = allWorkLists.value;
console.log('allWorkLists',allWorkLists.value)
if(checkWorkDataCalendarSearch.value === '') {
return postList_array;
}
checkWorkDataCalendarSearch.value = checkWorkDataCalendarSearch.value.trim().toLowerCase();
postList_array = postList_array.filter(function (opt) {
if ( opt.title.toLowerCase().indexOf(checkWorkDataCalendarSearch.value) !== -1){
return opt;
}
})
return postList_array;
});

interface headerToolbarType{
left:string,
center:string,
right:string,
}
// web headerToolbar顯示方式
const webDisableHeaderToolbar=ref<headerToolbarType>({
left: 'prev',
center: 'title,dayGridMonth',
right: 'next'
})
// mobile headerToolbar顯示方式
const mobileDisableHeaderToolbar=ref<headerToolbarType>({
left: 'prev',
center: 'title,dayGridMonth,listWeek,timeGridDay',
right: 'next'
})
//
const calendarOptions = ref<any>({
timeZone: 'Asia/Taipei',
locale:'zh-TW',
plugins: [dayGridPlugin, interactionPlugin, timeGridPlugin,listPlugin],
headerToolbar:window.screen.width < 767?mobileDisableHeaderToolbar:webDisableHeaderToolbar ,
//螢幕尺寸767以下顯示
initialView: window.screen.width < 767 ? 'listWeek' : 'dayGridMonth',
//高度設置
height: window.screen.width < 767 ? 800 : 800,
//*****初始化,新增事件初始化改為空值陣列,
// initialEvents: scheduleCalendarList.value,
events: [],
//時間設置
eventTimeFormat: {
hour: '2-digit',
minute: '2-digit',
hour12: false
},
//刪除事件
// eventClick: openDeleteEvent,
//新增事件
// select: addSchedule,
editable: false,//允許拖拉縮放
droppable: true, //允許將事情放到日曆上
selectable: true, //允許選擇
selectMirror: true,//允許選擇鏡像
dayMaxEvents: true,//允許一天最多事件時就顯示彈出窗口
weekends: true,//顯示週末
//eventsSet:handleEvents,
// drop: dropEvents;
// 更新遠程數據庫
// eventAdd:
// eventChange:
// eventRemove:
});
onMounted(() => {
getPageClass();
changeTitleTag(pageName.value);
getCalendar();
getAllDayWork();
calendarOptions.value.events=filterCheckWorkDataCalendar;
})
</script>

Node版本任你切換

Nodejs版本更新很快,使用快速切換就用到nvm:

nvm Mac 版本安裝

先確認自己是否有安裝 Node,如果之前是有安裝建議先移除,

移除透過cURL安裝的NVM

1
2
3
rm -rf ~/.nvm
rm -rf ~/.npm
rm -rf ~/.bower

移除~/.zshrc內的nvm設定:

1
vim ~/.zshrc

nvm 安裝,打開終端機 v0.34.0

1
2
$ curl -o- https://raw.githubusercontent.com/nvm-sh/nvm/v0.34.0/install.sh | bash

安裝不成功原因:如果出現以下內容,找不到 以下這些檔案,請您新增這些檔案
此安裝腳本會將 nvm repo clone 到 /.nvm,並且將 source line 新增至你的 profile 設定 ( ~/.bash_profile、/.zshrc、~/.profile 或 ~/.bashrc ):

1
2
3
4
touch ~/.bash_profile
touch ~/.bashrc
touch ~/.zshrc
touch ~/.profile

上述4項檔案加入環境變量:將這兩行加到檔案最後面。

1
2
3
4
export NVM_DIR="$HOME/.nvm"
[ -s "$NVM_DIR/nvm.sh" ] && \. "$NVM_DIR/nvm.sh" # This loads nvm
[ -s "$NVM_DIR/bash_completion" ] && \. "$NVM_DIR/bash_completion" # This loads nvm bash_completion

如果還是無法使用 nvm,可執行下面指令立即應用 ZSH 的設定:

1
source ~/.zshrc

確認是否安裝成功

1
nvm --verison

出現 0.34.0 //此為nvm 版本

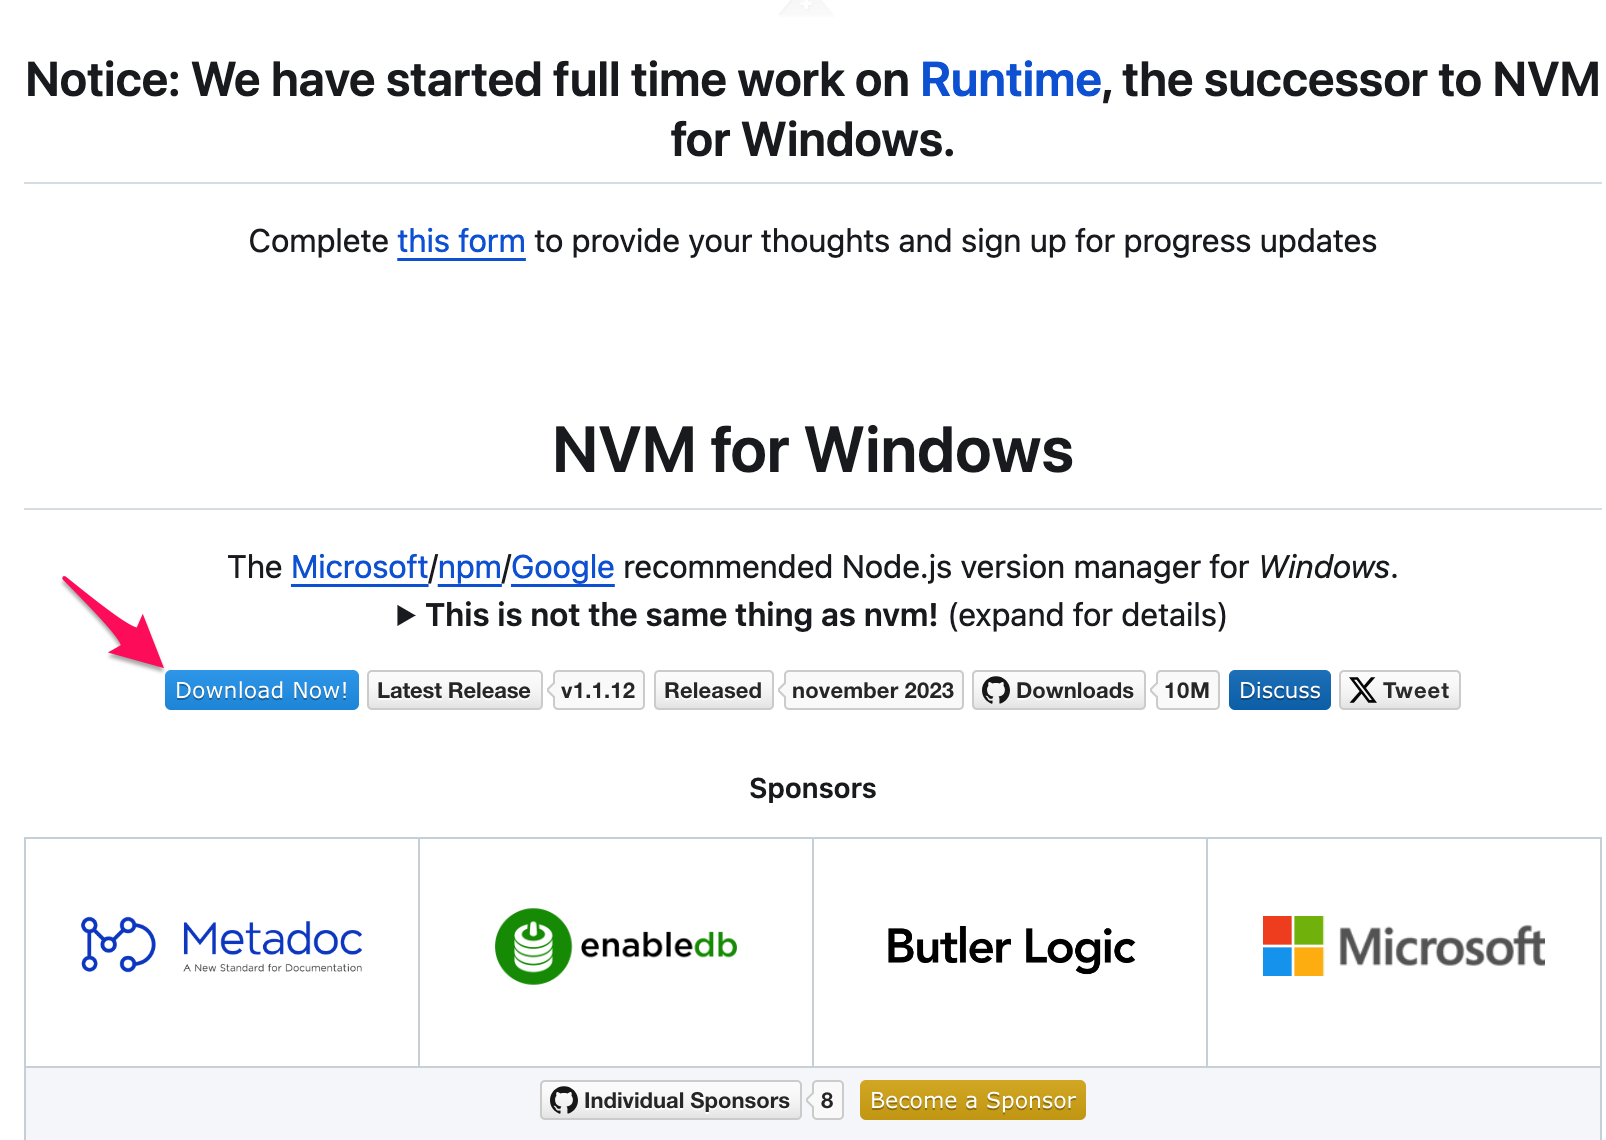
nvm Windows 版本安裝

nvm-windows下載

nvm 指令

指令解析
nvm ls-remote可安裝的 npm 版本
nvm install [version]>安裝 npm 版本
nvm ls目前已安裝的版本
nvm use [版本號]切換使用版本
nvm alias default [版本號]設定預設的版本

參考資料

Css Transition

CSS 過渡允許您在給定的持續時間內平滑地更改屬性值

transition:將四個過渡屬性設置為一個屬性的簡寫屬性

ex:鼠標懸停在 div 元素上時為 width 屬性指定一個值:
transition: width 2s;

1
2
3
4
5
6
7
8
9
div {
width: 100px;
height: 100px;
background: red;
transition: width 2s;
}
div:hover {
width: 300px;
}

transition-duration:指定過渡效果需要多少秒或毫秒才能完成

transition-property:指定過渡效果所針對的 CSS 屬性的名稱

transition-timing-function:指定過渡效果的速度曲線

ease- 指定一個緩慢開始,然後快速,然後緩慢結束的過渡效果(這是默認值)
linear- 指定從開始到結束具有相同速度的過渡效果
ease-in- 指定一個緩慢啟動的過渡效果
ease-out- 指定一個緩慢結束的過渡效果
ease-in-out- 指定開始和結束緩慢的過渡效果
cubic-bezier(n,n,n,n)- 允許您在三次貝塞爾函數中定義自己的值

transition-delay:指定過渡效果的延遲(以秒為單位)

ex:transition-delay: 1s;

1
2
3
4
transition-property: width;
transition-duration: 2s;
transition-timing-function: linear;
transition-delay: 1s;

Media Queries簡述

Html 的完整列表是

Media Queries 簡述
Media Queries
all - 所有的裝置
aural - 聽覺裝置
braille - 盲文點字機
handheld - 手持裝置
print -印表機輸出設備
projection - 投影輸出設備
screen - 電腦螢幕
tty - 聽障人士使用的 Teletype 機器
tv - 電視

Html 網頁上常用的為 all 、 screen 、 print

css

1
2
3
4
5
6
7
8
9
10
11
12
13
14
15
16
17
18
/*如果螢幕寬度為 400px 以上 且 700px 以下,就套用 css 設定*/
@media screen and(min-width: 400px) and (max-width: 700px) {
...
}
/*如果是彩色螢幕 或 彩色投影機設備,就套用 css 設定 */
@media screen and (color), projection and (color) {
...
}

/*如果螢幕寬度為 768px 以下,就套用 css 設定*/
@media screen and (max-width:768px) {
...
}

/*如果是彩色螢幕不套用 css 設定,印表機才套用*/
@media not screen and (color), print and (color) {
...
}

max-width,表示這個數字以下(包含) 的都適用。(<=)
min-width,表示這個數字以上(包含) 的都適用。(>=)

RWD

1
2
3
4
5
6
7
@media (min-width: 576px) { ... }

@media (min-width: 768px) { ... }

@media (min-width: 992px) { ... }

@media (min-width: 1200px) { ... }
1
2
3
4
5
6
7
8
9
@media (max-width: 575.99px) { ... }

@media (min-width: 576px) and (max-width: 767.99px) { ... }

@media (min-width: 768px) and (max-width: 991.99px) { ... }

@media (min-width: 992px) and (max-width: 1199.99px) { ... }

@media (min-width: 1200px) { ... }

Css3 選取器

CSS Reset:是把所有瀏覽器最不一致的地方強制歸 0

1
2
3
*{
....
}

CSS Normalize

保留原本預設 HTML 標籤的樣式,僅針對不同瀏覽器與各版本間不相容的標籤進行些微調整

超連結的動態僞類選取器

link:尚未點擊
hover:滑鼠觸碰
active:點擊當下
focus:取得焦點
visited:點擊過後

:nth-child(n) 偽類選取器:選取特定順序項目,n代表的是由0起始的遞增數字

:nth-child(odd) 偽類選取器:選取單數

:nth-child(even) 偽類選取器:選取偶數

:nth-child(an+b) 偽類選取器:「n」代表的是由0起始的遞增數字,a 與 b 則是你可以自訂的一個數值

1
2
3
tr:nth-child(3n+1){
background-color:#69C;
}

:first-child 偽類選取器:頭

:last-child 偽類選取器:尾

:first-of-type 偽類選取器:first-of-type

:last-of-type 偽類選取器:last-of-type

:not(值) 偽類選取器:選取…以外的項目,我要選到 li 標籤,但是不要選到(值) li

:empty 偽類選取器:選到空的

:first-letter 偽類選取器:首字選取器

:lang 語言僞類選取器

:checked 表單狀態選取器:開開關關

checkbox 在被勾選時變大

1
#box1:checked{ transform: scale(2); }

::selection 選取狀態僞元素

color (文字色彩)
background-color (背景色彩)
cursor (滑鼠游標)
caret-color (閃動標點)
outline (外框線)
text-decoration (文字裝飾)
text-emphasis-color (文字加重強調符號色彩)
text-shadow (文字陰影)

::before & ::after僞元素選取器

content內的值
none
normal
string:字串
url
counter:自訂要建立計數的區域名稱
attr
open-quote
close-quote
no-open-quote
no-close-quote
counter-increment: 自訂要建立計數的區域名稱 欲遞增的數
counter-reset: 自訂要建立計數的區域名稱 起始數

attr:取得的HTML屬性的值
取得 HTML 中 data-note

1
2
3
4
a::after{
content: attr(data-note);
color: #aaa;
}

A+B選取器

h1選到 h1 後面的那一個 p

1
h1 + p { color: red; }

A~B選取器

全部的 P 都會變成紅色的

1
h1 ~ p { color: red; }

alt特定屬性

所有圖片被加上一個10像素的紅色邊框,只有 alt 屬性的圖片則不會有邊框

1
2
img { border: 10px solid red; }
img[alt] { border:none; }

alt^特定屬性

alt 屬性中含有『燒腦』這個文字的圖片,並且讓它消失不見了

1
img[alt^="燒腦"] { display: none; }

屬性$=值:選取 Html屬性值的結尾等於特定文字(字串)的物件:

1
2
a[href$=".png"] { background-image: url("icon-png.png"); }
a[href$=".png" i] { background-image: url("icon-png.png"); }

屬性*=值:選取屬性值中【包含特定文字】的物件

圖片的 alt 屬性值中必須同時包含有燒腦以及哈哈

1
img[alt*="燒腦"][alt*="哈哈"] { display: none; }

屬性~=值:只要屬性值中有指定的單字

屬性|=值:開頭等於特定文字或包括 - 號

Css 的相關

基本的權重大小:!important > 行內樣式(比重1000)> ID 選擇器(比重100) > 類選擇器(比重10) > 標籤(比重1) > 通配符 > 繼承 > *瀏覽器默認屬性

全站預設值
*{
padding: 0
margin: 0
}

Element
div, p, ul, ol, li, em, header, footer, article

class & psuedo-class(偽類 & attribute(屬性選擇器)
在 html 上面會寫成 class=”box”
在 css 內長這樣 .box

id
html 上面是這樣寫的 id=”home”
css 內長這樣 #home

inline style attribute:寫在 html 行內的 style

終極大魔王
!important:的權重非常高,可以蓋過所有的權重

總結:!important > 行內樣式(inline style比重1000)> ID 選擇器(比重100) > 類選擇器(class 比重10) > 標籤(比重1) > 通配符 > 繼承 > 瀏覽器默認屬性

名稱解釋名詞
alt搜尋引擎識別;在圖像無法顯示時的替代文本
title元素的注釋信息;滑鼠移入會有元素的注釋信息

Box-sizing設定 width / height 的作用對象是哪個盒子(box)

1
box-sizing: content-box;

content-box 其實不設定時就是預設
一個物件的範圍,其實就是四個層層包裹的矩形所構成,由內而外分別是「content-box()、padding-box()、border-box()、margin-box()」

1
box-sizing: border-box;

width / height 的作用範圍就是指到 border 這個 box 的範圍了
參考資料

z-index

z-index可以設定元素的堆疊順序,
設定值越高越前面,可以為負數,例如:z-index: -1。
另外要注意的是z-index只能在有設定位(position)的元素上才會奏效。
可設定為position: static、absolute、relative、fixed。

偽類 (pseudo-classes) 是什麼?

偽類
:hover當用戶的鼠標或觸控板等設備放在元素上時,我們可以使用:hover更改元素的樣式。

:link,:visited 這兩個偽類都是用在含有 href 屬性的 < a > 元素上。
:link 可以調整使用者還未瀏覽過的連結樣式,而
:visited 則可以改變使用者已瀏覽過的連結樣式。

:disabled,:enabled按鈕元素可以設定為「禁用」狀態,
:disabled 按鈕元素可以設定為「禁用」狀態。
:enabled 可以調整按鈕在「禁用」或「非禁用」狀態時的樣式。

:first-child,:last-child
如果要在 HTML 中查找第一個或最後一個項目,可以使用
:first-child 和 :last-child。這些偽類會回傳一組兄弟元素中的第一個或最後一個元素。

偽元素 (pseudo-elements)是什麼?

::before,::after 偽元素
在元素上使用 ::before 和 ::after 偽元素,會在元素中產生一個子元素,但必須在偽元素中定義 content,這個 content 可以是任何字串,甚至可以是空字串。
::marker
使用 ::marker 可以調整列表或摘要元素 (summary) 的項目符號和編號的樣式。
::placeholder
當我們在設計表單時,會對一些元素,例如輸入框 (input),加入提示文字,而 ::placeholder 可以用來設定這個提示文字的樣式。
::first-letter
我們經常在部落格或文章的設計中,文章的第一段的第一個字母會有特殊的樣式,以增加讀者的注意力。

CSS 盒模型 (Box Model)

有兩種, IE 盒子模型、W3C 盒子模型;
盒模型: 內容(content)、填充(padding)、邊界(margin)、 邊框(border);
區 別: IE 的 content 部分把 border 和 padding 計算了進去;

垂直水平居中幾種方式?

單行文本: line-height = height
圖片: vertical-align: middle;
absolute 定位: top: 50%;left: 50%;transform: translate(-50%, -50%);
flex: display:flex;margin:auto

position的值, relative和absolute分別是相對於誰進行定位的?

relative:相對定位,相對於自己本身在正常文檔流中的位置進行定位。
absolute:生成絕對定位,相對於最近一級定位不為static的父元素進行定位。
fixed: (老版本IE不支持)生成絕對定位,相對於瀏覽器窗口或者frame進行定位。
static:默認值,沒有定位,元素出現在正常的文檔流中。
sticky:生成粘性定位的元素,容器的位置根據正常文檔流計算得出。

px像素(Pixel)的含義?

px像素:絕對單位,代表螢幕中每個「點」( pixel )

rem的含義?

rem :相對單位,每個元素透過「倍數」乘以根元素的 px 值。
通常做法是給html元素設置一個字體大小,然後其他元素的長度單位就為rem。

em的含義?

em :相對單位,每個子元素透過「倍數」乘以父元素的 px 值。
元素的width/height/padding/margin用em的話是相對於該元素的font-size

vw/vh的含義?

vw/vh :Viewport Width 和 Viewport Height,視窗的寬度和高度。
屏幕寬度和高度

% 的含義?

%:相對單位,每個子元素透過「百分比」乘以父元素的 px 值。

src vs href 的差別?

src用於替換目前元素,href用於在目前文件和引用資源之間確立聯繫。
src是source的縮寫,指向外部資源的位置,指向的內容將會嵌入到文件中目前標籤所在位置;在請求src資源時會將其指向的資源下載並套用到文件內,例如js腳本,img圖片 和frame等元素。

當瀏覽器解析到該元素時,會暫停其他資源的下載和處理,直到將該資源載入、編譯、執行完畢,圖片和框架等元素也如此,類似於將所指向資源嵌入目前標籤內。 這也是為什麼將js腳本放在底部而不是頭部。

href是Hypertext Reference的縮寫,指向網絡資源所在位置,建立和當前元素(錨點)或當前文檔(鏈接)之間的鏈接,如果我們在文檔中添加

那麼瀏覽器會識別該文件為css文件,就會並行下載資源並且不會停止目前文件的處理。 這也是為什麼建議使用link方式來載入css,而不是使用@import方式。

defer和 async 的差別?

defer 是 Deferred 的縮寫,代表 延遲。
作用與 async 相同,同樣會在背景執行,差別在於 defer 會等到 DOM 都解析完成後才執行(DOMContentLoaded 之前)。在 JS 檔有多個相依性、且要等 DOM 準備好才使用的情況下,defer 是很棒的選擇。

async 是 asynchronous 的縮寫,代表 非同步。
也就是說不用等待資源執行完畢就可以繼續跑下面的程式,添加 async 的 < script > 會在背景持續下載,一旦下載完成後會暫停解析 DOM,因為沒辦法確定 DOM 的狀況,所以通常會用在 GA 或是其他廣告的追蹤碼。

HTML 語義化優點?

1.對機器友好,帶有語義的文字表現力豐富,更適合搜尋引擎的爬蟲爬取有效訊息,有利於SEO。 除此之外,語意類別也支援讀屏軟體,根據文章可以自動產生目錄;
2.對開發者友好,使用語意類標籤增強了可讀性,結構更加清晰,開發者能清晰的看出網頁的結構,便於團隊的開發與維護。

css display 屬性,display 的值

CSS 的 display 屬性用來決定一個元素會擁有塊狀 block 或是行內 inline 的特性;會決定這個元素中的子元素會如何排列。
display 的值有:block、inline、inline-block、none、flex、grid 和 table

display:inline-block, block, inline 的區別及差別?

inline-block:會以 block 的方式呈現,可以在同一列 inline 水平並列,它可以設定元素的寬高/margin/padding。
block:每個 block 都是新的一行,可以設定元素的寬高/margin/padding,。
inline,為行內元素,多個相鄰的行內元素排在同一行裡,如果頁面一行排列不下,才會換新的一行;元素的寬高/margin/padding 接不可以改變,。

CSS Modules VS. styled-components

CSS Modules 就是為了解決這種場景而生的,它加入了局部作用域和模組依賴,可以確保某個元件的樣式不會影響到其他元件。 具體而言,CSS Modules 透過工程化的方法,可以將類別名稱編譯為雜湊字串,從而使得每個類別名稱都是獨一無二的,不會與其他的選擇器重名,由此可以產生局部作用域 。
原生 CSS 因為缺乏變量、函數這等方法,導致程式碼的維護性不高而且無法復用。除此之外,原生 CSS 還會造成全局汙染的問題,同樣名稱的選擇器會造成樣式覆蓋等等問題。因此出現 CSS Module 和 CSS-in-JS 的解決方法,兩者的特點如下:

原生 CSS 因為缺乏變量、函數這等方法,導致程式碼的維護性不高而且無法復用。除此之外,原生 CSS 還會造成全局汙染的問題,同樣名稱的選擇器會造成樣式覆蓋等等問題。因此出現 CSS Module 和 CSS-in-JS 的解決方法,兩者的特點如下
CSS Modules

利用文件名來產生 hash className 來解決命名衝突的問題
然後搭配 Sass 或是 Less 來增加變量、函數等特性來增加維護性

styled-components 則是 CSS-in-JS 其中一種
可讀性佳,好維護因為相關的 css 會在同一個區塊
樣式是和 JS 文件打包在一起,所以會拖慢 JS 文件加載時間
沒有單獨 CSS 文件所以無法緩存

什麼是 postProcessor (後處理器)

後處理器就是讓開發者依然撰寫 CSS,再經過擴充功能(plugin)的後製處理,將特定功能轉成瀏覽器能懂的指令。

請描述SVG,PNG,GIF,JPEG,WebP描述圖片的差異以及網站使用時機?

jpeg/jpg (靜態影像格式,點陣圖,不透明,不支援動態呈現);有壓縮,破壞性資料壓縮;被壓縮後還能最接近原本色彩飽和。
png (靜態影像格式,點陣圖,支援透明,不支援動態呈現);有壓縮,非破壞性資料壓縮;優勢:邊緣上處理比jpeg/jpg 較優勢;圖片色彩豐富飽和。
WebP 比jpeg/jpg檔案更小,換句話說能傳輸的更快。
svg (靜態影像格式,向量);可被縮放,縮放不影響品質。

如何寫Rwd ?

媒體查詢
viewport 設定

JS 數據類型有哪些 ?

數據類型主要包括兩部分:
基本數據類型: Undefined、Null、Boolean、Number 和 String
引用數據類型: Object 、Function、symbol

===」、「 ==」的區別?

==,(當且僅當兩個運算數相等時,它返回 true)即不檢查數據類型
===,(只有在無需類型轉換運算數就相等的情況下,才返回 true)需要檢查數據類型

var、let、const 區別?

var 存在變量提升,全局作用域或(若在塊級區域宣告,仍然可以在塊級區塊之外拿取,可重新聲明),可以修改,初始化
let 只能在區塊作用域內訪問,不可重新聲明,可以修改。
const 不變的常量,必須初始化,不可重新聲明,不能修改

Vue優化

1.v-for 與v-if避免同時使用:設置唯一Key值。
2.函數式元件。
3.區分computed 與watch使用場景。
4.v-if與v-show使用場景。
5.長列表 Object freeed 凍結。
6.使用keep alive組件。
7.路由懶加載。
8.開啟Gzip壓縮。
9.第三方插件指引入需要的
10.壓縮圖片
11.緩存靜態文件
12.Time Slicing 時間切割技術
13.非響應數據
14.Deferred 組件延時分批宣染
15.虛擬滾動組件

為伺服器傳送給使用者瀏覽器的一個小片段資料。
大小約 4kb
每次 request 時都會帶上
每次都會攜帶在Http 保存過多會帶來效能問題
比較常用的場景就是判斷用戶是否登錄
帳號登入、購物車、遊戲分數,或任何其他伺服器應該記住的資訊
記錄並分析使用者行為

LocalStorage

使用 key / value pair 的方式 給值或取值
大小預設有 5mb
每次 request 不會帶上
不會過期,除非手動清除
僅在劉覽器保存不參與 server 溝通
存入
localStorage.setItem(‘Name’,lara);
localStorage.setItem(‘User’,JSON.stringify(數據));
取出
localStorage.getItem(‘Name’);
JSON.parse(localStorage.getItem(‘User’));
刪除單一
localStorage.removeItem(‘Name’);
刪除所有
localStorage.clear();

SessionStorage

使用 key / value pair 的方式 給值或取值
大小預設有 5mb
每次 request 不會帶上
每次分頁或瀏覽器關掉後就會清除
僅在劉覽器保存不參與 server 溝通
如果遇到一些內容特別多的表單,為了提升用戶體驗,可能要把表單頁面拆分成多個子頁面,然後按照步驟引導用戶

什麼是閉包?

函式以及該函式被宣告時所在的作用域環境的組合。

什麼是Promise?

非同步(異步操作)執行流程語法。
建立Promise處理成功或是失敗

1
2
3
4
5
6
7
8
9
10
11
12
13
14
15
16
17
18
19
function requestData(url) {
return new Promise((resolve, reject) => {
setTimeout(() => {
if (url === "explainthis.io") {
resolve("hello welcome to explainthis");
} else {
reject("it is not explainthis");
}
}, 3000);
});
}

// 1. 請求成功
requestData("explainthis.io").then((res) => {
console.log(res); //hello welcome to explainthis
});

//2. 請求失敗
requestData("explainthis.com").catch((e) => console.log(e)); //it is not explainthis

Vue2 與Vue3 差異

  1. 生命週期變化
    Vue2:beforeCreate and Create
    Vue3:setup
  2. 渲染策略
    Vue2:提供類似Html模板編譯渲染函數返回DOM
    Vue3:DOM數級別,編譯靜態節點;元件級別
  3. Diff算法的提升
    Vue2:小於Vue3
    Vue3:大於Vue2
  4. 打包體積變化
    Vue2:未使用的文件代碼都被打包
    Vue3:模板編譯器生成對樹抖動友好的代碼,只有在模板使用時才導入該特性
  5. Api類型不同
    Vue2:選項型Api(Option Api)
    Vue3:組合型Api (Composition Api)
  6. typeScript 支持
    Vue2:TypeScript 不友善
    Vue3:組合型Api (Composition Api)
  7. 雙向資料綁定原理不同
    Vue2:ES5的一个APIObject.definePropert()
    Vue3:ES6的Proxy API對數據代理
  8. 是否支援碎片
    Vue2:不支援碎片
    Vue3:支援碎片,多個根節點
  9. 定義資料變數和方法不同
    Vue2:資料放入data中,在vue2中定義資料變數是data(){} ,建立的方法要在methods:{} 中
    Vue3:使用一個新的setup()方法 :引入reactive;reactive() 方法來聲明資料為響應性資料;使用setup()方法來傳回我們的響應性數據,從而template可以取得這些響應性數據

Vue3

利用新的語言特性(es6)
解決架構問題
速度更快:重寫了虛擬Dom實作,編譯模板的最佳化,更有效率的元件初始化,undate效能提升1.32倍,SSR速度提升了23倍
體積減少:對開發人員:實現更多其他的功能;對使用者:打包出來的包體積變小了
更易於維護:靈活的邏輯組合與復用;Vue3模組可以和其他框架搭配使用
更接近原生:VUE3是基於typescipt編寫的,可以享受到自動的類型定義提示;可以自訂渲染 API
更容易使用:響應式 Api 暴露出來;在 Vue3.x 中,元件現在支援有多個根節點