Angular Router路由的使用

設定路由

一前置作業新增頁面

新增Home與fetchData 頁面
新增Home頁面
1
2
3
// 新增元件指令
ng g c 頁面或是功能
ng g c Home
產生了home 資料夾內有以下檔案
1
2
3
4
home.component.html
home.component.scss
home.component.spec.ts
home.component.ts
新增user 頁面
1
ng g c User
產生了ng g c User 資料夾內有以下檔案
1
2
3
4
user.component.html
user.component.scss
user.component.spec.ts
user.component.ts
新增PageNotFound 頁面
1
ng g c PageNotFound
產生了page-not-found 資料夾內有以下檔案
1
2
3
4
page-not-found.component.html
page-not-found.component.scss
page-not-found.component.spec.ts
page-not-found.component.ts
二 在 app.routes.ts檔案設定
  • 引入Home,Users,User,PageNotFound元件,解構寫法必須加名稱Component 大駝峰式寫法
  • export const routes: Routes = [path: '路徑', component: 頁面元件]
  • 首頁 { path: "", redirectTo:'home',pathMatch:'full' },
  • 404頁 { path: '**', component: PageNotFoundComponent }
1
2
3
4
5
6
7
8
9
10
11
12
13
14
15
import { Routes } from '@angular/router';
//引入,解構寫法必須加名稱Component 大駝峰式寫法
import { HomeComponent } from './home/home.component';
import { UsersComponent } from './users/users.component';
import { UserComponent } from './user/user.component';
import { PageNotFoundComponent } from './page-not-found/page-not-found.component';

export const routes: Routes = [
{ path: "", redirectTo:'home',pathMatch:'full' },
{ path: "home", component:HomeComponent },
{ path: "users", component: UsersComponent},
{ path: "user/:userId", component: UserComponent},
{ path: '**', component: PageNotFoundComponent }, // 404頁面
];

配置應用程式 在app.config.ts檔案中新增以下設定:
1
2
3
4
5
6
7
8
9
10
11
12
13
14
15
16
import { ApplicationConfig, provideZoneChangeDetection } from '@angular/core';
import { provideRouter } from '@angular/router';

+ import { routes } from './app.routes';
import { provideClientHydration } from '@angular/platform-browser';
import { provideAnimationsAsync } from '@angular/platform-browser/animations/async';

export const appConfig: ApplicationConfig = {
providers: [
provideZoneChangeDetection({ eventCoalescing: true }),
+ provideRouter(routes),
provideClientHydration(),
provideAnimationsAsync()
]
};

this.router.navigate([‘users’]); 切換至頁面

  • 引入Router
  • constructor( private router: Router, ) { ... }
  • this.router.navigate([path網址])
1
2
3
4
5
6
7
8
9
10
11
12
import {  Router } from '@angular/router';

constructor(
private router: Router,
) {
...
}

viewProduct( item: any): void {
console.log(item)
this.router.navigate(["/index/product/"+item._id]);
}
### 元件的引入(Navba主選單的切換) 到components新增
1
2
// ng g c 頁面或是功能
ng g c Navbar
產生了navbar 資料夾內有以下檔案
1
2
3
4
navbar.component.html
navbar.component.scss
navbar.component.spec.ts
navbar.component.ts
利用 routerLink 指令實作頁面切換 navbar.component.html檔案內新增
  • routerLink是routes內的path
  • routerActive="active"
1
2
3
4
5
6
7
8
9
10
11
<nav class="nav">
<ul>
<li>
<a routerLink="/" routerActive="active" class="cursor-pointer">Home</a>
</li>
<li>
<a routerLink="fetch-data" routerActive="active" class="cursor-pointer">FetchData</a>
</li>
</ul>
</nav>

navbar.component.ts
引入RouterLink
import { RouterLink} from '@angular/router';
@Component({
imports: [
RouterLink
],
})
1
2
3
4
5
6
7
8
9
10
11
12
13
14
import { Component } from '@angular/core';
+ import { RouterLink } from '@angular/router';
@Component({
selector: 'app-navbar',
standalone: true,
imports: [
+ RouterLink
],
templateUrl: './navbar.component.html',
styleUrl: './navbar.component.scss'
})
export class NavbarComponent {

}

在首頁載入

在 app.component.ts
引入NavbarComponent

1
2
3
4
5
6
7
8
9
10
11
12
13
14
15
16
17
import { Component } from '@angular/core';
import { RouterOutlet } from '@angular/router';
+ import { NavbarComponent } from './components/navbar/navbar.component';
import { environment } from '../environments/environment';

@Component({
selector: 'app-root',
imports: [
RouterOutlet,
+ NavbarComponent,
],
templateUrl: './app.component.html',
styleUrl: './app.component.scss'
})
export class AppComponent {
title = environment.production ? 'Production' : '開發中';
}

嵌套路由

1
<router-outlet></router-outlet>

在 app.component.html 會使用 , 元件來定義頁面所需要顯示的位置

1
2
3
4
5
<app-navbar></app-navbar>
<main class="main">
<router-outlet />
</main>

router 案例github

404 頁面

如果要顯示自訂 404 頁面,請設定通配符路由,並將元件屬性設定為PageNotFoundComponent

1
2
3
4
5
6
7
8
9
10
11
12
13
import { Routes } from '@angular/router';
//引入,解構寫法必須加名稱Component 大駝峰式寫法
import { HomeComponent } from './home/home.component';
import { UsersComponent } from './users/users.component';
import { UserComponent } from './user/user.component';
+ import { PageNotFoundComponent } from './page-not-found/page-not-found.component';

export const routes: Routes = [
{ path: "", component: HomeComponent },
{ path: "users", component: UsersComponent},
{ path: "user/:userId", component: UserComponent},
+ { path: '**', component: PageNotFoundComponent }, // 404頁面
];

router 初次設定

動態 Router

以UserComponent(user資料夾user.component.ts) 為例
  • 載入@angular/core 的inject 載入@angular/router 的 ActivatedRoute,
  • private activeRouter = inject(ActivatedRoute);
  • this.activeRouter.snapshot.paramMap.get('userId')
1
2
3
4
5
6
7
8
9
10
11
12
13
14
15
16
17
18
19
20
21
22
23
+  import { Component, OnInit, inject } from '@angular/core';
+ import { CommonModule } from '@angular/common';
+ import { ActivatedRoute } from '@angular/router';

@Component({
selector: 'app-user',
imports: [
+ CommonModule,// Angular 17以後必須引入
],
templateUrl: './user.component.html',
styleUrl: './user.component.scss'
})
+ export class UserComponent implements OnInit{
+ private activeRouter = inject(ActivatedRoute);
+ ngOnInit(): void {
+ this.getDetailID();
+ }

+ getDetailID(): void {
+ const userId = this.activeRouter.snapshot.paramMap.get('userId');
+ console.log('userId', userId);
+ }
}

模組化且延遲載入,提升更好的使用者體驗

Angular 19 App with Lazy Loading
隨著專案的擴大,路由設定會越來越大,元件也會越來越多

  • loadComponent:() => import('檔案位置').then((m)=> m.HomeComponent)
1
2
3
4
5
6
7
8
9
10
11
12
13
14
15
16
17
18
19
20
21
22
23
24
25
26
27
28
29
30
31
32
33
34
35
36
37
38
39
40
41
42
43
44

import { Routes } from '@angular/router';

import { UserComponent } from './user/user.component';

export const routes: Routes = [
{ path: "", redirectTo: 'home', pathMatch: 'full' },
{
path: "home",
loadComponent:() => import('./home/home.component').then((m)=> m.HomeComponent)
},
{
path: "users",
loadComponent:() =>import('./users/users.component').then((m)=>m.UsersComponent)
},
{
path: "user/:userId",
component: UserComponent
},
{
path: "login",
loadComponent:() =>import('./login/login.component').then((m)=>m.LoginComponent)
},
{
path: "test_login",
loadComponent:()=>import('./test-login/test-login.component').then((m)=>m.TestLoginComponent)
},
{
path: "admin",
loadComponent:() =>import('./admin/index-admin/index-admin.component').then((m)=>m.IndexAdminComponent) ,
children: [
{
path: "admin_home",
loadComponent:()=>import('./admin/look/look.component').then((m)=>m.LookComponent)
},
{ path: '', redirectTo: 'admin_home', pathMatch: 'full' },
]
},
{
// 404頁面
path: '**',
loadComponent: () => import('./page-not-found/page-not-found.component').then((m) => m.PageNotFoundComponent)
},
];

Angular 列表渲染與判斷

渲染列表

*ngFor渲染列表 let item of todoDataList;let index = index,index 為索引
1
2
3
4
5
6
7
8
<ul *ngFor="let item of todoDataList;let index = index">
<li >
{{index +1}}
</li>
<li>
{{item.title}}
</li>
</ul>

判斷是否顯示與渲染列表

to-do.component.html

@if(isAvalible){}@else{}:判斷是否顯示
@for(i of tasks; track $index){}渲染列表
按鈕上(click)="addTasks()" 函式的綁定
1
2
3
4
5
6
7
8
9
10
11
12
13
14
15
16
17
18
19
20
21
22
23
24
25
26
27
28
29
30
31
32
33
<div class="lists">
@if(isAvalible){
<table class="table table-striped">
<thead>
<tr>
<th scope="col">項目</th>
<th scope="col">事項</th>
<th scope="col">操作</th>
</tr>
</thead>
<tbody>
@for (item of lists; track $index) {
<tr>
<td>
{{item.id}}
</td>
<td>
@if(item.isShow){
<input type="text" [(ngModel)]="item.editTask"/>
}@else{
{{item.subject}}
}
</td>
<td>
<button class="btn btn-warning" (click)="editTasks($index,item.editTask)">Edit</button>
<button class="btn btn-danger ml-2" (click)=" deleteTasks($index)">Delete</button></td>
</tr>
}

</tbody>
</table>
}
</div>

@if{}@else{}

在to-do.component.ts引入FormsModule
  • 引入FormsModuleimport { FormsModule } from '@angular/forms'
    因為ngModel是隸屬於FormsModule模組下的套件,所以要import FormsModule進來
  • importsFormsModule
  • export class ToDoComponent 內的資料定義與函式
    lists: listType[] = [];
    newTask: string = "";//表單綁定
    isAvalible : boolean = false;
    addTasks()函式綁定在Button
    addTasks()函式的邏輯判斷
事件繫結
input事件:輸入框偵測到任何輸入都會觸發 同時要帶入$event 事件參數,$event 是詳細描述此次事件之各種數值的物件 有幾種Evnet方式可以玩看看
  • (input): 偵測任何輸入時觸發
  • (keyup): 離開鍵盤按鍵時觸發
  • (blur): 焦點(當前鼠標或鍵盤聚焦之處)離開輸入框時觸發
  • (change): 焦點離開輸入框、並且值被改變時才觸發
參考資料
1
2
3
4
5
6
7
8
9
10
11
12
13
14
15
16
17
18
19
20
21
22
23
24
25
26
27
28
29
30
31
32
33
34
35
36
37
38
39
40
41
42
43
44
45
46
47
48
49
import { Component } from '@angular/core';
+ import { FormsModule } from '@angular/forms'
@Component({
selector: 'app-to-do',
standalone: true,
imports: [
+ FormsModule
],
templateUrl: './to-do.component.html',
styleUrl: './to-do.component.scss'
})

export class ToDoComponent {
Title: string = 'To Do Lists';
imageLink: string = "https://cdn-icons-png.flaticon.com/512/4697/4697260.png";
+ tasks: string[] = [];
+ newTask: string = "";//表單綁定
isAvalible : boolean = false;

//新增
+ addTasks() {
const vm = this;
//新增的參數
let query = {
id:Date.now().toString(),
subject: vm.newTask.trim(),
editTask: vm.newTask.trim(),
isShow:false,
}
console.log('新增的參數',query)
vm.lists.push(query);
vm.isAvalible = true;
}
//刪除
deleteTasks(index: number) {
const vm = this;
vm.lists.splice(index,1);
vm.isAvalible = vm.lists.length > 0;
}
//編輯
editTasks(index: number, editTask: string): string | void {
const vm = this;
vm.lists[index].isShow = true;
console.log(editTask)
vm.lists[index].subject = editTask;
console.log(vm.lists);
vm.newTask ="";
}
}

安裝primeng

1
npm install --save primeng 

全局引入 MatButtonModule與ButtonModule

在app.component.ts
  • 引入MatButtonModule
  • 引入ButtonModule
1
2
3
4
5
6
7
8
9
10
11
12
13
14
15
16
17
18
19
20
21
22
import { Component } from '@angular/core';
import { RouterOutlet } from '@angular/router';
+ import {MatButtonModule} from '@angular/material/button';
+ import { ButtonModule } from 'primeng/button';
import { ToDoComponent } from './components/to-do/to-do.component';

@Component({
selector: 'app-root',
standalone: true,
imports: [
RouterOutlet,
+ MatButtonModule,
+ ButtonModule,
ToDoComponent,
],
templateUrl: './app.component.html',
styleUrl: './app.component.scss'
})
export class AppComponent {
title = 'tode_project';
}

啟動
1
ng serve
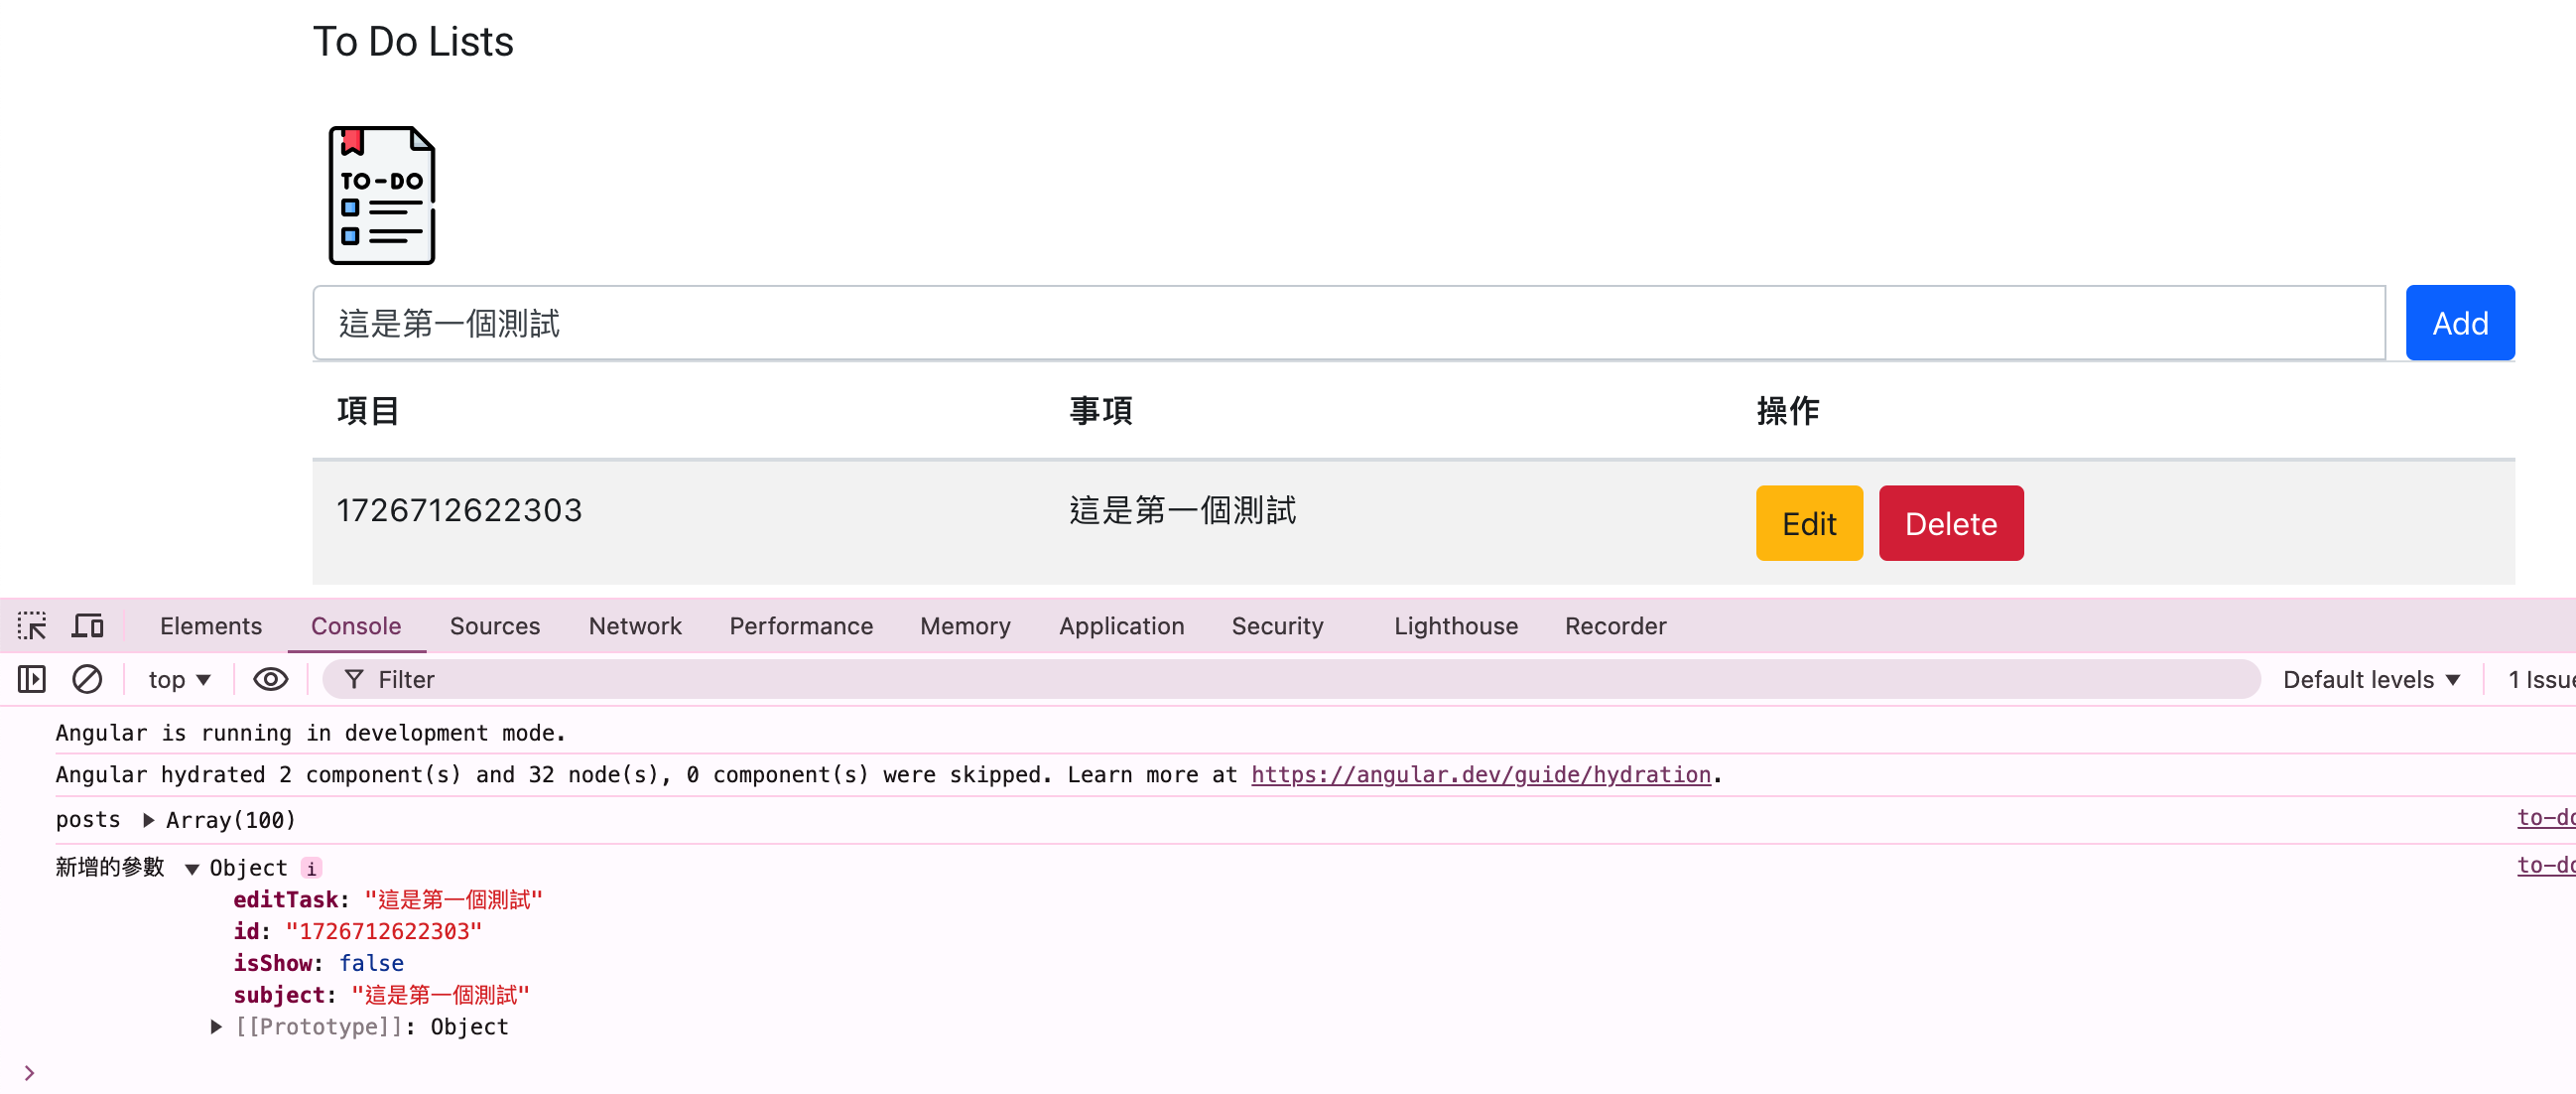
點擊函式觀看 表單與按鈕綁定函式的執行 更正函式

渲染列表 *ngFor

  • 必須引入import { FormsModule } from '@angular/forms'
  • imports: [ CommonModule,// Angular 17以後必須引入 ],
  • *ngFor="let item of posts ; let index = index"
.ts
1
2
3
4
5
6
7
8
9
10
11
12
13
//必須引入
import { FormsModule } from '@angular/forms'
@Component({
selector: 'app-fetch-data',
standalone: true,
imports: [
FormsModule,
CommonModule,// Angular 17以後必須引入
],
templateUrl: './fetch-data.component.html',
styleUrl: './fetch-data.component.scss'
})

1
2
3
4
5
6
7
8
9
10
11
12
13
14
15
16
17
18
19
20
21
22
23
24
25
26
27
28
29
30
31
32
33
34
35
36
37
38
39
40
41
42
43
44
45
46
47
<ng-container class="container">
<div class="container">
<table class="table table-striped">
<thead>
<tr>
<th scope="col">項目</th>
<th scope="col">姓名</th>
<th scope="col">電子郵件</th>
<th scope="col">城市</th>
<th scope="col">區域</th>

</tr>
</thead>
<tbody>

<!-- @for (post of posts; track post.id) {-->
<tr *ngFor="let item of posts ; let index = index" >
<td>
<p > {{item.user_id}}</p>
</td>
<td>
<input *ngIf="item.isEdit" [(ngModel)]="item.name"/>
<p *ngIf="!item.isEdit"> {{item.name}}</p>
</td>
<td>
<input *ngIf="item.isEdit" [(ngModel)]="item.email"/>
<p *ngIf="!item.isEdit"> {{item.email}}</p>
</td>
<td>
<input *ngIf="item.isEdit" [(ngModel)]="item.country"/>
<p *ngIf="!item.isEdit"> {{item.country}}</p>
</td>

<td>
<input *ngIf="item.isEdit" [(ngModel)]="item.address"/>
<p *ngIf="!item.isEdit"> {{item.address}}</p>
</td>

<td>
<button class="btn btn-warning" (click)="editPost(item.user_id,index)" >Edit</button>
<button class="btn btn-danger ml-2" (click)="remotePost(item.user_id,index)" [ngClass]="{'disabled':item.isEdit}">Delete</button></td>
</tr>
<!-- }-->
</tbody>
</table>
</div>
</ng-container>

判斷是否顯示 *ngIf

#dataEmpty

雙向綁定表單 [(ngModel)]

[ngClass]=”{‘disabled’:item.isEdit}”

1
2
3
4
<input *ngIf="item.isEdit" [(ngModel)]="item.name"/>
<p *ngIf="!item.isEdit"> {{item.name}}</p>

<button class="btn btn-danger ml-2" (click)="remotePost(item.user_id,index)" [ngClass]="{'disabled':item.isEdit}">Delete</button>

Angular CRUD

Angular 表單與按鈕的綁定

表單與按鈕的綁定

to-do.component.html

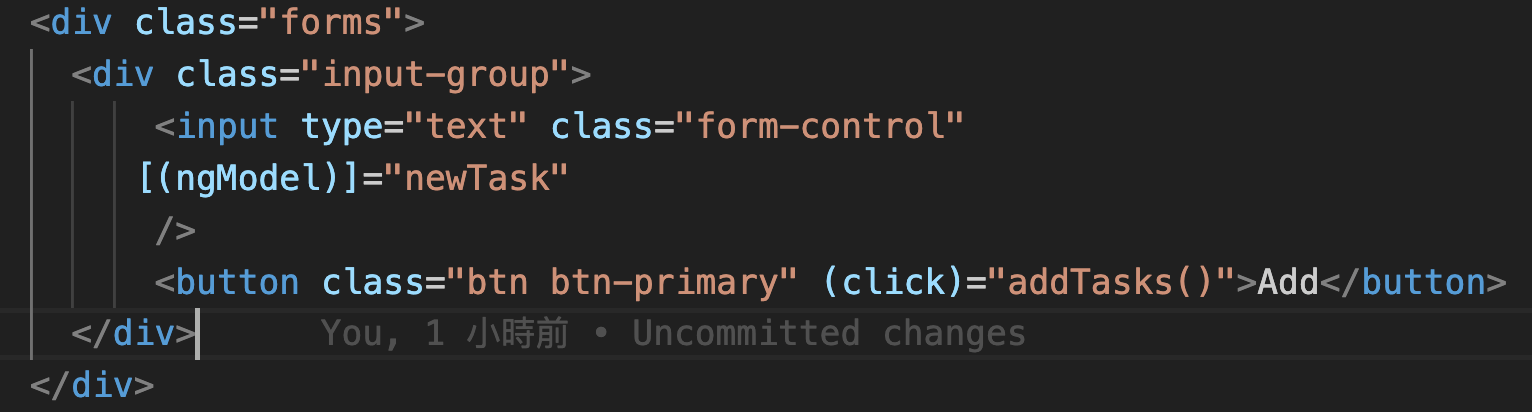
表單上[(ngModel)]="newTask
按鈕上(click)="addTasks()" 函式的綁定
1
2
3
4
5
6
7
8
<div class="forms">
<div class="input-group">
<input type="text" class="form-control"
[(ngModel)]="newTask"
/>
<button class="btn btn-primary" (click)="addTasks()">Add</button>
</div>
</div>
在to-do.component.ts 如果使用表單綁定 [(ngModel)] 要引入FormsModule
  • 引入FormsModuleimport { FormsModule } from '@angular/forms'
  • importsFormsModule
  • export class ToDoComponent 內的資料定義與函式
    tasks : string[] =[];
    newTask: string = "";//表單綁定
    isAvalible : boolean = false;
    addTasks()函式綁定在Button
    addTasks()函式的邏輯判斷
1
2
3
4
5
6
7
8
9
10
11
12
13
14
15
16
17
18
19
20
21
22
23
24
25
26
27
28
29
import { Component } from '@angular/core';
+ import { FormsModule } from '@angular/forms'
@Component({
selector: 'app-to-do',
standalone: true,
imports: [
+ FormsModule
],
templateUrl: './to-do.component.html',
styleUrl: './to-do.component.scss'
})

export class ToDoComponent {
Title: string = 'To Do Lists';
imageLink: string = "https://cdn-icons-png.flaticon.com/512/4697/4697260.png";
+ tasks: string[] = [];
+ newTask: string = "";//表單綁定
isAvalible : boolean = false;
+ addTasks() {
+ const vm = this;
//如果表單左右有空格就清除,將表單數據塞入陣列中,並且將 表單清空
if (vm.newTask.trim() != null) {
vm.tasks.push(vm.newTask)
vm.newTask="";
vm.isAvalible = true;
}
console.log(vm.tasks)
}
}

安裝primeng

PrimeNG 是一套豐富的 Angular 開源 UI 元件。造訪PrimeNG 網站以取得互動式簡報、綜合文件和其他資源。

1
npm install --save primeng 

全局引入 MatButtonModule與ButtonModule

在app.component.ts
  • 引入MatButtonModule
  • 引入ButtonModule
1
2
3
4
5
6
7
8
9
10
11
12
13
14
15
16
17
18
19
20
21
22
import { Component } from '@angular/core';
import { RouterOutlet } from '@angular/router';
+ import {MatButtonModule} from '@angular/material/button';
+ import { ButtonModule } from 'primeng/button';
import { ToDoComponent } from './components/to-do/to-do.component';

@Component({
selector: 'app-root',
standalone: true,
imports: [
RouterOutlet,
+ MatButtonModule,
+ ButtonModule,
ToDoComponent,
],
templateUrl: './app.component.html',
styleUrl: './app.component.scss'
})
export class AppComponent {
title = 'tode_project';
}

啟動
1
ng serve
點擊函式觀看 表單與按鈕綁定函式的執行 更正函式

Angular 資料與圖片的渲染

app/components/to-do/to-do.component.ts
export class ToDoComponent 內新增

Title: string = 'To Do Lists';
imageLink:string= "https://cdn-icons-png.flaticon.com/512/4697/4697260.png";
1
2
3
4
5
6
7
8
9
10
11
12
13
14
import { Component } from '@angular/core';


@Component({
selector: 'app-to-do',
standalone: true,
imports: [],
templateUrl: './to-do.component.html',
styleUrl: './to-do.component.scss'
})
export class ToDoComponent {
Title: string = 'To Do Lists';
imageLink:string= "https://cdn-icons-png.flaticon.com/512/4697/4697260.png";
}
to-do.component.html
資料使用花刮號渲染
圖面使用[src]="定義的圖片位址"
1
2
3
4
5
<div class="title">
<h1 >{{Title}}</h1>
<img [src]="imageLink" alt="">
</div>

Angular Material快速建立各種元件

使用Angular Material來幫我們快速建立各種元件

Angular Material 官網

1
ng add @angular/material

創建to-do

新增components資料夾,右鍵『在整合終端機中開啟』,終端機輸入以下指令
這意味我要新增一個ToDo

1
2
3
ng g c 頁面或是功能
ng g c ToDo

生成的檔案會是『大寫小寫英文-大寫小寫英文.component』副檔名會有

  • .html:HTML檔案
  • .scss:樣式
  • .spec.ts:單元測試檔案
  • .ts:資料定義與函式

components 資料夾內會新增一個 to-do資料夾
資料件內有以下內容

  • to-do.component.html
  • to-do.component.scss
  • to-do.component.spec.ts
  • to-do.component.ts

在app資料夾內app.component.html 新增

1
2
3
4
<main class="main">
<app-to-do></app-to-do>
</main>
<router-outlet />
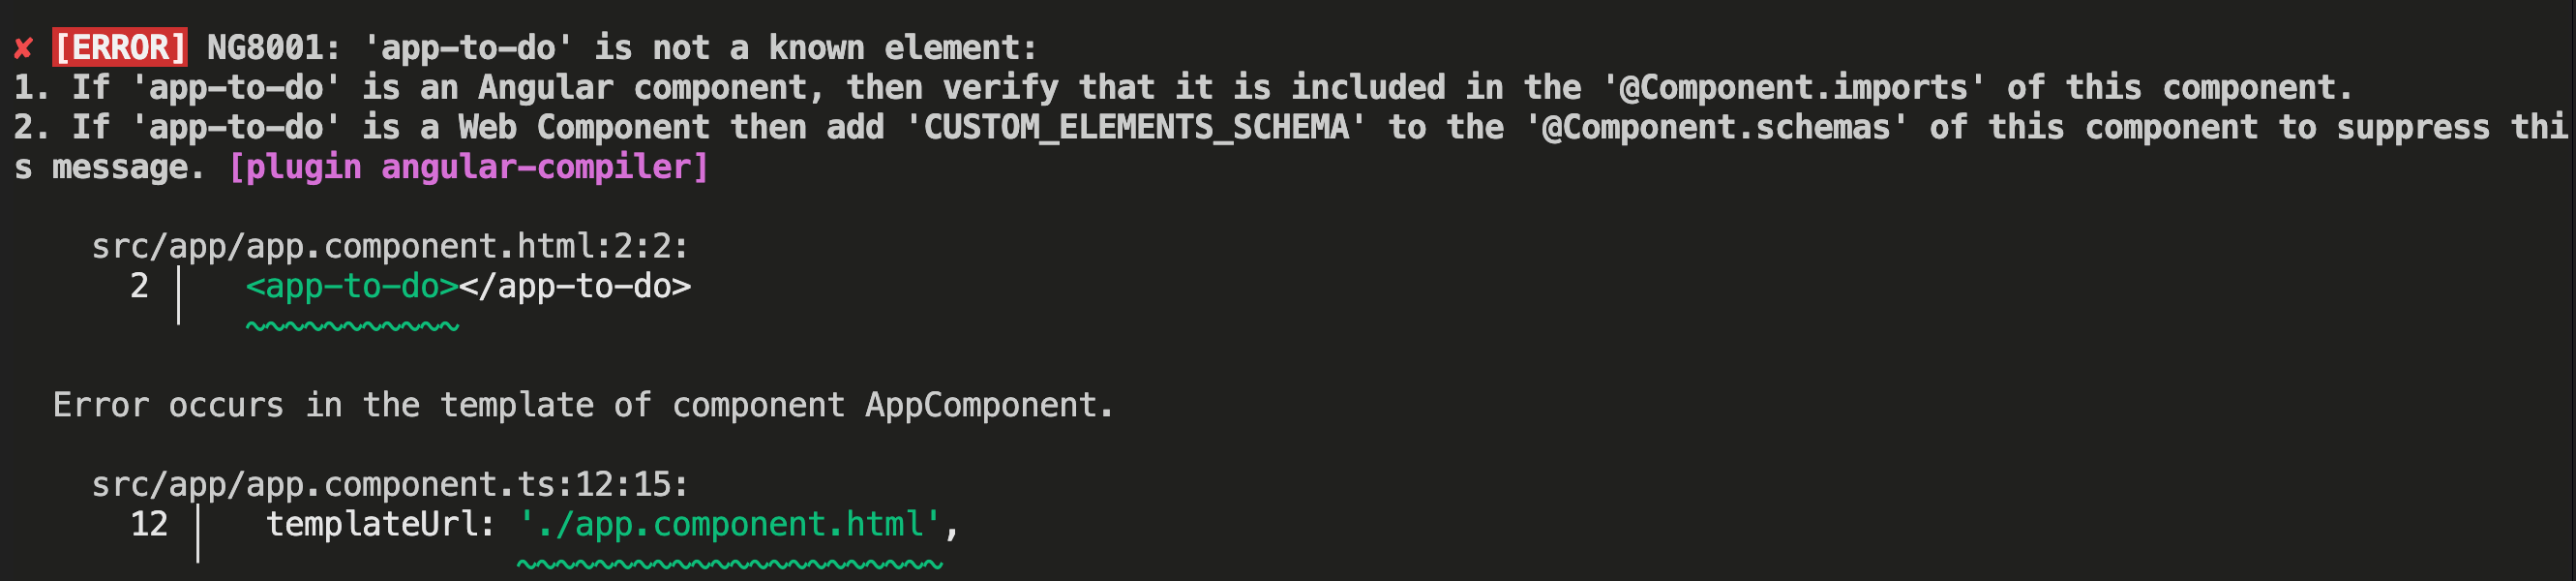
錯誤訊息:[ERROR] NG8001: 'app-to-do' is not a known element
處理方式:imports引入 ToDoComponent
在app資料夾內引入app.component.ts
1
2
3
4
5
6
7
8
9
10
11
12
13
14
15
16
17
18
import { Component } from '@angular/core';
import { RouterOutlet } from '@angular/router';
+ import { ToDoComponent } from './components/to-do/to-do.component';

@Component({
selector: 'app-root',
standalone: true,
imports: [
RouterOutlet,
+ ToDoComponent
],
templateUrl: './app.component.html',
styleUrl: './app.component.scss'
})
export class AppComponent {
title = 'tode_project';
}

安裝 Angular Material gitHub

Angular 第一個專案

安裝Angular CLI

node v20.15.1 (npm v10.7.0)
VSCode 擴充套件:Angular Extension Pack
若使用 VSCode(Visual Studio Code)編輯器,可安裝一個叫做 Angular Extension Pack 的擴充套件,整合了 Angular 相關擴充套件方便使用:

1
$ npm i -g @angular/cli@17

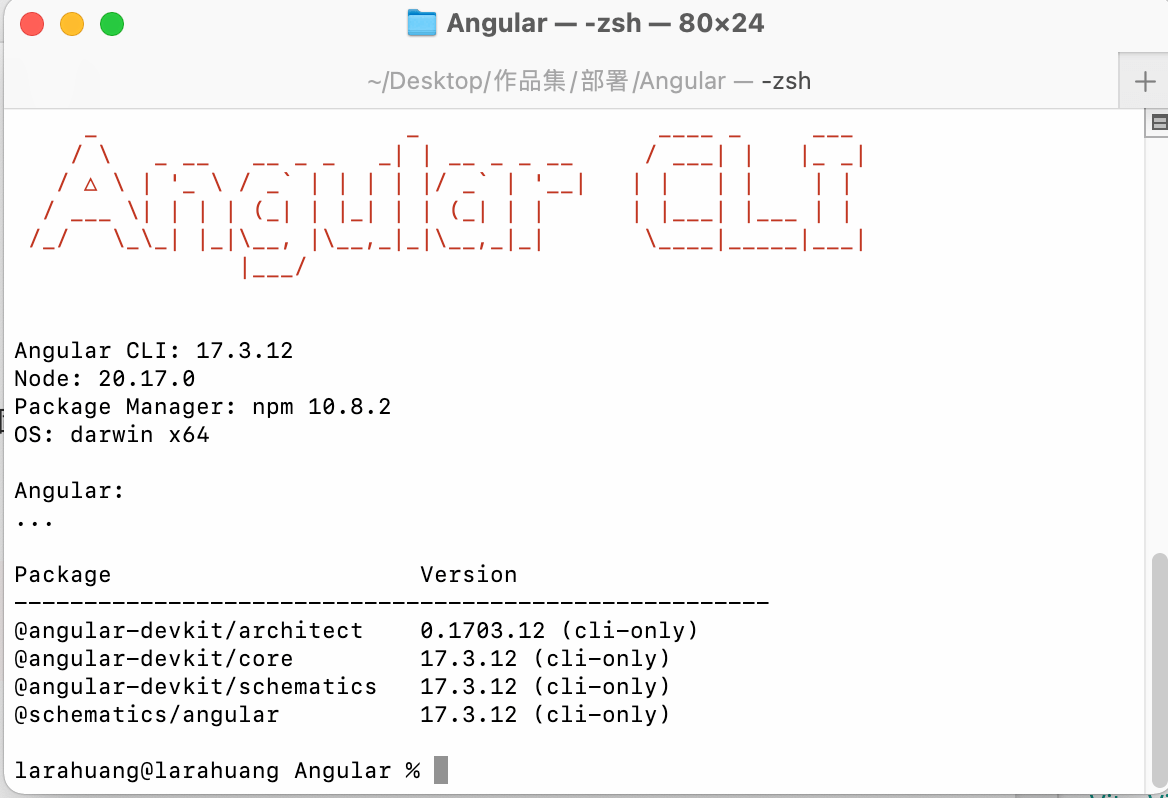
查看版本

1
2
ng version
17.3.12

Angular CLI: 17.3.12
Node: 20.15.1
Package Manager: npm 10.7.0
OS: darwin x64

建立Angular專案
1
ng new 專案名稱
Which stylesheet format would you like to use? 您想使用哪一種樣式表格式?Sass (SCSS)
[ https://sass-lang.com/documentation/syntax#scss ] ?
Do you want to enable Server-Side Rendering (SSR) and Static Site Generation (SSG/Prerendering)? 您想要啟用伺服器端渲染 (SSR) 和靜態網站產生 (SSG/預渲染) 嗎?yes
CREATE test/README.md (1065 bytes)
CREATE test/.editorconfig (274 bytes)
CREATE test/.gitignore (587 bytes)
CREATE test/angular.json (2902 bytes)
CREATE test/package.json (1258 bytes)
CREATE test/tsconfig.json (1012 bytes)
CREATE test/tsconfig.app.json (485 bytes)
CREATE test/tsconfig.spec.json (434 bytes)
CREATE test/server.ts (1729 bytes)
CREATE test/.vscode/extensions.json (130 bytes)
CREATE test/.vscode/launch.json (470 bytes)
CREATE test/.vscode/tasks.json (938 bytes)
CREATE test/src/main.ts (250 bytes)
CREATE test/src/index.html (290 bytes)
CREATE test/src/styles.scss (80 bytes)
CREATE test/src/main.server.ts (264 bytes)
CREATE test/src/app/app.component.scss (0 bytes)
CREATE test/src/app/app.component.html (19903 bytes)
CREATE test/src/app/app.component.spec.ts (910 bytes)
CREATE test/src/app/app.component.ts (301 bytes)
CREATE test/src/app/app.config.ts (404 bytes)
CREATE test/src/app/app.routes.ts (77 bytes)
CREATE test/src/app/app.config.server.ts (350 bytes)
CREATE test/public/favicon.ico (15086 bytes)
✔ Packages installed successfully.
Successfully initialized git.
cd 專案名稱

Would you like to share pseudonymous usage data about this project with the Angular Team at Google under Google's Privacy Policy at https://policies.google.com/privacy. For more details and how to change this setting, see https://angular.dev/cli/analytics.

您願意與 Angular 團隊分享有關此項目的匿名使用數據嗎 根據 Google 的隱私權政策 (https://policies.google.com/privacy) 在 Google 進行操作。了解更多 詳細資訊以及如何更改此設置,請參閱 https://angular.dev/cli/analytics。

1
ng serve --open
這個項目是用生成的 [Angular CLI](https://github.com/angular/angular-cli)
version 18.2.4.

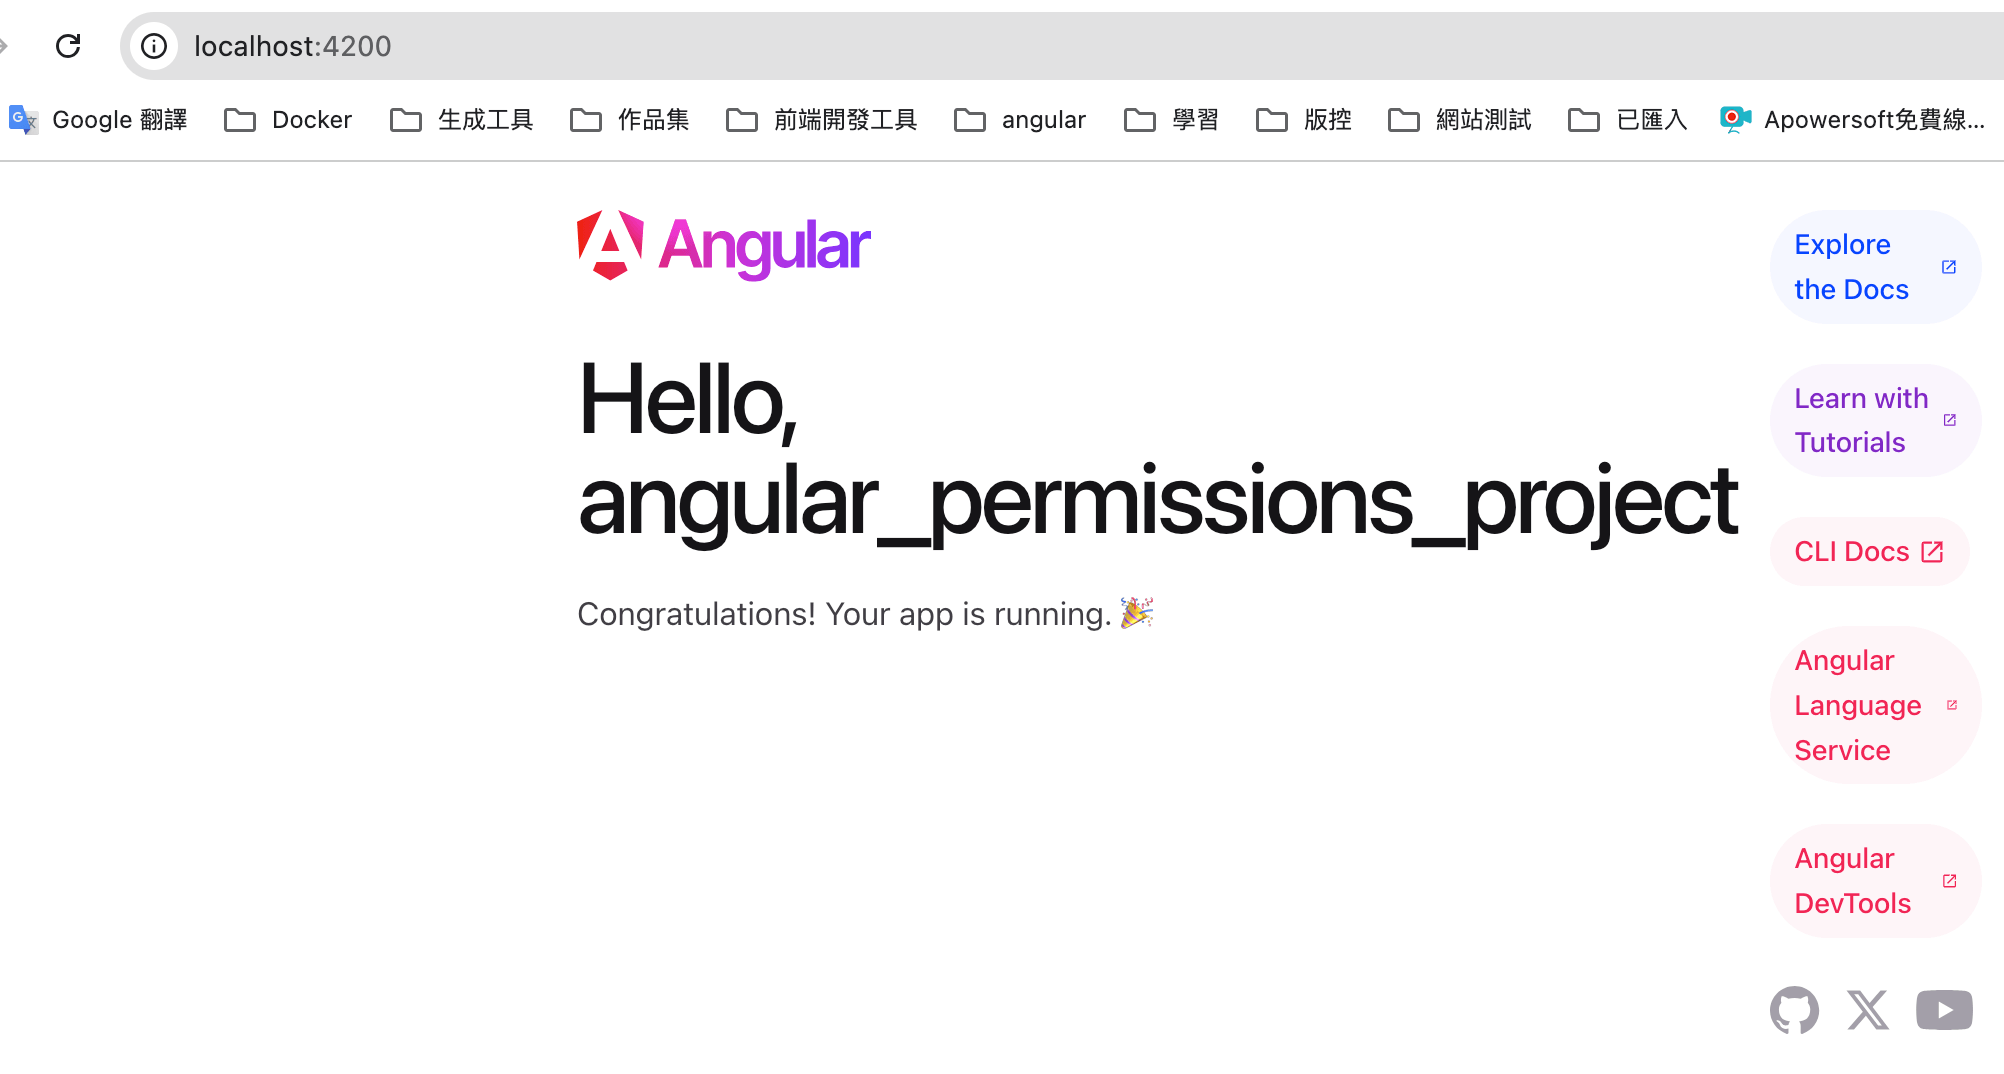
開發啟動

1
ng serve or npm run start

http://localhost:4200/

專案架構

├── node_modules // 安裝的所有套件
├── package.json //整個專案的設定檔,像是應用程式的名稱、版本、描述、關鍵字、授權、貢獻者、維護者、腳本、相依的相關套件及其版本資訊等等,詳細請參考官方文件的說明。
├── package-lock.json //整個專案的設定檔
├── public
│ └── favicon.ico
├── .angular
├── README.md //這個檔案是這個專案的說明文件,採用 Markdown 的語法。可以自由撰寫關於此專案的任何說明。
├── angular.json //Angular CLI 設定檔
├── tsconfig.app.json
├── tsconfig.json // TypeScript 編譯時看的編譯設定檔。
├── tsconfig.spec.json
├── .editorconfig
├── src //主要開發原始碼
├────├── app //包含整個網頁應用程式的 Module、Component、Service
├────├────└── app.routes.ts // 路由
├────├────└── app.config.ts
├────├────└── app.config.server.ts
├────├────└── app.component.ts //
├────├────└── app.component.spec.ts
├────├────└── app.component.scss
├────├────└── app.component.html
├────├────└── home
├────├────└────└── home.component.html //模板 Template
├────├────└────└── home.component.scss //樣式
├────├────└────└── home.component.spec //執行 ng test 命令會透過 Karma 進行測試
├────├────└────└── home.component.ts //元件 Component
├────├────└── page-not-found
├────├────└────└── page-not-found.component.html //模板 Template
├────├────└────└── page-not-found.component.scss //樣式
├────├────└────└── page-not-found.component.spec
├────├────└────└── page-not-found.component.ts
├────├────└── components // 子元件資料夾
├────├────├────└── navbar
├────├────├────└────└────navbar.component.html //模板 Template
├────├────├────└────└────navbar.component.scss //樣式
├────├────├────└────└────navbar.component.spec //執行 ng test 命令會透過 Karma 進行測試
├────├────├────└────└────navbar.component.ts //元件 Component
├────├── environments //環境變數設定檔
├────├────└── environment.prod.ts
├────├────└── environment.ts
├────├── index.html // 起始頁面1-1
├────├── main.server.ts
├────├── main.ts // 進入點載入:Angular CLI 在編譯與打包的時候,把這支檔案裡的程式,當做整個網頁應用程式的主要程式進入點。一般也是不會去動到這裡的程式碼。
├────│── server.ts
├────│── styles.scss

index.html 載入起始頁面1-1

在 index.html 檔案的 標籤內設定了,其定義應用程式執行的根路徑。此標籤是必要的,如果不設定就會讓應用程式找不到網頁,而拋出 404 - Not Found 的錯誤訊息。

1
2
3
4
5
6
7
8
9
10
11
12
13
14
15
16
17

<!doctype html>
<html lang="zh-Hant">
<head>
<meta charset="utf-8">
<title>AngularPermissionsProject</title>
<!------>
<base href="/">
<meta name="viewport" content="width=device-width, initial-scale=1">
<link rel="icon" type="image/x-icon" href="favicon.ico">
<link href="https://fonts.googleapis.com/css2?family=Roboto:wght@300;400;500&display=swap" rel="stylesheet">
<link href="https://fonts.googleapis.com/icon?family=Material+Icons" rel="stylesheet">
</head>
<body class="mat-typography">
<app-root></app-root>
</body>
</html>

Angular 專案架構

使用Angular Material來幫我們快速建立各種元件

Angular Material快速建立各種元件

產生一個新的組件,先安裝Angular Material

1
2
3
4
5
6
7
8
9
//先安裝Angular Material
ng add @angular/material
套件@angular/material@19.2.1 將被安裝並執行。
您要繼續嗎? (是/否)
The package @angular/material@19.2.1 will be installed and executed.
Would you like to proceed? (Y/n)
//ng g c 頁面或是功能
ng g c ToDo

生成的檔案會是『大寫小寫英文-大寫小寫英文.component』副檔名會有

  • .html:HTML檔案
  • .scss:樣式
  • .spec.ts:單元測試檔案
  • .ts:資料定義與函式

Build 建造

1
ng build

Run ng build 建構項目。建置工件將儲存在 dist/ 目錄。

運行單元測試

Run ng test 透過執行單元測試Karma.

運行端對端測試

Run ng e2e 透過您選擇的平台執行端對端測試。要使用該命令,您需要先新增一個實現端到端測試功能的套件。

Further help

要獲得有關 Angular CLI 使用的更多幫助 ng help 或去看看 Angular CLI Overview and Command Reference page.

Vite Vue單元測試實例-登入

登入頁的設計

基礎元件功能

  • 確認 email、password、verification、submit 元素存在
  • 確認 Email 輸入框可以填資料
  • 確認 Password 輸入框可以填資料
  • Email、Password 輸入後,data 對應的 formData 有存入相應的值
  • 預設 Password 輸入框的 type 為 password,不直接顯示

測試錯誤的 Email、Password、verification驗證情境

  • 當 Email 沒有填寫時,跳出 Required 的錯誤訊息
  • 當 Email 格式錯誤時,跳出相關錯誤訊息
  • 確認 Password 輸入框可以填資料
  • 當 Password 沒有填寫時,跳出 Required 的錯誤訊息
  • 當 Password 字數不符合 6~30 字符時,跳出相關錯誤訊息
  • 當 verification 沒有填寫時,跳出 Required 的錯誤訊息
  • 當 verification 字數不符合 4 字符時,跳出相關錯誤訊息

元件屬性的改變的行為

  • 當 Email、Password 未填寫時,登入按鈕為 Disabled
  • 當 Email、Password 格式錯誤時,登入按鈕為 Disabled
  • 當 Email、Password 格式正確時,登入按鈕可點擊
  • 點擊顯示 Password 的 icon 時,type 會轉換成 text

登入功能

  • 輸入錯誤的帳號密碼,會彈出警視窗
  • 確認 Router 可以順利導向

登入表單

1
2
3
4
5
6
7
8
9
10
11
12
13
14
15
16
17
18
19
20
21
22
23
24
25
26
27
28
29
30
31
32
33
34
35
36
37
38
39
40
41
42
43
44
45
46
47
48
49
50
51
52
53
54
55
56
57
58
59
60
61
62
63
64
65
66
67
68
69
70
71
72
73
74
75
76
77
78
79
80
81
82
83
84
85
86
87
88
89
90
91
92
93
94
95
96
97
98
99
100
101
102
103
104
105
106
107
108
109
110
111
112
113
114
115
116
117
118
119
120
121
122
123
124
125
126
127
128
129
130
//父組件
<script setup lang="ts">
import { ref,onMounted, getCurrentInstance,watchEffect,watch,computed } from 'vue'
//登入表單
const loginTitle = ref<string>('請先登入')
//登入表單標題Labels
const loginLabels = ref<loginFormType>({
email: '電子郵件',
password: '密碼',
verification: '驗證碼',
})
const loginForms = ref<loginFormType>({
email: '',
password: '',
verification: '',
})
//電子郵件驗證錯誤訊息
const messageCheckEmail = ref<string>('')
//電子郵件驗證函式
const checkEmail = () => {
const regEmail = /^([A-Za-z0-9_\-\.])+\@([A-Za-z0-9_\-\.])+\.([A-Za-z]{2,4})$/;
if (loginForms.value.email == "") {
messageCheckEmail.value = '電子郵件不能為空!';
errorCheckEmail.value = true;
} else if (loginForms.value.email?.search(regEmail) == -1) {
messageCheckEmail.value = '電子郵件不符合規格!';
errorCheckEmail.value = true;
} else {
messageCheckEmail.value = '';
errorCheckEmail.value = false;
}
}

//密碼表單驗證錯誤訊息
const messageCheckPassword = ref<string>('');
//密碼表單驗證函式
const checkPassword = () => {
const regPassword = /[a-zA-Z0-9]{6,30}/;
if (loginForms.value.password == "") {
messageCheckPassword.value = '密碼不能為空!';
} else if (loginForms.value.password?.search(regPassword) == -1) {
console.log(loginForms.value.password.length,regPassword)
messageCheckPassword.value = '密碼必須是6~30個字符以上!';
} else {
messageCheckPassword.value = '';
}
}
// 切換眼睛改變密碼顯示或是隱藏
const passwordVisible = ref<boolean>(false);
const passwordType = ref<string>('password');
const showPassword = () => {
passwordVisible.value = !passwordVisible.value;
passwordVisible.value ? passwordType.value = 'type' : passwordType.value = 'password';
}

//驗證碼表單驗證錯誤訊息
const messageCheckVerification = ref<string>('');
//驗證碼表單驗證錯誤訊息
const checkVerification = () => {
const regVerification = /[a-zA-Z0-9]{4}/;
if (loginForms.value.verification == "") {
messageCheckVerification.value = '驗證碼不能為空!';
} else if (loginForms.value.verification?.search(regVerification) == -1 ) {
messageCheckVerification.value = '驗證碼必須是4個字符以上!';

} else if (loginForms.value.verification !=code_box.value) {
messageCheckVerification.value = '驗證碼錯誤!';
} else {
messageCheckVerification.value = '';
}
}
const code_box = ref<string>('')
const generateCode =(length=4)=>{
// let chars = "0123456789abcdefghijklmnopqrstuvwxyzABCDEFGHIJKLMNOPQRSTUVWXYZ";
let chars = "0123456789";
let code = "";
for (var i = 0; i < length; i++) {
code += chars.charAt(Math.floor(Math.random() * chars.length));
}
code_box.value=code;
}

//點擊獲得新的驗證碼
const showCode =() => {
generateCode();
}
const checkLoginForms =computed(()=>{
if (loginForms.value.email == "" || loginForms.value.password == "" || loginForms.value.verification == "") {
return true;
} else if( messageCheckEmail.value!='' || messageCheckPassword.value!='' || messageCheckVerification.value!=''){
return true;
}else{
return false;
}
})

const loginSubmit = () => {
checkLoginForms.value?'':router.push({path: `/list`})
}
generateCode();
</script>

<route lang="yaml">
meta:
layout: frontLayout
</route>

<template>
<LoginForm
:loginTitle="loginTitle"
:loginLabels="loginLabels"
:loginForms="loginForms"
:messageCheckEmail="messageCheckEmail"
@sendCheckEmail ="checkEmail"
:messageCheckPassword="messageCheckPassword"
@sendCheckPassword ="checkPassword"
:messageCheckVerification=" messageCheckVerification"
@sendCheckVerification ="checkVerification"
:code_box="code_box"
@sendShowCode ="showCode"
:checkLoginForms="checkLoginForms"
@sendLoginSubmit ="loginSubmit"
:errorCheckEmail="errorCheckEmail"
:errorCheckPassword="errorCheckPassword"
:errorCheckVerification="errorCheckVerification"
:passwordVisible="passwordVisible"
:passwordType="passwordType"
@sendShowPassword="showPassword"
/>
</template>

子元件

1
2
3
4
5
6
7
8
9
10
11
12
13
14
15
16
17
18
19
20
21
22
23
24
25
26
27
28
29
30
31
32
33
34
35
36
37
38
39
40
41
42
43
44
45
46
47
48
49
50
51
52
53
54
55
56
57
58
59
60
61
62
63
64
65
66
67
68
69
70
71
72
73
74
75
76
77
78
79
80
81
82
83
84
85
86
87
88
89
90
91
92
93
94
95
96
97
98
99
100
101
102
103
104
105
106
107
108
<script setup lang="ts">
const props = defineProps({
loginTitle: { type: String },
loginLabels: { type: Object },
loginForms: { type: Object },
messageCheckEmail: { type: String },
messageCheckPassword: { type: String },
messageCheckVerification: { type: String },
code_box: { type: String },
checkLoginForms: { type: Boolean },

errorCheckEmail: { type: Boolean },
errorCheckPassword: { type: Boolean },
errorCheckVerification: { type: Boolean },
passwordVisible: { type: Boolean },
passwordType: { type: String },
})
const emit = defineEmits(['sendCheckEmail','sendCheckPassword','sendCheckVerification','sendShowCode','sendLoginSubmit','sendShowPassword'])
const sendCheckEmail =()=>{
emit('sendCheckEmail')
}
const sendCheckPassword =()=>{
emit('sendCheckPassword')
}
const sendCheckVerification=()=>{
emit('sendCheckVerification')
}
const sendShowCode= ()=>{
emit('sendShowCode')
}
const sendLoginSubmit= ()=>{
emit('sendLoginSubmit')
}
const sendShowPassword = ()=>{
emit('sendShowPassword')
}
</script>

<template>
<div class="form login_form mt-5">
<div class="text-center mb-3">
<b data-test="title" >{{ loginTitle }}</b>
</div>
<div class="input_item">
<label>{{ loginLabels.email }}</label>
<input type="text"
data-test="email"
v-model="loginForms.email"
@blur="sendCheckEmail"
:placeholder="loginLabels.email"
:class="{error:errorCheckEmail}"
/>
<div
class="error_message"
data-test="emailMessage"
>{{ messageCheckEmail }}</div>
</div>

<div class="input_item">

<label>{{ loginLabels.password }}</label>
<div class="password_input">
<input
data-test="password"
:type="passwordType"
v-model="loginForms.password"

@blur="sendCheckPassword"
:class="{ error: errorCheckPassword }"
:placeholder="loginLabels.password"/>
<i class="icon-eye-close"
@click.prevent="sendShowPassword"
:class="passwordVisible === false ? 'icon-eye-close' : 'icon-eye'"
></i>


</div>
<div class="error_message"
data-test="passwordMessage">{{ messageCheckPassword }}</div>
</div>
<div class="input_item verification" >
<label>{{ loginLabels.verification }}</label>
<input type="text"
@blur="sendCheckVerification"
data-test="verification"
v-model="loginForms.verification"
:class="{error:errorCheckVerification}"
:placeholder="loginLabels.verification"/>
<div class="codeBox">{{ code_box }}</div>
<a class="btn_change">
<i @click="sendShowCode" class="icon-spinner11"></i>
</a>
<div class="error_message"
data-test="verificationMessage"
>{{ messageCheckVerification }}</div>
</div>
<div class="flex justify-center">
<div class="flex w-64">
<a class="btn cancel mr-3">取消</a>
<a class="btn submit"
@click="sendLoginSubmit"
:class="{ disabled: checkLoginForms }"
>送出</a>
</div>
</div>
</div>
</template>

單元測試的建置

1

Vite Vue (語法糖)表單父傳子的綁定

組件間的傳遞

錯誤訊息

[plugin:vite:vue] v-model cannot be used on a prop, because local prop bindings are not writable. Use a v-bind binding combined with a v-on listener that emits update:x event instead.
  • 從父母那裡傳遞我們的數據
  • 我們的孩子發出一個事件來更新父實例
父組件
v-model:表單傳遞的名稱值='表單傳遞的名稱值'
1
2
3
4
5
6
7
8
9
10
11
12
13
14
15
16
17
18
19
20
21
22
23
24
25
26
27
28
29
30
31
32
33
34
35
<script setup lang="ts">
import { ref } from 'vue'
import TodList from '../../../components/TodoList.vue'

interface todosType{
id: Number,
text: String,
completed: boolean,
}
const todos = ref<todosType[]>([
{
id: 1,
text: 'Learn Vue.js 3',
completed: false
}
])
const newTodo = ref<string>('')
const createTodo = () => {
const query = {
id: 2,
text: newTodo.value,
completed: false
}
todos.value.push(query)
}
</script>

<template>
<TodList
:todos="todos"
v-model:newTodo='newTodo'
@sendCreateTodo ="createTodo"
/>
</template>

子組件
:value="表單傳遞的名稱值"
@input="emitNewTodoValue"
emitNewTodoValue是函式=>如果不是空字符,更新表單傳遞的名稱值(往父系傳遞) const emitNewTodoValue = (evt) =>{ emit('update:newTodo', evt.target.value) }
1
2
3
4
5
6
7
8
9
10
11
12
13
14
15
16
17
18
19
20
21
22
23
24
25
26
27
28
29
30
31
32
33
34
35
36
37
38
39
<script setup>
const props = defineProps({
todos: { type: Object },
newTodo: { type: String },
// lastNewTodoModifiers: {
// default: () => ({}),
// 'no-whitespace': () => {}
// },
})
const emit = defineEmits(['update:newTodo','sendCreateTodo'])
const emitNewTodoValue = (evt) =>
{
// let val = evt.target.value
// if (props.lastNewTodoModifiers['no-whitespace']) {
// val = val.replace(/\s/g, '')
// }
emit('update:newTodo', evt.target.value)
}

const sendCreateTodo = () =>{
emit('sendCreateTodo')
}
</script>

<template>
<div>
<div v-for="todo in todos" :key="todo.id" data-test="todo">
{{ todo.text }}
</div>
<input
type="text"
placeholder="Add"
:value="newTodo"
@input="emitNewTodoValue"
/>
<button @click="sendCreateTodo">新增</button>
</div>
</template>

Vue v-model指令,值和資料屬性中的值之間建立雙向資料綁定。

1
2
3
4
5
6
7
8
9
10
11
12
<script setup lang="ts">
import { ref } from 'vue'

const value = ref('')
</script>

<template>
<div>
<input v-model="value" type="text" />
<p>Value: {{ value }}</p>
</div>
</template>

v-model.lazy => 減少了 v-model 嘗試與 Vue 實例同步的次數 - 在某些情況下,可以顯著提高效能

v-model.number => 確保我們的值作為數字處理的一種方法是使用修飾符

v-model.trim => 在傳回值之前刪除前導或尾隨空格。

v-model.trim.lazy => 尾隨和前導空格將被刪除

參考資料
參考資料

Vite Vue List

子組件 Nav.vue單元測試

父組件

1
2
3
4
5
6
7
8
9
10
11
12
13
14
15
16
17
18
19
20
21
22
23
24
25
26
27
28
29
30
31
32
33
34
35
<template>
<Nav
:navLists="navLists"
:pageNameActive="pageNameActive"
@sendMenuClickActive="menuClickActive"
/>
<main>
<KeepAlive>
<router-view />
</KeepAlive>

</main>
<footer>
<div class="reserved">LaraHuang 版權所有</div>
</footer>

</template>

<script setup lang="ts">
import { ref, onMounted } from 'vue';
import Nav from '../components/Nav.vue';

import {navType} from '../types/nav'

const navLists = ref<navType[]>([
{ id_set: '001', title: 'Home', href: '/' ,icon: 'icon-location2' },
{ id_set: '002', title: 'List', href: '/list',icon: 'icon-cog' },
{ id_set: '003', title: 'Pinia', href: '/pinia',icon: 'icon-cog' },
])
const pageNameActive=ref<string>('001');
const menuClickActive =(item:navType)=>{
// pageNameActive.value= localStorage.getItem('pageName')as string
pageNameActive.value = item.id_set;
}
</script>

測試子組件如下Nav.vue

1
2
3
4
5
6
7
8
9
10
11
12
13
14
15
16
17
18
19
20
21
22
23
24
25
26
27
28
<template>
<div class="flex justify-center header">
<a href="/me"> <b class="flex justify-center"><h1>Lara 單元測試</h1></b> </a>
</div>
<ul class="nav flex justify-center h-12 leading-10 border_bottom_solid_2 bg_c6e2ff">
<li class="flex mx-2"
v-for="(item,id_set) in navLists" :key="id_set"
:class="pageNameActive == item.id_set ? 'isActive' : ''"
@click="sendMenuClickActive(item)"
>
<router-link :to="item.href" data-test="button" >
{{ item.title }}
</router-link>
</li>
</ul>
</template>

<script setup lang="ts">
import {navType} from '../types/nav'
const props = defineProps({
pageNameActive:{type:String},
navLists:{type:Object}
})
const emit = defineEmits(['sendMenuClickActive'])
const sendMenuClickActive=(_item:navType)=>{
emit('sendMenuClickActive',_item)
}
</script>
mount:掛載。
props:父傳子。
data-test:在html綁定。
findAll():與 類似find,傳回數組DOMWrapper。
expect(value):攥寫每一筆測試時都會使用 expect(value) 和匹配器 (matcher) 來『斷言』某個值,expect (value) 的參數 value 會是程式碼產生的值
toContain('C'):包含
findComponent():尋找 Vue 元件實例,VueWrapper如果找到則傳回。否則返回ErrorWrapper。
emitted():子傳遞給父元件
toHaveLength(Number):Length數量
toEqual():等於
toHaveProperty():屬性的值
測試內容 describe:是用來將一至多組有相關的測試組合在一起的區塊。
1
2
3
4
5
6
7
8
9
10
11
12
13
14
15
16
17
18
19
20
21
22
23
24
25
26
27
28
29
30
31
32
33
34
35
36
37
38
39
40
41
42
43
44
45
46
47
48
49
50
51
52
53
54
55
56
57
58
59
60
61
62
63
64
65
import { describe, it, expect } from 'vitest'
import { mount } from '@vue/test-utils'
import Nav from '../Nav.vue'
//Nav.vue 從父元件frontLayout.vue獲得以下陣列
describe('Nav.vue 從父元素 frontLayout.vue 取得以下陣列', () =>
{
const navLists = [
{ id_set: '001', title: 'Home', href: '/' ,icon: 'icon-location2' },
{ id_set: '002', title: 'List', href: '/list',icon: 'icon-cog' },
{ id_set: '003', title: 'Pinia', href: '/pinia',icon: 'icon-cog' },
]
const pageNameActive = '001';
let wrapper
if (typeof document !== 'undefined') {
wrapper = mount(Nav, {
props: {
navLists: navLists,
pageNameActive: pageNameActive
}
})
}

it('navLists資料是否正確渲染訊息? ', () =>
{
if (typeof document !== 'undefined') {
//尋找所有 li標籤
const items = wrapper.findAll('li');

expect(items.length).toBe(items.length);
expect(items[0].text()).toBe('Home');
expect(items[1].text()).toBe('List');
expect(items[2].text()).toBe('Pinia');
}


});
it('Active 傳遞初始值時渲染', () => {
expect(pageNameActive).toMatch(pageNameActive);
})

it('點擊時發出當前資料的事件,Li會新增isActive Class', async() =>
{
if (typeof document !== 'undefined') {
const items = wrapper.findAll('li');
const li = wrapper.find('li');
// 點擊按鈕
await wrapper.get('[data-test="button"]').trigger('click')
//斷言唯一碼必想等
expect(pageNameActive).toMatch(items[0].id_set);
expect(pageNameActive).toMatch(items[1].id_set)
expect(pageNameActive).toMatch(items[2].id_set)
// 斷言li 會包含一個isActive Class
expect(wrapper.get('li').classes()).toContain('isActive')
}
})
it('按一下時檢索當前資料的事件', async () =>
{
if (typeof document !== 'undefined') {
// 點擊按鈕
await wrapper.get('[data-test="button"]').trigger('click')
// 子傳父到sendMenuClickActive 函式
expect(wrapper.emitted()).toHaveProperty('sendMenuClickActive')
}
})
})

Vite Vue 單元測試attributes 判斷屬性

describe:是用來將一至多組有相關的測試組合在一起的區塊。

attributes:判斷屬性

attributes:判斷屬性。
classes:尋找 class 屬性,語法查詢的話將得到一個陣列的結果。。
target:尋找target 屬性。
mount:掛載。
data-test:在html綁定。
props:父傳子。
find():使用 Document.querySelector() 的語法,find() 沒有找到目標元素時不會拋出錯誤。
expect(value):攥寫每一筆測試時都會使用 expect(value) 和匹配器 (matcher) 來『斷言』某個值,expect (value) 的參數 value 會是程式碼產生的值
toContain('C'):包含

案例父傳子attributes判斷屬性 單元測試

defineProps

1
2
3
4
5
6
7
8
9
10
11
12
13
14
//html
<template>
<a class="link A C B"
data-test="link"
:href="href" :target="target">點擊</a>
</template>

<script setup lang="ts">
const props = defineProps({
href: { type: String ,required: false },
target: { type: String, required: false },
})

</script>
單元測試
引入描述、它、斷言 =>引入測試mount程式 =>引入組件 =>定義 =>斷言
1
2
3
4
5
6
7
8
9
10
11
12
13
14
15
16
17
18
19
20
21
22
23
24
25
26
27
28
29
30
31
32
33
34
35
36
37
38
39
40
41
42
43
44
45
46
47
48
49
50
51
52
53
54
55
//引入描述、它、斷言
import { describe, it, expect } from 'vitest'
//引入測試實用程式
import { mount } from '@vue/test-utils'
//引入元件
import AButton from '../A.vue'

describe('A標籤', () =>
{
const href = 'https://ithelp.ithome.com.tw/'
const target = '_blank'
// 定義 wrapper掛載AButton元件的父傳子資料
let wrapper
if (typeof document !== 'undefined') {
//掛載AButton元件,父傳子
wrapper = mount(AButton, {
props: {
href: href,
target: target
}
})
}

it('取得A標籤所有訊息,A標籤樣式是否包含link', () =>
{
if (typeof document !== 'undefined') {
//取得A標籤attributes所有訊息
wrapper.find('[data-test="link"]').attributes()
console.log('取得所有A標籤訊息', wrapper.find('[data-test="link"]').attributes())
//斷言A標籤class是否包含link
expect(wrapper.find('[data-test="link"]').classes()).toContain('link')
}
})

it('取得A標籤所有class訊息', () =>
{
if (typeof document !== 'undefined') {
//A標籤class是否包含link
expect(wrapper.find('[data-test="link"]').classes()).toContain('link')

//斷言A標籤class是否包含A
expect(wrapper.find('[data-test="link"]').classes()).toContain('A')

//斷言A標籤class是否包含C
expect(wrapper.find('[data-test="link"]').classes()).toContain('C')

//斷言A標籤class是否包含B
expect(wrapper.find('[data-test="link"]').classes()).toContain('B')

//斷言取得A標籤所有class訊息
console.log('取得A標籤所有class訊息', wrapper.find('[data-test="link"]').classes())
//[ 'link', 'A', 'C', 'B' ]
}
})
})

Vue 單元測試text()& html()內容物