MySql Tables 基本觀念與數據類型

Tables 基本觀念

  • 一個Databases 是多個Table 組成。
    A Database is just a bunch of tables.
  • 表以結構化格式儲存資料。
    Tables hold the data in structured format.

Data Type

Numeric Types (數字類型)

  • BIT(size)位值類型。 每個值的位數在大小中指定。 size 參數可以儲存 1 到 64 之間的值。size 的預設值為 1。
  • TINYINT:一個非常小的整數。 有符號範圍是從 -128 到 127。無符號範圍是從 0 到 255。size 參數指定最大顯示寬度(即 255)
  • BOOL:零被視為假,非零值被視為真。
  • BOOLEAN:等於布林值
  • SMALLINT(size):一個小整數。 有符號範圍是從 -32768 到 32767。無符號範圍是從 0 到 65535。size 參數指定最大顯示寬度(即 255)
  • MEDIUMINT:一個中等整數。 有符號範圍是從 -8388608 到 8388607。無符號範圍是從 0 到 16777215。size 參數指定最大顯示寬度(即 255)
  • INT:一個中等整數。 有符號範圍是從-2147483648到2147483647。無符號範圍是從0到4294967295。size參數指定最大顯示寬度(即255)
  • INTEGER(size):等於中等整數
  • BIGINT(size):一個大整數。 有符號範圍是從 -9223372036854775808 到 9223372036854775807。無符號範圍是從 0 到 18446744073709551615。size 到 18446744073709551615。size 到 18446744073709551615。
  • FLOAT:浮點數。 總位數在大小中指定。 小數點後的位數在 d 參數中指定。 此語法在 MySQL 8.0.17 中已棄用,並將在未來的 MySQL 版本中刪除
  • DOUBLE(size, d):正常大小的浮點數。 總位數在大小中指定。 小數點後的位數在d參數中指定
  • DECIMAL(size, d):精確的定點數。 總位數在大小中指定。 小數點後的位數在 d 參數中指定。 size 的最大數量為 65。d 的最大數量為 30。size 的預設值為 10。d 的預設值為 0。
  • DEC(size, d):等於精確的定點數

String Types (字符類型)

  • CHAR:固定長度字串(可以包含字母、數字和特殊字元)。 size 參數指定列長度(以字元為單位)- 可以是從 0 到 255。
  • VARCHAR:可變長度字串(可以包含字母、數字和特殊字元)。 size 參數指定最大列長度(以字元為單位) - 可以是從 0 到 65535
  • BINARY:等於 CHAR(),但儲存二進位位元組字串。 size 參數指定列長度(以位元組為單位)。預設值為 1
  • VARBINARY:等於 VARCHAR(),但儲存二進位位元組字串。 size 參數指定最大列長度(以位元組為單位)。
  • TINYBLOB:對於 BLOB(二進位大型物件)。最大長度:255 位元組
  • TINYTEXT:儲存最大長度為 255 個字元的字串
  • TEXT(size):保存最大長度為 65,535 位元組的字串
  • BLOB(size):對於 BLOB(二進位大型物件)。最多可容納 65,535 位元組的數據
  • MEDIUMTEXT:保存最大長度為 16,777,215 個字元的字串
  • MEDIUMBLOB:對於 BLOB(二進位大型物件)。最多可容納 16,777,215 位元組的數據
  • LONGTEXT:保存最大長度為 4,294,967,295 個字元的字串
  • LONGBLOB:對於 BLOB(二進位大型物件)。最多可容納 4,294,967,295 位元組的數據
  • ENUM(val1, val2, val3, ...):只能有一個值的字串對象,該值是從可能值列表中選擇的。您最多可以在 ENUM 清單中列出 65535 個值。如果插入的值不在清單中,則會插入空白值。這些值會按照您輸入的順序排序
  • SET(val1, val2, val3, ...):一個字串對象,可以有 0 個或多個從可能值清單中選擇的值。您可以在 SET 清單中列出最多 64 個值

Date Types

  • DATE:A date. Format: YYYY-MM-DD. The supported range is from '1000-01-01' to '9999-12-31' 格式:年-月-日。支援的範圍是從“1000-01-01”到“9999-12-31”
  • DATETIME:日期和時間的組合。格式:YYYY-MM-DD hh:mm:ss。支援的範圍是從“1000-01-01 00:00:00”到“9999-12-31 23:59:59”。在列定義中新增 DEFAULT 和 ON UPDATE 以自動初始化並更新至目前日期和時間
  • TIMESTAMP:一個時間戳。 TIMESTAMP 值儲存為自 Unix 紀元 ('1970-01-01 00:00:00' UTC) 以來的秒數。格式:YYYY-MM-DD hh:mm:ss。支援的範圍是從“1970-01-01 00:00:01”UTC 到“2038-01-09 03:14:07”UTC。可以在列定義中使用 DEFAULT CURRENT_TIMESTAMP 和 ON UPDATE CURRENT_TIMESTAMP 指定自動初始化和更新到目前日期和時間
  • TIME:一次。格式:時:分:秒。支援的範圍是從“-838:59:59”到“838:59:59”
  • YEAR:四位數格式的年份。允許的四位數字格式值:1901 到 2155 和 0000。 MySQL 8.0 不支援兩位數格式的年份。

參考w3schools MySQL Data Types

MySql Database 與Tables 基本操作

Database 與 Tables

Database有多的Tables
Tables是存取數據的地方,有一定的結構

Database Level

  • show databases
  • create database
  • drop database
  • use database
  • select database
  • 啟動MySQL
    1
    2
    sudo /usr/local/mysql/support-files/mysql.server start
    使用系統密碼
  • 連接 MySQL 伺服器與 MySQL 用戶端
    1
    2
    /usr/local/mysql/bin/mysql -u root -h 127.0.0.1 -p
    密碼

show databases 展示所有Db

1
2
3
4
5
6
7
8
9
10
11
show databases;
SHOW databases;
+--------------------+
| Database |
+--------------------+
| information_schema |
| mysql |
| performance_schema |
| sys |
+--------------------+
4 rows in set (0.00 sec)

information_schema,mysql,performance_schema,sys 為默認

create database 創建Db

1
2
3
4
5
6
7
8
9
10
11
12
13
14
create database test_db;
Query OK, 1 row affected (0.00 sec)

//result
+--------------------+
| Database |
+--------------------+
| information_schema |
| mysql |
| performance_schema |
| sys |
| test_db |
+--------------------+
5 rows in set (0.00 sec)

資料庫內多了一個剛剛創建的test_db

use test_db

默認並沒使用任何Database

1
2
use test_db;
Database changed

select database()

1
2
3
4
5
6
7
select database();
+------------+
| database() |
+------------+
| test_db |
+------------+
1 row in set (0.00 sec)

如果沒有被 use => select database()
默認並沒使用任何Database 為NULL

1
2
3
4
5
6
+------------+
| database() |
+------------+
| NULL |
+------------+
1 row in set (0.00 sec)

drop database 刪除數據庫名稱

1
2
3
4
5
6
7
8
9
10
11
12
drop database test_db;
Query OK, 0 rows affected (0.02 sec)
//result
+--------------------+
| Database |
+--------------------+
| information_schema |
| mysql |
| performance_schema |
| sys |
+--------------------+
4 rows in set (0.00 sec)

分號在MySql :結束應該去執行=>可改變的

Delay
修改不使用分號改為$$

1
2
3
4
5
6
7
8
9
10
11
12
13
14
15
16
17
18
19
20
21
22
23
24
25
26
27
delimiter $$ 

show databases $$;

+--------------------+
| Database |
+--------------------+
| information_schema |
| mysql |
| performance_schema |
| sys |
+--------------------+
4 rows in set (0.01 sec)

delimiter ;
當前有效
show databases $$;
show databases;
+--------------------+
| Database |
+--------------------+
| information_schema |
| mysql |
| performance_schema |
| sys |
+--------------------+
4 rows in set (0.01 sec)

使用KeyWord大寫

MySql mac 安裝

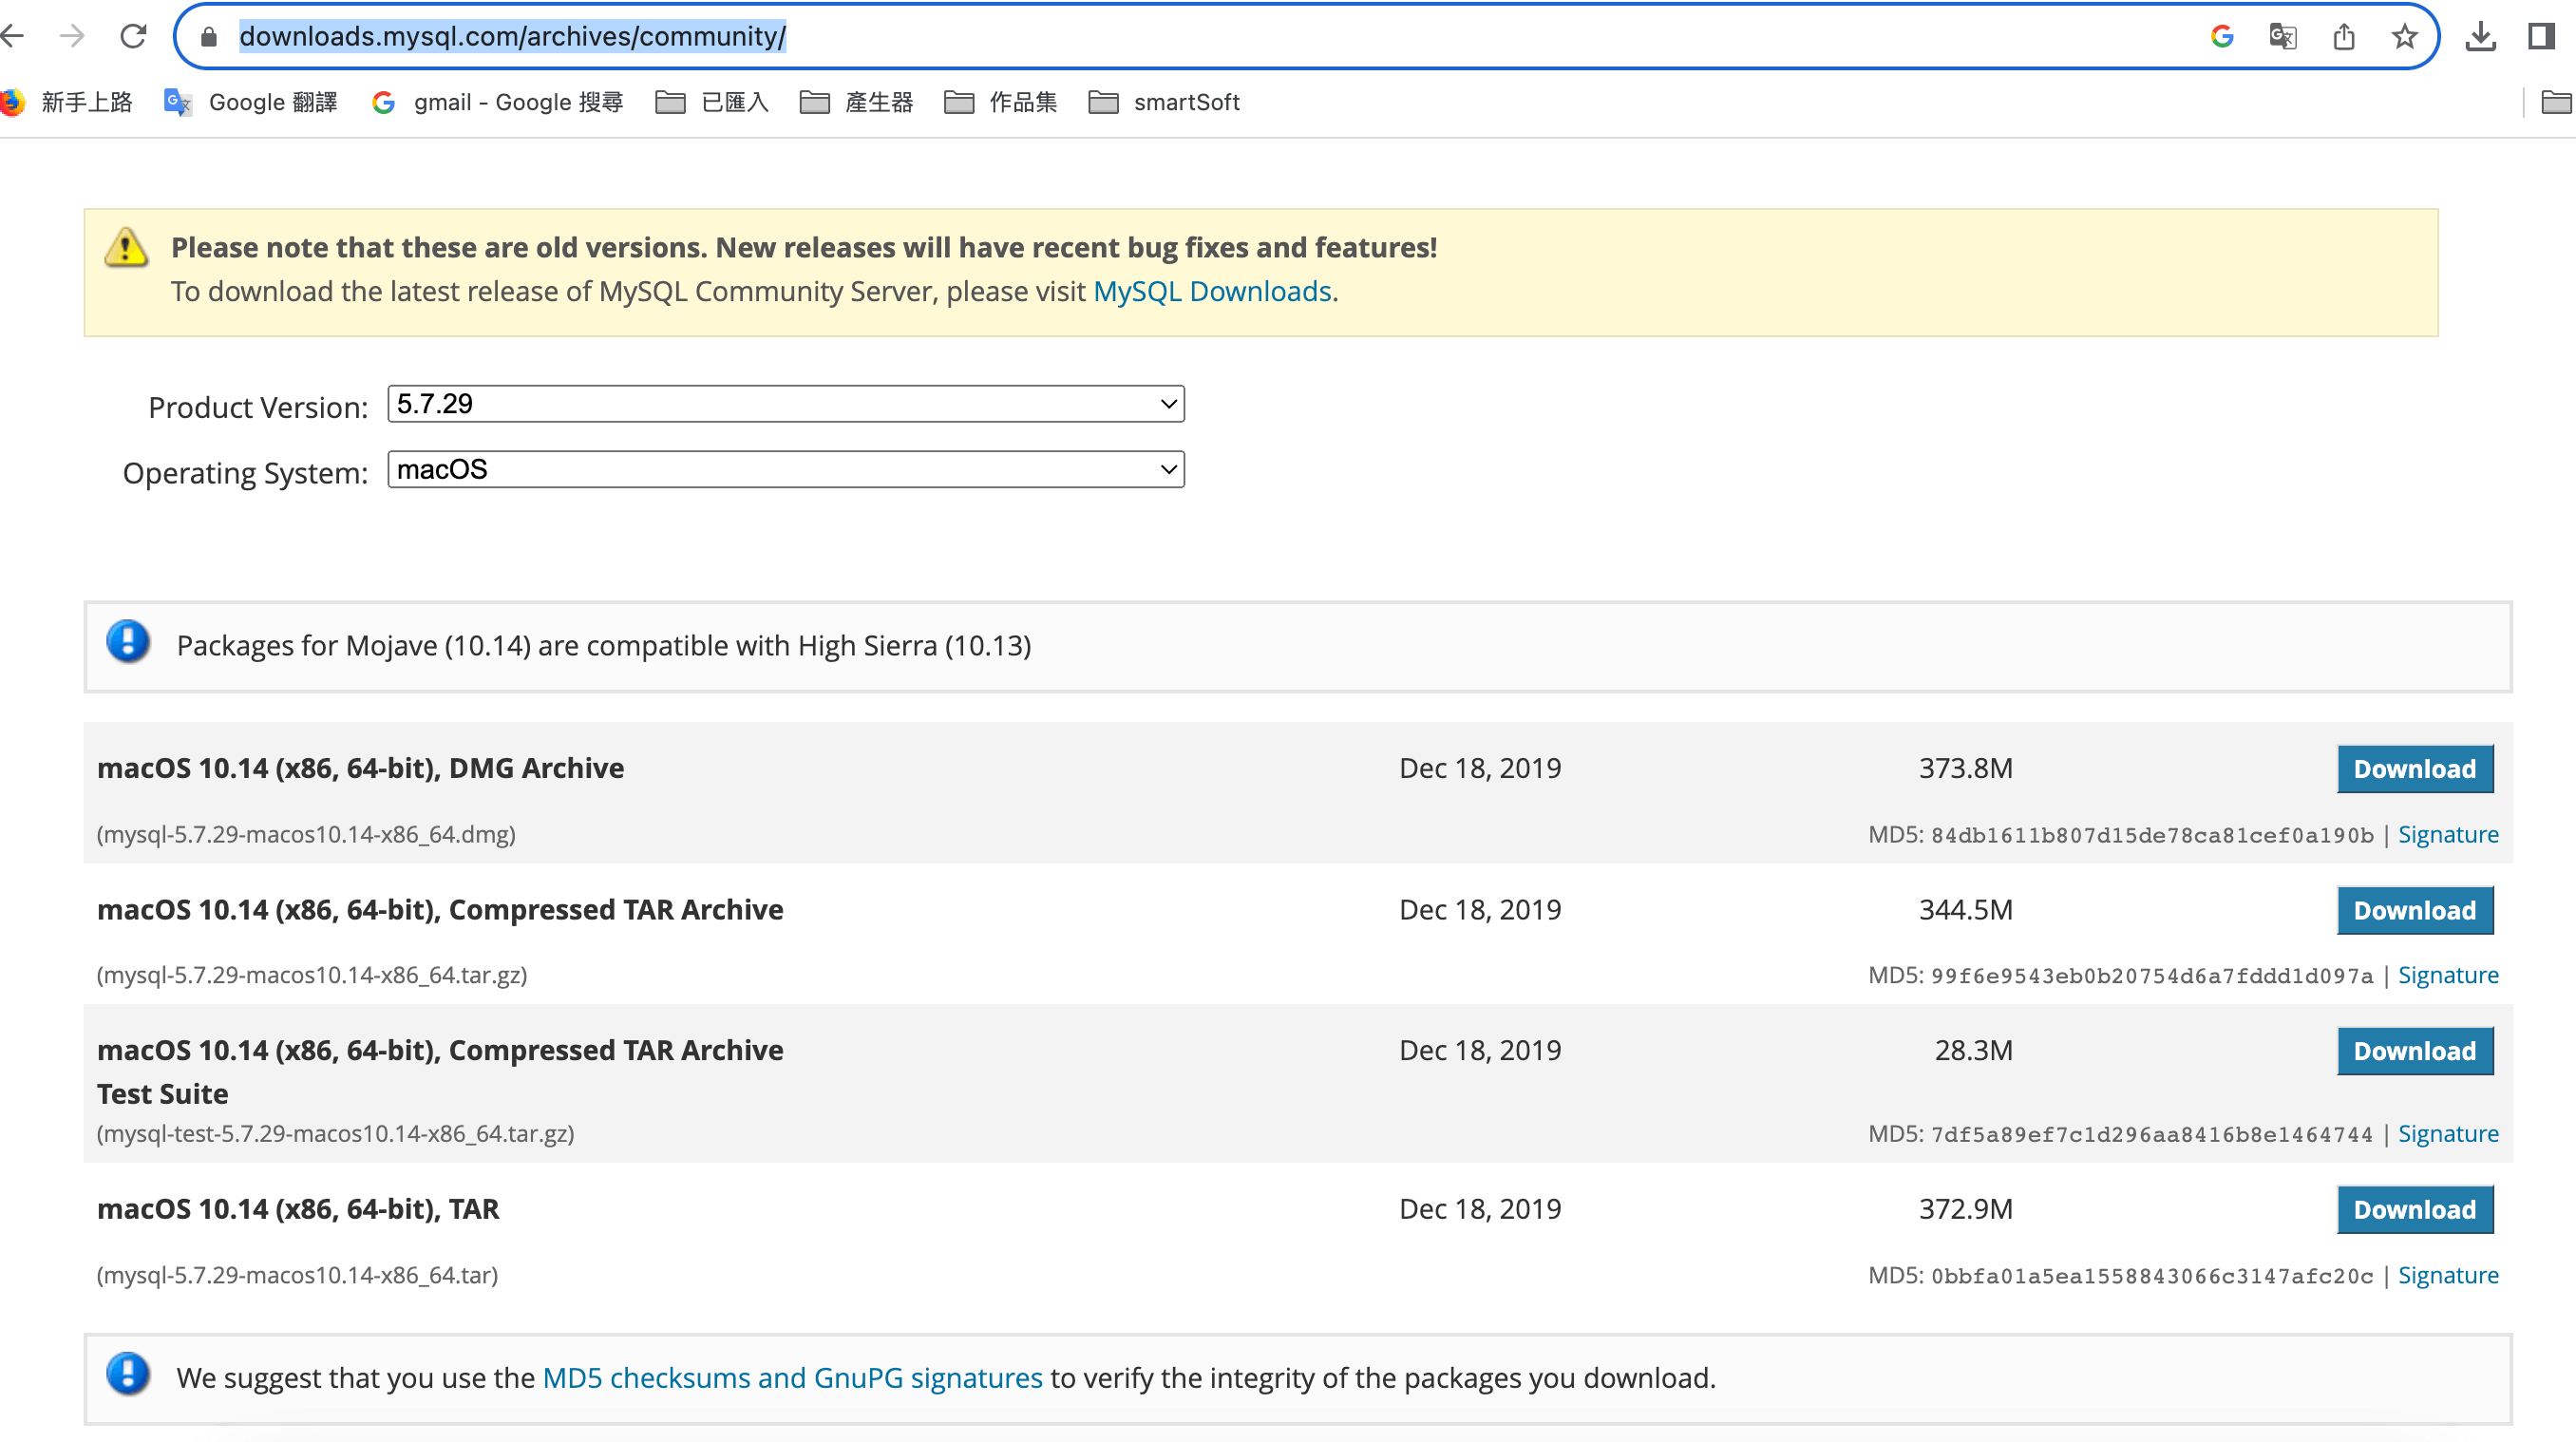
MySQl 下載

確認自己的電腦系統設備:
到官網下載
MySQL 8.0 可支援您的資料庫伺服器平台
% : macOS 15 or macOS 14
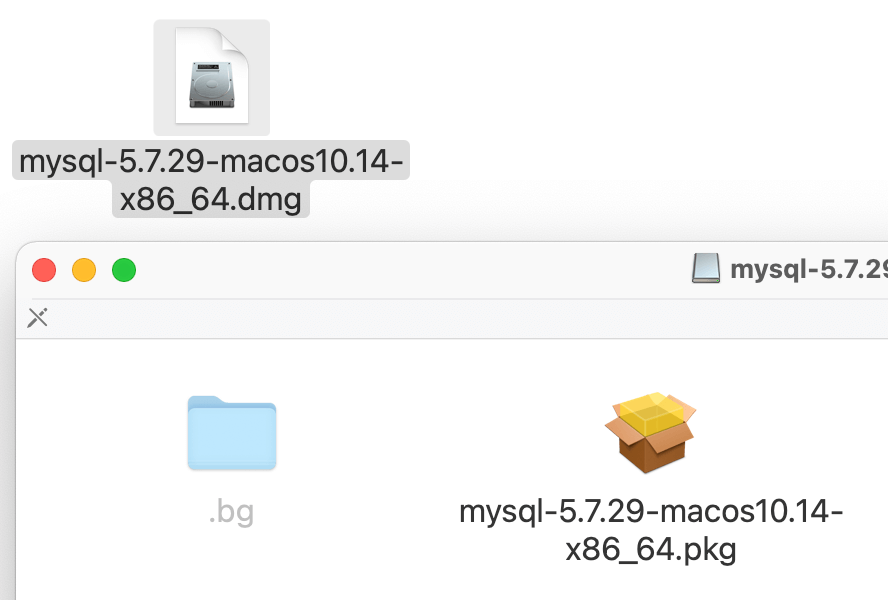
選擇 Community Server for mac 5.7.29dmg 版本

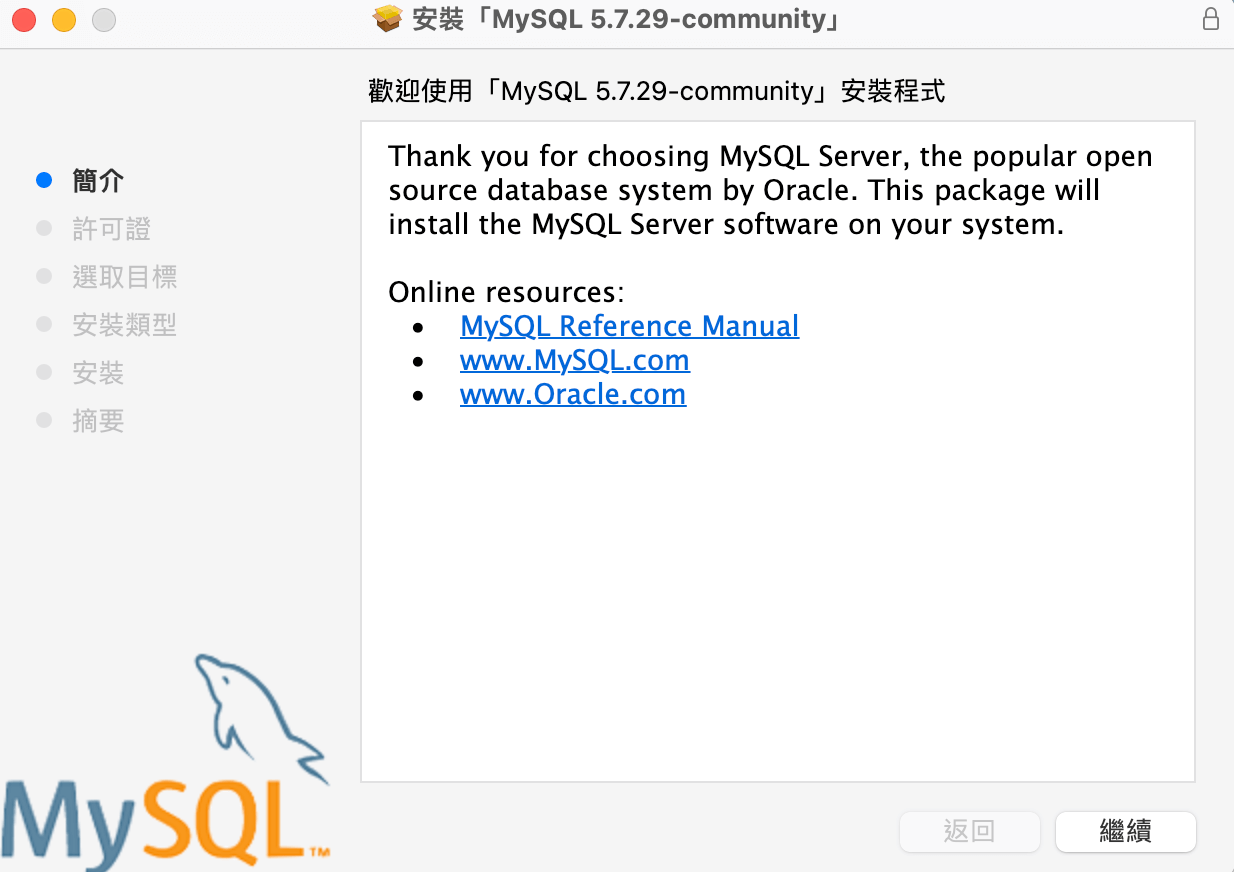
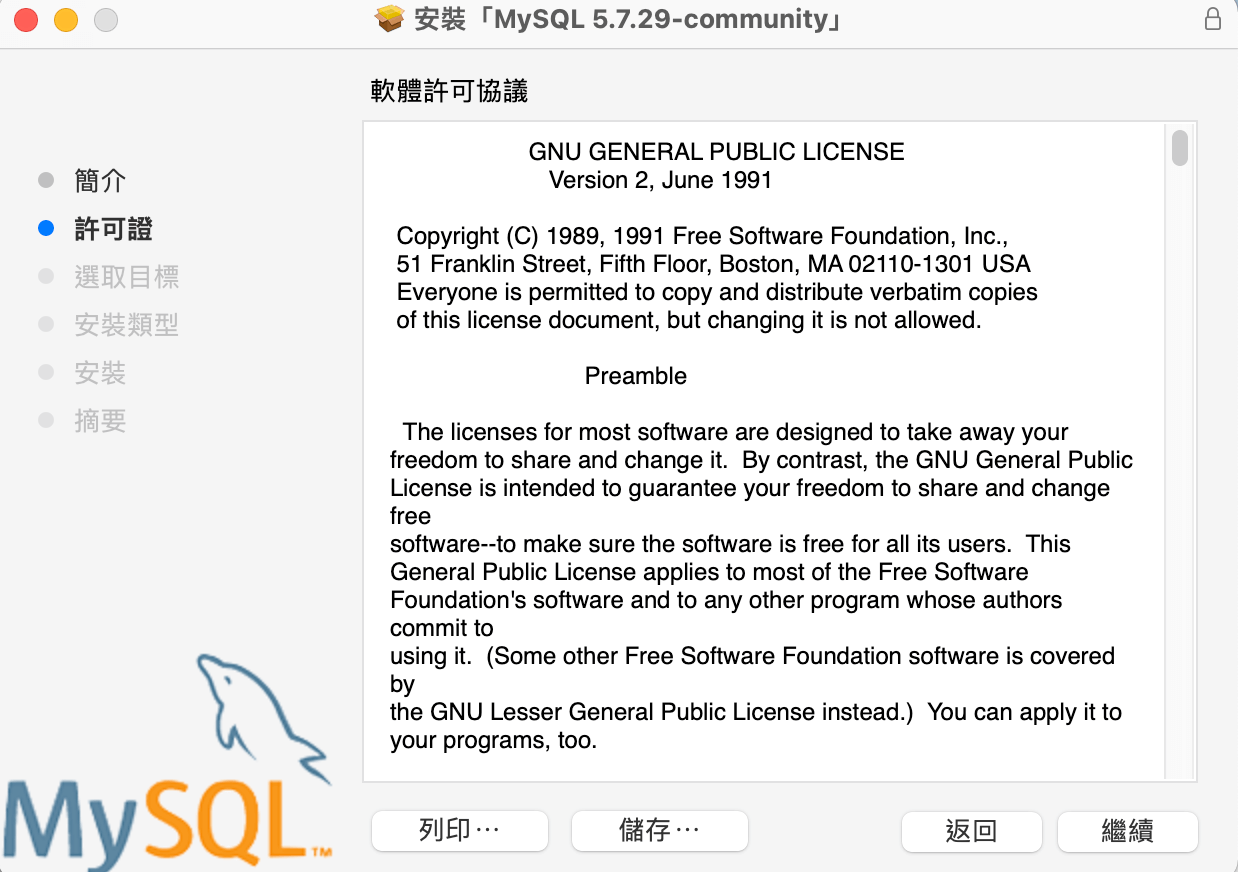
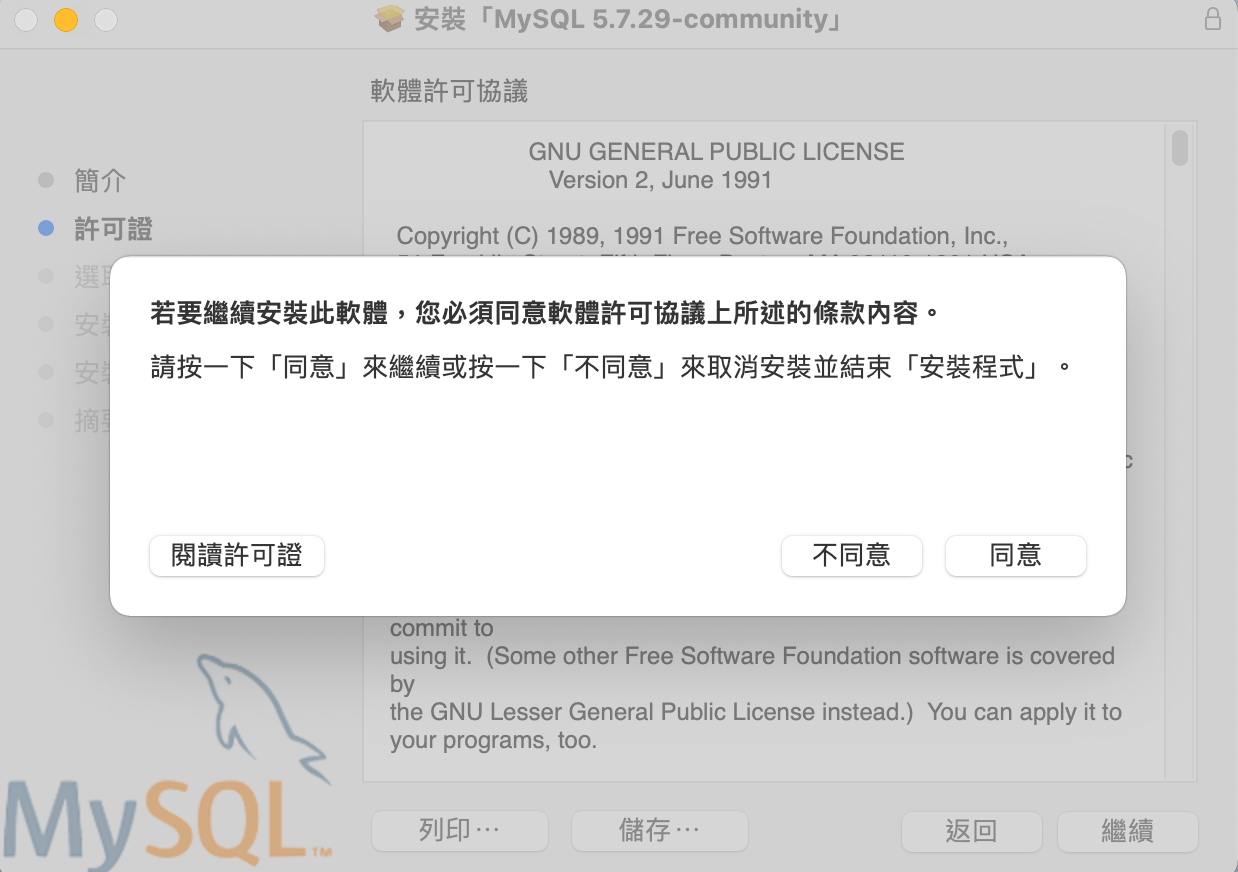
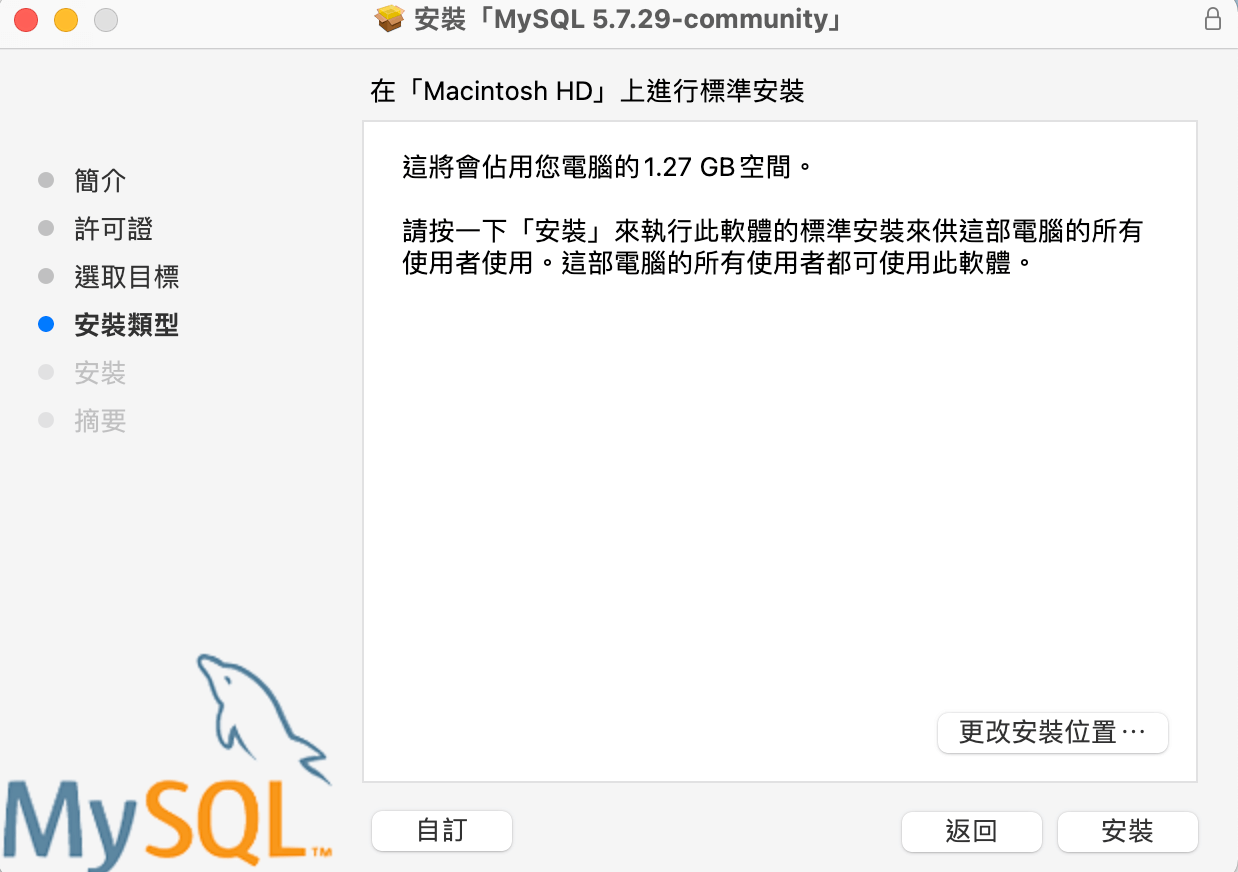
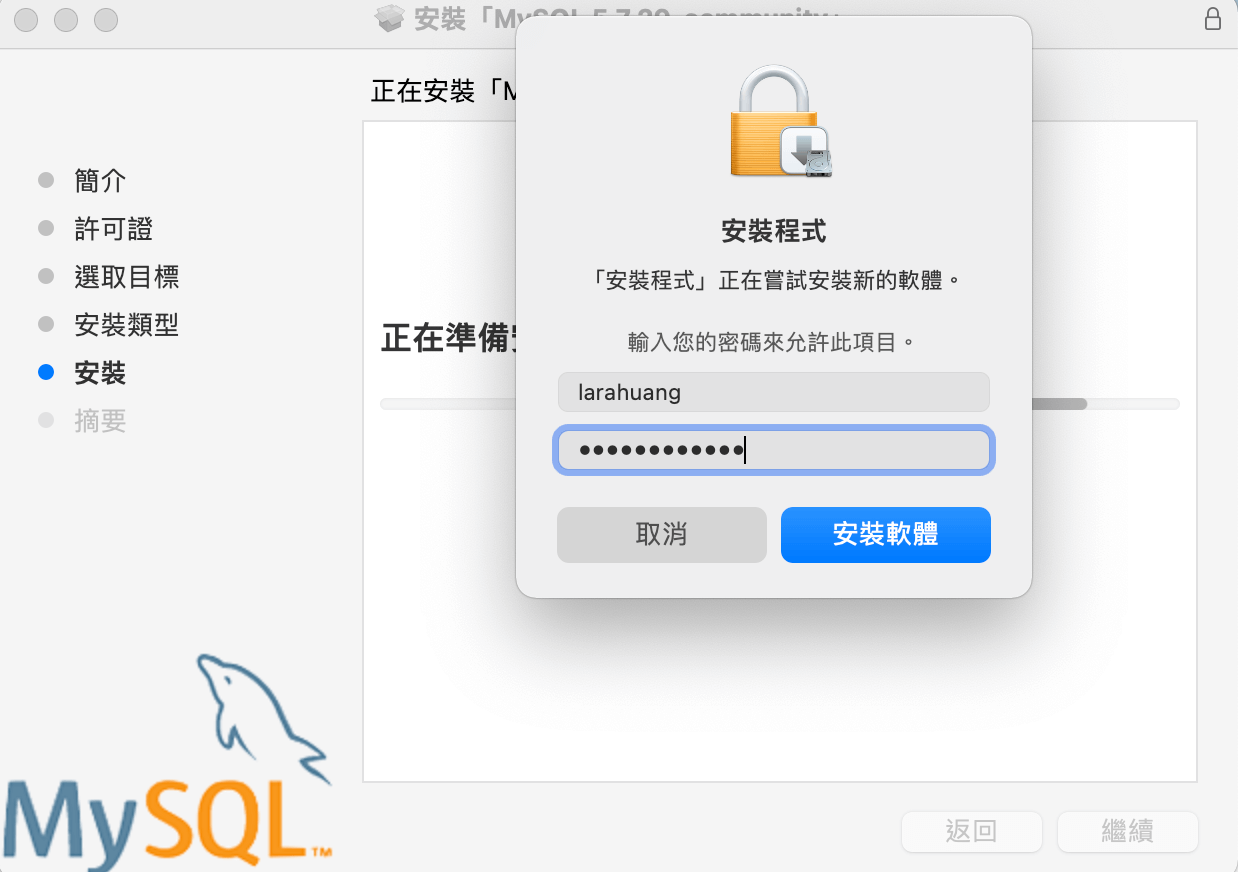
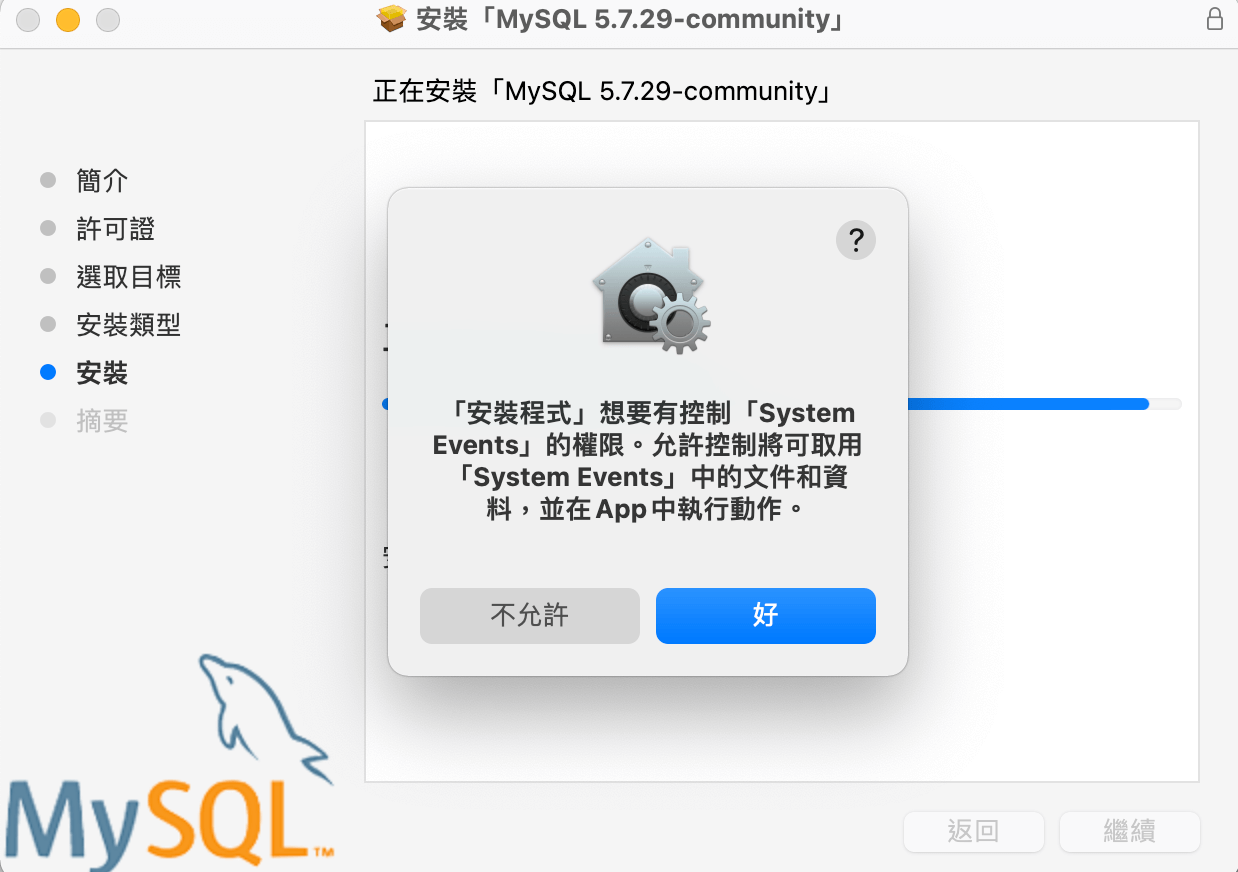
安裝=>按照安裝精靈指示

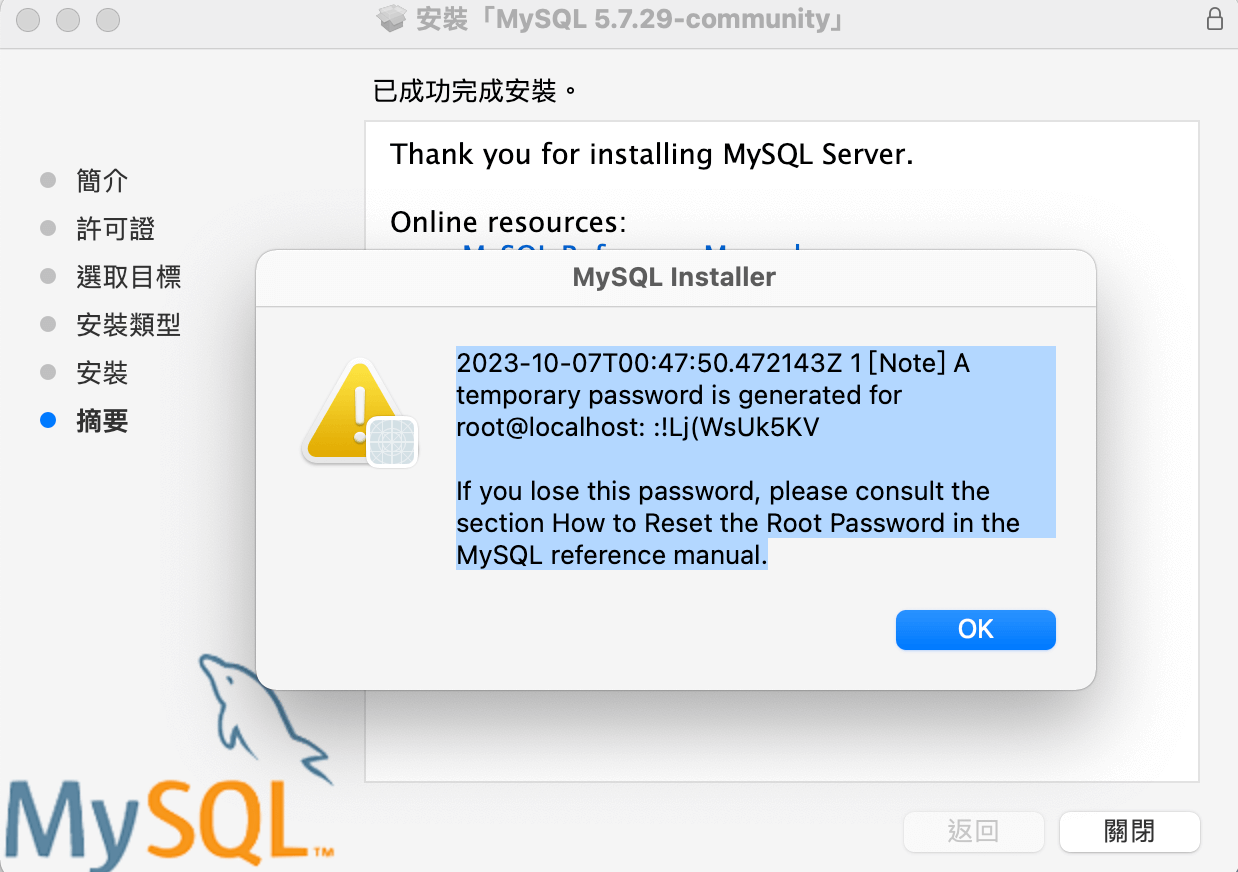
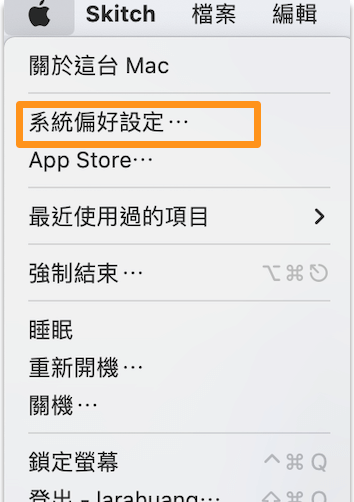
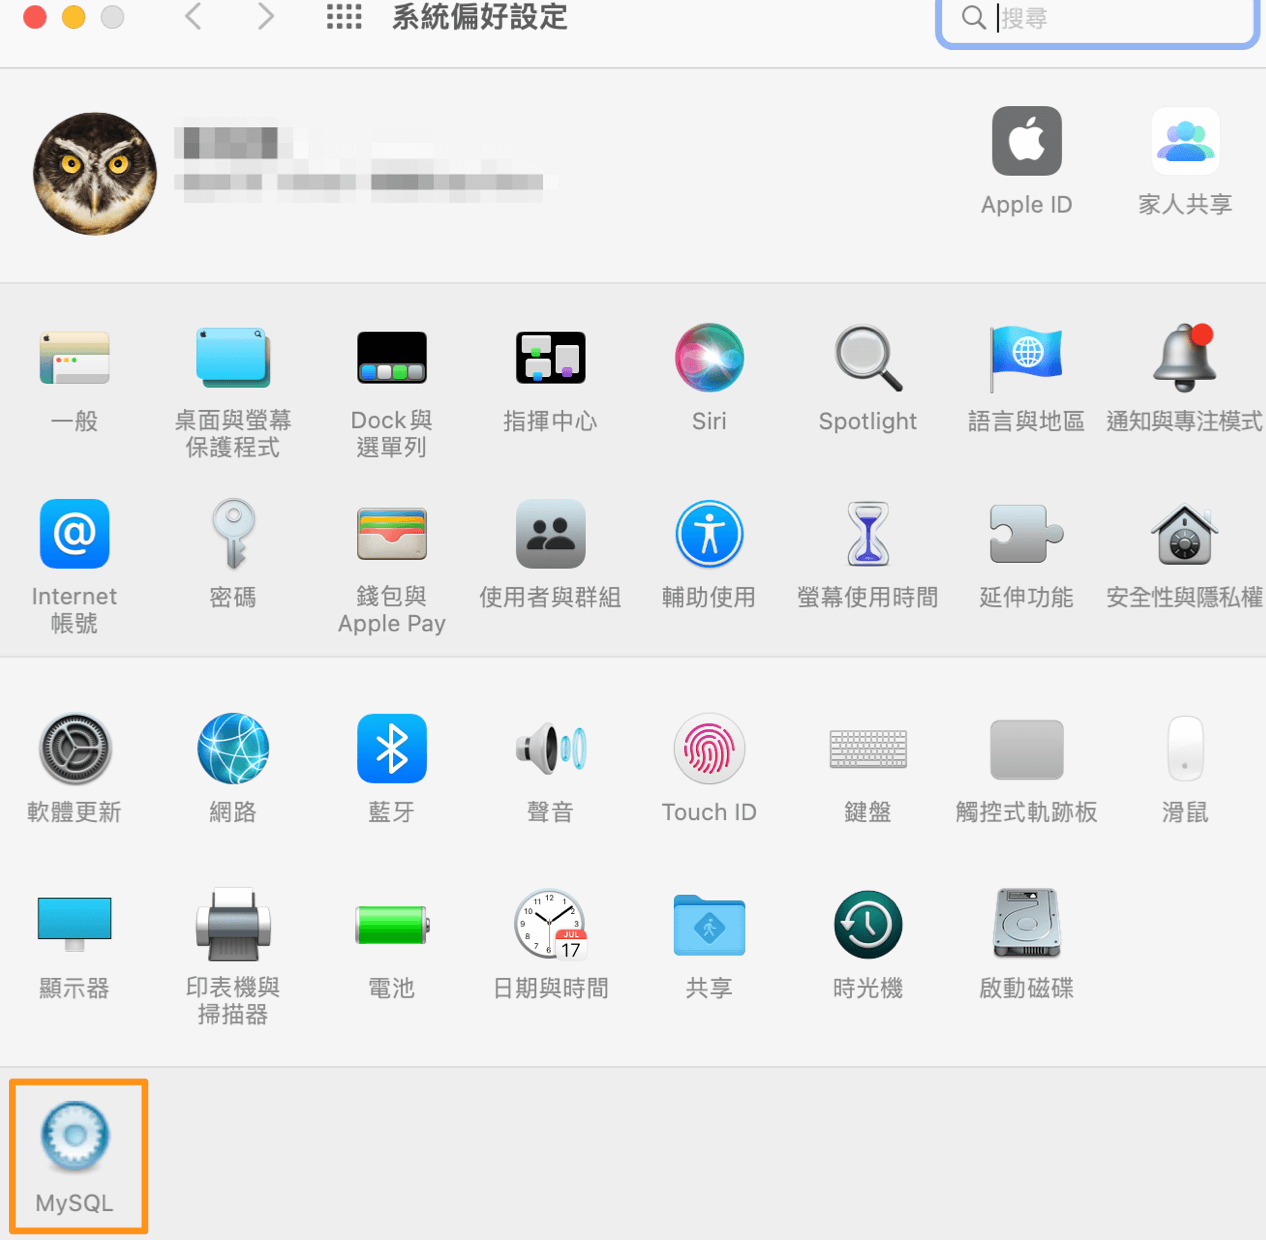
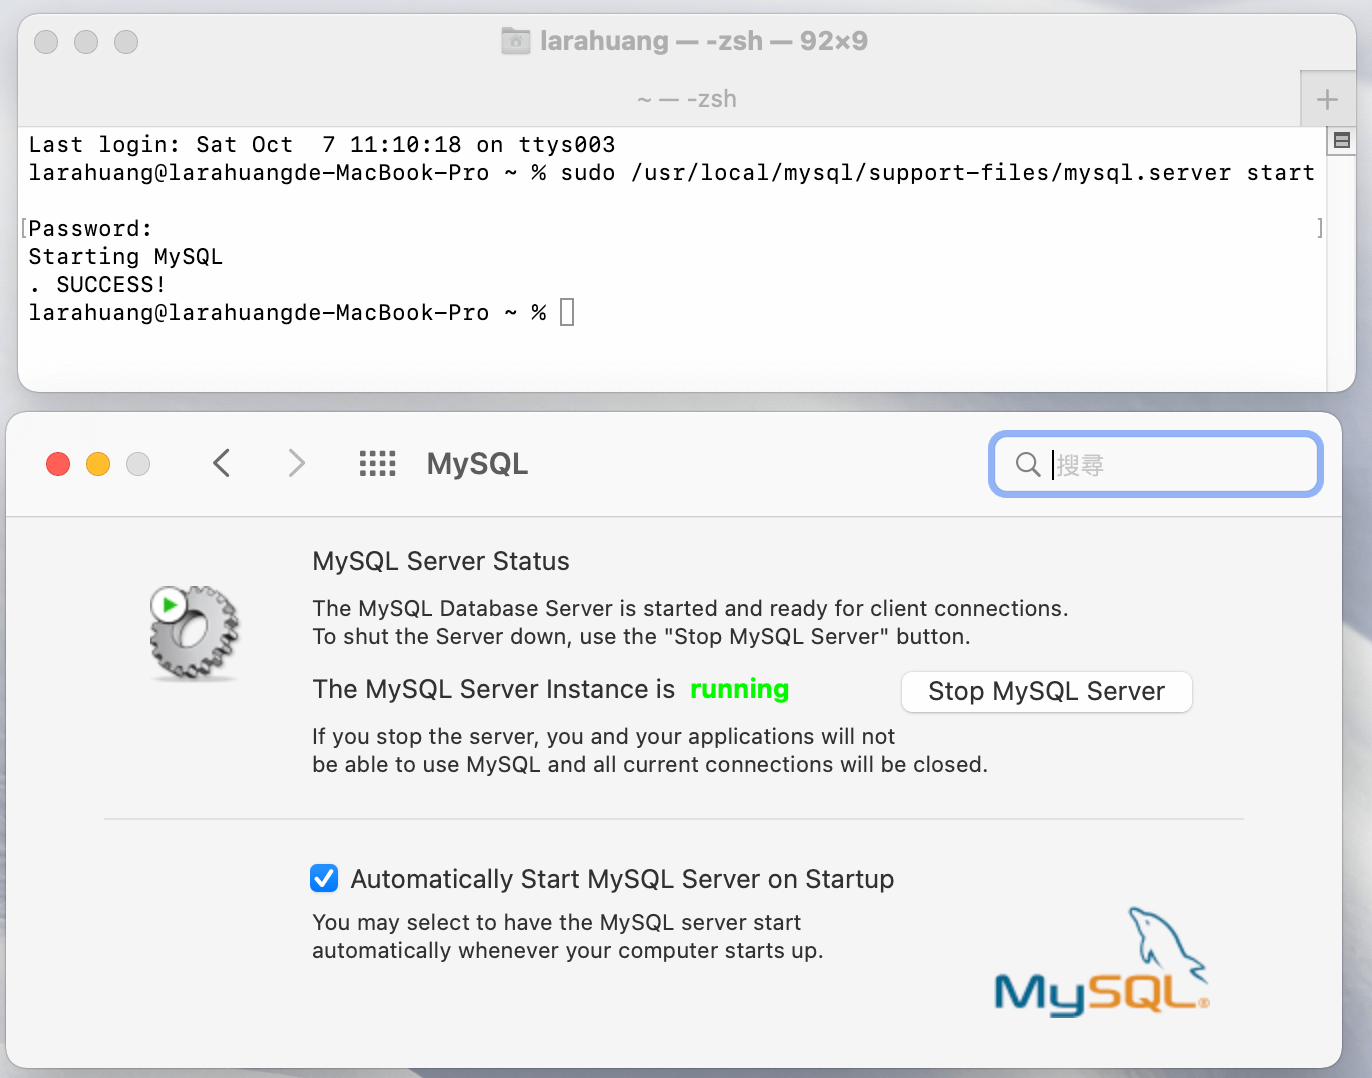
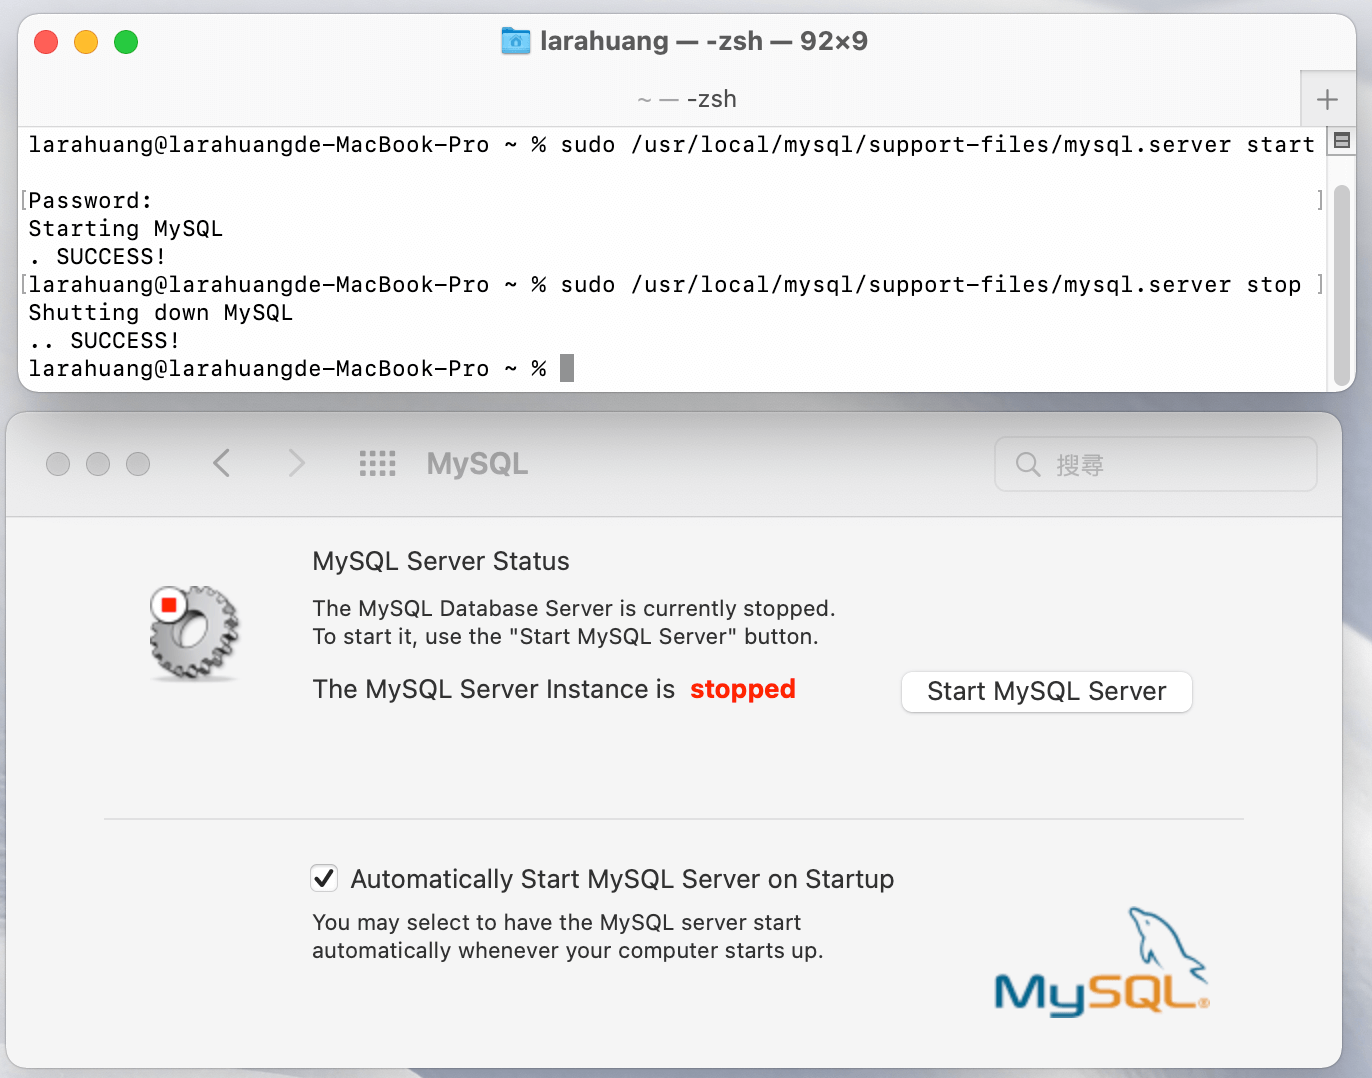
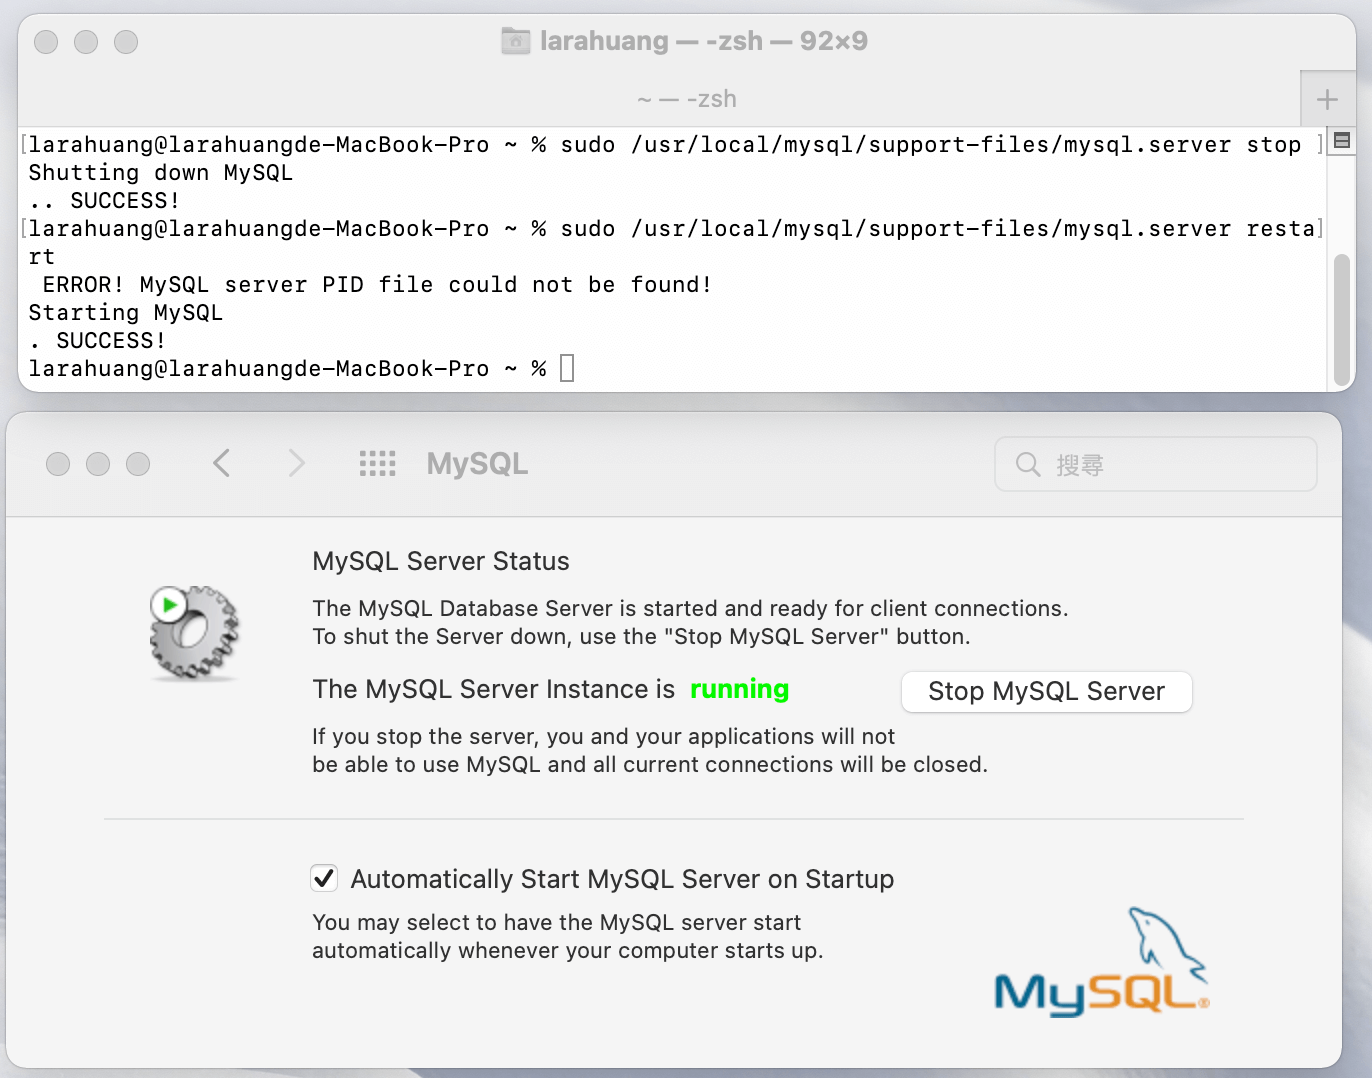
簡介 許可證=>同意 選取目標 安裝類型 安裝權限密碼 獲得安裝權限 獲得初始root密碼 ### mac系統與MySQL控制版面

終端機MySQL指令

啟動MySQL

1
sudo /usr/local/mysql/support-files/mysql.server start
停止MySQL
1
sudo /usr/local/mysql/support-files/mysql.server stop

重新啟動MySQL

1
sudo /usr/local/mysql/support-files/mysql.server restart

連接 MySQL 伺服器與 MySQL 用戶端
Connect MySQL Server with MySQL Client

1
2
/usr/local/mysql/bin/mysql -u root -h 127.0.0.1 -p
密碼

重置密碼 Reset Password (當然要先連接 MySQL 伺服器與 MySQL 用戶端)

1
ALTER USER 'root'@'localhost' IDENTIFIED BY '重置密碼';

初次MySQL使用

STEP1 到MySQL目錄

1
cd /usr/local/mysql/support-files

STEP2 啟動MySQL

1
2
3
4
5
sudo ./mysql.server start
Password:系統密碼
Starting MySQL
Logging to '/usr/local/mysql/data/larahuangde-MacBook-Pro.local.err'.
SUCCESS!

STEP3 cd .. 查看mysql目錄 ls

1
2
3
4
5
6
7
8
9
10
11
12
13
14
15
16
17
18
19
20
21
22
23
24
25
26
27
28
29
cd .. 

larahuang@larahuangde-MacBook-Pro mysql % ls

LICENSE data keyring share
README docs lib support-files
bin include man

cd bin //到bin 資料夾
innochecksum mysqlbinlog
lz4_decompress mysqlcheck
my_print_defaults mysqld
myisam_ftdump mysqld-debug
myisamchk mysqld_multi
myisamlog mysqld_safe
myisampack mysqldump
mysql mysqldumpslow
mysql_client_test_embedded mysqlimport
mysql_config mysqlpump
mysql_config_editor mysqlshow
mysql_embedded mysqlslap
mysql_install_db mysqltest_embedded
mysql_plugin mysqlxtest
mysql_secure_installation perror
mysql_ssl_rsa_setup replace
mysql_tzinfo_to_sql resolve_stack_dump
mysql_upgrade resolveip
mysqladmin zlib_decompress

STEP4 登入mysql =>Welcome to the MySQL

1
2
3
4
5
6
7
8
9
10
11
12
13
14
15
./mysql -u root -h 127.0.0.1 -p

Enter password: 初次安裝時的密碼
//進入MySQL version: 5.7.29
Welcome to the MySQL monitor. Commands end with ; or \g.
Your MySQL connection id is 2
Server version: 5.7.29

Copyright (c) 2000, 2020, Oracle and/or its affiliates. All rights reserved.

Oracle is a registered trademark of Oracle Corporation and/or its
affiliates. Other names may be trademarks of their respective
owners.

Type 'help;' or '\h' for help. Type '\c' to clear the current input statement.

STEP5 更改密碼指令

1
2
3
4
5
6
7
8
//一定要分號
ALTER USER 'root'@'localhost' IDENTIFIED BY '重置密碼';
Query OK, 0 rows affected (0.01 sec)
ERROR 1064 (42000): You have an error in your SQL syntax; check the manual that corresponds to your MySQL server version for the right syntax to use near 'ALTER USER 'root'@'localhost' IDENTIFIED by '新密碼''

//退出
exit
Bye

如何卸載MySQL(終端機指令)

1
2
3
4
5
6
7
sudo rm -rf /usr/local/var/mysql
sudo rm -rf /usr/local/mysql*
sudo rm -rf /Library/StartupItems/MySQLCOM
sudo rm -rf /Library/PreferencePanes/My*
sudo rm -rf /Library/Receipts/mysql*
sudo rm -rf /Library/Receipts/MySQL*
sudo rm -rf /private/var/db/receipts/*mysql*

js 當地時鐘

Html 寫入一個 canvas,js 綁定

1
2
3
4
5
<div class="container">
<div class="content">
<canvas class="canvas" width="500" height="500" ></canvas>
</div>
</div>

js 綁定標籤 canvas,使用其getContext()方法

檢查支援

1
2
3
4
5
6
7
8
9
10
11
12
13
14
15
16
17
18
19
20
21
22
23
24
25
26
27
28
29
30
31
32
33
34
35
36
37
38
39
40
41
42
43
44
45
46
47
48
49
50
51
52
53
54
55
56
57
58
59
60
61
62
63
64
65
66
67
68
69
70
71
72
73
74
75
76
77
78
79
80
81
82
83
84
85
86
87
88
89
var canvas = document.querySelector("canvas");
const ctx = canvas.getContext("2d");
//檢查支援
if (canvas.getContext) {
var ctx = canvas.getContext("2d");
var radius = canvas.height / 2;
console.log('radius1',radius)
ctx.translate(radius, radius);
radius = radius * 0.90
console.log('radius2',radius * 0.90)
//每一秒執行一次函式
setInterval(drawClock, 1000);
}


function drawClock() {
drawFace(ctx, radius);
drawNumbers(ctx, radius);
drawTime(ctx, radius);
}

//塞入時鐘圖案
function drawFace(ctx, radius) {
var grad;
ctx.beginPath();
ctx.arc(0, 0, radius, 0, 2*Math.PI);
ctx.fillStyle = 'white';
ctx.fill();
ctx.strokeStyle = '#00bcd4'; //外框顏色
ctx.lineWidth = radius*0.1;
ctx.stroke();
ctx.beginPath();
ctx.arc(0, 0, radius*0.1, 0, 2*Math.PI);
ctx.fillStyle = '#00bcd4';//中心點顏色
ctx.fill();
}

//塞入1~12的字樣
function drawNumbers(ctx, radius) {
var ang;
var num;
ctx.font = radius*0.15 + "px arial";
ctx.textBaseline="middle";
ctx.textAlign="center";
for(num = 1; num < 13; num++){
ang = num * Math.PI / 6;
ctx.rotate(ang);
ctx.fillStyle = '#3333';//小時的顏色
ctx.translate(0, -radius*0.85);
ctx.rotate(-ang);
ctx.fillText(num.toString(), 0, 0);
ctx.rotate(ang);
ctx.translate(0, radius*0.85);
ctx.rotate(-ang);
}
}


function drawTime(ctx, radius){
var now = new Date();
var hour = now.getHours();
var minute = now.getMinutes();
var second = now.getSeconds();
//hour
hour=hour%12;
hour=(hour*Math.PI/6)+
(minute*Math.PI/(6*60))+
(second*Math.PI/(360*60));
drawHand(ctx, hour, radius*0.5, radius*0.07);
//minute
minute=(minute*Math.PI/30)+(second*Math.PI/(30*60));
drawHand(ctx, minute, radius*0.8, radius*0.07);
// second
second=(second*Math.PI/30);
drawHand(ctx, second, radius*0.9, radius*0.02);
}


function drawHand(ctx, pos, length, width) {
ctx.beginPath();
ctx.strokeStyle = '#3f51b5';//指針顏色
ctx.lineWidth = width;
ctx.lineCap = "round";
ctx.moveTo(0,0);
ctx.rotate(pos);
ctx.lineTo(0, -length);
ctx.stroke();
ctx.rotate(-pos);
}

Canvas Clock Face (畫布時鐘圖案)
Canvas Clock Numbers(畫布時鐘數字)
畫布啟動時鐘

js 點擊鍵盤發出聲音

綁定class叫做 key 的值

1
2
const keys = document.querySelectorAll('.key')
console.log(keys.length) //9

綁定keydown 呼叫函式playsound

document.addEventListener(’keydown’, function(e){ … }, false);
點擊呼叫該函數addEventListener 三考

1
window.addEventListener('keydown', playsound)

keys迴圈

1
2
3
keys.forEach((key) => {
key.addEventListener('click', removeTransition)
})

data attributes 自訂屬性

透過幫html加上data-*自訂屬性

1
2
3
4
5
6
7
8
9
10
11
12
13
14
15
16
17
18
19
//函數playsound
function playsound(e) {
console.log('e',e)
console.log('e.code',e.code) //"e.code" "KeyF"
//透過幫html加上data-*自訂屬性
const key = document.querySelector(`.key[data-key="${e.code}"]`)
console.log('`.key[data-key="${e.code}"]`',`.key[data-key="${e.code}"]`)//".key[data-key='KeyD']"
const audio = document.querySelector(`audio[data-key="${e.code}"]`)
key.classList.add('play')
//
audio.currentTime = 0
audio.play()
}

function removeTransition(e) {
console.log('e.propertyName',e.propertyName)
if (e.propertyName !== 'transform') return
e.target.classList.remove('play')
}

點擊呼叫該函數addEventListener
addEventListener(transitioned,執行的函式)
audio.currentTime
javascript使用add()、remove()、replace()和toggle()方法來改變元素的外觀
classList add()方法來改變元素的外觀
classList remove()方法來改變元素的外觀
classList toggle()方法來改變元素的外觀
Css顯示與transform scale()

Vite vue-i18n TypeScript elementPlus 的坑

安裝版本的選擇

1
npm install vue-i18n@next --save

實踐上必須版本9以上

獨自拆成一個檔案 i18n.ts

引入要用的語系zh,en 為json的檔案
*要把 legacy 設為 false,才可以使用 Composition API
在 src/ 目錄底下,新增 plugins/i18n.ts,設定語系並在main.ts引入

1
2
3
4
5
6
7
8
9
10
11
12
13
14
15
16
17
18
import { createI18n } from 'vue-i18n'
import zh from '../lang/zh-TW.json'
import en from '../lang/en-US.json'

type MessageSchema = typeof zh

const i18n = createI18n<[MessageSchema], 'zh-TW' | 'en-US'>({
legacy: false, // 要把 legacy 設為 false,才可以使用 Composition API
locale: 'zh-TW', //
fallbackLocale: 'zh-TW',
globalInjection: true,//全域注入
messages: {
'zh-TW': zh,
'en-US': en
}
})
//輸出
export default i18n

新增zh-TW.json,en-US.json

在 src/ lang資料夾,新增 zh-TW.json 以及 en-US.json 兩個檔案

1
2
3
4
5
6
7
8
9
10
11
12
13
14
15
16
17
18
19
20
21
22
23
24
25
26
27
28
// zh-TW.json
{
"nav_menu":{
"home":"Home",
"login":"Login",
"register":"Register"
},
"form_validate":{
"PleaseConfirmPassword":"Please confirm password!",
"PleaseEnterPassword":"Please Enter Password!",
"PasswordCannotBeEmpty":"Password cannot be empty.!",
}
}

// zh-TW.json
{
"nav_menu":{
"home":"首頁",
"login":"登入",
"register":"註冊"
},
"form_validate":{
"PleaseConfirmPassword":"請再輸入一次密碼!",
"PleaseEnterPassword":"請輸入電子信箱!",
"PasswordCannotBeEmpty":"密碼不能為空!"
}
}

在 TypeScript 中使用 ESLint

#在 TypeScript 中使用 ESLint

安裝 ESLint

1
npm install eslint --save-dev

安裝 typescript-eslint-parser

由於 ESLint 預設使用 Espree 進行語法解析,無法識別 TypeScript 的一些語法,故我們需要安裝 typescript-eslint-parser,替代掉預設的解析器,別忘了同時安裝 typescript:

1
npm install typescript typescript-eslint-parser --save-dev

由於 typescript-eslint-parser 對一部分 ESLint 規則支援性不好,故我們需要安裝 eslint-plugin-typescript,彌補一些支援性不好的規則。

1
npm install eslint-plugin-typescript --save-dev

建立配置檔案

ESLint 需要一個配置檔案來決定對哪些規則進行檢查,配置檔案的名稱一般是 .eslintrc.js 或 .eslintrc.json。
當執行 ESLint 的時候檢查一個檔案的時候,它會首先嚐試讀取該檔案的目錄下的配置檔案,然後再一級一級往上查詢,將所找到的配置合併起來,作為當前被檢查檔案的配置。
我們在專案的根目錄下建立一個 .eslintrc.js,內容如下:

1
2
3
4
5
6
7
8
9
10
11
12
13
14
15
16
17
18
module.exports = {
parser: 'typescript-eslint-parser',
plugins: [
'typescript'
],
rules: {
// @fixable 必須使用 === 或 !==,禁止使用 == 或 !=,與 null 比較時除外
'eqeqeq': [
'error',
'always',
{
null: 'ignore'
}
],
// 類別和介面的命名必須遵守帕斯卡命名法,比如 PersianCat
'typescript/class-name-casing': 'error'
}
}

以上配置中,我們指定了兩個規則,其中 eqeqeq 是 ESLint 原生的規則(它要求必須使用 === 或 !==,禁止使用 == 或 !=,與 null 比較時除外),typescript/class-name-casing 是 eslint-plugin-typescript 為 ESLint 增加的規則(它要求類別和介面的命名必須遵守帕斯卡命名法,比如 PersianCat)。
規則的取值一般是一個數組(上例中的 eqeqeq),其中第一項是 off、warn 或 error 中的一個,表示關閉、警告和報錯。後面的項都是該規則的其他配置。
如果沒有其他配置的話,則可以將規則的取值簡寫為陣列中的第一項(上例中的 typescript/class-name-casing)。

關閉、警告和報錯的含義如下:
  • 關閉:禁用此規則
  • 警告:程式碼檢查時輸出錯誤資訊,但是不會影響到 exit code
  • 報錯:發現錯誤時,不僅會輸出錯誤資訊,而且 exit code 將被設為 1(一般 exit code 不為 0 則表示執行出現錯誤)

檢查整個專案的 ts 檔案

我們的專案原始檔一般是放在 src 目錄下,所以需要將 package.json 中的 eslint 指令碼改為對一個目錄進行檢查。由於 eslint 預設不會檢查 .ts 字尾的檔案,所以需要加上引數 –ext .ts:

1
2
3
4
5
{
"scripts": {
"eslint": "eslint src --ext .ts"
}
}

在 VSCode 中整合 ESLint 檢查

在編輯器中整合 ESLint 檢查,可以在開發過程中就發現錯誤,極大的增加了開發效率。
要在 VSCode 中整合 ESLint 檢查,我們需要先安裝 ESLint 外掛,點選「擴充套件」按鈕,搜尋 ESLint,然後安裝即可。
VSCode 中的 ESLint 外掛預設是不會檢查 .ts 字尾的,需要在「檔案 => 首選項 => 設定」中,新增以下配置:

1
2
3
4
5
6
7
{
"eslint.validate": [
"javascript",
"javascriptreact",
"typescript"
]
}

使用 AlloyTeam 的 ESLint 配置

ESLint 原生的規則和 eslint-plugin-typescript 的規則太多了,而且原生的規則有一些在 TypeScript 中支援的不好,需要禁用掉。
這裡我推薦使用 AlloyTeam ESLint 規則中的 TypeScript 版本,它已經為我們提供了一套完善的配置規則。

1
npm install --save-dev eslint typescript typescript-eslint-parser eslint-plugin-typescript eslint-config-alloy

在 TypeScript 中使用 TSLint

TSLint 的使用比較簡單,參考官網的步驟安裝到本地即可:

1
npm install --save-dev tslint

建立配置檔案 tslint.json

1
2
3
4
5
6
7
8
9
10
11
12
13
14
{
"rules": {
// 必須使用 === 或 !==,禁止使用 == 或 !=,與 null 比較時除外
"triple-equals": [
true,
"allow-null-check"
]
},
"linterOptions": {
"exclude": [
"**/node_modules/**"
]
}
}

為 package.json 新增 tslint 指令碼

1
2
3
4
5
{
"scripts": {
"tslint": "tslint --project . src/**/*.ts src/**/*.tsx",
}
}

其中 –project . 會要求 tslint 使用當前目錄的 tsconfig.json 配置來獲取型別資訊,很多規則需要型別資訊才能生效。
此時執行 npm run tslint 即可檢查整個專案。

使用 AlloyTeam 的 TSLint 配置
AlloyTeam 為 TSLint 也打造了一套配置 tslint-config-alloy

1
npm install --save-dev tslint-config-alloy

為什麼 ESLint 無法檢查出使用了未定義的變數(no-undef 規則為什麼被關閉了)?
因為 typescript-eslint-parser 無法支援 no-undef 規則。它針對正確的介面定義會報錯。
所以我們一般會關閉 no-undef 規則。
為什麼有些定義了的變數(比如使用 enum 定義的變數)未使用,ESLint 卻沒有報錯?
因為無法支援這種變數定義的檢查。建議在 tsconfig.json 中新增以下配置,使 tsc 編譯過程能夠檢查出定義了未使用的變數:

1
2
3
4
5
6
{
"compilerOptions": {
"noUnusedLocals": true,
"noUnusedParameters": true
}
}
參考
在 TypeScript 中使用 ESLint

Git 錯誤訊息處理

git 出現 fatal: not a git repository (or any of the parent directories)問題

錯誤訊息為:fatal: not a git repository (or any of the parent directories): .git
中譯:找不到 .git 這樣的目錄。

使用 git init 指令

1
git init

remote: Support for password authentication was removed on August 13, 2021.

1
2
3
remote: Support for password authentication was removed on August 13, 2021.
remote: Please see https://docs.github.com/en/get-started/getting-started-with-git/about-remote-repositories#cloning-with-https-urls for information on currently recommended modes of authentication.
fatal: Authentication failed for 'https://github.com/gpg-team/lottery-front.git/'

處理方式:生成令牌

登入git

Settings

選擇 Develop Setting

選擇 Tokens 點選Generate token

全新版本,克隆的时候也在​​​github.com​​前面加个令牌

1
git clone https://(TOKEN)@github.com/網址.git 

全新版本,克隆的时候也在​​​github.com​​前面加个令牌

1
git clone -b <分支名稱> https://<TOKEN>@github.com/網址.git