Vue動態 Class & Style

動態class:綁定HTML class

給 :class (v-bind:class 的縮寫) 傳遞一個物件來動態切換 class
active 是否存在取決於資料屬性 isActive 的真假值

  • :class="{ active: isActive }"
  • active是 css 的樣式,如果是true 加入active
1
2
3
4
5
6
7
8
9
10
11
12
13
14
15
16
17
18
19
20
<template>
<div
class="static"
:class="{ active: isActive }"
>
Class
</div>
<button @click="changeClass">改變Class</button>
</template>


<script setup lang="ts">
import { ref, onMounted ,watchEffect,computed} from 'vue'

const isActive =ref<boolean>(false);
const changeClass =()=>{
isActive.value =!isActive.value;
}
</script>

動態Style:綁定內聯樣式

  • :style="{ color: activeColor, fontSize: fontSize + 'px',backgroundColor: activeColor,}
1
2
3
4
5
6
7
8
9
10
11
12
13
14
15
16
17
18
19
20
21
<template>
<div class="style"
v-bind:style="{ color: activeColor, fontSize: fontSize + 'px',backgroundColor:activeBgColor }">Style</div>
<button class="green" @click="changeStyle">改變style</button>
</template>


<script setup lang="ts">
import { ref, onMounted ,watchEffect,computed} from 'vue'

const activeColor =ref<string>('red');
const activeBgColor =ref<string>('#ddd');
const fontSize =ref<number>(18);

const changeStyle =()=>{
activeColor.value ='blue';
fontSize.value =19;
activeBgColor.value= '#eee';
}
</script>

Vue動態 Class & Style Github

Vite Vue 菜單Active

Vite Vue 菜單active

  • 點擊 獲取 Menu index索引後
  • 讓 menuActive=index時;
  • 判斷 menuActive == index時 li 塞入isActive;
  • isActive 是Class 的樣式
1
2
3
4
5
6
7
8
9
10
11
12
13
14
15
16
17
18
19
20
21
22
23
24
25
26
27
28
29
30
31
32
33
34
35
36
37
38
39
40
41
42
43
44
45
46
<template>
<ul>
<li
v-for="(item,id) in menus"
:key="id"
:class="menuActive == item.id ? 'isActive' : ''"
@click="menuClickActive(item)"
>
{{ item.title }}
</li>
</ul>
</template>


<script setup lang="ts">
import {ref,onMounted} from 'vue';

interface menuType{
id:string,
title:string,
}
const menus =ref<menuType[]>([
{ id:'01',title: '首頁' },
{ id:'03',title: '關於我們' },
{ id:'02',title: '聯絡我們' }
])
const menuActive =ref<string |any>('01')
const menuClickActive =(item:menuType)=>{
menuActive.value=index.id;
}

</script>


<style lang="css">
ul{
display:flex;
li{
display:flex;
margin:auto 10px;
&.isActive{
border-bottom:1px solid #333;
}
}
}
</style>

Vite Vue (語法糖))驗證碼

這裡用到Math.random js隨機亂數與charAt js 回指定位置的字元 功能

  • 定義verification;綁定驗證碼表單v-model.trim="verification"
  • 驗證碼產生函式參數6碼; 0到9,小寫a-z,大寫A-Z;隨機Math.random();charAt() 方法可傳回指定位置的字元
  • 點擊獲得新的驗證碼函式
  • onMounted即產生=>驗證碼產生函式
github 驗證碼
1
2
3
4
5
6
7
8
9
10
11
12
13
14
15
16
17
18
19
20
21
22
23
24
25
26
27
28
29
30
31
32
33
34
35
36
37
38
39
40
41
<template>
<div class="item verification">
<!--綁定驗證碼表單-->
<input v-model.trim="verification">
<!--產生的驗證碼-->
<div class="codeBox">{{code_box}}</div>
<!--點擊產生新的驗證碼-->
<i @click="showCode" class="fa-solid fa-arrows-rotate"></i>
</div>
</template>

<script setup lang="ts">
import { ref , onMounted} from 'vue'
const verification = ref<string>('');

// 驗證碼產生
const code_box =ref<string>('');
const generateCode =(length=6)=>{
//0到9,小寫a-z,大寫A-Z
let chars = "0123456789abcdefghijklmnopqrstuvwxyzABCDEFGHIJKLMNOPQRSTUVWXYZ";

let code = "";
//隨機亂數Math.random()
//charAt() 方法可傳回指定位置的字元

for (var i = 0; i < length; i++) {
code += chars.charAt(Math.floor(Math.random() * chars.length));
}
code_box.value=code;
}

//點擊獲得新的驗證碼
const showCode =() => {
generateCode();
}

onMounted(() => {
generateCode();
});
</script>

參考資料

Vite Vue 語法糖 element_plus 寫法

@修飾符綁在el-form 上=> @keyup.enter 或是 @keyup.enter.native => el-button 或是 el-input均能使用;
Vue3 Element Plus el-button @keyup.enter Enter按鍵 觸發點擊事件
@修飾符綁在el-button 上=> @keyup.enter 或是 @keyup.enter.native 已測試無任何效果
參考資料
@keyup.enter 與@keyup.enter.native 的差別

1
2
3
4
5
6
7
8
9
10
11
12
13
14
15
16
17
18
19
20
21
22
23
24
25
26
27
28
29
30
31
32
33
34
35
36
37
38
39
40
41
42
43
44
45
46
47
48
49
50
51
52
53
54
55
56
57
58
59
60
61
62
63
64
65
66
67
68
69
70
71
72
73
74
75
76
77
78
79
80
81
82
83
84
85
86
87
88
89
90
91
92
93
94
95
96
97
98
99
100
101
102
103
104
105
106
107
108
109
110
111
112
113
114
115
116
117
118
119
120
121
122
123
124
125
126
127
128
129
130
131
132
133
134
135
136
137
138
139
140
141
142
143
144
145
146
147
148
149
150
151
152
153
154
155
156
157
158
159
160
161
162
163
164
165
166
167
168
169
170
171
172
173
174
175
176
177
178
179
180
181
182
183
184
185
186
187
188
189
190
191
192
193
194
195
196
197
198
199
200
201
202
203
204
205
206
207
208
209
210
211
212
213
214
215
216
217
218
219
220
221
222
223
224
225
<template>
<!--:model 表單綁定 ,ref="formRef" 驗證方式-->
<el-form class="auth-form mb30"
:model="loginForms"
label-width="100px"
label-position="left"
ref="formRef"
@keyup.enter="LoginSubmit(formRef)">
<!--電子郵件 => el-form-item,prop 與:rules必須綁定才能夠驗證-->
<el-form-item
prop="email"
label="電子郵件"
:rules="rulesLogin.email"
>
<!--el-input =>v-mode綁定表單-->
<el-input
v-model.trim="loginForms.email"
:placeholder="請輸入電子郵件"
/>
</el-form-item>
<!--密碼 => el-form-item,prop 與:rules必須綁定才能夠驗證-->
<el-form-item class="password" label="密碼" prop="password" :rules="rulesLogin.password">
<!--el-input =>v-mode綁定表單-->
<el-input
:type="passwordVisible === false ? 'password' : 'input'"
v-model.trim="loginForms.password"
placeholder="請輸入密碼"
/>
<i
@click="passwordVisible = !passwordVisible"
:class="passwordVisible === false ? 'icon-eye-blocked': 'icon-eye'"
>
</i>
</el-form-item>
<!--驗證碼 => el-form-item,prop 與:rules必須綁定才能夠驗證-->
<el-form-item label="驗證碼"
prop="verification"
:rules="rulesLogin.verification">
<el-input v-model.trim="loginForms.verification"/>
<div class="codeBox">{{code_box}}</div>
<a class="btn_change" @click="showCode">
<i class="icon-loop2"></i>
</a>
</el-form-item>
<div class="button_group mb-8">
<el-button class="auth-btn" @click="resetForm(formRef)">
取消
</el-button>
<el-button class="auth-btn" @click="LoginSubmit(formRef)">
送出
</el-button>
</div>
</el-form>
</template>

<script setup lang="ts">
import { ref, computed,onMounted } from "vue"
import { useRouter } from "vue-router"
import { ElMessage } from "element-plus"
import { FormInstance } from "element-plus"

// 定義FormInstance為formRef並在 el-form的ref內使用
const formRef = ref<FormInstance>();
// 表單屬性Type
interface loginFormType{
email: string,
password: string,
verification: string,
}
// Login表單數組
const loginForms = ref<loginFormType>({
// username: '',//admin
email: "",
password: "", //admin
verification: "",
})
// 定義密碼表單顯示text
const passwordVisible = ref(false);
// 定義密碼表單顯示text
const checkPasswordVisible = ref(false)
//登入表單屬性Type
interface rulesLoginType{
email: ({
required: boolean;
message: string;
trigger: string;
type?: undefined;
} | {
type: string;
message: string;
trigger: string[];
required?: undefined;
})[];
password: ({
required: boolean;
message: string;
trigger: string;
} | {
min: number;
max: number;
message: string;
trigger: string;
required?: undefined;
})[];
verification: ({
required: boolean;
message: string;
trigger: string;
validator?: undefined;
} | {
validator: (_rule: object, value: string, callback: Function) => void;
trigger: string;
required?: undefined;
message?: undefined;
})[]
}

//登入表單驗證
const rulesLogin =ref<rulesLoginType>(
{
account: [
{required: true,message : '帳號不能為空',trigger : 'blur'},
{ min: 2, max: 30, message: '帳號在2~30字符之間', trigger: "blur" },
],
password : [
{ required: true, message: '密碼不能為空', trigger: "blur" },
{ min: 2, max: 30, message: '密碼必須在2~30字符之間', trigger: "blur" },
],
verification:[
{ required: true, message: '驗證碼不能為空!', trigger: "blur" },
{ validator: checkVerification, trigger: 'blur' }
],
}
)
// 驗證碼產生
const code_box =ref<string>('');
const generateCode =(length=6)=>{
let chars = "0123456789abcdefghijklmnopqrstuvwxyzABCDEFGHIJKLMNOPQRSTUVWXYZ";
let code = "";
for (var i = 0; i < length; i++) {
code += chars.charAt(Math.floor(Math.random() * chars.length));
}
code_box.value=code;
}
//點擊獲得新的驗證碼
const showCode =() => {
generateCode();
}
//驗證碼驗證
const checkVerification =(_rule: object, value: string, callback: Function)=>{
value !== code_box.value?callback(new Error('驗證碼輸入錯誤')):callback();
}
// 登入
const LoginSubmit = (formEl: FormInstance | undefined) => {
if (!formEl) return
formEl.validate(async (valid: any) => {
if (valid) {
try {
let query = {
email: loginForms.value.email,
password: loginForms.value.password,
}
const res = await Login(query);
if (res.status === 200) {
localStorage.setItem("token", res.data.token)
ElMessage({
message: "Success!", type: "success",
});
router.push({ name: "Admin", })
}

} catch (err: any) {
console.log(err)
errorMessage.value = err.response.message;
const error = errorMessage.value
switch (error) {
case "用戶不存在":
ElMessage.error(t("forms.userNull"))
break
case "密碼錯誤 !":
ElMessage.error(t("forms.passwordError"))
break
}
}
} else {
return false
}
})
}
// 重置
const resetForm = (formEl: FormInstance | undefined) => {
if (!formEl) return
formEl.resetFields()
}
onMounted(() => {
generateCode();
})
</script>


<style lang="scss">
.verification{
.el-form-item__content{
display: flex;

.el-input{
width: 65%;
max-width: 65%;
}
.codeBox{
margin-left: 15px;
letter-spacing: 1.8px;
font-size: 14px;
font-weight: bolder;
}
.btn_change{
margin-left: 15px;
font-size: 21px;
font-weight: bolder;
color: #00bcd4;
}

}
}
</style>

參考資料

登入頁改為pinia寫法

安裝 pinia 與引入請參閱
src內新增 store資料夾新增 login.ts

1
2
3
4
5
6
7
8
9
10
11
12
13
14
15
16
17
18
19
20
21
22
23
24
25
26
27
28
29
30
31
32
33
34
35
36
37
38
39
40
41
42
43
44
45
46
47
48
49
50
51
52
53
54
55
56
57
58
59
60
61
62
63
64
65
66
67
68
69
70
71
72
73
74
75
76
77
78
79
80
81
82
83
84
85
86
87
88
89
90
91
92
93
94
95
96
97
98
99
100
101
102
103
104
105
106
107
108
109
//login.ts
import { defineStore } from 'pinia'
import { ref, computed } from 'vue'
import { useRouter } from "vue-router"
import { ElMessage } from "element-plus"
import { Login } from "../api/user"
import { FormInstance } from "element-plus"
import { loginFormType, rulesLoginType} from "../types/loginType"

export const useLoginStore = defineStore('login', () => {
const router = useRouter()
const formRef = ref<FormInstance>();
// Login表單數據
const loginForms = ref<loginFormType>({
email: "",
password: "", //admin
verification: "",
})
// 定義密碼表單顯示text
const passwordVisible = ref(false)
// 定義密碼表單顯示text
const checkPasswordVisible = ref(false)
// 驗證碼產生
const code_box =ref<string>('');
// 驗證碼驗證
const checkVerification =(_rule: object, value: string, callback: Function)=>{
value !== code_box.value?callback(new Error('驗證碼輸入錯誤')):callback();
}
// Login表單驗證
const rulesLogin = computed<rulesLoginType>(() => ({
email: [
{ required: true, message: '不能為空', trigger: "blur" },
{type: "email",message: '不能為空',trigger: ["blur", "change"]},
],
password: [
{ required: true, message: '不能為空', trigger: "blur" },
{ min: 6, max: 30, message: '不能為空', trigger: "blur" },
],

verification:[
{ required: true, message: '驗證碼不能為空!', trigger: "blur" },
{ validator: checkVerification, trigger: 'blur' }
]
}))
// 產生驗證碼
const generateCode =(length=6)=>{
let chars = "0123456789abcdefghijklmnopqrstuvwxyzABCDEFGHIJKLMNOPQRSTUVWXYZ";
let code = "";
for (var i = 0; i < length; i++) {
code += chars.charAt(Math.floor(Math.random() * chars.length));
}
code_box.value=code;
}
// 點擊獲得新的驗證碼
const showCode =() => {
generateCode();
}
const errorMessage = ref<string>('');
// 登入
const LoginSubmit = (formEl: FormInstance | undefined) => {
if (!formEl) return
formEl.validate(async (valid: any) => {
if (valid) {
try {
let query = {
email: loginForms.value.email,
password: loginForms.value.password,
}
const res = await Login(query);
if (res.status === 200) {
localStorage.setItem("token", res.data.token)
ElMessage({
message: "Success!", type: "success",
});
router.push({ name: "Admin", })
}

} catch (err: any) {
console.log(err)
errorMessage.value = err.response.message;
const error = errorMessage.value
switch (error) {
case "用戶不存在":
ElMessage.error('用戶不存在')
break
case "密碼錯誤 !":
ElMessage.error('密碼錯誤 !')
break
}
}
} else {
return false
}
})
}
// 重置
const resetForm = (formEl: FormInstance | undefined) => {
if (!formEl) return
formEl.resetFields()
}
return {
formRef,
loginForms,passwordVisible,checkPasswordVisible,rulesLogin,
code_box,
generateCode,showCode,
errorMessage,
LoginSubmit,resetForm,
}
})

頁面使用
@修飾符綁在el-form 上=> @keyup.enter 或是 @keyup.enter.native => el-button 或是 el-input均能使用;
Vue3 Element Plus el-button @keyup.enter Enter按鍵 觸發點擊事件
@修飾符綁在el-button 上=> @keyup.enter 或是 @keyup.enter.native 已測試無任何效果
參考資料
@keyup.enter 與@keyup.enter.native 的差別

1
2
3
4
5
6
7
8
9
10
11
12
13
14
15
16
17
18
19
20
21
22
23
24
25
26
27
28
29
30
31
32
33
34
35
36
37
38
39
40
41
42
43
44
45
46
47
48
49
50
51
52
53
54
55
56
57
58
59
60
61
62
63
64
65
66
67
68
69
70
71
72
73
<template>
<!--:model 表單綁定 ,ref="formRef" 驗證方式-->
<el-form class="auth-form mb30"
:model="loginForms"
label-width="100px"
label-position="left"
ref="formRef"
@keyup.enter="LoginSubmit(formRef)"
>
<!--電子郵件 => el-form-item,prop 與:rules必須綁定才能夠驗證-->
<el-form-item
prop="email"
label="電子郵件"
:rules="rulesLogin.email"
>
<!--el-input =>v-mode綁定表單-->
<el-input
v-model.trim="loginForms.email"
:placeholder="請輸入電子郵件"
/>
</el-form-item>
<!--密碼 => el-form-item,prop 與:rules必須綁定才能夠驗證-->
<el-form-item class="password" label="密碼" prop="password" :rules="rulesLogin.password">
<!--el-input =>v-mode綁定表單-->
<el-input
:type="passwordVisible === false ? 'password' : 'input'"
v-model.trim="loginForms.password"
placeholder="請輸入密碼"
/>
<i
@click="passwordVisible = !passwordVisible"
:class="passwordVisible === false ? 'icon-eye-blocked': 'icon-eye'"
>
</i>
</el-form-item>
<!--驗證碼 => el-form-item,prop 與:rules必須綁定才能夠驗證-->
<el-form-item label="驗證碼"
prop="verification"
:rules="rulesLogin.verification">
<el-input v-model.trim="loginForms.verification"/>
<div class="codeBox">{{code_box}}</div>
<a class="btn_change" @click="showCode">
<i class="icon-loop2"></i>
</a>
</el-form-item>
<div class="button_group mb-8">
<el-button class="auth-btn" @click="resetForm(formRef)">
取消
</el-button>
<el-button class="auth-btn" @click="LoginSubmit(formRef)">
送出
</el-button>
</div>
</el-form>
</template>

<script setup lang="ts">
//引入pinia
import {storeToRefs} from 'pinia'
import {onMounted } from "vue"
import { useLoginStore } from '../stores/login'
import {validatorMessageType}from "../types/loginType"
//宣告storeLogin
const storeLogin = useLoginStore();
//解構
const {formRef,loginForms,passwordVisible,checkPasswordVisible,rulesLogin,code_box,errorMessage } = storeToRefs(storeLogin);
const { generateCode,showCode,LoginSubmit,resetForm } = storeLogin;

onMounted(() => {
//頁面打開後即載入驗證碼
generateCode();
})
</script>

github

Vue2 methods

1
2
3
4
5
6
7
8
9
10
11
12
13
14
15
16
17
18
19
20
21
22
23
24
25
26
27
28
29
30
31
//Html
<div id="app">
<p>{{ message }}</p>
<button @click="reverseMessage">反轉訊息</button>
</div>

//script
var app = new Vue({
el: '#app',
data: {
message: 'Hello Vue!'
},
methods: {
reverseMessage: function () {
this.message = this.message.split('').reverse().join('')
}
}
})

//Style Scss
button{
background-color:red;
border:1px solid red;
border-radius: 5px;
color:white;
padding:5px 10px;
&:hover{
background-color:#a62525;
border:1px solid #a62525;
}
}

Vue2 安裝與Vue Cli

對於製作原型或學習,你可以這樣使用最新版本:

參閱Vue2官網

1
<script src="https://cdn.jsdelivr.net/npm/vue@2.7.16/dist/vue.js"></script>
1
2
3
4
5
6
7
8
9
10
11
12
13
14
15
16
17
18
19
20
21
22
<!DOCTYPE html>
<html>
<head>
<meta charset="utf-8">
<title>Vue2 </title>
<script src="https://cdn.staticfile.net/vue/2.7.0/vue.min.js"></script>
</head>
<body>
<div id="app">
<p>{{ message }}</p>
</div>

<script>
new Vue({
el: '#app',
data: {
message: 'Hello Vue.js!'
}
})
</script>
</body>
</html>

測試

安裝vue-cli

node 版本 12.13.0 或 14.17.0
Vue CLI 4.x 安裝

1
2
3
4
5
6
7
8
nvm use 14.17.0
npm install -g @vue/cli
# OR
yarn global add @vue/cli

// 檢查版本
vue --version
//@vue/cli 5.0.8

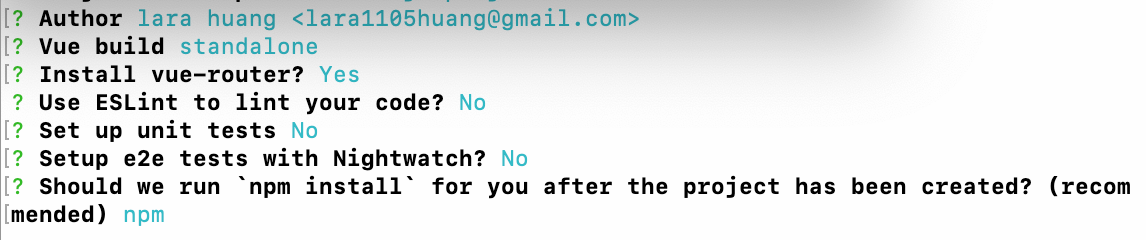
? Project name vue2_project
? Project description A Vue.js project
? Author lara huang xxxxxxxxxx@gmail.com
? Vue build standalone
? Install vue-router? Yes
? Use ESLint to lint your code? No
? Set up unit tests No
? Setup e2e tests with Nightwatch? No
? Should we run npm install for you after the project has been created? (recom
mended) npm
Yes, use NPM

cd 檔案夾名稱
開發中啟動

1
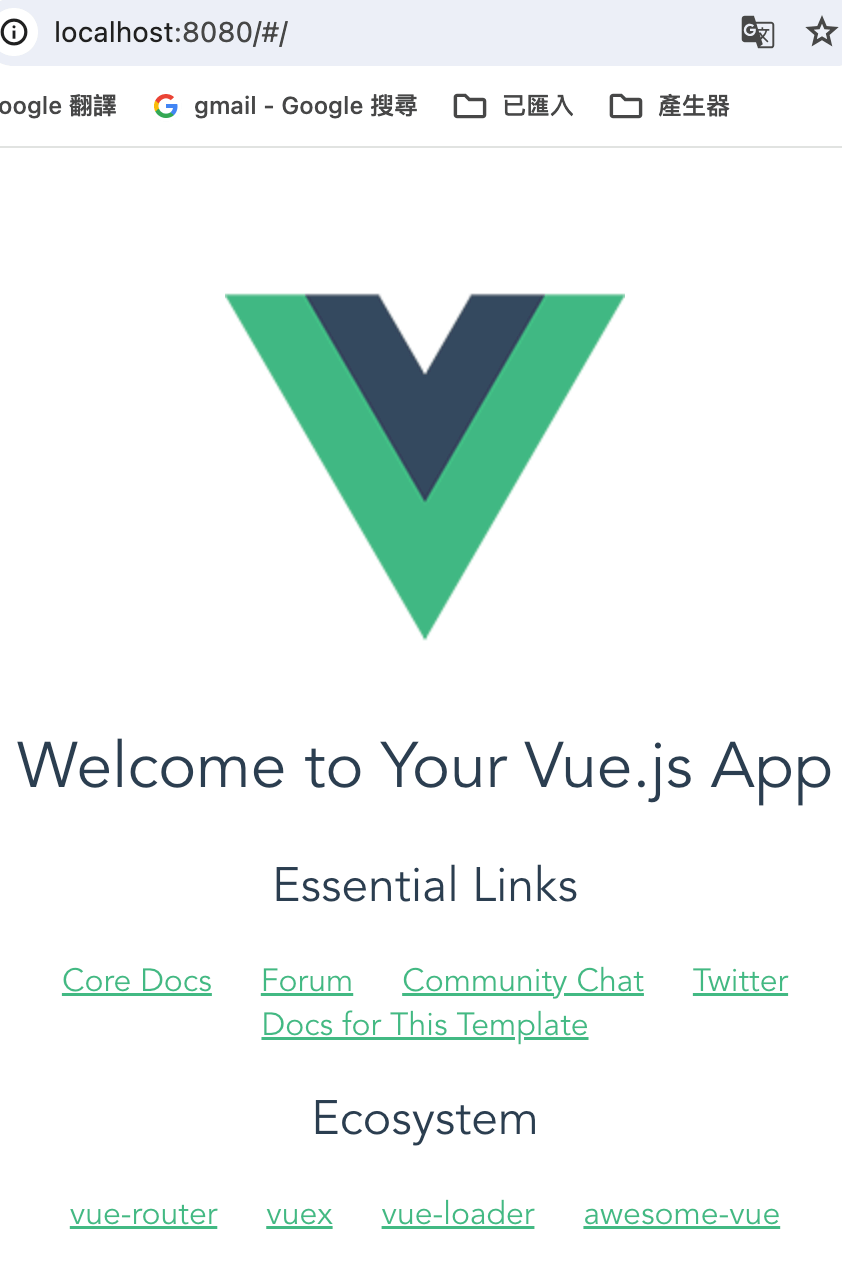
npm run dev
github
參考資料
Vue文件 & 安裝 Vue CLI

Vue2 v-for

1
2
3
4
5
6
7
8
9
10
11
12
13
14
15
16
17
18
19
20
//Html
<div id="app">
<ol>
<li v-for="(item,index,text) in todos" :key="text">
{{ item.text }}
</li>
</ol>
</div>

//script
var app = new Vue({
el: '#app',
data: {
todos: [
{ text: 'Learn JavaScript' },
{ text: 'Learn Vue' },
{ text: 'Build something awesome' }
]
}
})

Vue2 Class & Style

我們可以將一個物件傳遞給 v-bind:class 來動態切換類別:

1
2
3
4
5
6
7
8
9
10
11
12
13
14
15
16
17
18
19
20
21
22
23
24
25
26
27
28
29
30
31
32
33
34
35
36
37
//html
<div id="app">
<div
class="static"
:class="{ active: isActive }"
>Class</div>
<button @click="changeClass">改變Class</button>


<div class="style" v-bind:style="{ color: activeColor, fontSize: fontSize + 'px' }">Style</div>
<button class="green" @click="changeStyle">改變style</button>
</div>
</div>


//script
var app = new Vue({
el: '#app',
data: {
//class
isActive: false,
//style
activeColor: 'red',
fontSize: 30
},
methods: {
changeClass: function () {
const vm=this;
vm.isActive=!vm.isActive;
},
changeStyle: function () {
const vm=this;
vm.activeColor='blue';
vm.fontSize=18;
},
}
})

Vue 菜單active

點擊 獲取 Menu index索引後 讓 menuActive=index時;
判斷 menuActive == index時 li 塞入isActive;
isActive 是Class 的樣式

1
2
3
4
5
6
7
8
9
10
11
12
13
14
15
16
17
18
19
20
21
22
23
24
25
26
27
28
29
30
31
32
33
34
35
36
37
38
39
40
41
42
43
44
45
//Html
<div id="app">
<ul>
<li
v-for="(item,index,id) in menus"
:key="id"
:class="menuActive == index ? 'isActive' : ''"
@click="menuClickActive(index)"
>
{{ item.title }}
</li>
</ul>
</div>


//Style
var app = new Vue({
el: '#app',
data: {
menus: [
{ id:'',title: '首頁' },
{ id:'',title: '關於我們' },
{ id:'',title: '聯絡我們' }
],
menuActive:0,
},
methods: {
menuClickActive : function (index) {
const vm =this;
vm.menuActive =index;
}
}
})
//Style
ul{
display:flex;
li{
display:flex;
margin:auto 10px;
&.isActive{
border-bottom:1px solid #333;
}
}
}

Vue 菜單active

Vue Cdn 菜單active

點擊 獲取 Menu index索引後 讓 menuActive=index時;
判斷 menuActive == index時 li 塞入isActive;
isActive 是Class 的樣式

1
2
3
4
5
6
7
8
9
10
11
12
13
14
15
16
17
18
19
20
21
22
23
24
25
26
27
28
29
30
31
32
33
34
35
36
37
38
39
40
41
42
43
44
45
//Html
<div id="app">
<ul>
<li
v-for="(item,index,id) in menus"
:key="id"
:class="menuActive == index ? 'isActive' : ''"
@click="menuClickActive(index)"
>
{{ item.title }}
</li>
</ul>
</div>


//Style
var app = new Vue({
el: '#app',
data: {
menus: [
{ id:'',title: '首頁' },
{ id:'',title: '關於我們' },
{ id:'',title: '聯絡我們' }
],
menuActive:0,
},
methods: {
menuClickActive : function (index) {
const vm =this;
vm.menuActive =index;
}
}
})
//Style
ul{
display:flex;
li{
display:flex;
margin:auto 10px;
&.isActive{
border-bottom:1px solid #333;
}
}
}

Swiper

swiper 安裝

swiper官網

1
npm install swiper --save

swiper 版本11.0.7

main.ts 引入swiper-bundle.css

官網css說明

  • swiper-bundle.css - 所有 Swiper 樣式,包括所有模組樣式(如導覽、分頁等)
  • swiper-bundle.min.css 壓縮的全部Swiper 樣式
檔案node_modules/swiper/swiper-bundle.css另存到@/assets/swiper-bundle.css 並且到main.ts全局加入
1
import '@/assets/swiper-bundle.css';

SwiperSlide props

  • 是 Swiper 幻燈片內部組件的另一個鉤子,用於獲取幻燈片資料(與 SwiperSlide 插槽道具中的資料相同)
    is one more hook for components inside of Swiper slides to get the slide data (same data as in SwiperSlide slot props)
  • - 元素將會被加入到 swiper-container 的開頭
    - element will be added to the beginning of swiper-container
  • -(預設)- 元素將添加到 swiper-container 的末尾
    (default) - element will be added to the end of swiper-container
  • - 元素將會被加入到 swiper-wrapper 的開頭
    - element will be added to the beginning of swiper-wrapper
  • - 元素將會被加入到 swiper-wrapper 的末尾
    - element will be added to the end of swiper-wrapper
1
2
3
4
5
6
7
8
9
10
11
12
13
14
15
16
17
18
19
20
21
22
23
24
25
26
27
28
29
30
31
32
33
34
35
36
37
38
39
40
41
42
43
<template>
<swiper
:modules="modules"
:slides-per-view="1"
:space-between="50"
:spaceBetween="30"
:effect="'fade'"
:loop="true"
:autoplay="{ delay: 4000, disableOnInteraction: false }"

@swiper="onSwiper"
@slideChange="onSlideChange"
:pagination="pagination"
>
<swiper-slide>Slide 1

</swiper-slide>
<swiper-slide>Slide 2</swiper-slide>
<template v-slot:container-start><span>Start</span></template>
<template v-slot:container-end><span>End</span></template>
<template v-slot:wrapper-start><span>One</span></template>
<template v-slot:wrapper-end><span>Two</span></template>
</swiper>
</template>

<script setup lang="ts">
import { Swiper, SwiperSlide } from 'swiper/vue';
import { Autoplay, Pagination, Navigation, Scrollbar }from 'swiper/modules';

const modules = [Autoplay, Pagination, Navigation, Scrollbar];
const pagination ={
clickable: true,
renderBullet: function (index:any, className:any) {
return '<span class="' + className + '">' + (index + 1) + '</span>';
},
}
const onSwiper = (swiper:any) => {
console.log(swiper);
};
const onSlideChange = () => {
console.log('slide change');
};
</script>

swiper參數

swiper參數

參數解釋備註
Pagination控制是否可以點選圓點指示器切換輪播分頁
Navigation 定義左右切換箭頭
Autoplay是否自動輪播{delay: 5000}
loop是否循環播放
slides-per-view 控制一次顯示幾張輪播圖
space-between 輪播圖之間的距離
allya11y 參數或布林值 true 的對象
allowSlideNext設定為 false 以停用滑動到下一個投影片方向(向右或底部) 預設是true
allowTouchMove如果為 false,則切換投影片的唯一方法是使用外部 API 函數,例如 SlidePrev 或 SlideNext預設是true
autoHeight設定為 true ,滑桿包裝器將調整其高度以適應目前活動投影片的高度預設是false
breakpoints允許為不同的響應斷點(螢幕尺寸)設定不同的參數。 並非所有參數都可以在斷點中更改,只有那些不需要不同佈局和邏輯的參數才可以更改,例如slidesPerView、slidesPerGroup、spaceBetween、grid.rows。 諸如loop和effect之類的參數將不起作用 object,
1
2
3
4
5
6
7
8
9
10
11
12
13
14
breakpoints: {
320: {
slidesPerView: 2,
spaceBetween: 20
},
480: {
slidesPerView: 3,
spaceBetween: 30
},
640: {
slidesPerView: 4,
spaceBetween: 40
}
}
cardsEffect允許為不同的響應斷點(螢幕尺寸)設定不同的參數。 並非所有參數都可以在斷點中更改,只有那些不需要不同佈局和邏輯的參數才可以更改,例如slidesPerView、slidesPerGroup、spaceBetween、grid.rows。 諸如loop和effect之類的參數將不起作用 具有卡片效果參數的對象
1
2
3
4
effect: 'cards',
cardsEffect: {
// ...
},
breakpointsBase ase 斷點(測試版)。 可以是窗戶或容器。 如果設定為視窗(預設),則斷點鍵表示視窗寬度。 如果設定為容器,則斷點鍵被視為滑動器容器寬度
centerInsufficientSlides 啟用後,如果幻燈片數量少於slidesPerView,它會將幻燈片居中。 不適合用於循環模式和 grid.rows 預設為false
centeredSlides 如果為 true,則活動投影片將居中,而不是始終位於左側。 預設為false
centeredSlidesBounds 如果為 true,則活動投影片將會居中,而不是在滑桿的開頭和結尾加上間隙。 必需的 centeredSlides:true。 不適合與循環或分頁一起使用 預設為false
containerModifierClass 修飾符CSS類別的開頭,可以根據不同的參數添加到swiper容器中 'swiper-'
controller 具有控制器參數的物件或布林 true 以使用預設設定啟用 控制器
1
2
3
controller: {
inverse: true,
},
coverflowEffect 具有 Coverflow 效果參數的物件。
1
2
3
4
5
effect: 'coverflow',
coverflowEffect: {
rotate: 30,
slideShadows: false,
},
createElements 啟用後,Swiper 將自動使用 swiper-wrapper 元素包裹投影片,並將建立啟用的導覽、分頁和捲軸所需的元素(使用各自的 params 物件或布林值 true)) 預設false
creativeEffect
1
2
3
4
5
6
7
8
9
10
11
effect: 'creative',
creativeEffect: {
prev: {
// will set `translateZ(-400px)` on previous slides
translate: [0, 0, -400],
},
next: {
// will set `translateX(100%)` on next slides
translate: ['100%', 0, 0],
},
},
cssMode 預設false 啟用後,它將使用現代 CSS Scroll Snap API。 它不支援 Swiper 的所有功能,但可能會在簡單的配置中帶來更好的效能。 這是啟用時不支援的:
立方體效果
速度參數可能沒有作用 所有與過渡開始/結束相關的事件(請改用slideChange) SlidesPerGroup 的支援有限 模擬觸控沒有效果,用滑鼠「拖曳」不起作用 抵抗沒有任何影響 允許投影片上一頁/下一頁 滑動處理程序 如果您將其與其他效果(尤其是 3D 效果)一起使用,則需要使用
元素包裹投影片的內容。 如果您在投影片上使用任何自訂樣式(例如背景顏色、邊框半徑、邊框等),則應在 swiper-slide-transform 元素上設定它們。
1
2
3
4
5
6
7
8
9
10
11
12
13
14
15
16
17
<div class="swiper">
<div class="swiper-wrapper">
<div class="swiper-slide">
<!-- wrap slide content with transform element -->
<div class="swiper-slide-transform">
... slide content ...
</div>
</div>
...
</div>
</div>
<script>
const swiper = new Swiper('.swiper', {
effect: 'flip',
cssMode: true,
});
</script>
cubeEffect 具有立方體效果參數的對象
1
2
3
4
effect: 'cube',
cubeEffect: {
slideShadows: false,
},
direction 可以是“水平”或“垂直”(對於垂直滑塊)。
1
'horizontal' | 'vertical'
edgeSwipeDetection string | boolean 預設是false 啟用釋放 Swiper 事件以在應用程式中進行回掃工作。 如果設定為“阻止”,那麼它將阻止系統向後滑動導航。 此功能僅適用於「觸控」事件(而不是指標事件),因此它適用於 iOS/Android 設備,不適用於具有指標(觸控)事件的 Windows 裝置。
edgeSwipeThreshold number:20 從螢幕左邊緣開始釋放觸控事件以便在應用程式中向後滑動的區域(以像素為單位)
effect 過渡效應:'slide', 'fade', 'cube', 'coverflow', 'flip' or 'creative'