Vite React router

安裝react-router

Single Page Application,中文又稱單頁式應用程式( SPA)

1
npm install --save react-router-dom@6.4.1

React Router 起手式

  • HashRouter用於 Web 瀏覽器,因為某些原因不應(或不能)將 URL 發送到服務器。
打開main.jsx檔案
  1. 引入 import { HashRouter } from "react-router-dom"
  2. HashRouter 是一個元件概念,接著只需要使用它將整個 < App /> 包起來即可
1
2
3
4
5
6
7
8
9
10
11
12
13
14
import * as React from "react";
import * as ReactDOM from "react-dom";
import { HashRouter } from "react-router-dom";
import App from './App'
import './index.css'

const root=ReactDOM.createRoot(document.getElementById('root'));
root.render(
<React.StrictMode>
<HashRouter>
<App />
</HashRouter>
</React.StrictMode>
)

以上成功引入了 React Router

React Router 基本使用

使用 Route

  • path:定義路徑
  • element:定義對應的元件
1
<Route path="/todolist" element={ <ToDoList/> }>

< Route > 只能包在 < Routes > 底下使用,因此正確來講必須這樣寫才對

1
2
3
4
5
6
7
8
9
10
11
12
13
14
15
16
17
18
import React from 'react'
import { HashRouter, Route, Routes } from "react-router-dom";
import ReactDOM from 'react-dom/client'
import App from './App'
import './index.css'
import ToDoList from "./TodoList";

const root=ReactDOM.createRoot(document.getElementById('root'));
root.render(
<React.StrictMode>
<HashRouter>
<Routes>
<Route path="/" element={ <App /> } />
<Route path="/todolist" element={ <ToDoList /> } />
</Routes>
</HashRouter>
</React.StrictMode>
)

重新 npm run dev

打開http://localhost:3000/#/todolist

巢狀路由

路徑位置App.jsx

  • 載入import { Link } from "react-router-dom"
  • Link to="/"
App=>載入
1
2
3
4
5
6
7
8
9
10
11
12
13
14
15
16
17
18
19
20
21
22
23
24
25
26
import { Outlet, Link } from 'react-router-dom';

const App = () => {
return (
<>
<nav className="px-5 flex items-center h-[60px] bg-indigo-500 text-white">
<h1 className="mr-auto text-2xl">React TodoList</h1>
<ul className="flex">
<li className="mr-3">
<Link to="/" className="border p-3 hover:bg-indigo-600 duration-500">Home</Link>
</li>
<li className="mr-3">
<Link to="/todolist" className="border p-3 hover:bg-indigo-600 duration-500">ToDoList</Link>
</li>
<li className="mr-3">
<Link to="/admin" className="border p-3 hover:bg-indigo-600 duration-500">Admin</Link>
</li>
</ul>
</nav>
<h1>App</h1>
<Outlet />
</>
)
}

export default App;

路徑內容main.jsx
以下App Route 包裹 ToDoList元件
< Route path=”/“ element={} >
<Route path=”todolist” element={ } >
< /Route>
以下Admin Route 包裹 AdminProducts元件
< Route path=”/admin” element={} >
<Route path=”products” element={ } >
< /Route>

1
2
3
4
5
6
7
8
9
10
11
12
13
14
15
16
17
18
19
20
21
22
23
24
25
import React from 'react'
import ReactDOM from 'react-dom/client'
import { HashRouter, Route, Routes } from "react-router-dom";
import App from './App'
import './index.css'

import ToDoList from "./views/ToDoList";
import Admin from "./views/Admin";
import AdminProducts from './views/AdminProducts';

const root = ReactDOM.createRoot(document.getElementById('root'));
root.render(
<React.StrictMode>
<HashRouter>
<Routes>
<Route path="/" element={<App />} >
<Route path="todolist" element={ <ToDoList /> } />
</Route>
<Route path="/admin" element={ <Admin /> } >
<Route path="products" element={<AdminProducts /> } />
</Route>
</Routes>
</HashRouter>
</React.StrictMode>
)

Admin =>載入

1
2
3
4
5
6
7
8
9
10
11
12
13
14
15
16
17
18
19
20
21
22
23
import { Outlet, Link } from 'react-router-dom';

const Admin = () => {
return (
<>
<nav className="px-5 flex items-center h-[60px] bg-indigo-500 text-white">
<h1 className="mr-auto text-2xl">React TodoList</h1>
<ul className="flex">
<li className="mr-3">
<Link to="/admin" className="border p-3 hover:bg-indigo-600 duration-500">Admin</Link>
</li>
<li className="mr-3">
<Link to="/admin/products" className="border p-3 hover:bg-indigo-600 duration-500">AdminProducts</Link>
</li>
</ul>
</nav>
<h1>Admin</h1>
<Outlet />
</>
)
}

export default Admin;

NavLink 切換頁面的方式

檔案App.jsx,將 Link 通通改成 NavLink

<NavLink to=”/“ className={({ isActive }) =>
[
‘border p-3 hover:bg-indigo-600 duration-500’,
isActive ? ‘router-link-active’ : null
].join(‘ ‘)
}>Home

1
2
3
4
5
6
7
8
9
10
11
12
13
14
15
16
17
18
19
20
21
22
23
24
25
26
27
28
29
30
31
32
33
import { Outlet, Link ,NavLink} from 'react-router-dom';

const App = () =>
{

return (
<>
<nav className="px-5 flex items-center h-[60px] bg-indigo-500 text-white">
<h1 className="mr-auto text-2xl">React TodoList</h1>
<ul className="flex">
<li className="mr-3">
<NavLink to="/" className={({ isActive }) =>
[
'border p-3 hover:bg-indigo-600 duration-500',
isActive ? 'router-link-active' : null
].join(' ')
}>Home</NavLink>
</li>
<li className="mr-3">
<Link to="/todolist" className="border p-3 hover:bg-indigo-600 duration-500">ToDoList</Link>
</li>
<li className="mr-3">
<Link to="/admin" className="border p-3 hover:bg-indigo-600 duration-500">Admin</Link>
</li>
</ul>
</nav>
<h1>App</h1>
<Outlet />
</>
)
}

export default App;

檔案index.css新增以下

1
2
3
.router-link-active {
@apply bg-indigo-800;
}

React Router - Hook

//載入
import { useEffect } from “react”;
常用的 React Router Hook

  • useLocation: 載入
  • useParams: 載入
  • useNavigate: 載入
  • useRoutes: 載入

useLocation

在App.jsx內舉例

1
2
3
4
5
6
7
8
9
10
11
12
13
14
15
16
17
18
19
20
21
22
//載入
import { useEffect } from "react";
import { useLocation } from "react-router";

const App = () =>
{
const { hash, key, pathname, search, state } = useLocation();
useEffect(() => {
console.log('hash:', hash); // hash: #products
console.log('key:', key); // key: ry5x4mjc
console.log('pathname:', pathname); // pathname: /products
console.log('search:', search); // search: ?q=ray
console.log('state:', state); // state: { products: { id: '1', name: 'QQ 產品' } }
},[]);

return (
<>
<div>App</div>
</>
)
}
export default App;

useParams 動態參數

1
2
3
4
5
6
7
8
9
10
11
12
13
14
15
16
17
import { useEffect } from "react";
import { useParams,Navigate } from 'react-router-dom';

const App = () =>
{
const { id } = useParams();
useEffect(() => {
console.log('params id:', id); // params id: 123
},[]);

return (
<>
<div>App</div>
</>
)
}
export default App;

useNavigate 重新導向

1
2
3
4
5
6
7
8
9
10
11
12
13
14
15
16
17
18
19
20
21
22
23
24
25
26
27
28
29
30
31
32
33
34
35
36
import { useEffect } from "react";
import { useNavigate } from 'react-router-dom';

const App = () =>
{
const navigate = useNavigate();
useEffect(() => {
console.log('params id:', id); // params id: 123
},[]);

return (
<>
<h1>Products</h1>
<button
className="border-1 bg-indigo-500 p-3 text-white"
onClick={ () => navigate('/products/123')}
>
點我跳轉
</button>
<button
className="border-1 bg-indigo-500 p-3 text-white"
onClick={ () => navigate(-1) }
>
前一頁
</button>
<button
className="border-1 bg-indigo-500 p-3 text-white"
onClick={ () => navigate(1) }
>
後一頁
</button>
<Outlet />
</>
)
}
export default App;

Lazy Loading:可以將我們的程式碼分割成不同的 chunk,然後在你需要或請求的時候才去載入相對應檔案

將以上改寫,新增routes資料夾index.jsx

  • 載入lazy
  • 載入useRoutes
  • 頁面載入與lazy寫法
1
2
3
4
5
6
7
8
9
10
11
12
13
14
15
16
17
18
19
20
21
22
23
24
25
26
27
28
29
30
31
32
33
34
35
36
37
38
//載入lazy
import { lazy } from 'react';
//載入useRoutes
import { useRoutes } from 'react-router-dom';
//頁面載入,路由懶加載
const App = lazy(() => import('../App'));
const ToDoList = lazy(() => import('../views/toDoList'));
const Products = lazy(() => import('../views/Products'));
const Product = lazy(() => import('../views/Product'));
const Admin = lazy(() => import('../views/admin/Admin'));

const routes = [
{
path: '/',
element: <App />,
},
{
path: '/todoList',
element: <ToDoList />,
},
{
path: "/product/:id",
element: <Product />,
},
{
path: '/admin',
element: <Admin />,
//巢狀
children: [
{
path: 'products',
element: <Products />,
}
],
}
];

export default () => useRoutes(routes);

在views /Product.jsx內
載入useParams
const { id } = useParams();

1
2
3
4
5
6
7
8
9
10
11
12
13
14
15
import { useEffect } from "react";
import { useParams } from 'react-router-dom';
const Product = () =>{
const { id } = useParams();
useEffect(() => {
console.log('params id:', id);
},[]);
return (
<div>
<p className="text-center text-3xl mt-20">The post ID is {id}</p>
</div>
)
}

export default Product
Vite React Tailwind CSS

Vite React 安裝 Tailwind CSS

Tailwind

1
npm install --save tailwindcss postcss autoprefixer

建立Tailwind CSS config & PostCSS config

1
npx tailwindcss init -p

Created Tailwind CSS config file: tailwind.config.js
Created PostCSS config file: postcss.config.js

專案底下會創建出 tailwind.config.cjs 與 postcss.config.cjs 兩個檔案

打開 tailwind.config.js
加入
“./index.html”,
“./src/**/*.{js,ts,jsx,tsx}”,

1
2
3
4
5
6
7
8
9
10
11
12
13
/** @type {import('tailwindcss').Config} */
export default {
content: [
"./index.html",
"./src/**/*.{js,ts,jsx,tsx}",
],
theme: {
extend: {},
},
plugins: [],
}


index.css 內容全部刪除,改成以下

1
2
3
@tailwind base;
@tailwind components;
@tailwind utilities;

Vite React第一個專案與環境變數

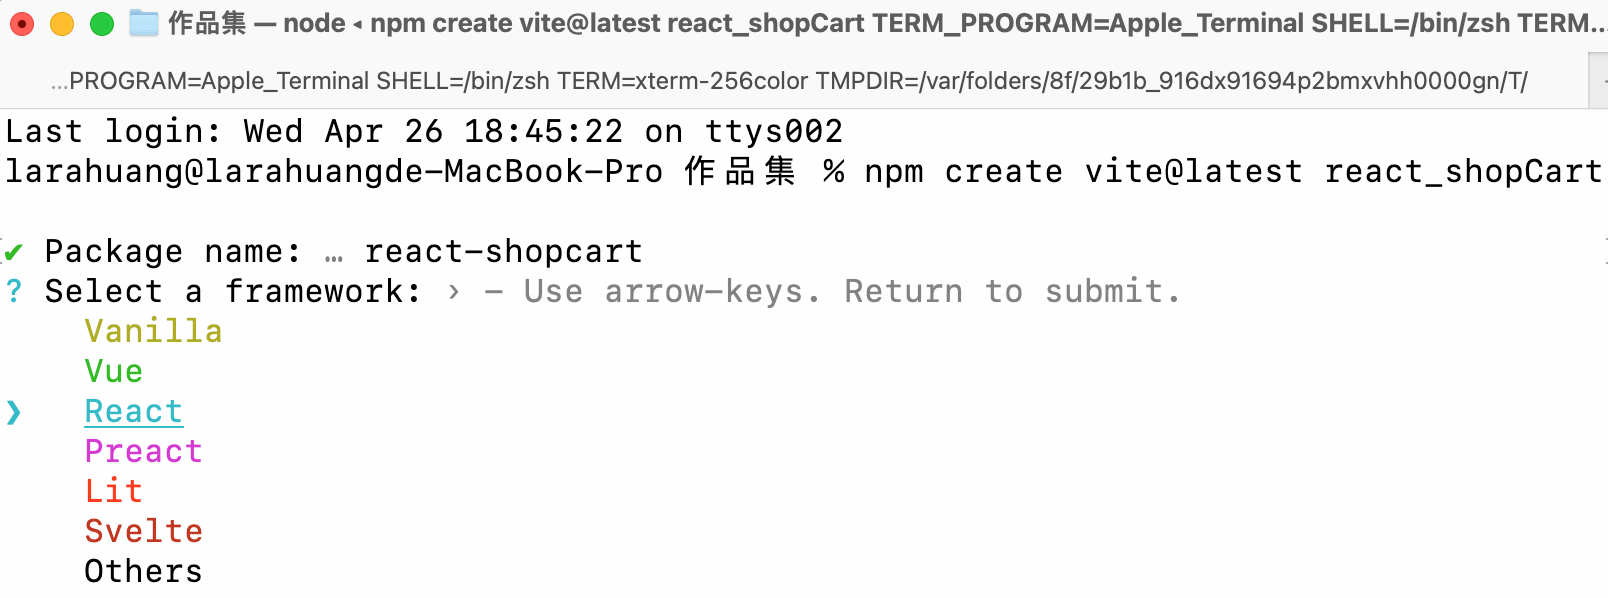
使用終端機 vite 安裝react

Vite 需要在 Node.js 版本 14.18+、16+
vite版本必須使用3.1.0

1
npm create vite@3.1.0 專案名稱
  1. Select a framework:React
  2. Select a variant:Javascript
1
2
3
4
5
cd 專案名稱

npm install
//啟動
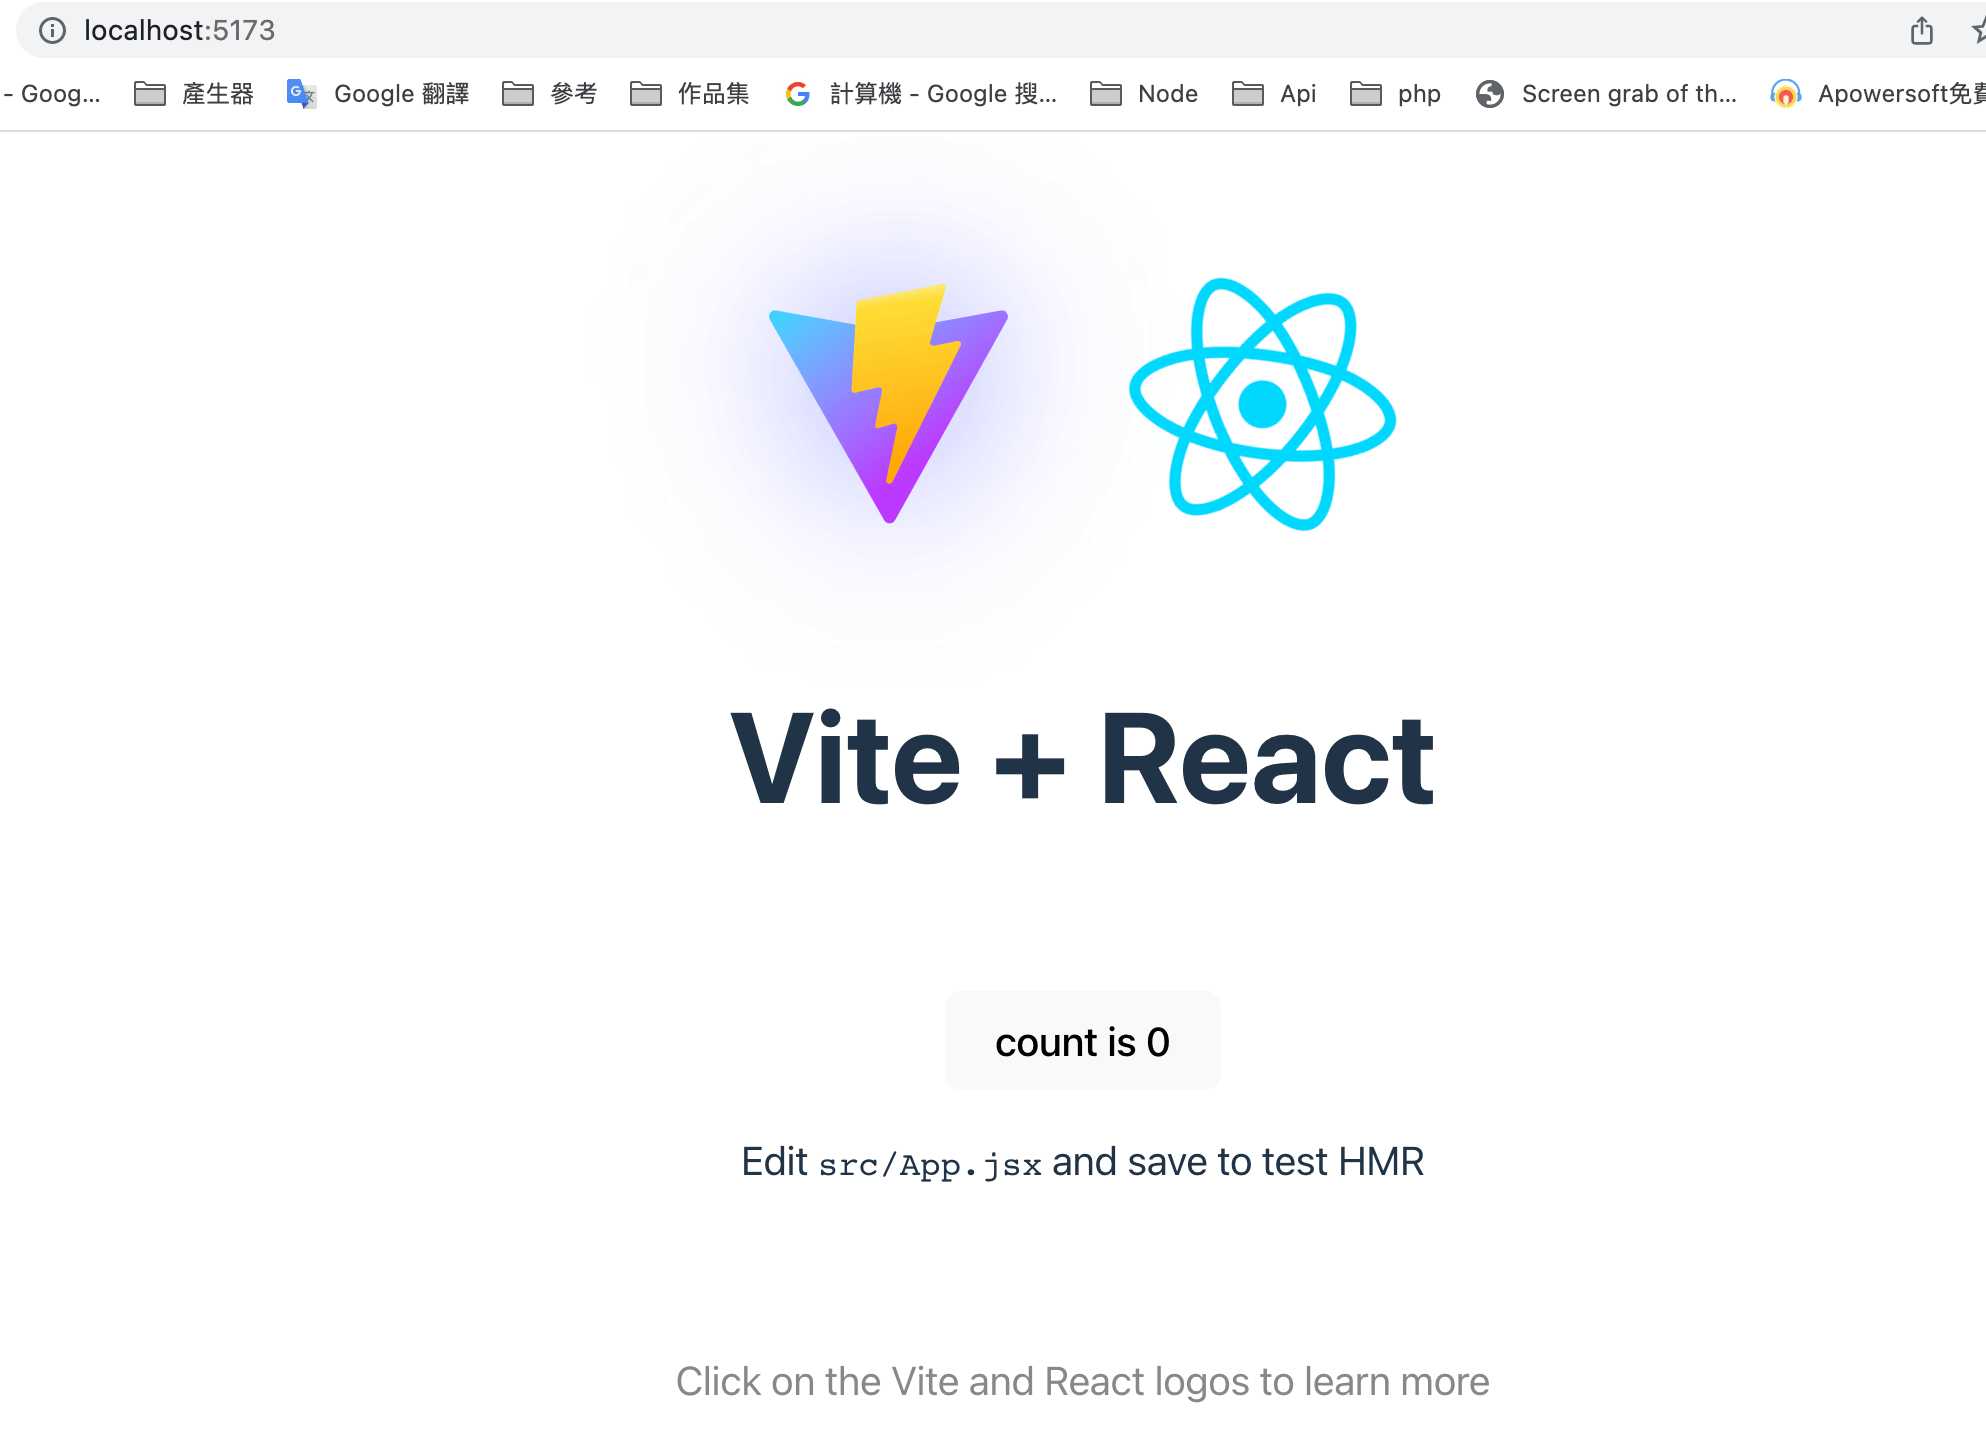
npm run dev

http://localhost:5173/

環境變數設定

修改vite.config.js 檔案,加入以下

  • 載入import path from "path"
  • 載入import { resolve } from 'path'
  • export default defineConfig內新增envDir: path.resolve(__dirname, "./env")
1
2
3
4
5
6
7
8
9
10
11
12
13
14
15
16
17
import { defineConfig } from 'vite'
import react from '@vitejs/plugin-react'
import path from "path"
import { resolve } from 'path';

// https://vitejs.dev/config/
export default defineConfig({
plugins: [react()],
base: "/",
resolve: {
alias: {
'@': resolve(__dirname, '/src')
}
},
envDir: path.resolve(__dirname, "./env")
})

在專案內新增env資料夾,資料夾內新增:.env.development,.env.production,.env.staging

開發端環境.env.development

1
VITE_API_URL = '開發端環境Api網址'

正式主機位置.env.production

1
2
VITE_API_URL = '正式主機位置Api網址'

測試環境.env.staging

1
2
VITE_API_URL = '測試環境位置Api網址'

使用

1
import.meta.env.VITE_API_URL

Node express Generator環境安裝與解析

使用 Express-Generator 來自動產生環境

node版本 14.20.1
全域方法安裝express-generator
在 Express 4.16 時,將 body-parser 改為 內建選項 ,所以不需要進行安裝,但如果是 4.16 之前的版本則需要透過 npm 來安裝。

1
npm install express-generator -g

项目初始化:專案名稱

1
express -e 專案名稱

cd 專案名稱

1
2
到專案
cd 專案名稱

//啟動

1
2
npm start

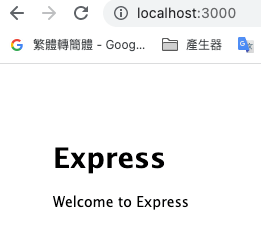
到此網址觀看
http://localhost:3000

解析資料夾內容 tree

1
2
3
4
5
6
7
8
9
10
11
12
13
14
15
16
17
┌── app.js
├── bin
│ └── www // 程式進入點
├── package-lock.json
├── package.json
├── public
│ ├── images
│ ├── javascripts
│ └── stylesheets
│ └── style.css
├── routes // 路由
│ ├── index.js
│ └── users.js
└── views
├── error.ejs
├── index.ejs

bin/www 是整個程式的進入點,

1
2
3
4
5
6
7
8
9
10
11
12
13
14
15
16
17
18
19
20
21
22
23
24
25
26
27
28
29
30
31
32
33
34
35
36
37
38
39
40
41
42
43
44
45
46
47
48
49
50
51
52
53
54
55
56
57
58
59
60
61
62
63
64
65
66
67
68
69
70
71
72
73
74
75
76
77
78
79
80
81
82
83
84
85
86
87
88
/**
* 模組依賴關係。
*/

var app = require('../index');
var debug = require('debug')('lara-node-express-mysql:server');
var http = require('http');

/**
* Get port from environment and store in Express.
*/

var port = normalizePort(process.env.PORT || '3000');
app.set('port', port);

/**
* 建立 HTTP 伺服器。
*/

var server = http.createServer(app);

/**
* 在所有網路介面上偵聽提供的連接埠。
*/

server.listen(port);
server.on('error', onError);
server.on('listening', onListening);

/**
* 將連接埠標準化為數字、字串或 false。
*/

function normalizePort(val) {
var port = parseInt(val, 10);

if (isNaN(port)) {
// named pipe
return val;
}

if (port >= 0) {
// port number
return port;
}

return false;
}

/**
* HTTP 伺服器「錯誤」事件的事件偵聽器。
*/

function onError(error) {
if (error.syscall !== 'listen') {
throw error;
}

var bind = typeof port === 'string'
? 'Pipe ' + port
: 'Port ' + port;

// 用友善的訊息處理特定的監聽錯誤
switch (error.code) {
case 'EACCES':
console.error(bind + ' 需要提升權限');
process.exit(1);
break;
case 'EADDRINUSE':
console.error(bind + ' 已在使用中');
process.exit(1);
break;
default:
throw error;
}
}

/**
* HTTP 伺服器「監聽」事件的事件監聽器。
*/

function onListening() {
var addr = server.address();
var bind = typeof addr === 'string'
? 'pipe ' + addr
: 'port ' + addr.port;
debug('Listening on ' + bind);
}

package.json 解析
package.json文件中最重要的就是name和version字段,這兩項是必填的。
name必須小於等於214個字符,不能以.或_開頭,不能有大寫字母,因為名稱最終成為URL的一部分因此不能包含任何非URL安全字符。
npm官方建議我們不要使用與核心節點模組相同的名稱。
version一般的格式是x.x.x, 並且需要遵循該規則。
private如果這個屬性被設定為true,npm將拒絕發布它,這是為了防止一個私有模組被無意間發佈出去。
description是一個字串,用於編寫描述資訊。有助於人們在npm庫中搜尋的時候發現你的模組。
keywords是一個字串組成的數組,有助於人們在npm庫中搜尋的時候發現你的模組。
scripts字段指定了執行腳本指令的npm命令列縮寫,例如start指定了執行npm run start時,所要執行的命令。
dependencies
dependencies欄位指定了專案運行所依賴的模組,devDependencies指定專案開發所需的模組。
它們的值都是一個物件。該物件的各個成員,分別由模組名和對應的版本要求組成,表示依賴的模組及其版本範圍。
當安裝依賴的時候使用–save參數表示將該模組寫入dependencies屬性,–save-dev表示將該模組寫入devDependencies屬性。
enginesengines欄位指明了該模組運作的平台,例如Node或npm的某個版本或瀏覽器。
參考資料

1
2
3
4
5
6
7
8
9
10
11
12
13
14
15
16
17
18
19
20
21
22
23
24
25
26
27
28
29
30
31
32
33
{
"name": "lara-node-express-mysql",
"version": "0.0.0",
"private": true,
"description": "antd-theme",
"keywords":["node.js","antd", "theme"],
"homepage": "https://zhiqianduan.com",
"bugs":{"url":"http://path/to/bug","email":"yindong@xxxx.com"},
"license": "ISC",
"author": "yindong",
"contributors":[{"name":"yindong","email":"yindong@xxxx.com"}],
"files": "",
"main": "./dist/default.js",
"bin": "",
"man": "",
"directories": "",
"repository": {
"type": "git",
"url": "https://path/to/url"
},
"scripts": {
"test": "node ./bin/www",
"start": "node index.js"
},
"dependencies": {
"cookie-parser": "~1.4.4",
"debug": "~2.6.9",
"ejs": "~2.6.1",
"express": "~4.16.1",
"http-errors": "~1.6.3",
"morgan": "~1.9.1"
}
}

解析 router
路由是指應用程式的端點 (URI) 如何回應客戶端請求。
這些路由方法指定一個回呼函數(有時稱為「處理函數」),當應用程式收到指定路由(端點)和 HTTP 方法的請求時呼叫。
用程式「偵聽」與指定路由和方法相符的請求,當偵測到匹配時,它會呼叫指定的回調函數。
routes/index.js

1
2
3
4
5
6
7
const express = require('express')
const app = express()

// 當向主頁發出 GET 請求時,回應“hello world”
app.get('/', (req, res) => {
res.send('hello world')
})

Method

1
2
3
4
5
6
7
8
9
10
11
12
13
14
// GET method route
app.get('/', (req, res) => {
res.send('GET request to the homepage')
})

// POST method route
app.post('/users', (req, res) => {
res.send('POST request to the homepage')
})

app.all('/secret', (req, res, next) => {
console.log('訪問秘密部分 ...')
next() // pass control to the next handler
})

app.js

1
2
3
4
5
6
7
8
9
10
11
12
13
14
15
16
17
18
19
20
21
22
23
24
25
26
27
28
29
30
31
32
33
34
35
36
37
38
39
40
41
42
var createError = require('http-errors');
var express = require('express');
var path = require('path');
var cookieParser = require('cookie-parser');
var logger = require('morgan');

var indexRouter = require('./routes/index');
var usersRouter = require('./routes/users');

var app = express();

// 查看引擎設定
app.set('views', path.join(__dirname, 'views'));
app.set('view engine', 'ejs');

app.use(logger('dev'));
app.use(express.json());
app.use(express.urlencoded({ extended: false }));
app.use(cookieParser());
app.use(express.static(path.join(__dirname, 'public')));

app.use('/', indexRouter);
app.use('/users', usersRouter);

// 捕獲 404 並轉送到錯誤處理程序
app.use((req, res, next)=> {
next(createError(404));
});

// 錯誤處理程序
app.use((err, req, res, next) =>{
// 設定局部變量,僅提供開發中的錯誤
res.locals.message = err.message;
res.locals.error = req.app.get('env') === 'development' ? err : {};

// 渲染錯誤頁面
res.status(err.status || 500);
res.render('error');
});
//使用 module.exports 匯出檔案
module.exports = app;

參考官網:Node express router

參考epxress generator 安裝

Node express 使用 multer 上傳到 imgur 圖片儲存庫

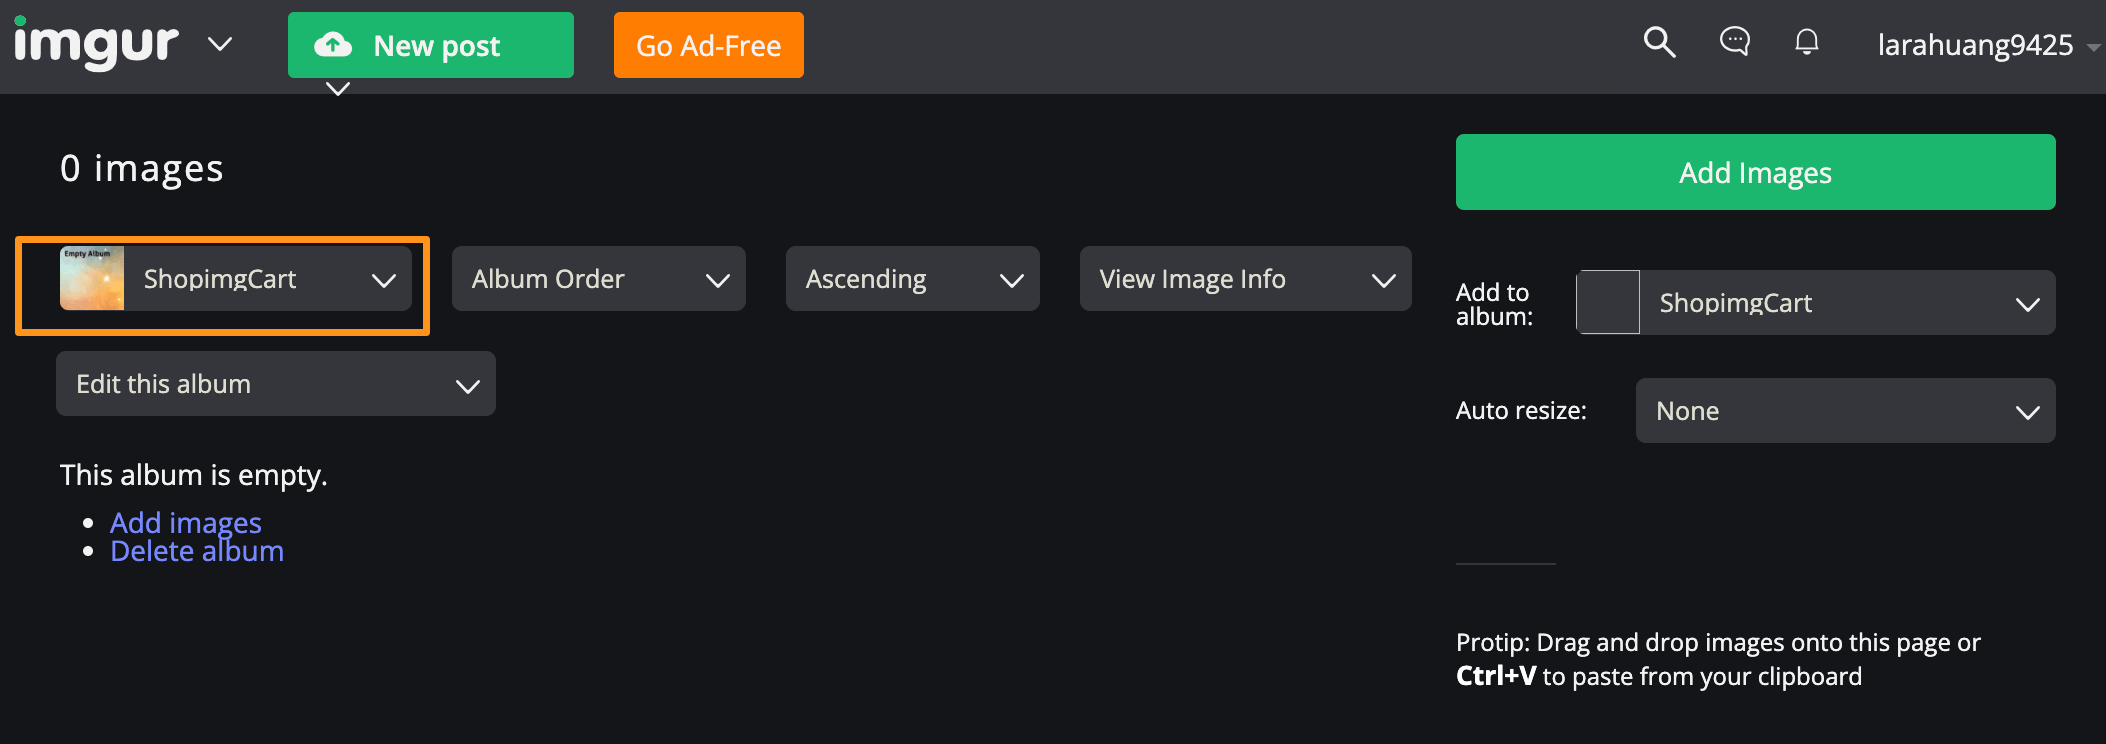
Imgur Album 建立

imgur官網

  • 申請帳號
  • 登入 Imgur 網站
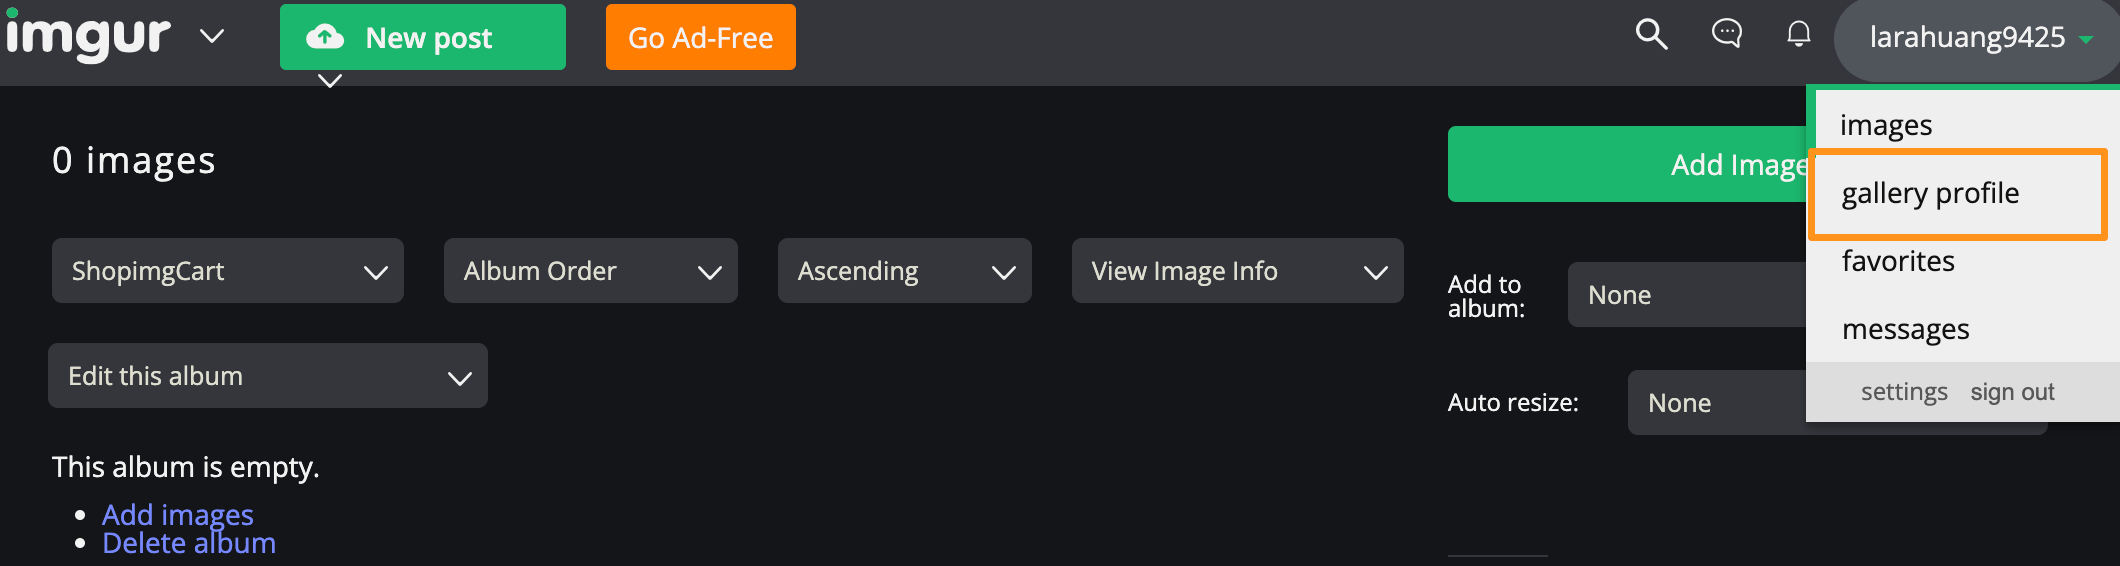
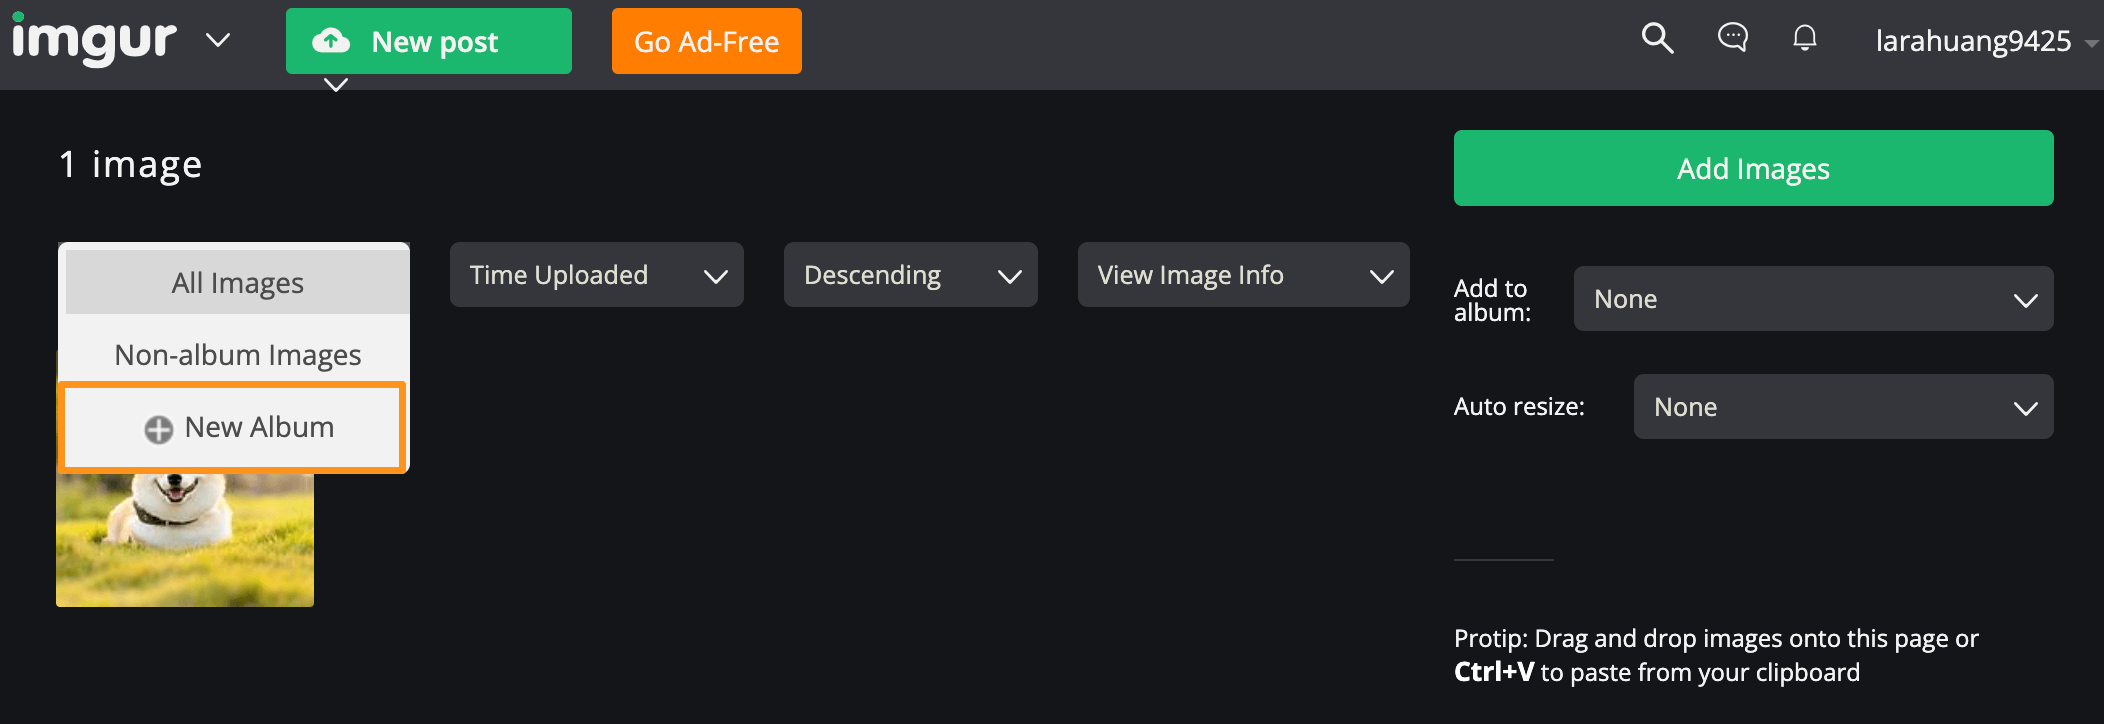
  • 右上角的使用者資訊下拉 images
這裡 接下來找到「All images」的下拉選單,裡面會有一個「New Album」 成功建立了一個 Album!
Imgur Album ID 取得

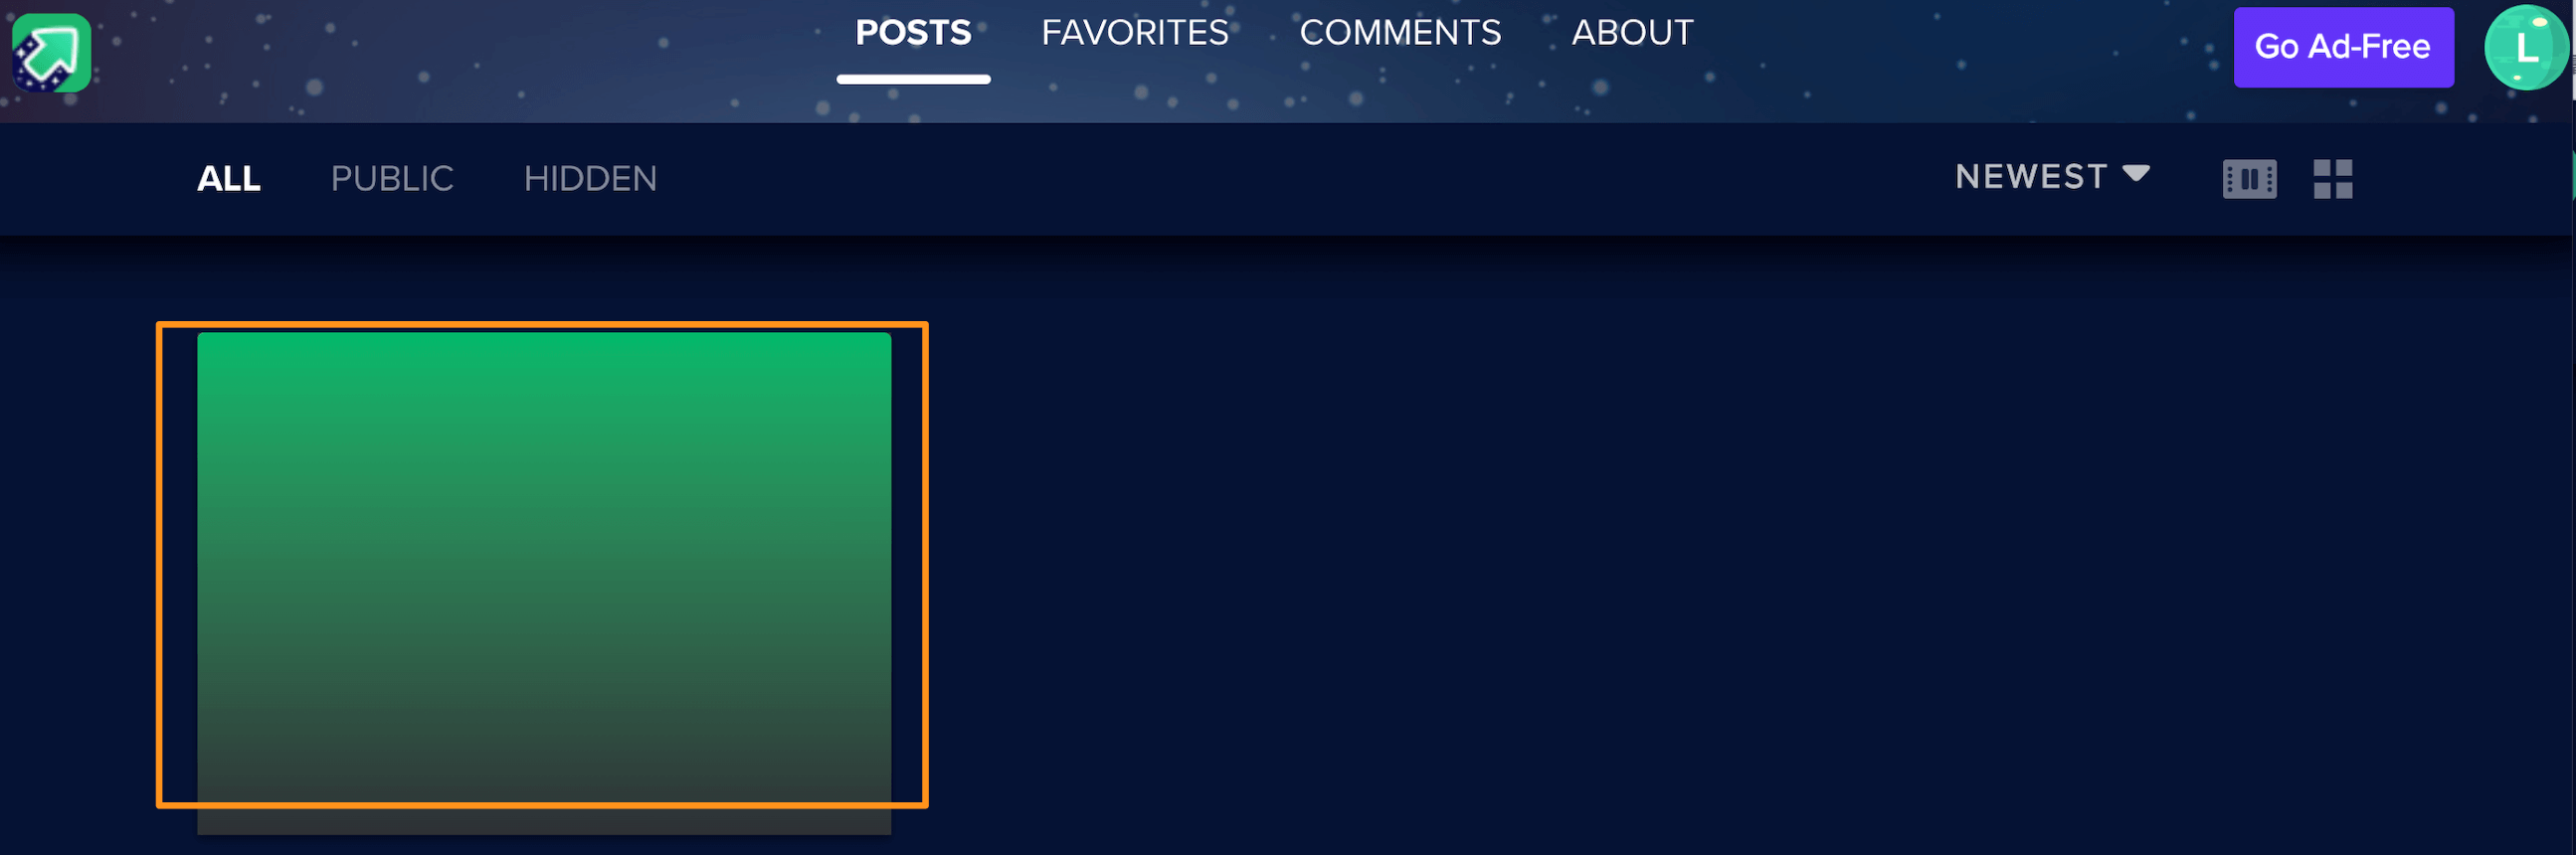
點一下使用者資訊下拉「gallery profile」

Posts => All

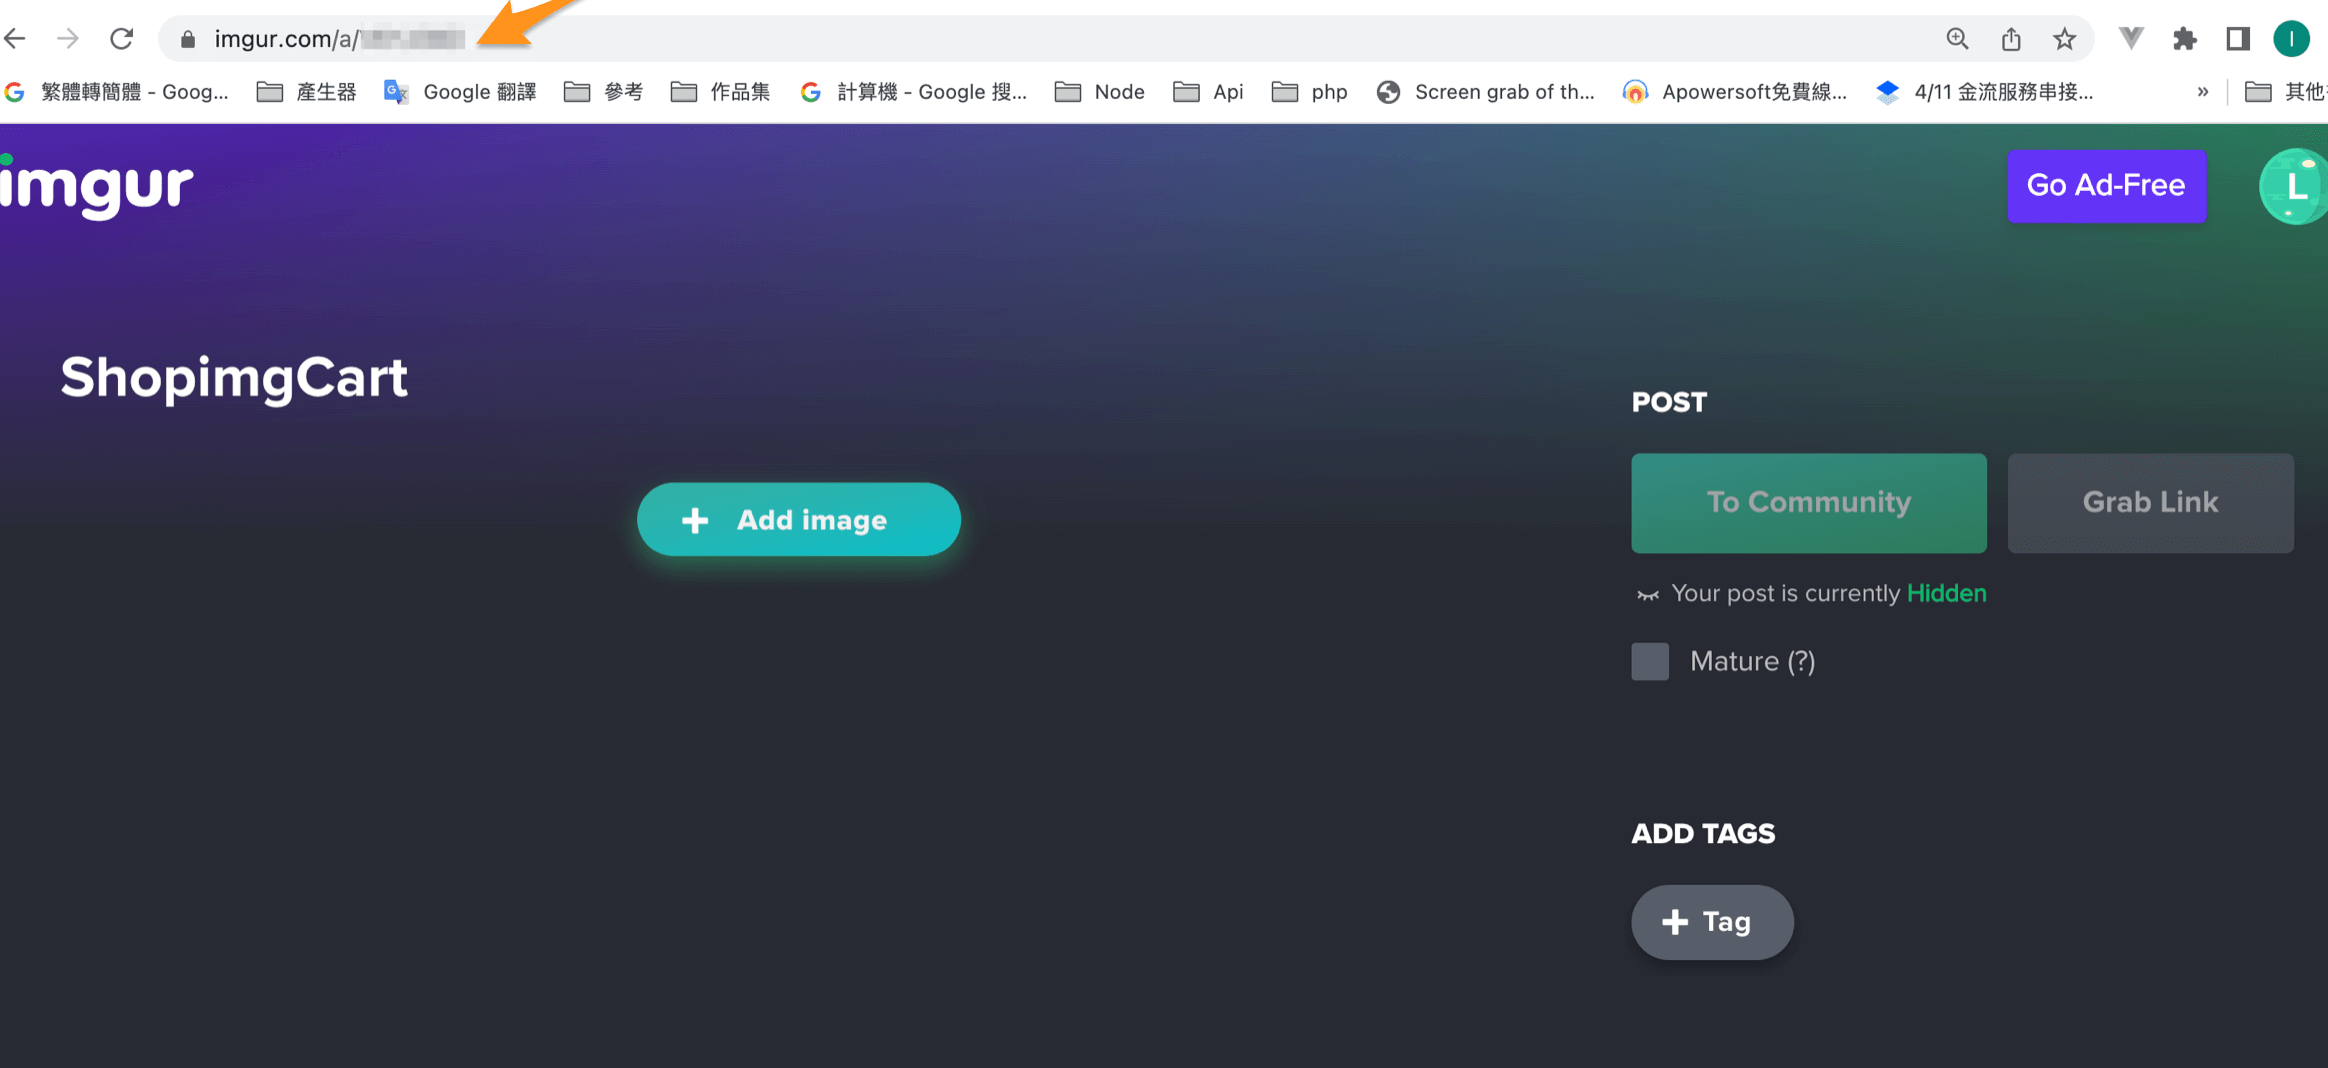
進入到 Album 之後看網址,我們只需要下方圖片紅框圈起來部分就好,那部分就是我們要找的 Album ID

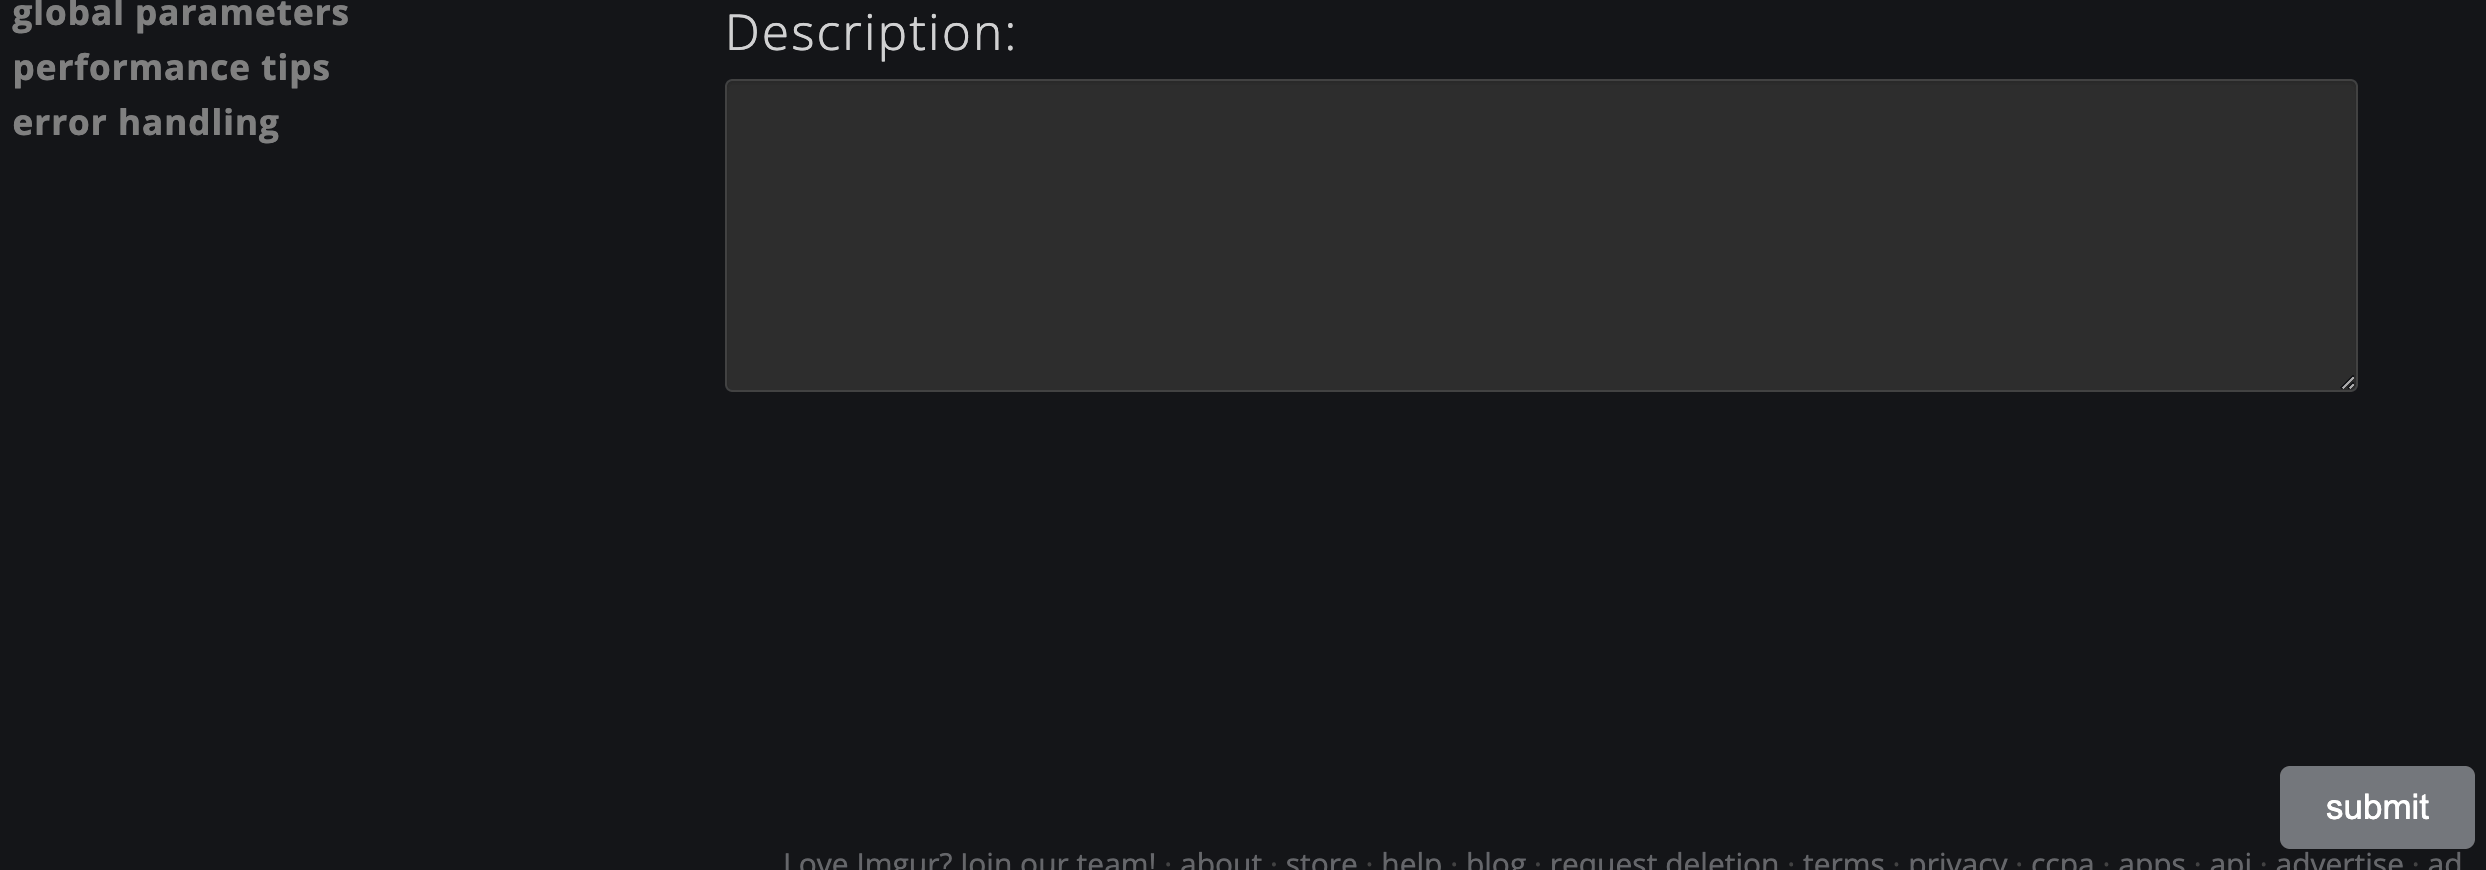
註冊 Imgur 應用程式

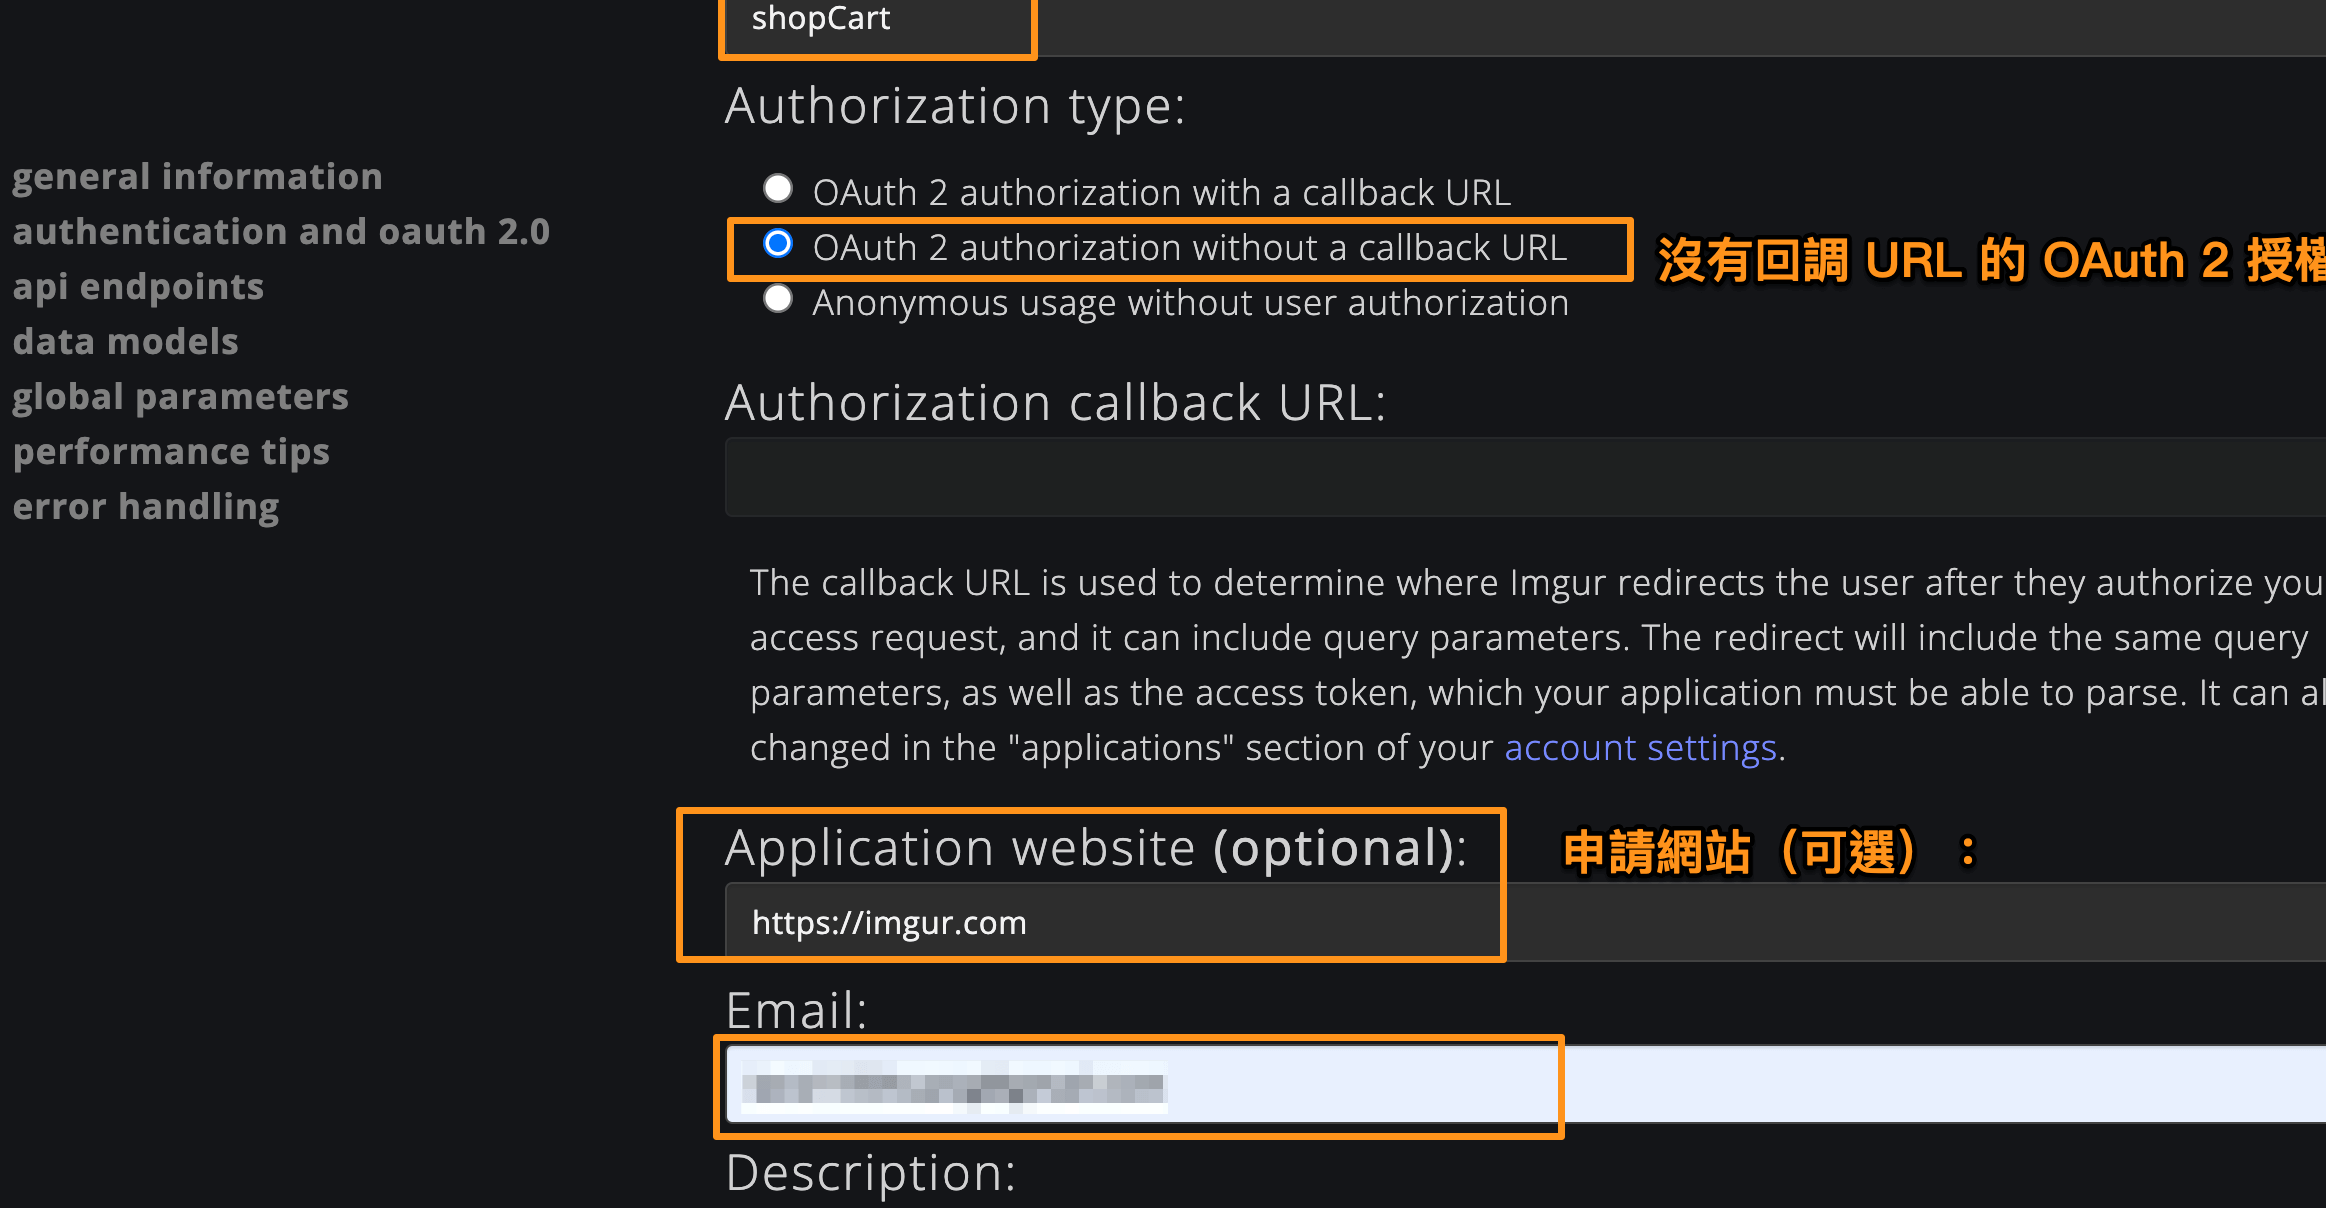
Register an Application
Application name =>任意名字
Authorization type =>選 OAuth 2 authorization without a callback URL
Authorization callback URL =>https://imgur.com
Email=>聯絡的到你的信箱

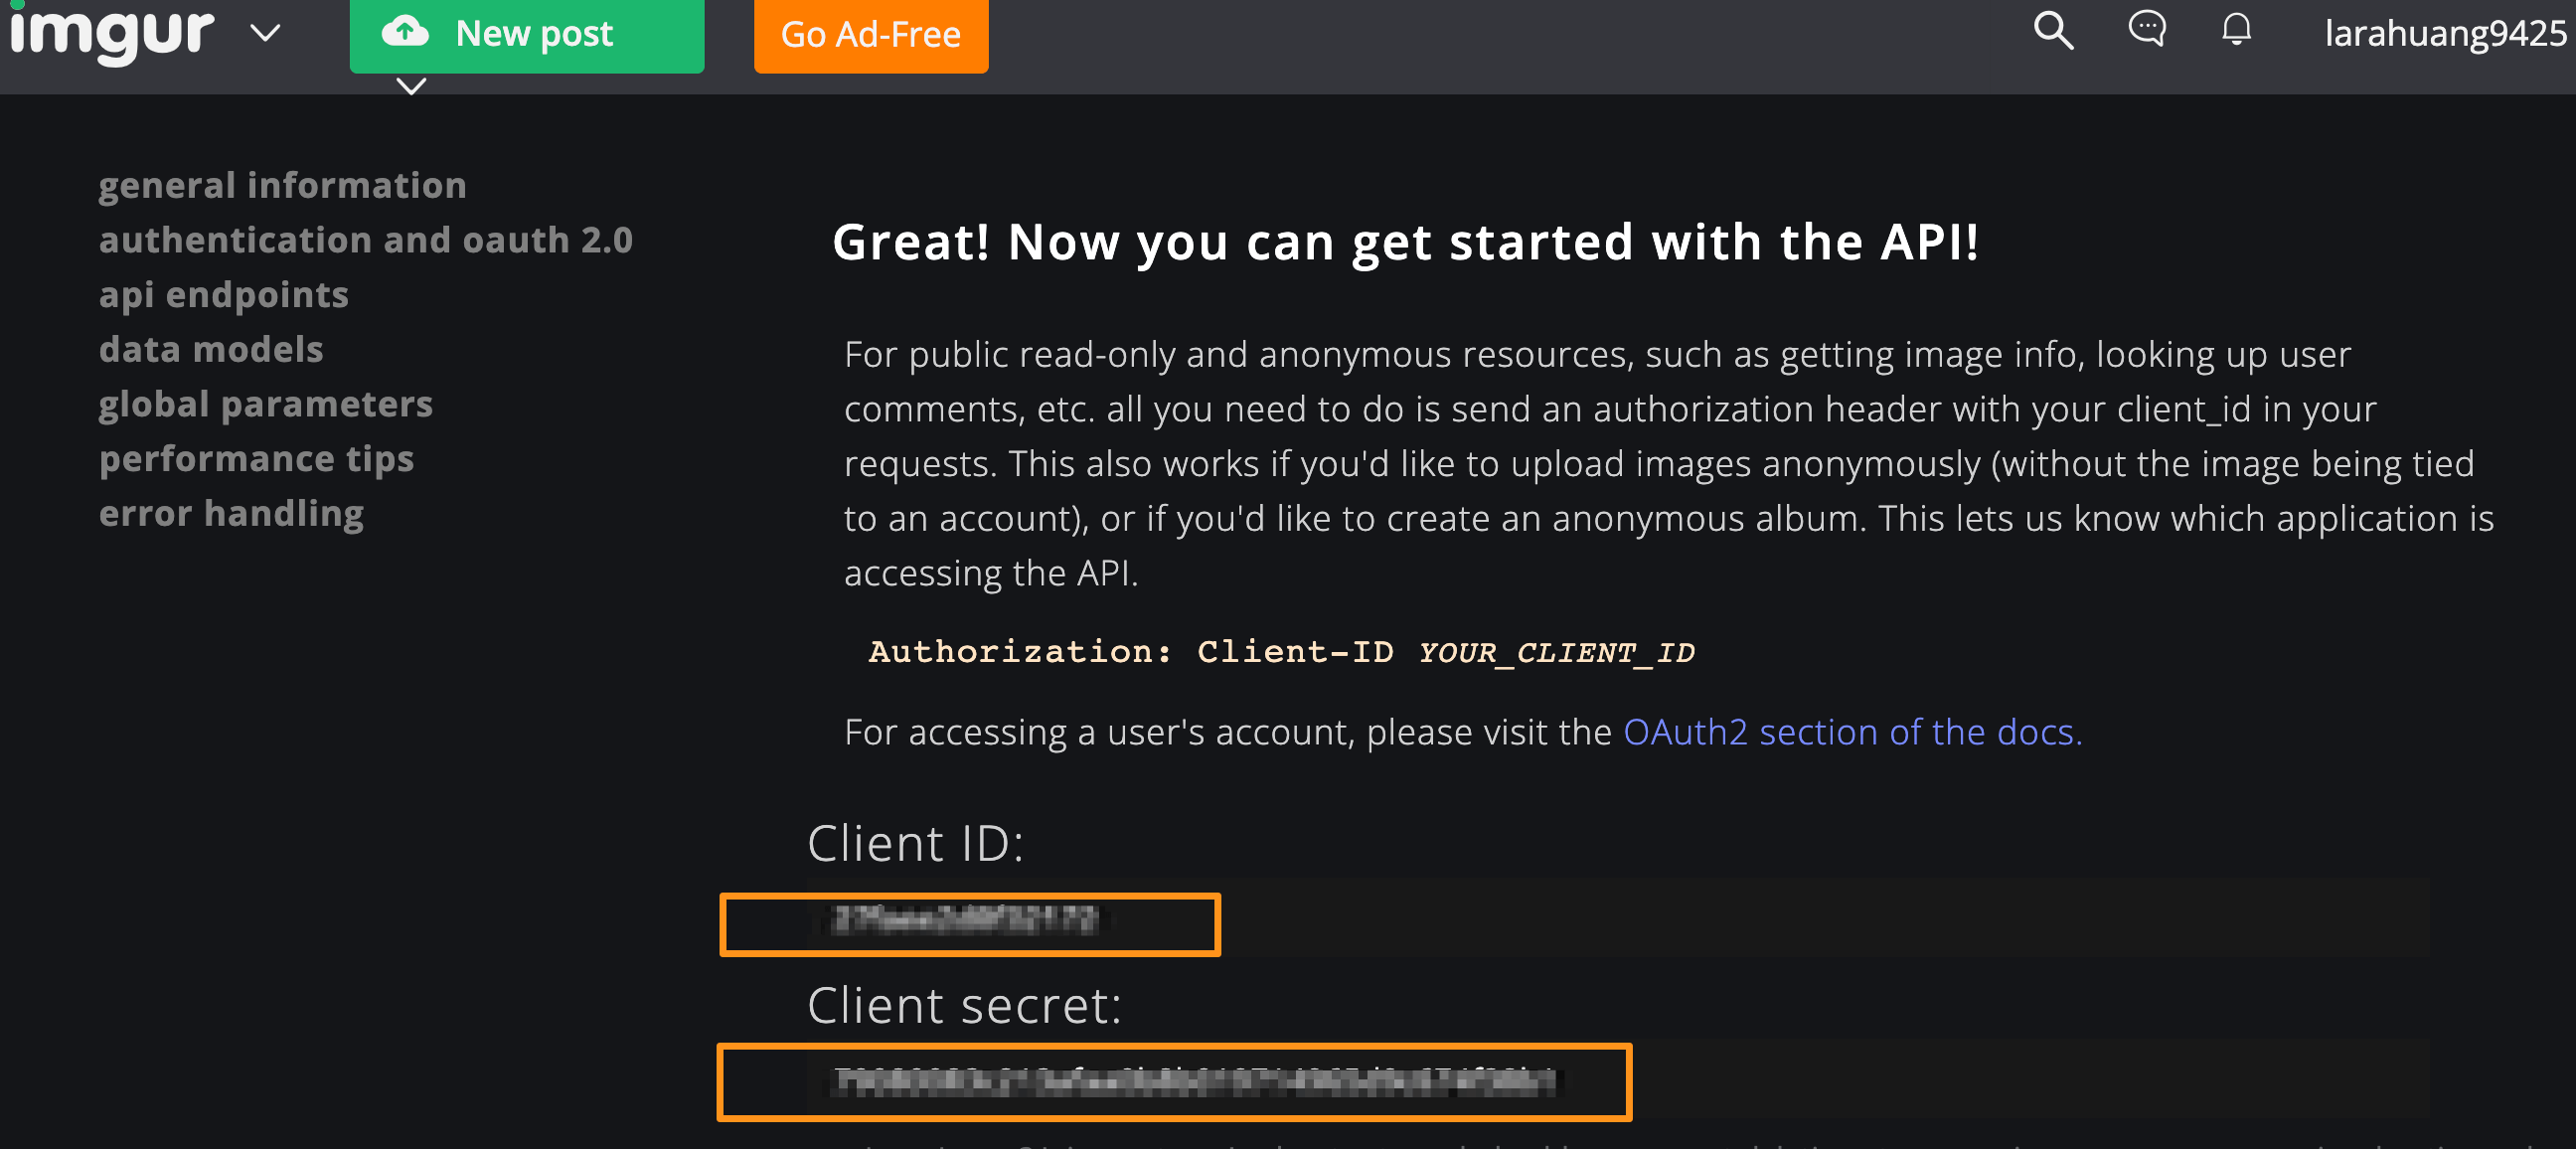
獲得

Client ID:

Client secret:

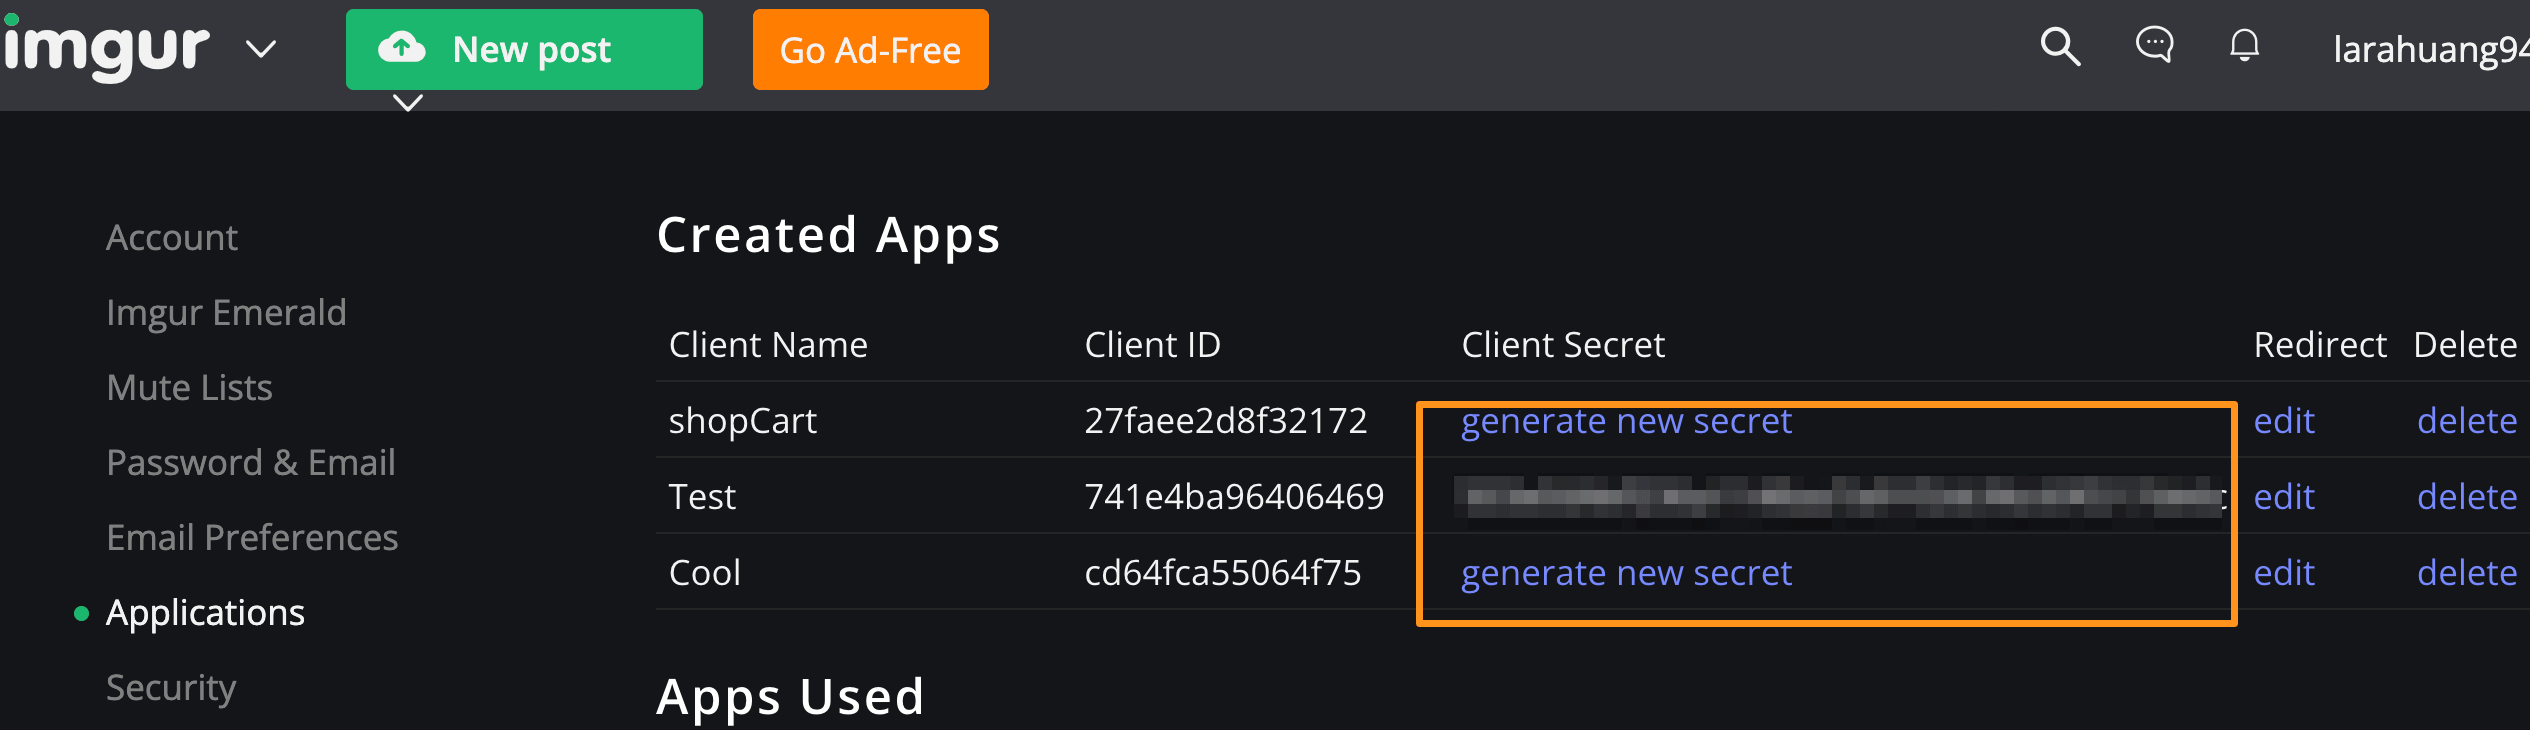
如果不小心丟失 Client secret:
點一下「generate new secret」重新生成

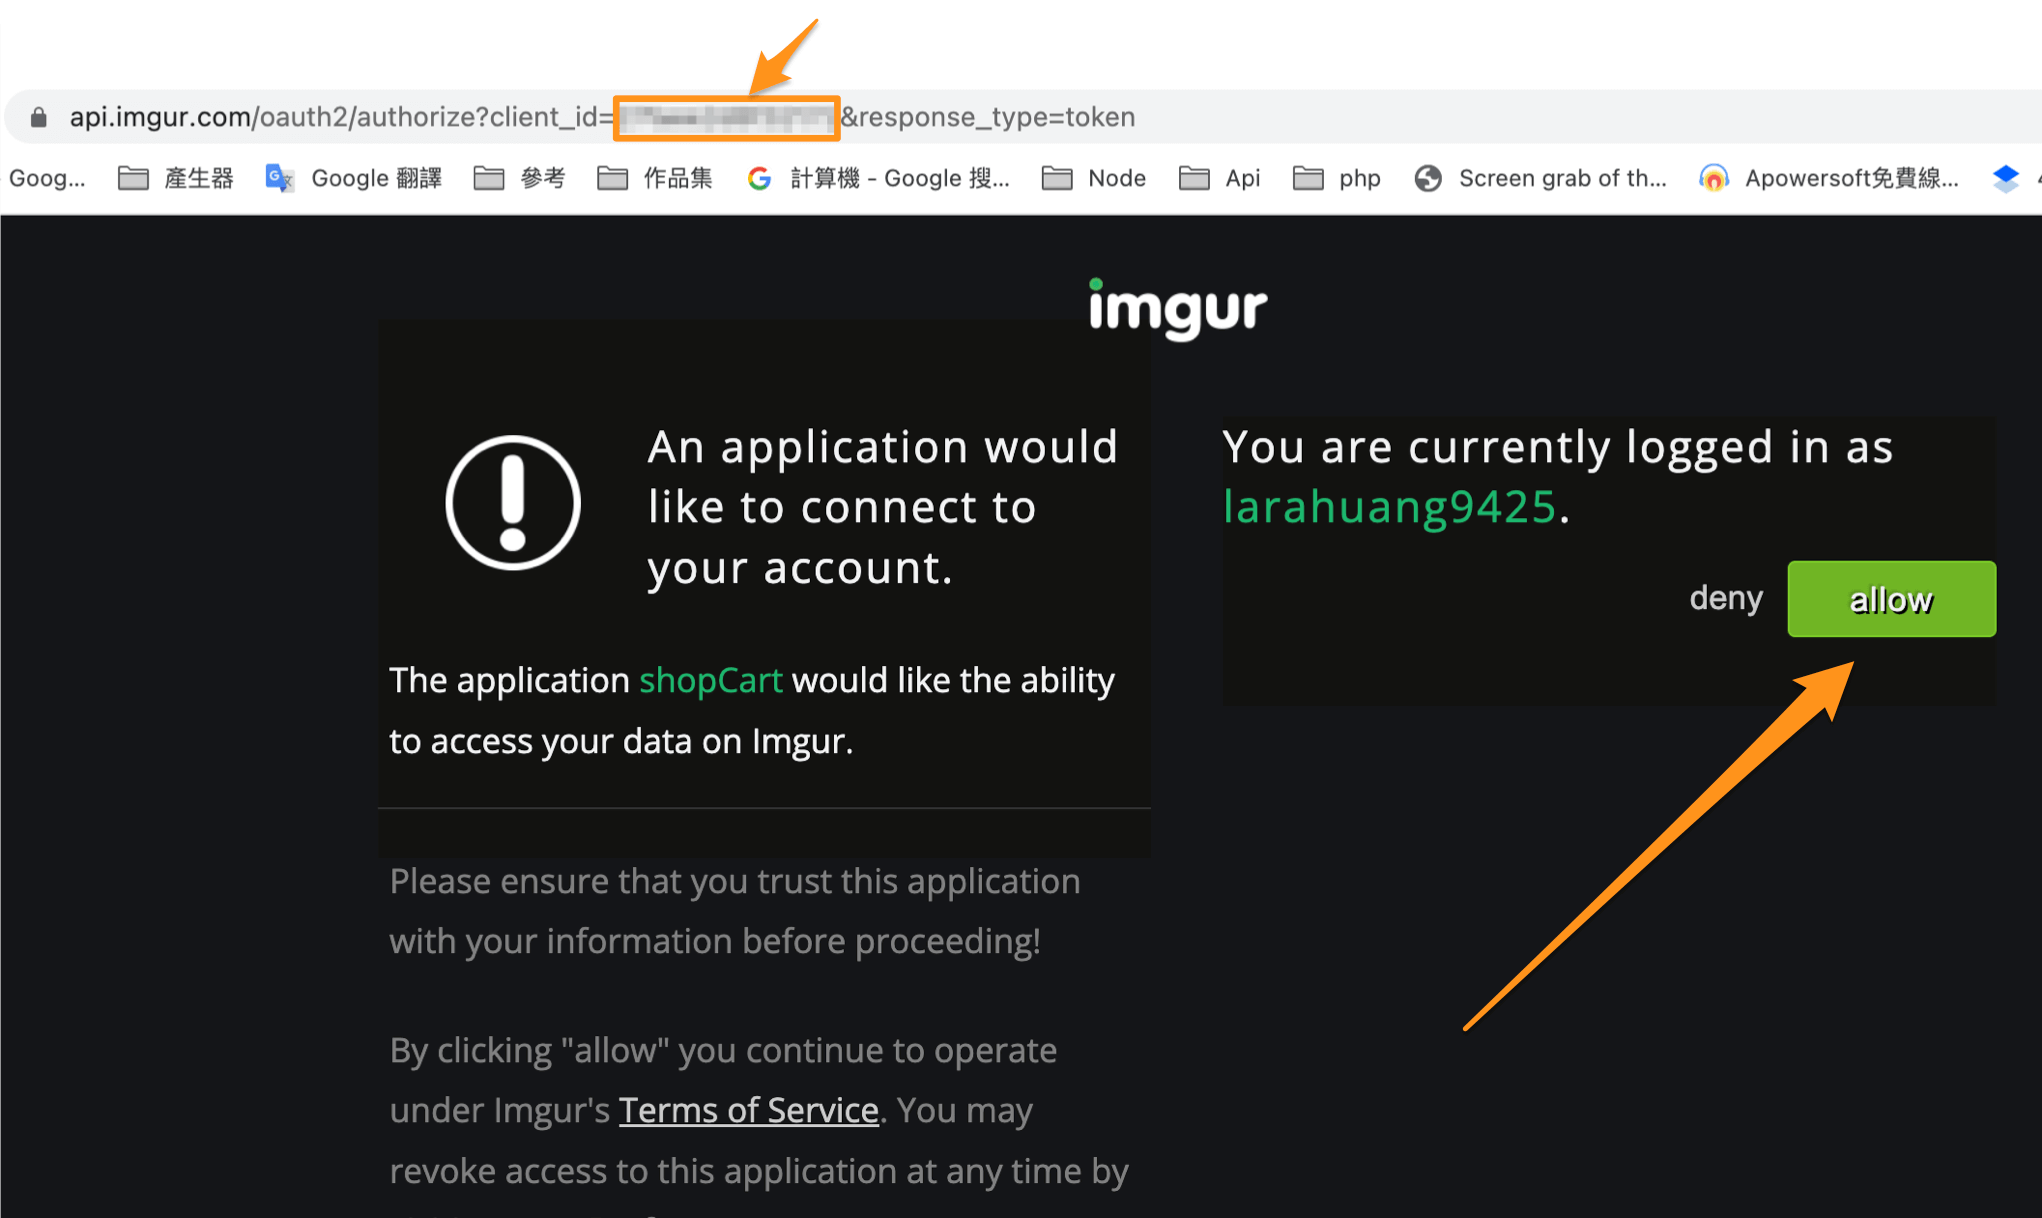
取得 Refresh Token

${Client ID} =>放入申請的Client ID

1
https://api.imgur.com/oauth2/authorize?client_id=${Client ID}&response_type=token

按下Allow

取得 Refresh Token

1
https://imgur.com/#access_token=xxxxx&expires_in=xxxxxx&token_type=bearer&refresh_token=xxxxxxxxxxxxx&account_username=申請帳號&account_id=xxxxxxxxxxxx

安裝multer

1
npm install --save multer

設定 Multer

  • limits: 限制上傳檔案的大小
  • fileSize: 限制上傳檔案的大小 接受的單位為 bytes:1MB = 1000000 bytes(為 1MB)
  • fileFilter 限制接受的上傳格式
    其接受三個參數: request 物件、帶有上傳檔案資訊的file 物件、篩選完成後呼叫的cb 函式。
    cb() 是一個當篩選完成時被呼叫 Callback 函式,其接受兩個參數:(1)錯誤訊息 (2)說明是否接受該檔案的 Boolean 值
1
2
3
4
5
6
7
8
9
10
11
12
13
14
15
//載入multer
const multer = require('multer')

const upload = multer({
limits: {
fileSize: 1000000
},
fileFilter(req, file, cb) {

if (!file.originalname.match(/\.(png|jpg|jpeg)$/)) {
return cb(new Error('圖片格式必須是png或jpg或jpeg格式'))
}
cb(undefined, true)
},
}).any();

安裝 imgur

1
npm install --save imgur@1.0.2

前置作業
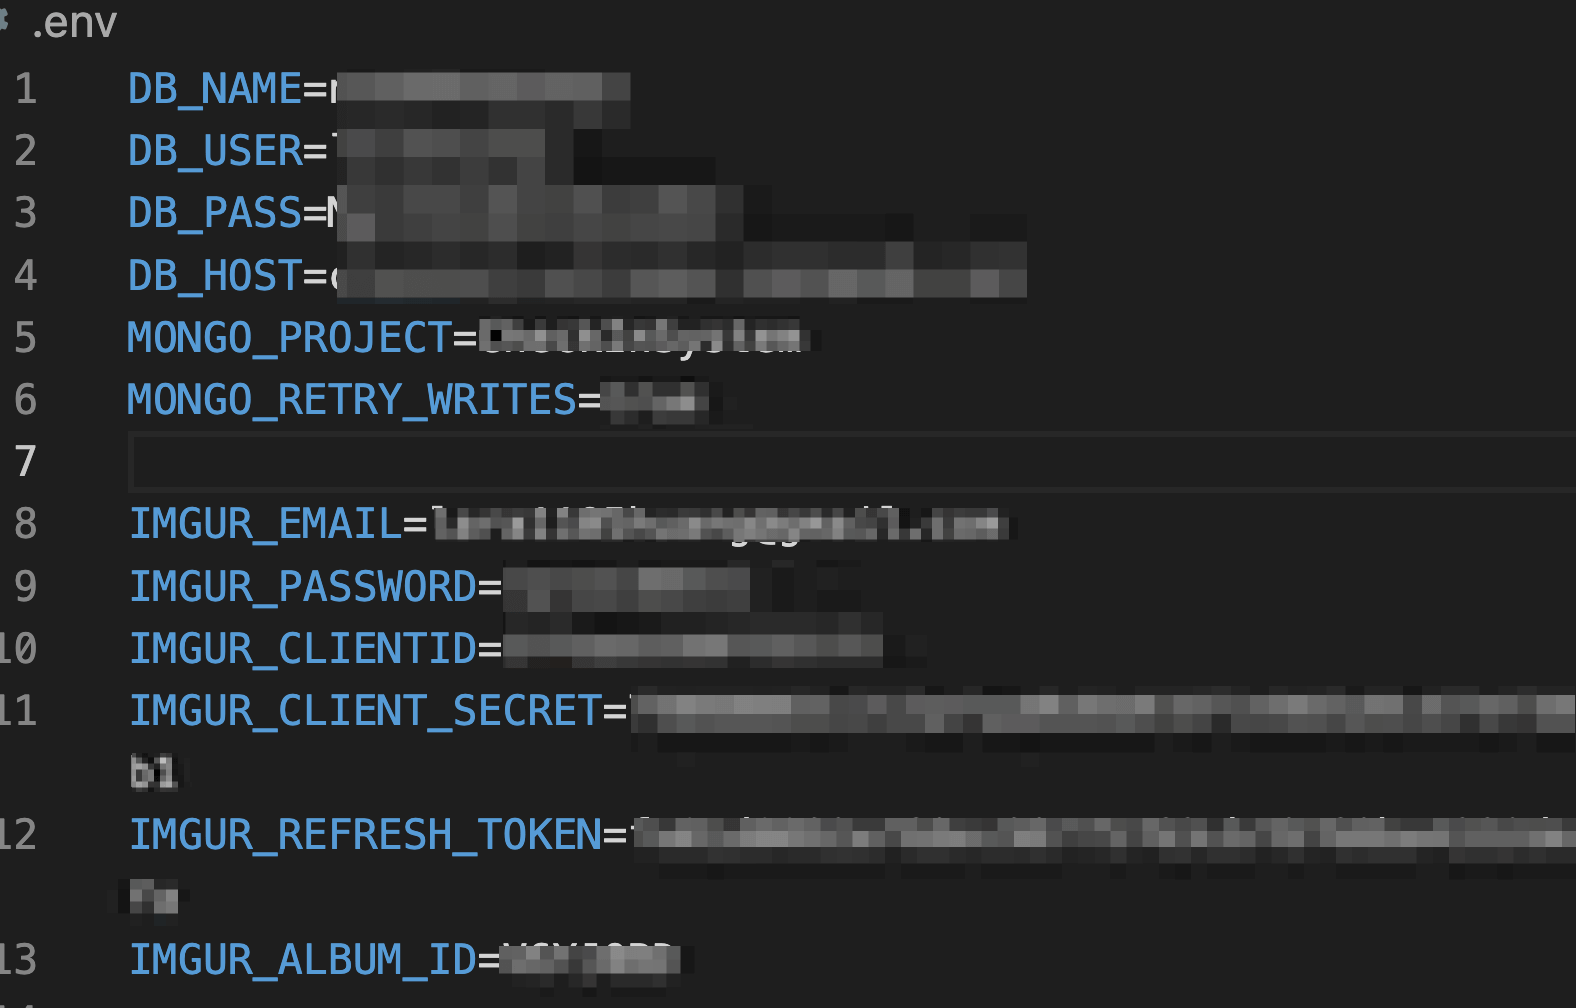
在環境變數增加
IMGUR_EMAIL=xxxx@gmail.com
IMGUR_PASSWORD=xxxxxxx
IMGUR_CLIENTID=xxxxxx
IMGUR_CLIENT_SECRET=xxxxxxx
IMGUR_REFRESH_TOKEN=xxxxxx
IMGUR_ALBUM_ID=xxxxxx

1
2
3
4
5
6
7
8
9
10
11
12
13
14
15
16
17
18
19
20
21
22
23
const imgur = require('imgur')

router.post('/upload', (req, res, next) =>{
upload(req, res, () => {
// 設置憑證
imgur.setCredentials(
process.env.IMGUR_EMAIL,
process.env.IMGUR_PASSWORD,
process.env.IMGUR_CLIENTID
);
//上傳Base64
imgur.uploadBase64(
req.files[0].buffer.toString('base64'),
process.env.IMGUR_ALBUM_ID
)
.then((json) => {
res.send({ url: json.link });
})
.catch((err) => {
res.send(err.message);
});
})
});

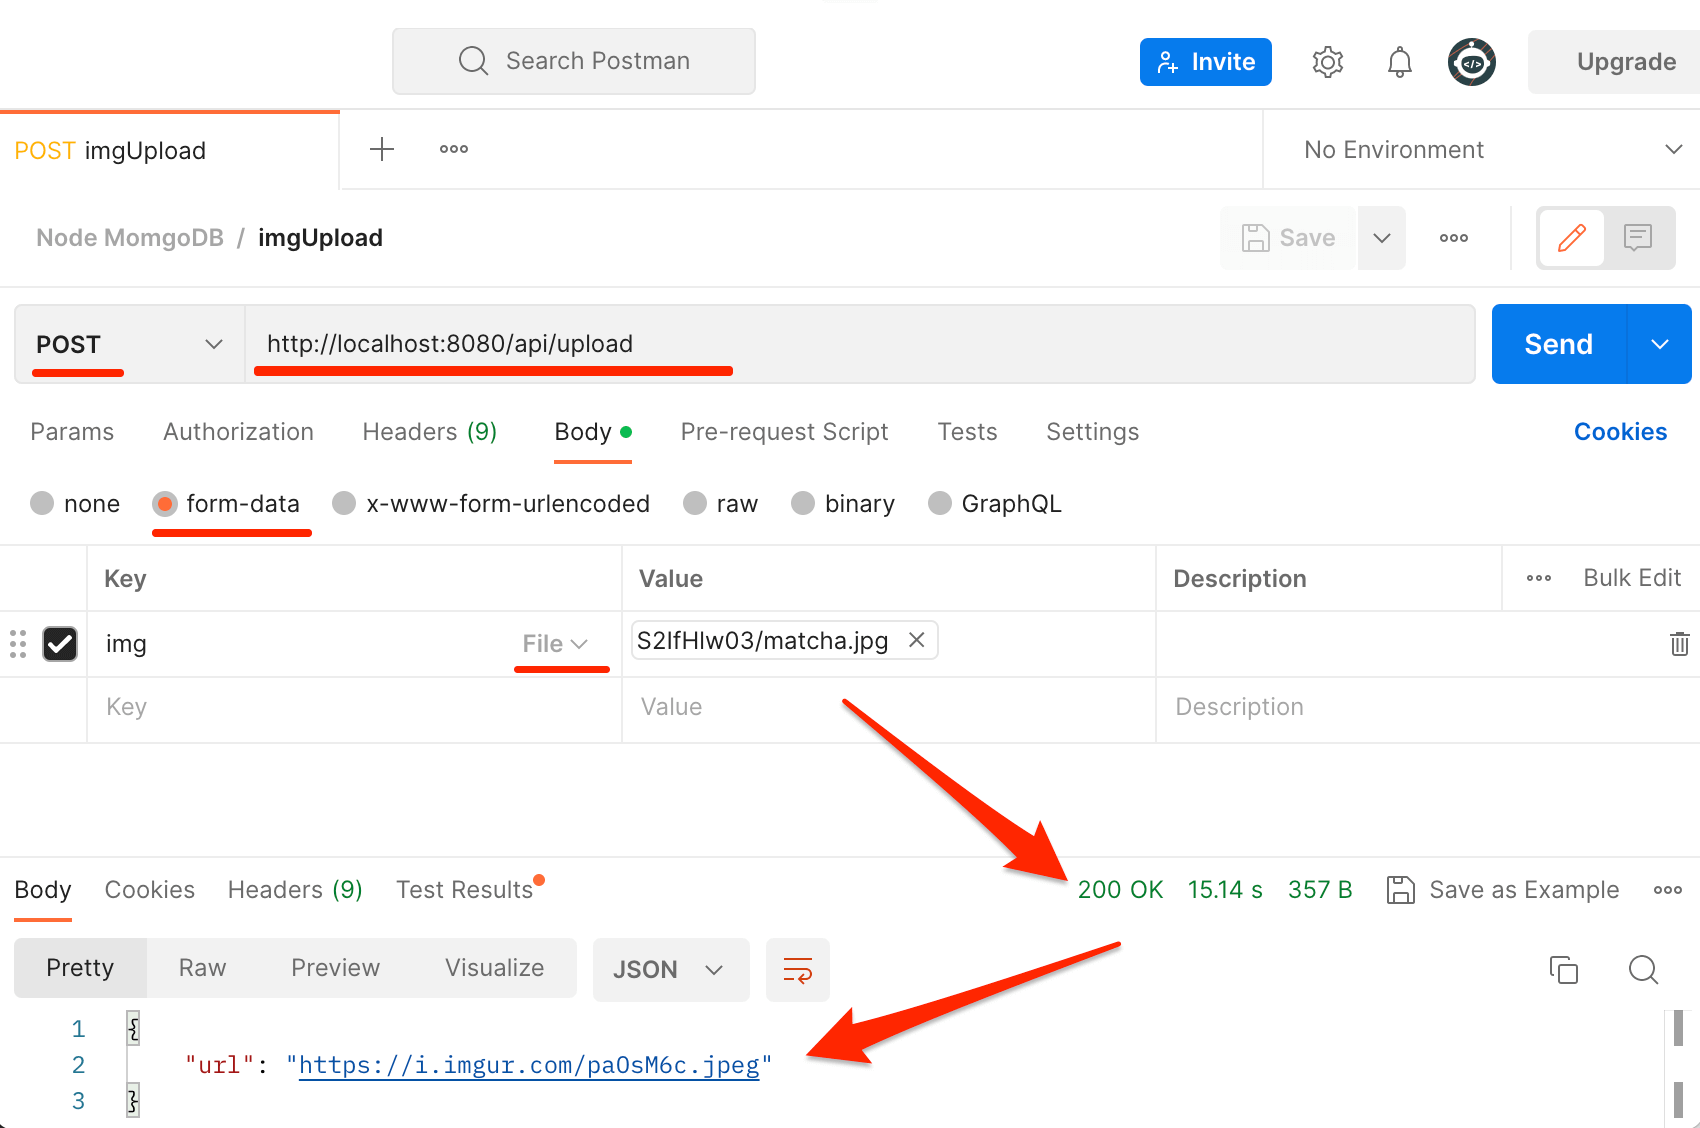
打開Postman
method:Post
body=>form-data =>key(img) select :filed (選擇filed)=>上傳檔案

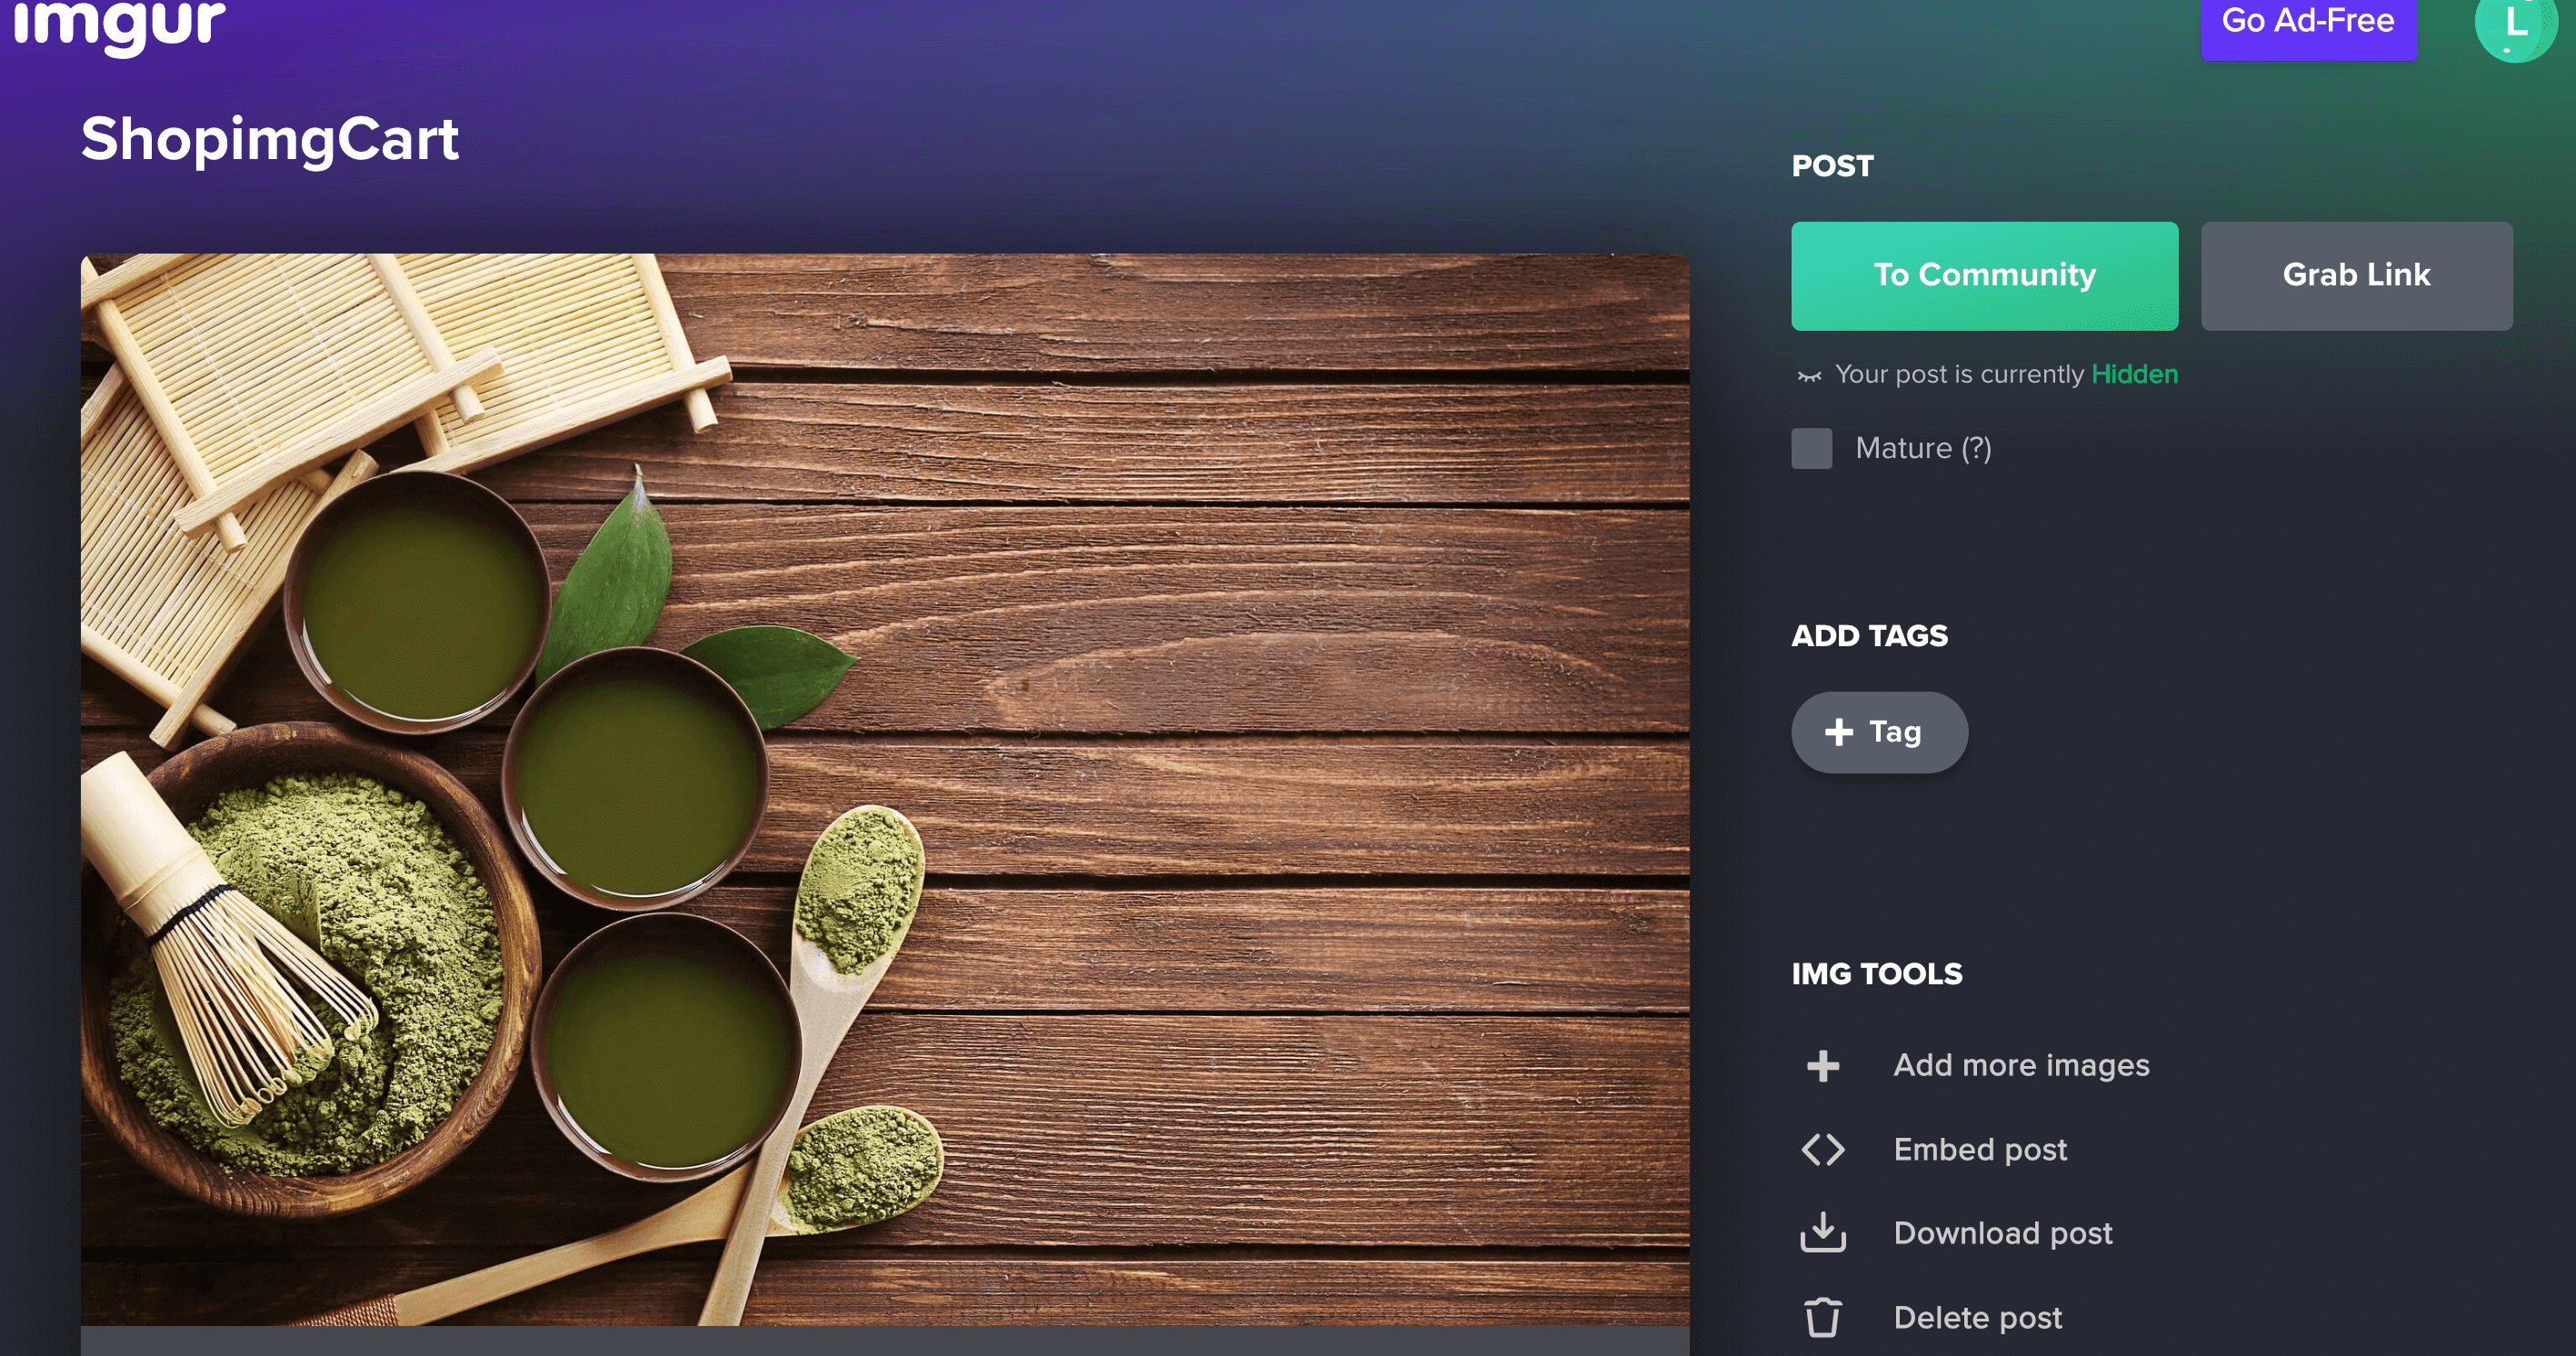
到imgur資料夾內檢查是否已經上傳到imgur

Node express Vercel部署

使用 Express-Generator 來自動產生環境

參考epxress generator 安裝

如果是在vercel放置Node express 專案

  • 注意要將根目錄的app.js改為 index.js
  • “注意”bin/www/ require改為index,var app = require('../index');
      專案根目錄內新增 一個vercel.json
      1
      2
      3
      4
      5
      6
      7
      8
      9
      10
      11
      12
      13
      14
      15
      {
      "version": 2,
      "builds": [
      {
      "src": "./index.js",
      "use": "@vercel/node"
      }
      ],
      "routes": [
      {
      "src": "/(.*)",
      "dest": "/"
      }
      ]
      }

MongoDB CRUD

建立模組(Creating a model)–Schemas:構造函數,定義存儲在每個文檔中的字段,及其驗證要求和默認值。

新增models資料庫,並新增一個資料為newsModel.js
載入(require)mongoose資料庫

timestamps時間戳:對像或布爾值 - 默認為 false。 如果為真,Mongoose 會將 createdAt 和 updatedAt 屬性添加到您的模式並為您管理這些屬性。

使用uuid npm uuid

MongoDB 會自動產生一組 id

1
2
3
4
5
6
7
8
9
10
11
12
13
14
15
16
17
18
19
20
21
22
23
24
25
26
27
28
29
30
31
32
33
34
35
36
37
38
39
40
const mongoose = require('mongoose')
//require uuid
const { v4: uuidv4 } = require('uuid')
const newsSchema = mongoose.Schema(
{
uuid: {
type: String,
default: () => uuidv4()
},
subject: {
type: String,
match: [
/^.{2,10}$/,
'Please add a valid subject 2~10',
],
required: [true, "Please enter subject"],
trim: true,
},
content: {
type: String,
match: [
/^.{4,500}$/,
'Please add a valid content 4~500',
],
required: [true, "請輸入內容"],
trim: true,
},
createdTime: {
type: String,
},
updatedTime: {
type: String,
}
}
/* {
timestamps: true
}*/
)
const News = mongoose.model('News', newsSchema);
module.exports = News;

安裝moment.js

1
npm install moment --save

router/api.js

1
2
3
4
5
6
7
8
9
10
11
12
13
14
15
16
17
18
19
20
21
22
23
24
25
26
27
28
29
30
31
32
33
34
35
36
37
38
39
40
41
42
43
44
45
46
47
48
49
50
51
52
53
54
55
56
57
58
59
60
61
62
63
64
65
66
67
68
69
70
71
72
73
74
75
76
77
78
79
80
81
82
83
84
85
86
87
88
89
90
91
92
93
94
95
96
97
98
99
100
101
102
103
104
105
106
107
108
109
110
111
112
113
114
115
116
117
118
const express = require('express')
//載入newsModel
const News = require('../models/newModel')
//載入時間套件
const moment = require('moment');
moment().format();


//Create
router.post('/new', async(req, res) => {
try {
/* #swagger.tags = ['News']
#swagger.description = '' */

/* #swagger.parameters['obj'] = {
in: 'body',
description: '',
required: true,
schema: { $ref: "#/definitions/AddNews" }
} */

/* #swagger.security = [{
"apiKeyAuth": []
}] */
const data = new News({
subject:req.body.subject,
image:req.body.image,
content:req.body.content,
createdTime: moment(Date.now()).format('YYYY-MM-DDTHH:mm:ss.SSS'),
updatedTime: moment(Date.now()).format('YYYY-MM-DDTHH:mm:ss.SSS'),
})
const news = await data.save();
res.status(200).json(news);

} catch (error) {
const expr = error.message;
console.log('News error.message',expr)
switch (expr) {
case 'News validation failed: subject: Please add a valid subject 2~30':
res.status(400).json({ message: 'subject 驗證失敗:subject必須2~30字符' })
break;
case 'News validation failed: subject: Please add a valid name 2~30, content: Please add a valid content 4~500':
res.status(400).json({message: '`subject`,`content`驗證失敗' })
break;
case 'News validation failed: content: Please add a valid content 4~500':
res.status(400).json({message: 'content驗證失敗:subject必須4~500字符' })
break;
default:
console.log('!!');
}
// res.status(500).json({message: error.message})
}
})
router.get('/news', async(req, res) => {
try {
const news = await News.find({});
res.status(200).json(news);
} catch (error) {
res.status(500).json({message: error.message})
}
})
router.get('/news/:id', async(req, res) =>{
try {
const {id} = req.params;
const news = await News.findById(id);
res.status(200).json(news);
} catch (error) {
res.status(500).json({message: error.message})
}
})
router.put('/news/:id', async(req, res) => {
try {
/* #swagger.tags = ['News']
#swagger.description = '' */

/* #swagger.parameters['obj'] = {
in: 'body',
description: '',
required: true,
schema: { $ref: "#/definitions/News" }
} */

/* #swagger.security = [{
"apiKeyAuth": []
}] */
const { id } = req.params;
const data = {
subject:req.body.subject,
image:req.body.image,
content:req.body.content,
updatedTime: moment(Date.now()).format('YYYY-MM-DDTHH:mm:ss.SSS'),
}
const news = await News.findByIdAndUpdate(id, data);
// we cannot find any news in database
if(!news){
return res.status(404).json({message: `cannot find any news with ID ${id}`})
}
const updatedNews = await New.findById(id);
res.status(200).json(updatedNews);

} catch (error) {
res.status(500).json({message: error.message})
}
})
router.delete('/news/:id', async(req, res) =>{
try {
const {id} = req.params;
const test = await News.findByIdAndDelete(id);
if(!test){
return res.status(404).json({message: `cannot find any news with ID ${id}`})
}
res.status(200).json(test);

} catch (error) {
res.status(500).json({message: error.message})
}
})

MongoDB

Mongoose 是MongoDB 的前端,MongoDB 是一個使用面向文檔數據模型的開源NoSQL 數據庫。
npm 官網=>搜尋 mongoose
mongoose
安裝mongoose

1
npm i mongoose

MongoDB官網
//如圖

Accept Privacy Policy & Teams of Service
譯:接受隱私政策和服務條款
點選
點選建立資料庫Build the DataBase
選擇Free 免費,選擇地區並創建
取得使用者帳號與密碼
你想從哪裡連接?
將條目添加到您的 IP 訪問列表
IP地址 / 描述 0.0.0.0/0 / anyone can access
Connect DataBase 連接資料庫
選取Drivers
取得資料庫連結網址:
mongodb+srv://使用者帳號:此專案密碼@網址/?retryWrites=true&w=majority

環境變數:在程式剛啟動時,就可以載入require(‘dotenv’).config();

1
2
3
4
5
6
7
8
9
10
11
12
13
14
15
16
17
18
19
20
21
22
23
24
25
26
27
28
29
30
31
32
33
34
35
36
37
38
39
40
41
42
43
44
45
46
47
48
//express
const express = require('express')
//資料庫
const mongoose = require('mongoose')
//環境變數
require('dotenv').config()
const user = process.env.DB_USER;
const password = process.env.DB_PASS;
const host = process.env.DB_HOST;
const project = process.env.MONGO_PROJECT;
const retryWrites = process.env.MONGO_RETRY_WRITES;
const connectionString = `mongodb+srv://${user}:${password}@${host}/${project}?retryWrites=${retryWrites}&w=majority`;
const connectionString = `mongodb+srv://${user}:${password}@${host}/?retryWrites=${retryWrites}&w=majority`;
mongoose.set("strictQuery", false)

mongoose.connect(connectionString,{serverSelectionTimeoutMS: 5000})
.then(() => {
console.log('連結mongoose');
})
.catch((err) => {
console.log(err.message);
});

const app = express()

app.use(express.json())
// express 網址編碼 中內置的一種方法,用於將傳入的 Request Object 識別為strings 或 arrays; extended=>廣大的。

app.use(express.urlencoded({ extended: false }))


const api = require('./routes/api')
app.use('/api', api)

const auth = require('./routes/auth')
app.use('/auth', auth)


app.get('/', (req, res) => {
res.send('Hello Node Api!')
})

const PORT = process.env.PORT || 8080;


app.listen(PORT, () => console.log(`服務器正在監聽端口 ${PORT}`));

module.exports = app;

CRUD

一.新增models/newModel.js

1
2
3
4
5
6
7
8
9
10
11
12
13
14
15
16
17
18
19
20
21
22
23
24
25
26
27
28
29
30
31
const mongoose = require('mongoose')
//Mongoose對MongoDB的操作涉及三個層面:Schema, Model與Entity
//Schema是資料文件的骨架,本身不影響資料庫,用來產生Model
//Model是用Schema產生的模型。
//Entity是用Model創建的實作。
//Model與Entity的操作會影響資料庫。

const newSchema = mongoose.Schema(
{
subject: {
type: String,
required: [true, "Please enter subject"]
},
image: {
type: String,
required: false,
},
content: {
type: String,
required: false,
}
},
{
timestamps: true
}
)


const New = mongoose.model('News', newSchema);

module.exports = New;

二.index.js,載入newModel

1
2
3
4
5
6
7
8
9
10
11
12
13
14
15
16
17
18
19
20
21
22
23
24
25
26
27
28
29
30
31
32
33
34
35
36
37
38
39
40
41
42
43
44
45
46
47
48
49
50
51
52
53
54
55
56
57
58
59
60
61
62
63
64
65
66
67
68
69
70
71
72
73
74
75
76
77
78
79
80
81
82
83
84
85
86
87
88
89
90
91
92
93
94
95
96
97
98
99
100
const express = require('express')
const mongoose = require('mongoose')
const New = require('./models/newModel')
//環境變數
require('dotenv').config()
const user = process.env.DB_USER;
const password = process.env.DB_PASS;
const host = process.env.DB_HOST;
const project = process.env.MONGO_PROJECT;
const retryWrites = process.env.MONGO_RETRY_WRITES;
const connectionString = `mongodb+srv://${user}:${password}@${host}/${project}?retryWrites=${retryWrites}&w=majority`;

mongoose.set("strictQuery", false)

mongoose.connect(connectionString,{serverSelectionTimeoutMS: 5000})
.then(() => {
console.log('連結mongoose');
})
.catch((err) => {
console.log(err.message);
});

const app = express()

// Json格式
app.use(express.json())
// express 中內置的一種方法,用於將傳入的 Request Object 識別為strings 或 arrays。
app.use(express.urlencoded({extended: false}))


//建立Create =>New.create
app.post('/new', async(req, res) => {
try {
const news = await New.create(req.body)
res.status(200).json(news);

} catch (error) {
console.log(error.message);
res.status(500).json({message: error.message})
}
})
//Read news All =>New.find({})
app.get('/news', async(req, res) => {
try {
const news = await New.find({});
res.status(200).json(news);
} catch (error) {
res.status(500).json({message: error.message})
}
})
//Read news id=> New.findById(id)
app.get('/news/:id', async(req, res) =>{
try {
const {id} = req.params;
const news = await New.findById(id);
res.status(200).json(news);
} catch (error) {
res.status(500).json({message: error.message})
}
})

//updatedNews => New.findByIdAndUpdate(id, req.body)
app.put('/news/:id', async(req, res) => {
try {
const {id} = req.params;
const newR = await New.findByIdAndUpdate(id, req.body);
// we cannot find any news in database
if(!newR){
return res.status(404).json({message: `cannot find any news with ID ${id}`})
}
const updatedNews = await New.findById(id);
res.status(200).json(updatedNews);

} catch (error) {
res.status(500).json({message: error.message})
}
})

//Delete news id =>New.findByIdAndDelete(id)
app.delete('/news/:id', async(req, res) =>{
try {
const {id} = req.params;
const test = await New.findByIdAndDelete(id);
if(!test){
return res.status(404).json({message: `沒有發現任何 News ID ${id}`})
}
res.status(200).json(test);

} catch (error) {
res.status(500).json({message: error.message})
}
})

const PORT = process.env.PORT || 8080;


app.listen(PORT, () => console.log(`服務器正在監聽端口 ${PORT}`));

module.exports = app;

Render部署

Render
選取WebServer

箭頭內貼入Git庫網址

在Name框中,輸入一個簡短的名字來標識你的網站。


如果你的入口文件是 index.js,在Start Command中填寫node index.js。
如果你的入口是 server.js,在Start Command中填寫node server.js

再向下滑動頁面會看到Advanced按鈕

如果你的應用使用了環境變量,你可以在Advanced設置中輸入。也可以在這裡添加 .env文件,這樣就不用你手動一個一個地添加。

處理Bug

環境變數內新增

NODE_VERSION 14.20.1

Node express 使用 Swagger 自動生成 API 文件

使用 Express-Generator 來自動產生環境

參考epxress generator 安裝
node版本 14.20.1
全域方法安裝express-generator

1
npm install express-generator -g

项目初始化:專案名稱

1
express -e 專案名稱

cd 專案名稱

1
2
到專案
cd 專案名稱

//啟動

1
2
npm start

到此網址觀看
http://localhost:3000

如何使用環境

將打包好的 dist 內的資料放到 public /
改完后,重新启动express项目

如果是在vercel放置Node express 專案

  • 注意要將根目錄的app.js改為 index.js
  • “注意”bin/www/ require改為index,var app = require('../index');
      專案根目錄內新增 一個vercel.json
      1
      2
      3
      4
      5
      6
      7
      8
      9
      10
      11
      12
      13
      14
      15
      {
      "version": 2,
      "builds": [
      {
      "src": "./index.js",
      "use": "@vercel/node"
      }
      ],
      "routes": [
      {
      "src": "/(.*)",
      "dest": "/"
      }
      ]
      }

      安裝 swagger-ui-express

      1
      2
      3
      4
      //安裝 swagger-ui-express

      npm install swagger-ui-express@4.6.3 --save
      npm install swagger-jsdoc@6.2.8 --save

      https://cdnjs.cloudflare.com/ajax/libs/swagger-ui/4.18.3/swagger-ui.css 另存到
      public css資料夾內 新增swagger-ui.css
      swagger-ui.css
      swagger_style

      在index.js載入swaggerUi,swaggerFile

      1
      2
      3
      4
      5
      6
      7
      8
      9
      10
      11
      12
      // const express = require('express')之後

      const swaggerUi = require('swagger-ui-express')
      const swaggerFile = require('./swagger.json')

      // const app = express()後面
      var options = {
      customCssUrl: '網址/css/swagger-ui.css',

      };
      //swagger 路徑
      app.use('/swagger', swaggerUi.serve, swaggerUi.setup(swaggerFile,options))

      安裝 swagger-autogen 自動產生

      1
      npm install swagger-autogen@2.23.1 --save

      新增檔案swagger.js載入swaggerAutogen

      1
      2
      3
      4
      5
      6
      7
      8
      9
      10
      11
      12
      13
      14
      15
      16
      17
      18
      19
      20
      21
      22
      23
      24
      25
      26
      27
      28
      29
      30
      31
      32
      33
      34
      35
      36
      37
      38
      39
      40
      41
      42
      43
      44
      45
      46
      47
      48
      49
      50
      51
      52
      53
      54
      55
      56
      const swaggerAutogen = require('swagger-autogen')();

      //內容
      const doc = {
      info: {
      "version": "1.0.0",
      "title": "Node MongoDB Resful Api",
      description: "swagger autogen自動生成的Api文檔"
      },

      host: "localhost:8080",
      basePath: "/",
      //localhost端時為schemes=>http
      //遠端端時為schemes=>https
      schemes: ['http', 'https'],
      consumes: ['application/json'],
      produces: ['application/json'],
      //安全定義
      securityDefinitions: {
      //api密鑰授權
      apiKeyAuth:{
      type: "apiKey",
      // 可以是“header”、“query”或“cookie”
      in: "header",
      //標頭、查詢參數或 cookie 的名稱
      name: "Authorization",
      description: ""
      }
      },
      //定義
      definitions: {
      //參數欄位與schema 對照=>Add開頭我設定為Post
      AddProduct: {
      $name: "蘋果",
      $quantity: 1,
      $price: 199,
      $image:'https://cdn.pixabay.com/photo/2016/10/25/17/58/apple-1769553_1280.jpg',
      },
      //參數欄位與schema 對照
      AddNew: {
      $subject: "今天天氣很好",
      $image: 'https://cdn.pixabay.com/photo/2015/07/05/10/18/tree-832079_1280.jpg',
      content:''
      },
      AddUser: {
      $user: "Lara",
      $email: 'lara1105huang@gmail.com',
      $password:"Lara1234567"
      }
      }
      }
      // 輸出的文件名稱
      const outputFile = './swagger.json';
      // 要指向的啟動 API
      const endpointsFiles = ['./server.js'];
      swaggerAutogen(outputFile, endpointsFiles,doc);

      啟動swaggerAutogen 的方法
      package.json 增加一行指令

      1
      "swagger-autogen": "node swagger.js"

      終端機啟動

      1
      npm run swagger-autogen

      Swagger-autogen: Success ✔

      router/api.js
      Post
      /* swagger 內容*/
      //schema => AddProduct
      //schema => AddNew

      1
      2
      3
      4
      5
      6
      7
      8
      9
      10
      11
      12
      13
      14
      15
      16
      17
      18
      19
      20
      21
      22
      23
      24
      25
      26
      27
      28
      29
      30
      31
      32
      33
      34
      35
      36
      37
      38
      39
      40
      41
      42
      43
      44
      45
      46
      47
      router.post('/product', async(req, res) => {
      try {
      /* #swagger.tags = ['Product']
      #swagger.description = '' */

      /* #swagger.parameters['obj'] = {
      in: 'body',
      description: '',
      required: true,
      schema: { $ref: "#/definitions/AddProduct" }
      } */

      /* #swagger.security = [{
      "apiKeyAuth": []
      }] */
      const product = await Product.create(req.body)
      res.status(200).json(product);
      }catch (error) {
      console.log(error.message);
      res.status(500).json({message: error.message})
      }

      )

      router.post('/new', async(req, res) => {
      try {
      /* #swagger.tags = ['New']
      #swagger.description = '' */

      /* #swagger.parameters['obj'] = {
      in: 'body',
      description: '',
      required: true,
      schema: { $ref: "#/definitions/AddNew" }
      } */

      /* #swagger.security = [{
      "apiKeyAuth": []
      }] */
      const news = await New.create(req.body)
      res.status(200).json(news);

      } catch (error) {
      console.log(error.message);
      res.status(500).json({message: error.message})
      }
      })

      //註冊

      //schema => AddUser

      1
      2
      3
      4
      5
      6
      7
      8
      9
      10
      11
      12
      13
      14
      15
      16
      17
      18
      19
      20
      21
      22
      23
      24
      25
      26
      27
      28
      29
      30
      31
      32
      33
      router.post('/register', async(req, res) =>
      {
      try {
      const newUser = new User(req.body);
      newUser.password = bcrypt.hashSync(req.body.password, 12);
      const token = jwt.sign({email: newUser.email, user: newUser.email, _id: newUser._id}, 'RESTFULAPI').toString();
      let userArr = {
      user: newUser.user,
      email: newUser.email,
      password: newUser.password,
      created: newUser.created,
      token:token
      }
      /* #swagger.tags = ['User']
      #swagger.description = '' */

      /* #swagger.parameters['obj'] = {
      in: 'body',
      description: '',
      required: true,
      schema: { $ref: "#/definitions/AddUser" }
      } */

      /* #swagger.security = [{
      "apiKeyAuth": []
      }] */
      const user = await User.create(userArr);

      res.status(200).json(user);
      } catch (error) {
      res.status(500).json({message: error.message})
      }
      })

      上傳

      安裝multer,imgur
      載入multer,imgur
      設定 Multer

      1
      2
      3
      4
      5
      6
      7
      8
      9
      10
      11
      12
      13
      14
      15
      16
      17
      18
      19
      20
      21
      22
      23
      24
      25
      26
      27
      28
      29
      30
      31
      32
      33
      34
      35
      36
      37
      38
      39
      40
      41
      42
      43
      44
      45
      46
      47
      48
      49
      50
      const multer = require('multer')
      const imgur = require('imgur')
      //// 設定 Multer
      const upload = multer({

      limits: {
      //大小為 1MB
      fileSize: 1000000
      },

      fileFilter(req, file, cb)
      {
      //只接受三種檔案格式:jpg、png、jpeg — 若篩選失敗,丟出錯誤訊息
      //originalname獲得檔案的原始名稱(名稱+檔案格式)
      //.match:確認檔案格式是篩選時所設定
      if (!file.originalname.match(/\.(png|jpg|jpeg)$/)) {
      return cb(new Error('Please upload a picture!'))
      }
      cb(undefined, true)
      }
      }).any();

      router.post('/upload', (req, res, next) =>
      {
      upload(req, res, () => {
      imgur.setCredentials(
      process.env.IMGUR_EMAIL,
      process.env.IMGUR_PASSWORD,
      process.env.IMGUR_CLIENTID
      );
      imgur.uploadBase64(
      req.files[0].buffer.toString('base64'),
      process.env.IMGUR_ALBUM_ID
      )
      .then((json) => {
      res.send({ url: json.link });
      /*
      #swagger.consumes = ['multipart/form-data']
      #swagger.parameters['singleFile'] = {
      in: 'formData',
      type: 'file',
      required: 'true',
      description: '',
      } */
      })
      .catch((err) => {
      res.send(err.message);
      });
      })
      });

Node middleware 中介軟體

middleware

從發出請求(Request)之後,到接收回應(Response)這段來回的途徑上,用來處理特定用途的程式
比較常見的Middleware有身份驗證(Identity)、路由(Routing)或回應壓縮(Response Compression)等
middleware function 傳入三個參數,然後輸出想要的資料:

  • 第一個參數是 request
  • 第二個參數是 response
  • 再透過第三個參數 next 把控制權轉移到下一個 middleware

app.js

1
2
3
4
5
6
7
8
9
10
11
12
13
14
const express = require("express");
const app = express();

app.use((req, res, next) => {
console.log("middleware 守門員");
next();
});

app.get("/", (req, res) => {
res.send('<h1>這是 middleware 練習</h1>' );
});

const port = process.env.port || 3000;
app.listen(port);

Token 例子
middleware新增token.js

1
2
3
4
5
6
7
8
9
10
11
12
13
14
15
const verifyToken = (req, res, next) =>
{
const bearerHeader = req.headers.authorization;
if (typeof bearerHeader !== 'undefined') {
const bearer = bearerHeader.split(' '); // 字串切割
const bearerToken = bearer[1]; // 取得 JWT
req.token = bearerToken; // 在response中建立一個token參數
next(); // 結束 Middleware 進入
}
else {
req.send({result:'令牌無效!'})
}
}
//輸出 verifyToken
module.exports = verifyToken;

到要使用Tokn 的router 使用 middleware

1
2
3
4
5
6
7
8
9
10
11
12
13
14
15
16
17
18
19
20
21
22
23
24
25
26
27
28
29
const express = require('express')
//載入verifyToken
const verifyToken = require('../middleware/token')


//使用verifyToken
router.get('/users', verifyToken,async (req, res) =>{
try {
const users = await User.find({});
res.status(200).json(users);
} catch (error) {
res.status(500).json({message: error.message})
}
})

//使用verifyToken
router.delete('/users/:id', verifyToken,async(req, res) =>{
try {
const {id} = req.params;
const user = await User.findByIdAndDelete(id);
if(!user){
return res.status(404).json({message: `沒有發現任何使用者 ${id}`})
}
res.status(200).json(user );

} catch (error) {
res.status(500).json({message: error.message})
}
})