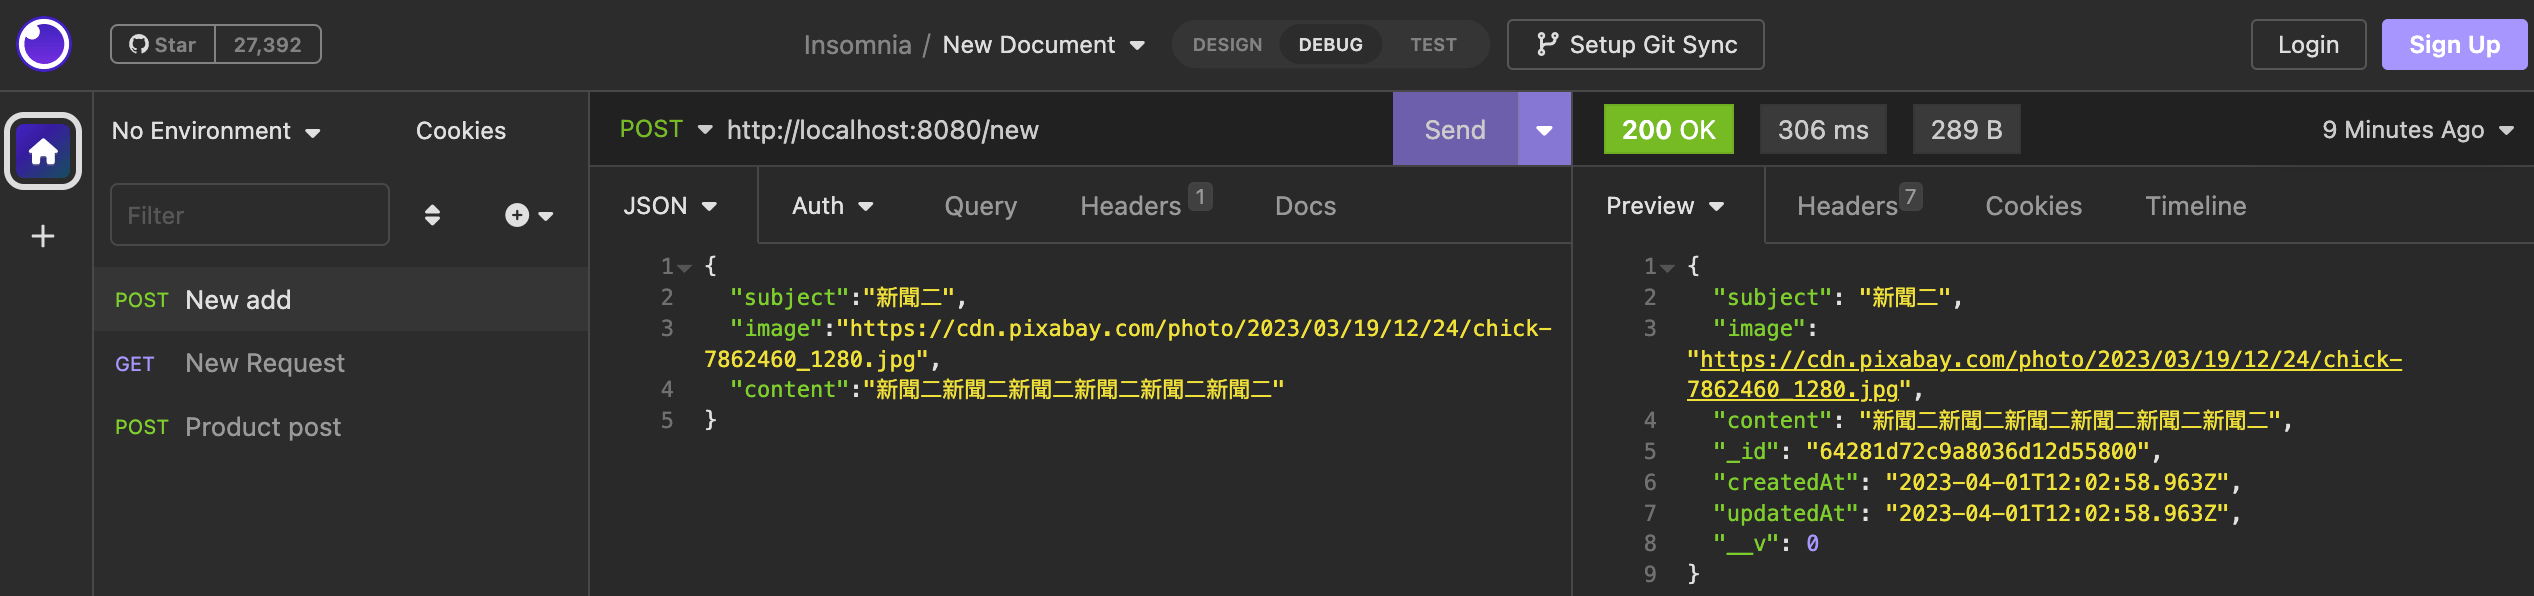
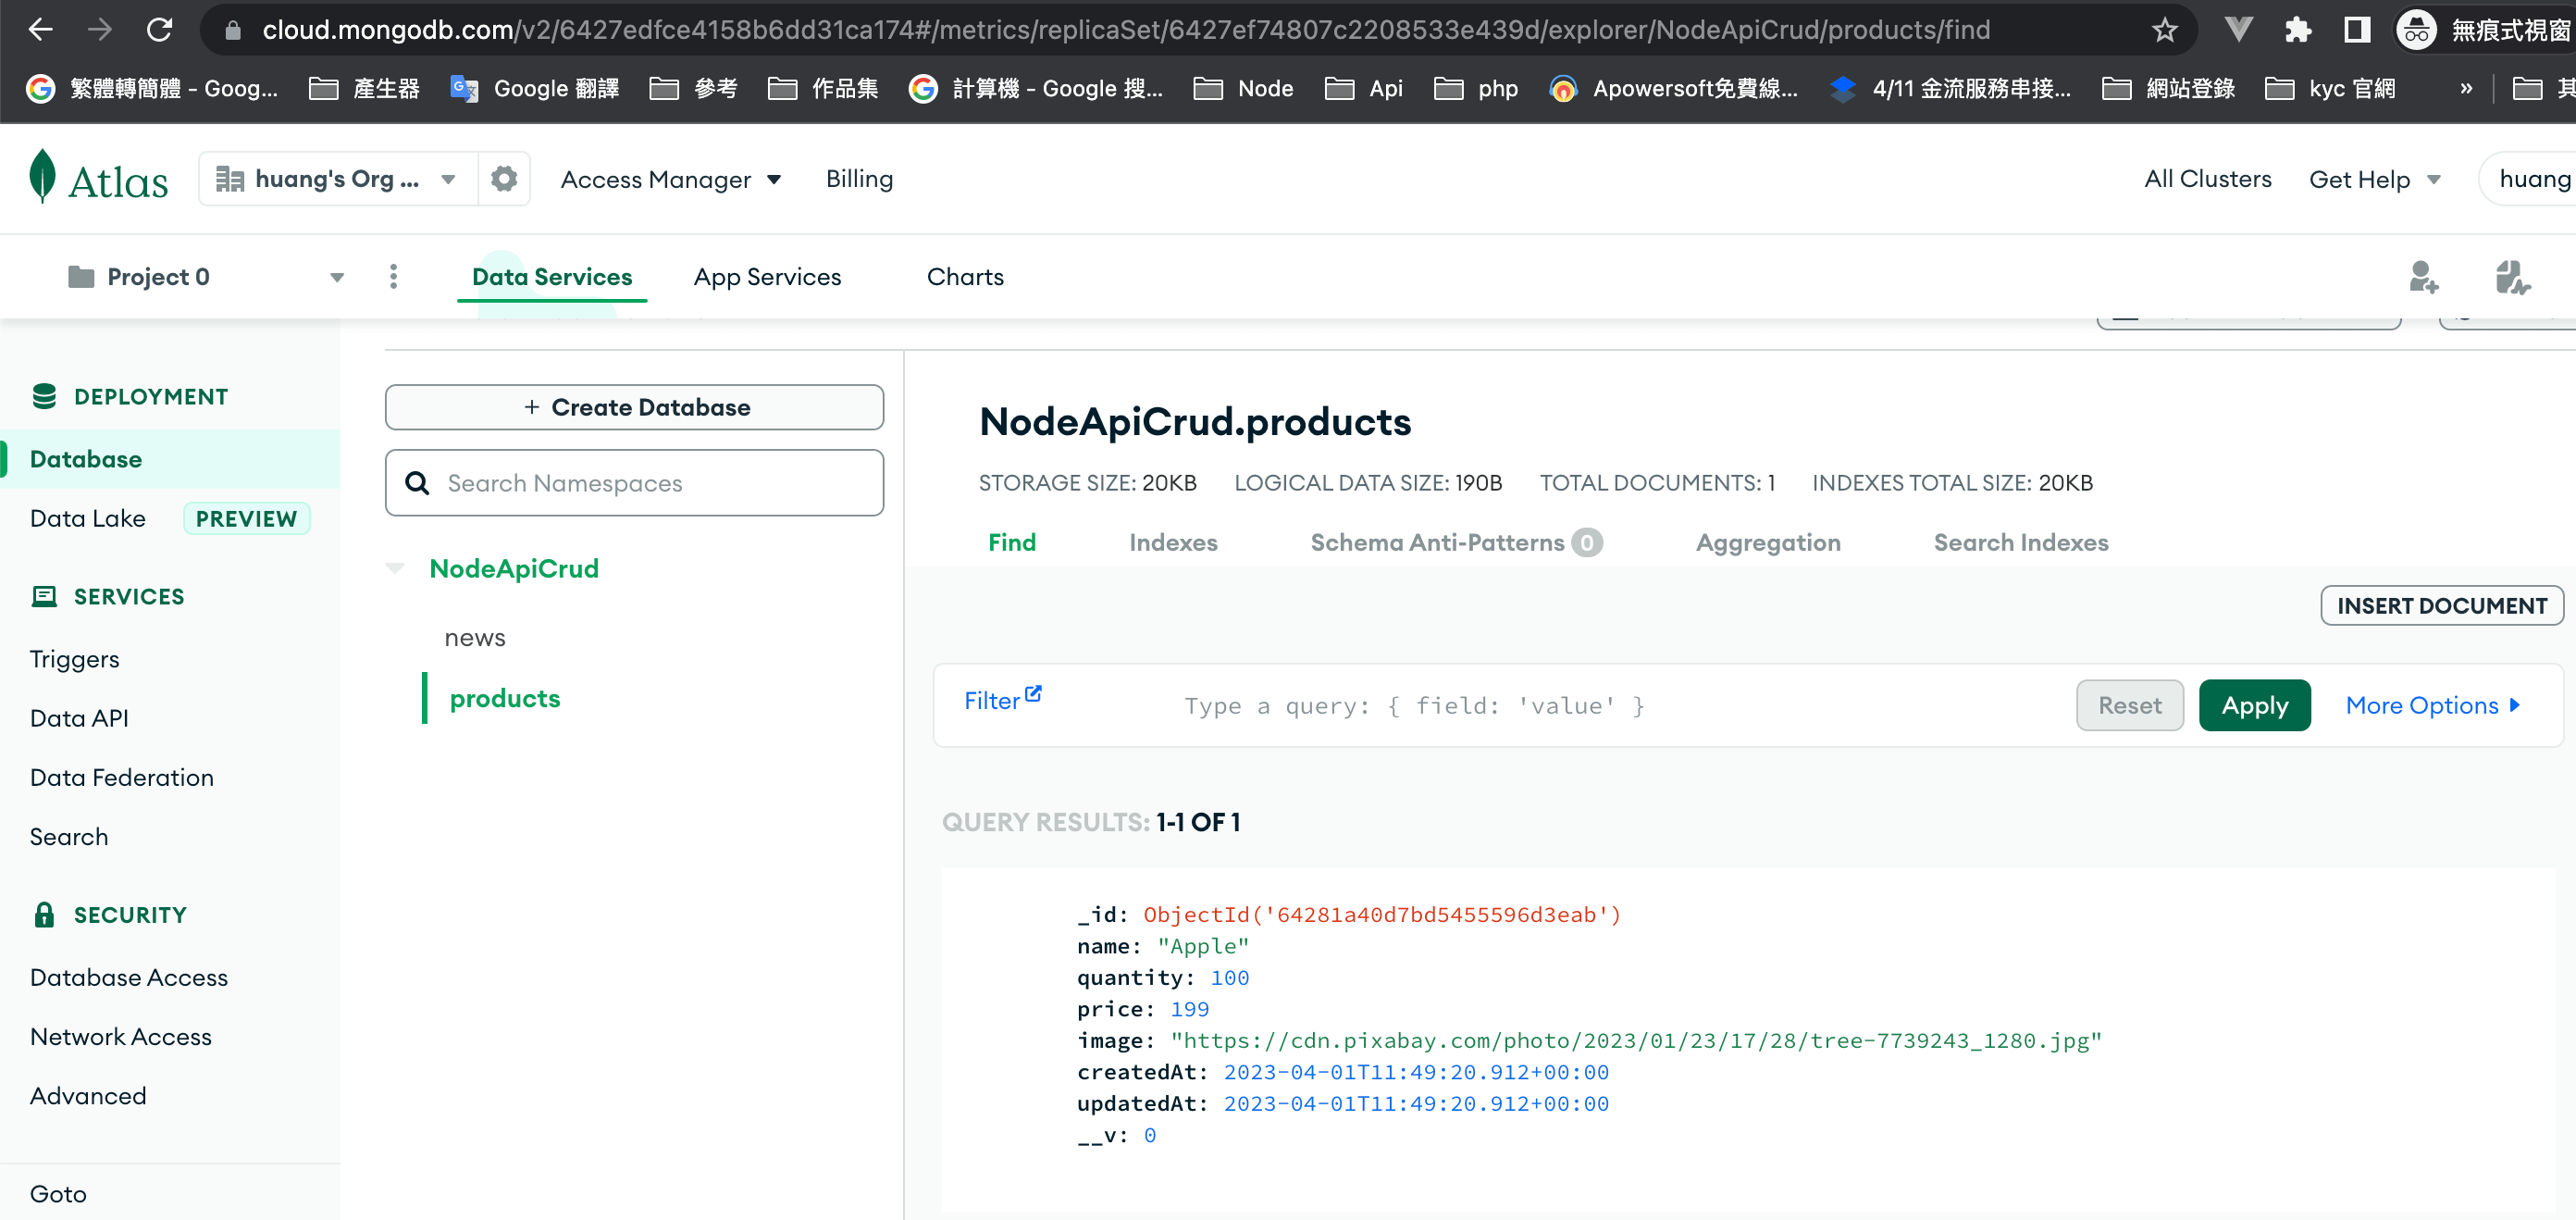
路由規則

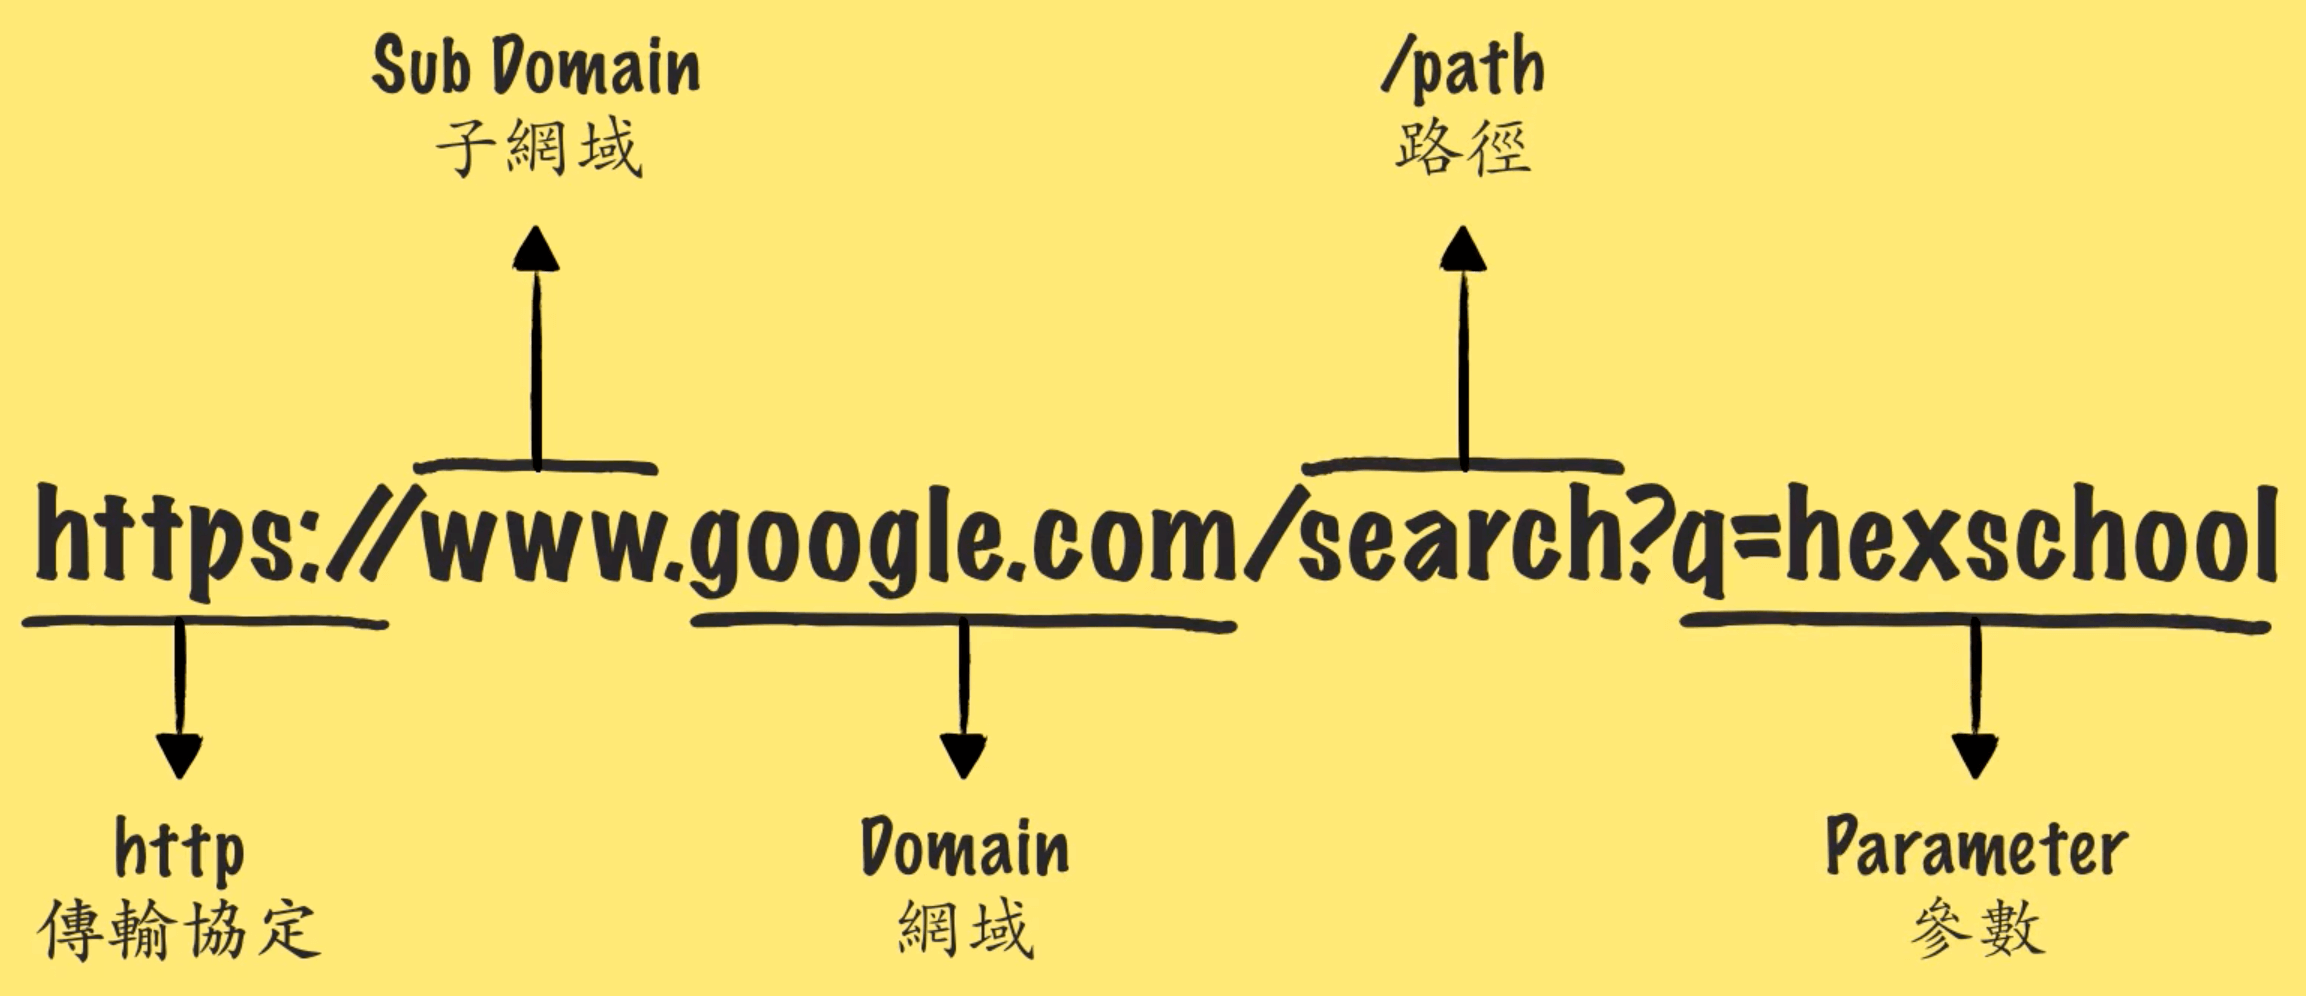
網址解析

1
https//www.google.com.tw/search?q=hexschool
  • http:傳輸協定
  • https:傳輸協定加密
  • wwwsub Domain子網域
  • google.com.twDomain網域
  • /search路徑
  • ?q=xxxxParameter參數,會用 ?q 代表,q 代表 query
  • &多個參數會用 & 做串聯。

params 取得指定路徑

透過 request 的參數 params 取得路由的參數

1
2
3
4
5
6
app.get('/news/:id', async(req, res) =>{
//取得動態參數
let params = req.params.id;
console.log(params);
res.send(`<h1>param is ${params}</h1>`);
})

透過 query 取得網址參數

127.0.0.1:3000/page/tom?limit=10&q=ddd

app.get("/page/:name", (req, res) => {
  let params = request.params.name;
  let limit = request.query.limit;
  console.log(limit); // 網址帶入的參數
  let query = request.query.q;
  console.log(query); // 網址帶入的參數
  response.send(
    `<h1>${params} 的播放清單</h1>` +
    `<p>關鍵字為 ${query} 的資料中找出 ${limit} 資料 </p>`
  );
});

Node express Web 應用程式架構 & 環境安裝

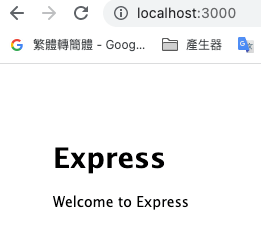
Express 是最小又靈活的Node.js Web 應用程式架構,為Web 與行動式應用程式提供一組健全的特性。

可以接的資料庫

  • Firebase
  • MongoDB
  • MySql

環境安裝

新增資料夾 project

1
2
3
4
5
6
7
8
9
10
11
cd project 

//npm init 指令(新增package.json)
npm init

//安裝express 指令
sudo npm install express --save
檔案內有
node_modules資料夾與package.json
//package.json內
dependencies多了一個express 版本號

開啟 web 伺服器

新增app.js

1
2
3
4
5
6
7
8
9
10
11
const express =require('express')
const app =express()
app.get('/',(req,res)=>{
//傳送資料
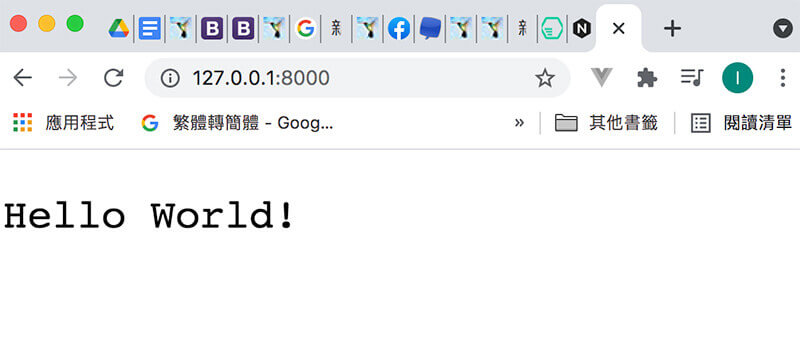
res.send('Hello Word!')
})

//監聽
var port=process.env.PORT || 3000;
app.listen(port)

//啟動
node app.js

查詢

1
& nvm ls 

使用14.20.1

1
nvm use 14.20.1

目前node版本,npm版本
Now using node v14.20.1 (npm v6.14.17)

安裝express

以全域方法安裝express-generator工具。
在 Express 4.16 時,將 body-parser 改為 內建選項 ,所以不需要進行安裝,但如果是 4.16 之前的版本則需要透過 npm 來安裝。

1
npm install express-generator -g

项目初始化:專案名稱

1
express -e 專案名稱

到專案
cd 專案名稱

1
npm install

啟動express

1
npm start

將打包好的 dist 內的資料放到 public / 
改完后,重新启动express项目

Node express JWT Api

什麼是 JWT?

JSON Web Tokens (JWT) 是一種開放式標準 (RFC 7519),用於以 JSON 物件的形式在各​​方之間安全地傳輸資訊。 JWT 通常用於身份驗證和授權目的。它們由三個部分組成:

  1. 標頭 HEADER:包含有關令牌的元數據,例如令牌的類型(JWT)和使用的雜湊演算法。
  2. 有效負載 PAYLOAD:包含聲明,即關於實體(通常是使用者)和附加資料的陳述。
  3. 簽章:用於驗證令牌的完整性和真實性。

cors 跨來源資源共用

跨來源資源共用(Cross-Origin Resource Sharing (CORS))是一種使用額外 HTTP 標頭令目前瀏覽網站的使用者代理 (en-US)取得存取其他來源(網域)伺服器特定資源權限的機制。當使用者代理請求一個不是目前文件來源——例如來自於不同網域(domain)、通訊協定(protocol)或通訊埠(port)的資源時,會建立一個跨來源 HTTP 請求(cross-origin HTTP request)
安裝cors

1
npm install cors --save

啟用所有 CORS 請求

  1. 載入express
  2. 載入cors
  3. use cors
1
2
3
4
5
6
7
8
9
10
11
12
13
var express = require('express')
var cors = require('cors')
var app = express()

app.use(cors())

app.get('/products/:id', (req, res, next)=> {
res.json({msg: '這對所有來源都支持 CORS!'})
})

app.listen(80, function () {
console.log('CORS-enabled web server listening on port 80')
})
### 為單個路由啟用 CORS
  1. 載入express
  2. 載入cors
  3. 在單一路由加入cors()
1
2
3
4
5
6
7
8
9
10
11
var express = require('express')
var cors = require('cors')
var app = express()

app.get('/products/:id', cors(), (req, res, next)=> {
res.json({msg: '為單個路由啟用 CORS 的'})
})

app.listen(80, function () {
console.log('這是為偵聽端口 80 的單個啟用了 RouteCORS 的 Web 服務器啟用了 CORS')
})

Configuring CORS=>配置 CORS

1
2
3
4
5
6
7
8
9
10
11
12
13
14
15
16
17
var express = require('express')
var cors = require('cors')
var app = express()

var corsOptions = {
origin: 'http://example.com',
// 選項成功狀態:一些舊版瀏覽器(IE11、各種 SmartTV)在 204 上卡住
optionsSuccessStatus: 200
}

app.get('/products/:id', cors(corsOptions), function (req, res, next) {
res.json({msg: 'This is CORS-enabled for only example.com.'})
})

app.listen(80, function () {
console.log('CORS-enabled web server listening on port 80')
})

默認配置相當於:

  • origin:配置 Access-Control-Allow-Origin CORS 標頭。
  • methods:配置 Access-Control-Allow-Methods CORS 標頭。要一個逗號分隔的字符串(例如:'GET,PUT,POST')或一個數組(例如:['GET', 'PUT', 'POST'])。
  • allowedHeaders配置 Access-Control-Allow-Headers CORS 標頭。 需要一個逗號分隔的字符串(例如:'Content-Type,Authorization')或一個數組(例如:['Content-Type', 'Authorization'])。 如果未指定,則默認反映請求的 Access-Control-Request-Headers 標頭中指定的標頭。
  • exposedHeaders配置 Access-Control-Expose-Headers CORS 標頭。 需要一個逗號分隔的字符串(例如:'Content-Range,X-Content-Range')或一個數組(例如:['Content-Range', 'X-Content-Range'])。 如果未指定,則不會公開任何自定義標頭。
  • credentials配置 Access-Control-Allow-Credentials CORS 標頭。 設置為 true 以傳遞標頭,否則將被省略。
  • maxAge:配置 Access-Control-Max-Age CORS 標頭。 設置為整數以傳遞標頭,否則將被省略。 preflightContinue:將 CORS 預檢響應傳遞給下一個處理程序。
  • preflightContinue:將 CORS 預檢響應傳遞給下一個處理程序。
  • optionsSuccessStatus:提供用於成功 OPTIONS 請求的狀態代碼,因為一些舊版瀏覽器(IE11、各種 SmartTV)會在 204 上阻塞。
1
2
3
4
5
6
{
"origin": "*",
"methods": "GET,HEAD,PUT,PATCH,POST,DELETE",
"preflightContinue": false,
"optionsSuccessStatus": 204
}

bcryptjs密碼加密

安裝bcryptjs bcryptjs
密碼加密,此套件的加密是不可逆的,所以沒有辦法從加密後的結果回推原始密碼,相對安全性提高非常多

1
npm install bcryptjs --save

異步

1
2
3
4
const bcrypt = require('bcrypt');
const saltRounds = 10;
const myPlaintextPassword = 's0/\/\P4$$w0rD';
const someOtherPlaintextPassword = 'not_bacon';

技術 1(在單獨的函數呼叫上產生鹽和雜湊值):
bcrypt.hash()

1
2
3
4
5
bcrypt.genSalt(saltRounds, function(err, salt) {
bcrypt.hash(myPlaintextPassword, salt, function(err, hash) {
// Store hash in your password DB.
});
});

技術 2(自動產生鹽和雜湊值):
bcrypt.hash()

1
2
3
bcrypt.hash(myPlaintextPassword, saltRounds, function(err, hash) {
// Store hash in your password DB.
});

這兩種技術達到相同的最終結果。

要檢查密碼:

1
2
3
4
5
6
7
// Load hash from your password DB.
bcrypt.compare(myPlaintextPassword, hash, function(err, result) {
// result == true
});
bcrypt.compare(someOtherPlaintextPassword, hash, function(err, result) {
// result == false
});

JWT 包含三個重要部分:Header、Payload、Signature。它們一起組合成一個標準結構:header.payload.signature.
客戶端通常在Authorization header 中附加 JWT 和 Bearer 前綴:

1
2
Authorization: Bearer [header].[payload].[signature]
Authorization: base64(Header) + base64(Payload) + base64(Signature)

或者僅在x-access-token標頭中:

1
x-access-token: [header].[payload].[signature]

Node.js express 和 MongoDB 用戶身份驗證

安裝 jsonwebtoken

1
2
3
npm install jsonwebtoken --save
//載入 jsonwebtoken
const jwt = require('jsonwebtoken')

產生 JWT
透過模組上的sign()方法可以產生一組 JWT,產生時需要將存放在 Token 當中的資料帶入payload參數中、密鑰帶入secretOrPrivateKey參數中:

1
jwt.sign(payload, secretOrPrivateKey, [options, callback])

options參數非必填,但透過帶入options物件能設定許多選項。例如:

  • algorithm:設定產生簽章要使用的雜湊演算法(預設: HS256)
  • expiresIn:設定 Token 多久後會過期(自動在 Payload 新增 exp)
  • noTimestamp:設定產生 JWD 時不會自動在 Payload 中新增iat時間

callback 參數非必填,但若要以非同步方式產生 JWD,可以提供一個 Callback 函式,Token 將能在 Callback 函式中取得。

1
2
3
4
// 設定密鑰
const SECRET = 'thisismynewproject'
// 建立 Token
const token = jwt.sign({ _id: user._id.toString() }, SECRET, { expiresIn: '1 day' })

Node express dotenv與環境變數設定

node 使用版本號16.14.0

安裝dotenv與環境變數設定

dotenv
建立 .env 檔 (不要加入 git)

1
npm install dotenv --save

.env 檔,全大寫

1
2
3
4
5
DB_USER=user
DB_PASS=xxxxxxx
DB_HOST=xxxxxxxx.xxxxxxx.mongodb.net
MONGO_PROJECT=xxxxxxx
MONGO_RETRY_WRITES=true

環境變數:在程式剛啟動時,就可以載入require(‘dotenv’).config();

1
2
3
4
5
6
7
8
9
10
11
12
13
14
15
16
17
18
19
20
21
22
23
24
25
26
27
28
29
30
31
32
33
34
35
36
37
38
39
40
41
42
43
44
45
46
47
48
49
//express
const express = require('express')
//資料庫
const mongoose = require('mongoose')
//環境變數
require('dotenv').config()
//資料庫連結
const user = process.env.DB_USER;
const password = process.env.DB_PASS;
const host = process.env.DB_HOST;
const project = process.env.MONGO_PROJECT;
const retryWrites = process.env.MONGO_RETRY_WRITES;
const connectionString = `mongodb+srv://${user}:${password}@${host}/${project}?retryWrites=${retryWrites}&w=majority`;

mongoose.set("strictQuery", false)

mongoose.connect(connectionString,{serverSelectionTimeoutMS: 5000})
.then(() => {
console.log('連結mongoose');
})
.catch((err) => {
console.log(err.message);
});

const app = express()

app.use(express.json())
// express 網址編碼 中內置的一種方法,用於將傳入的 Request Object 識別為strings 或 arrays; extended=>廣大的。

app.use(express.urlencoded({ extended: false }))


const api = require('./routes/api')
app.use('/api', api)

const auth = require('./routes/auth')
app.use('/auth', auth)


app.get('/', (req, res) => {
res.send('Hello Node Api!')
})

const PORT = process.env.PORT || 8080;


app.listen(PORT, () => console.log(`服務器正在監聽端口 ${PORT}`));

module.exports = app;

Node express MongoDB CRUD Api 與 Render 部署

node 使用版本號16.14.0

npm init

1
2
npm init
npm init -y //產生一個空白的 package.json (懶人專用)

基本上結束後,你可以看到這個資料夾底下,新增了一個 Package.json
內容如下:
package name: 你這個 Project 要叫什麼名字
version: 你決定這個 Project 現在該是第幾版
description: Project 基本介紹
entry point: 進入點,如果要跑你的 Project 應該要執行哪個檔案
author: 作者
license: 你這個 Project 是採用什麼授權的
test command:

啟動指令node

新增server.js
console.log(‘Hello’)

1
node server.js

修改啟動指令為npm run server

在package.json內scripts新增”server”: “node server.js”

1
2
3
"scripts": {
"server": "node server.js"
},

npm
搜尋 express
express.js 官網
Express 是最小又靈活的Node.js Web 應用程式架構,為Web 與行動式應用程式提供一組健全的特性。
安裝express

1
npm install express --save

在server.js內容下新增

1
2
3
4
5
6
7
8
9
10
11
12
13
載入express
const express = require('express')
const app = express()


//client req=> Node App
//client res<= Node App
app.get('/', (req, res) => {
res.send('Hello Node Api!')
})

const PORT = process.env.PORT || 3030;
app.listen(PORT, () => console.log(`Server Port ${PORT}`));

insomnia Api

使用nodemon此工具是如Postman功能相同

安裝nodemon

安裝於全域

1
npm install nodemon -g  //安裝於全域

nodemon 功能
自動重啟應用程式,持續偵測你的預設程式,默認支持 node&coffeescript,但是易於運行任何可執行文件(比如python,make等)可以忽略特定文件或目錄,觀察指定的目錄資料夾,與服務器應用程序或一次運行公用程序和 REPLs 一起使用,可在 node 中被存取使用
nodemon
修改自動重啟應用程式為npm run dev
在package.json內scripts新增”server”: “nodemon server.js”

1
"dev": "nodemon server.js",

連結MongoBD

Mongoose 是MongoDB 的前端,MongoDB 是一個使用面向文檔數據模型的開源NoSQL 數據庫。
npm 官網=>搜尋 mongoose
mongoose
安裝mongoose

1
npm i mongoose

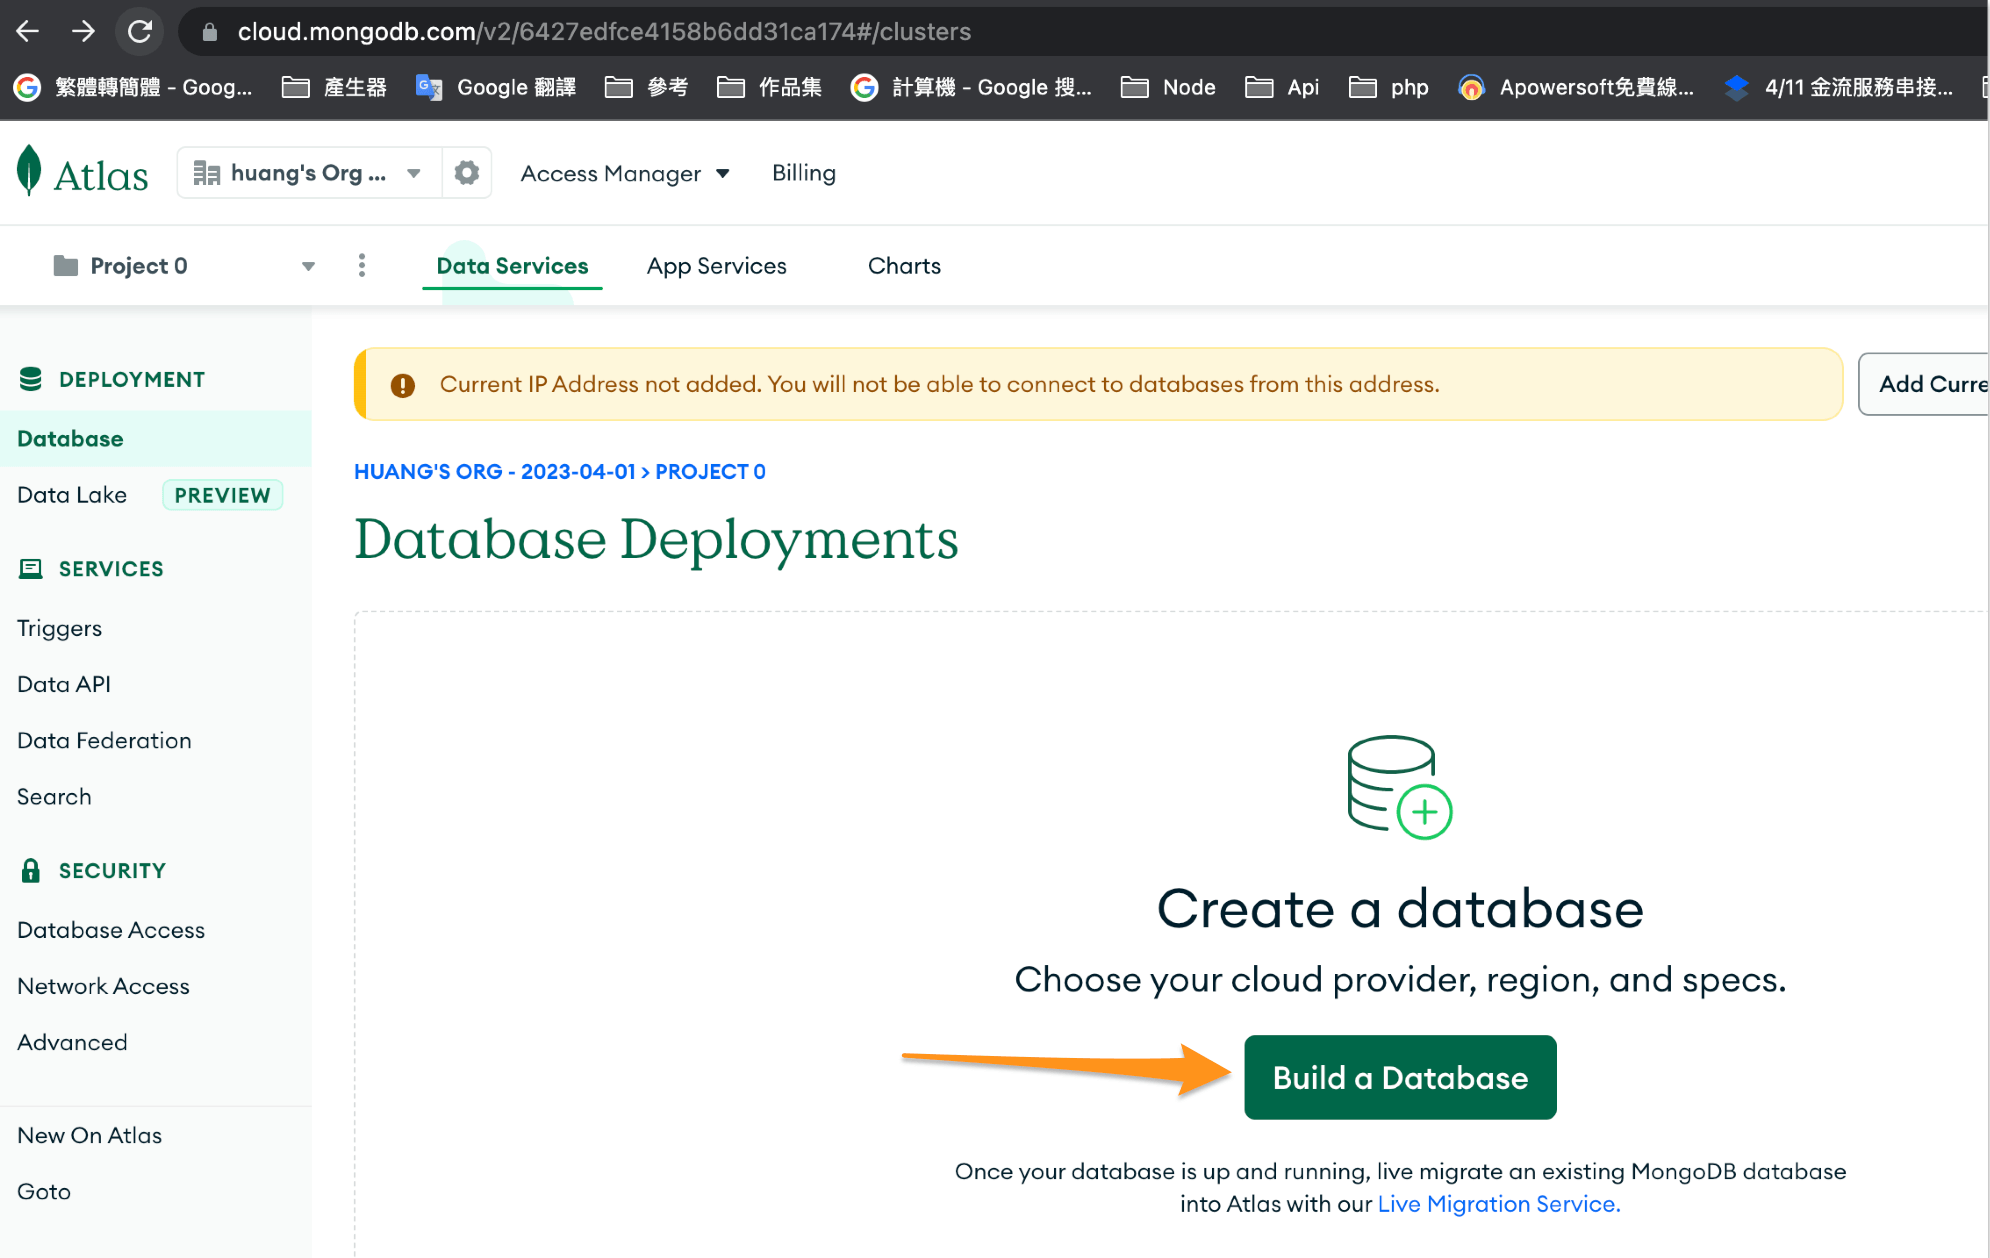
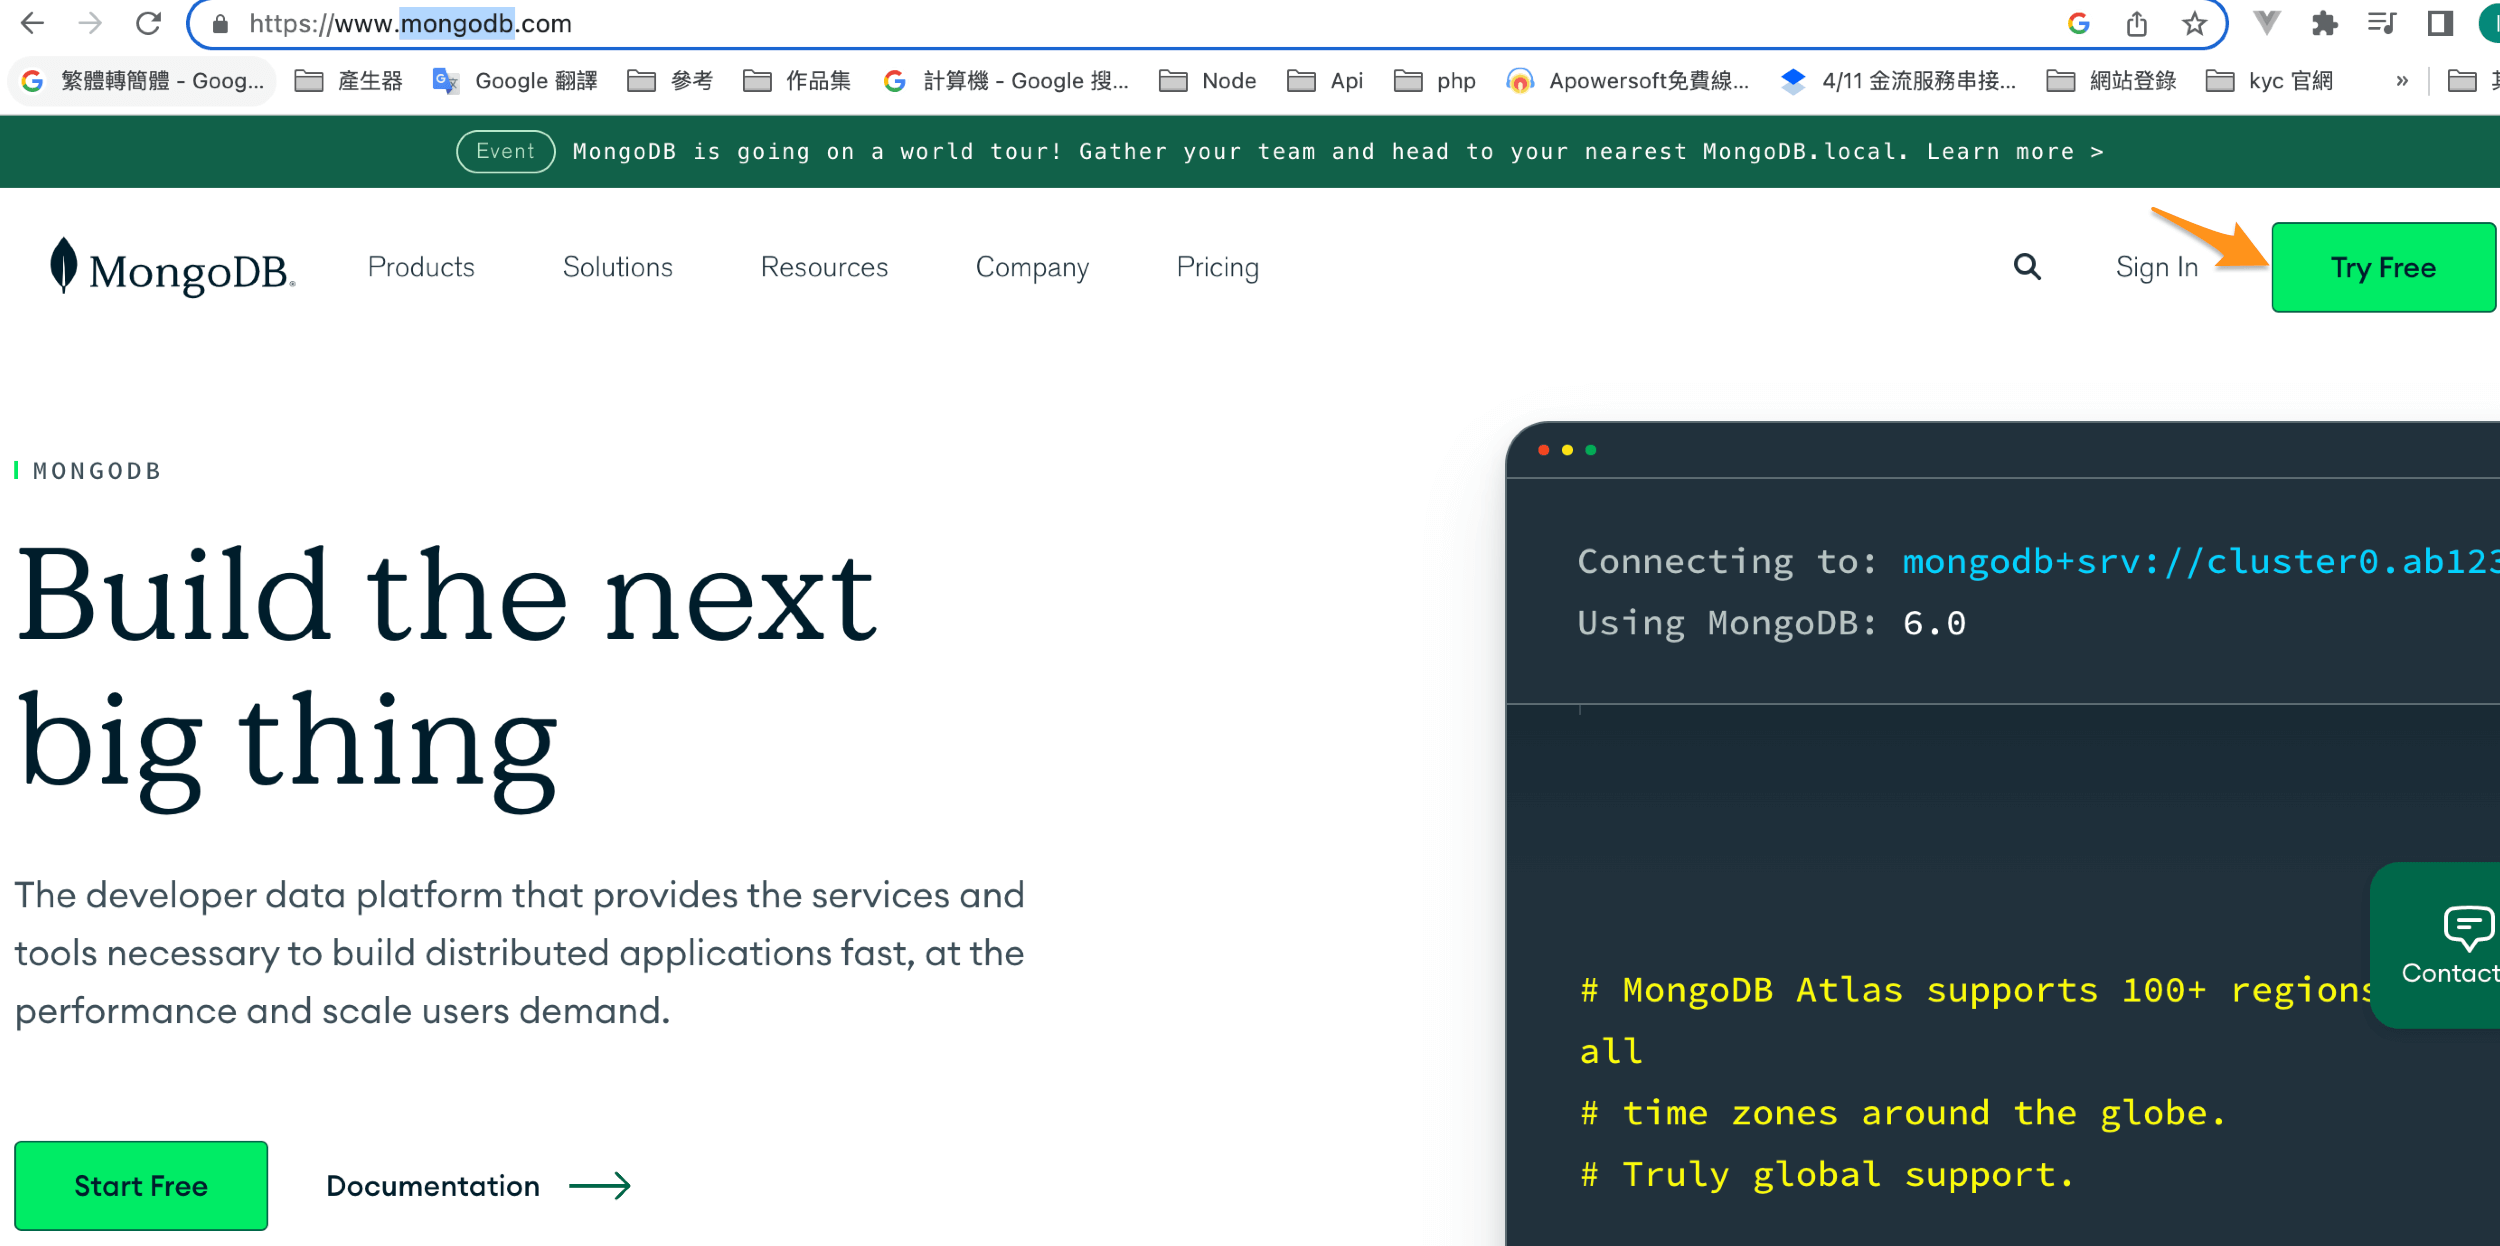
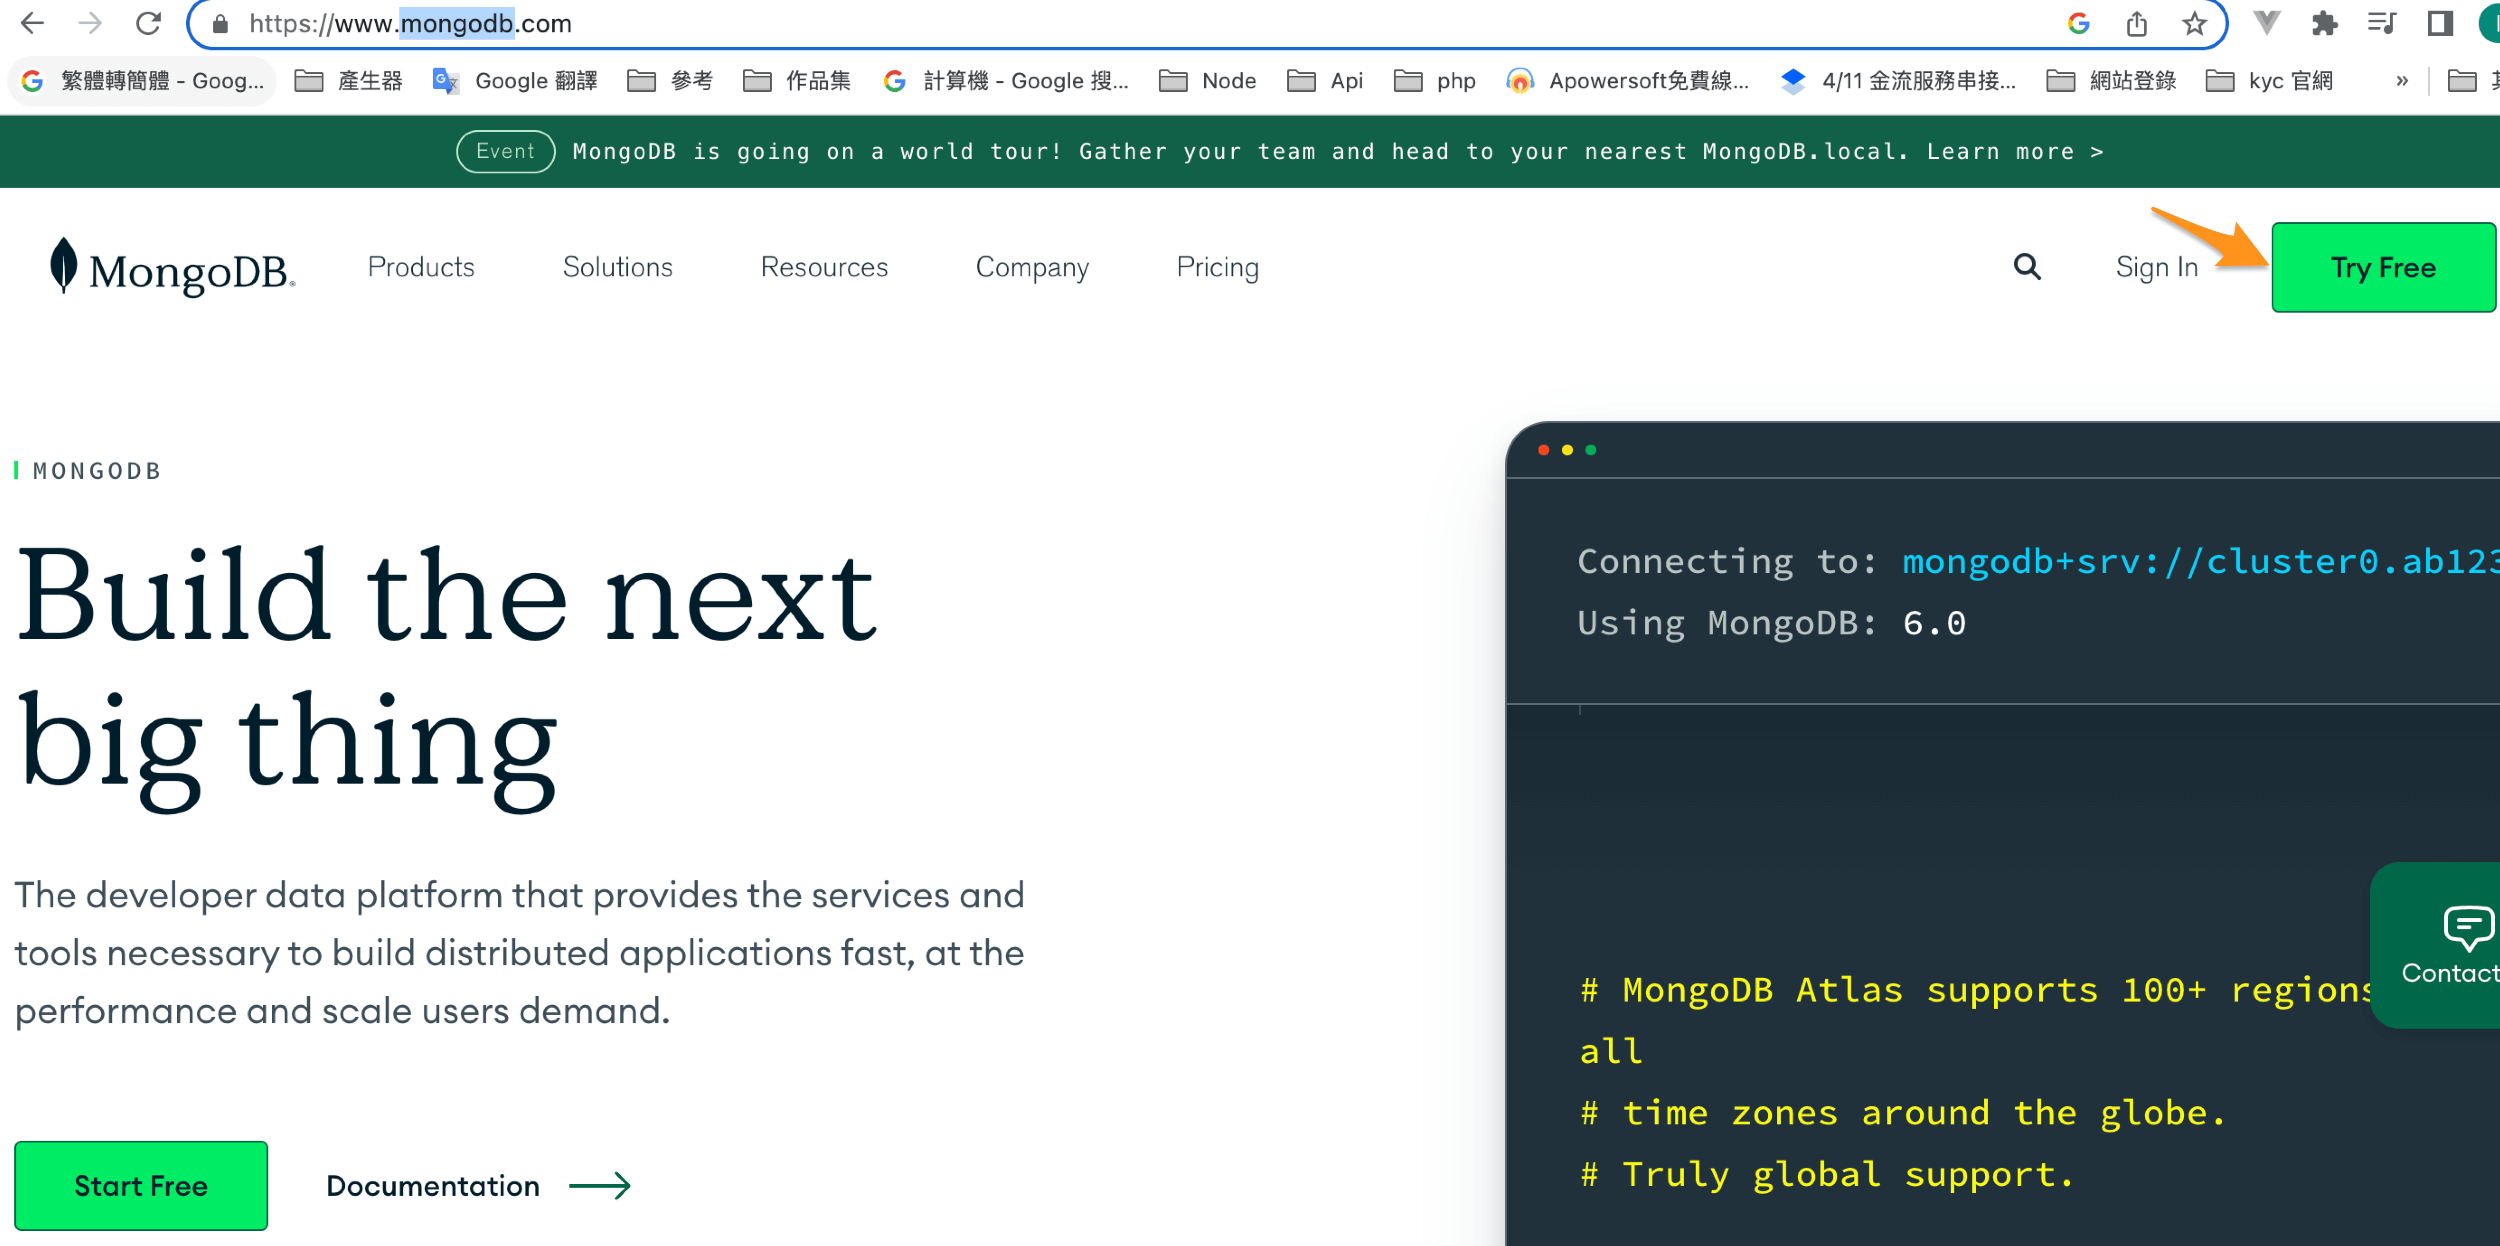
MongoDB官網
//如圖

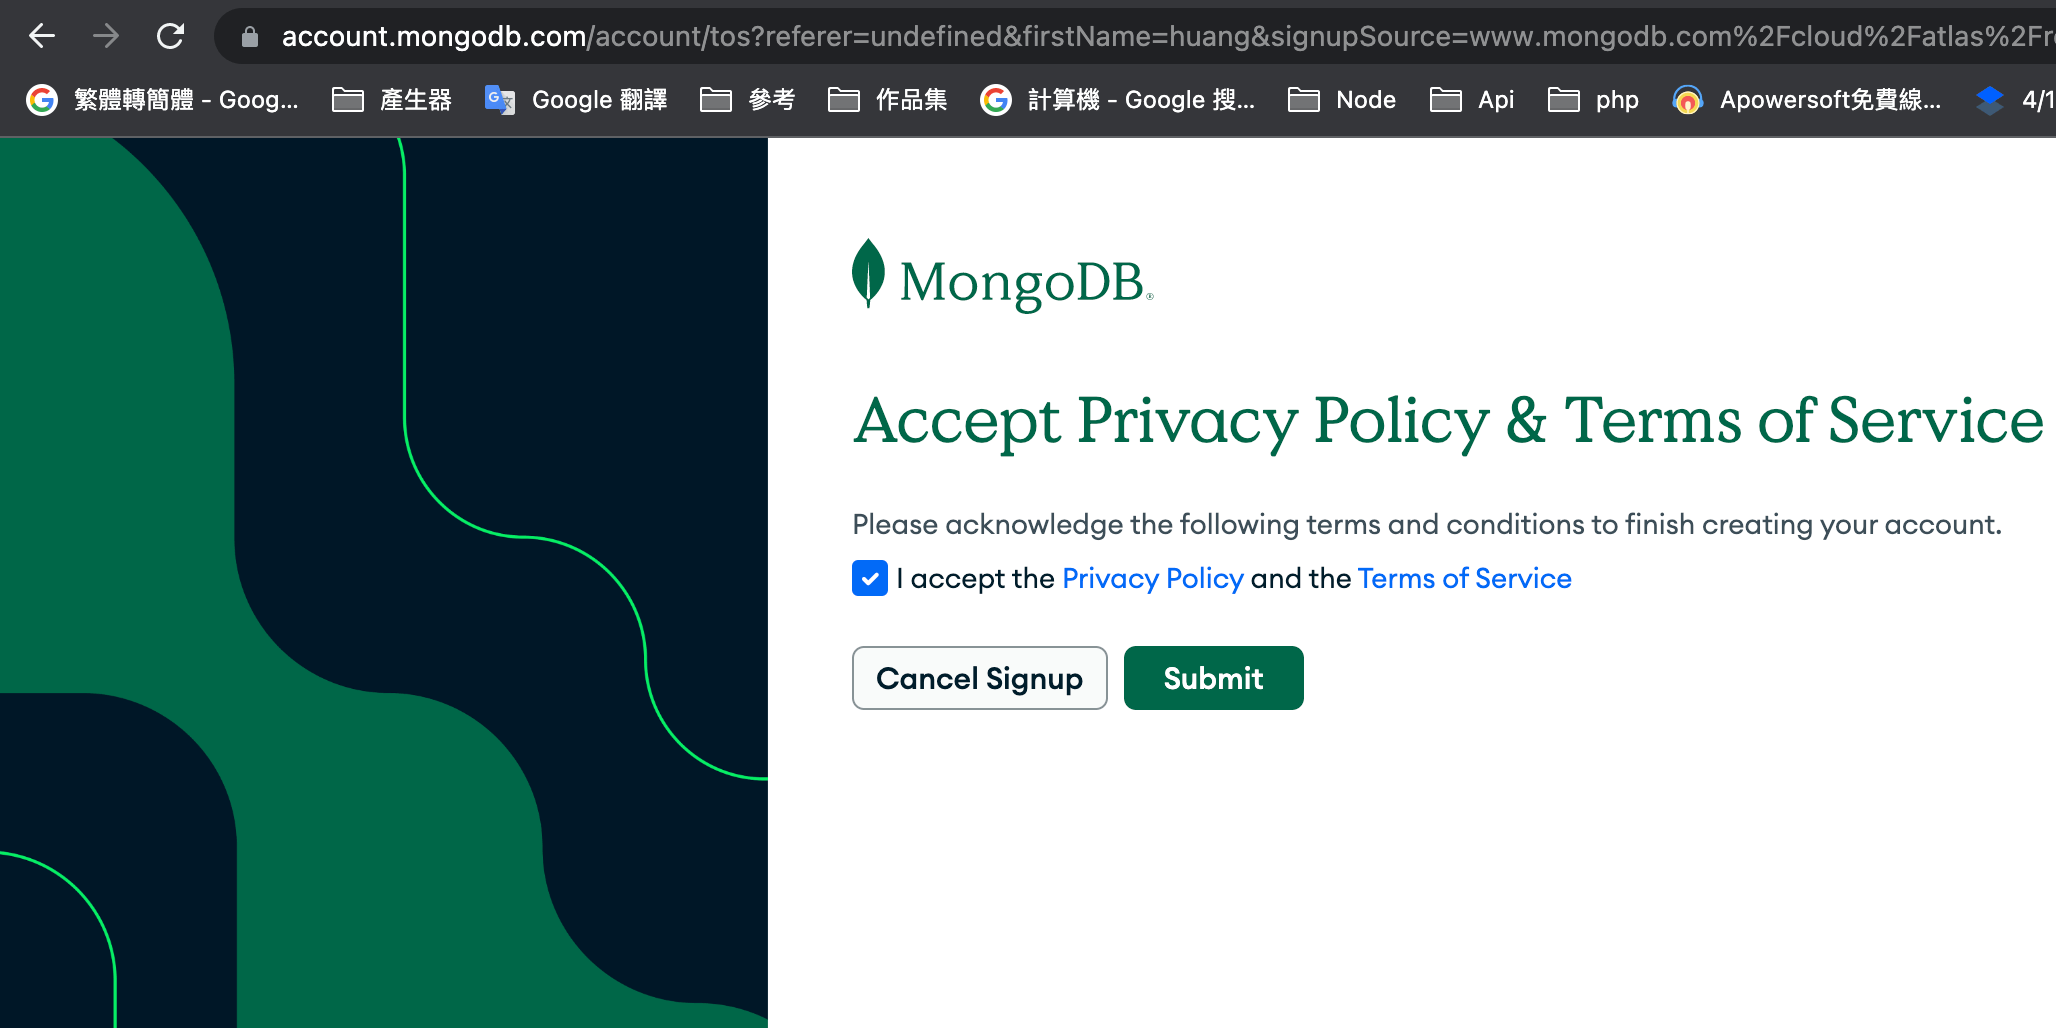
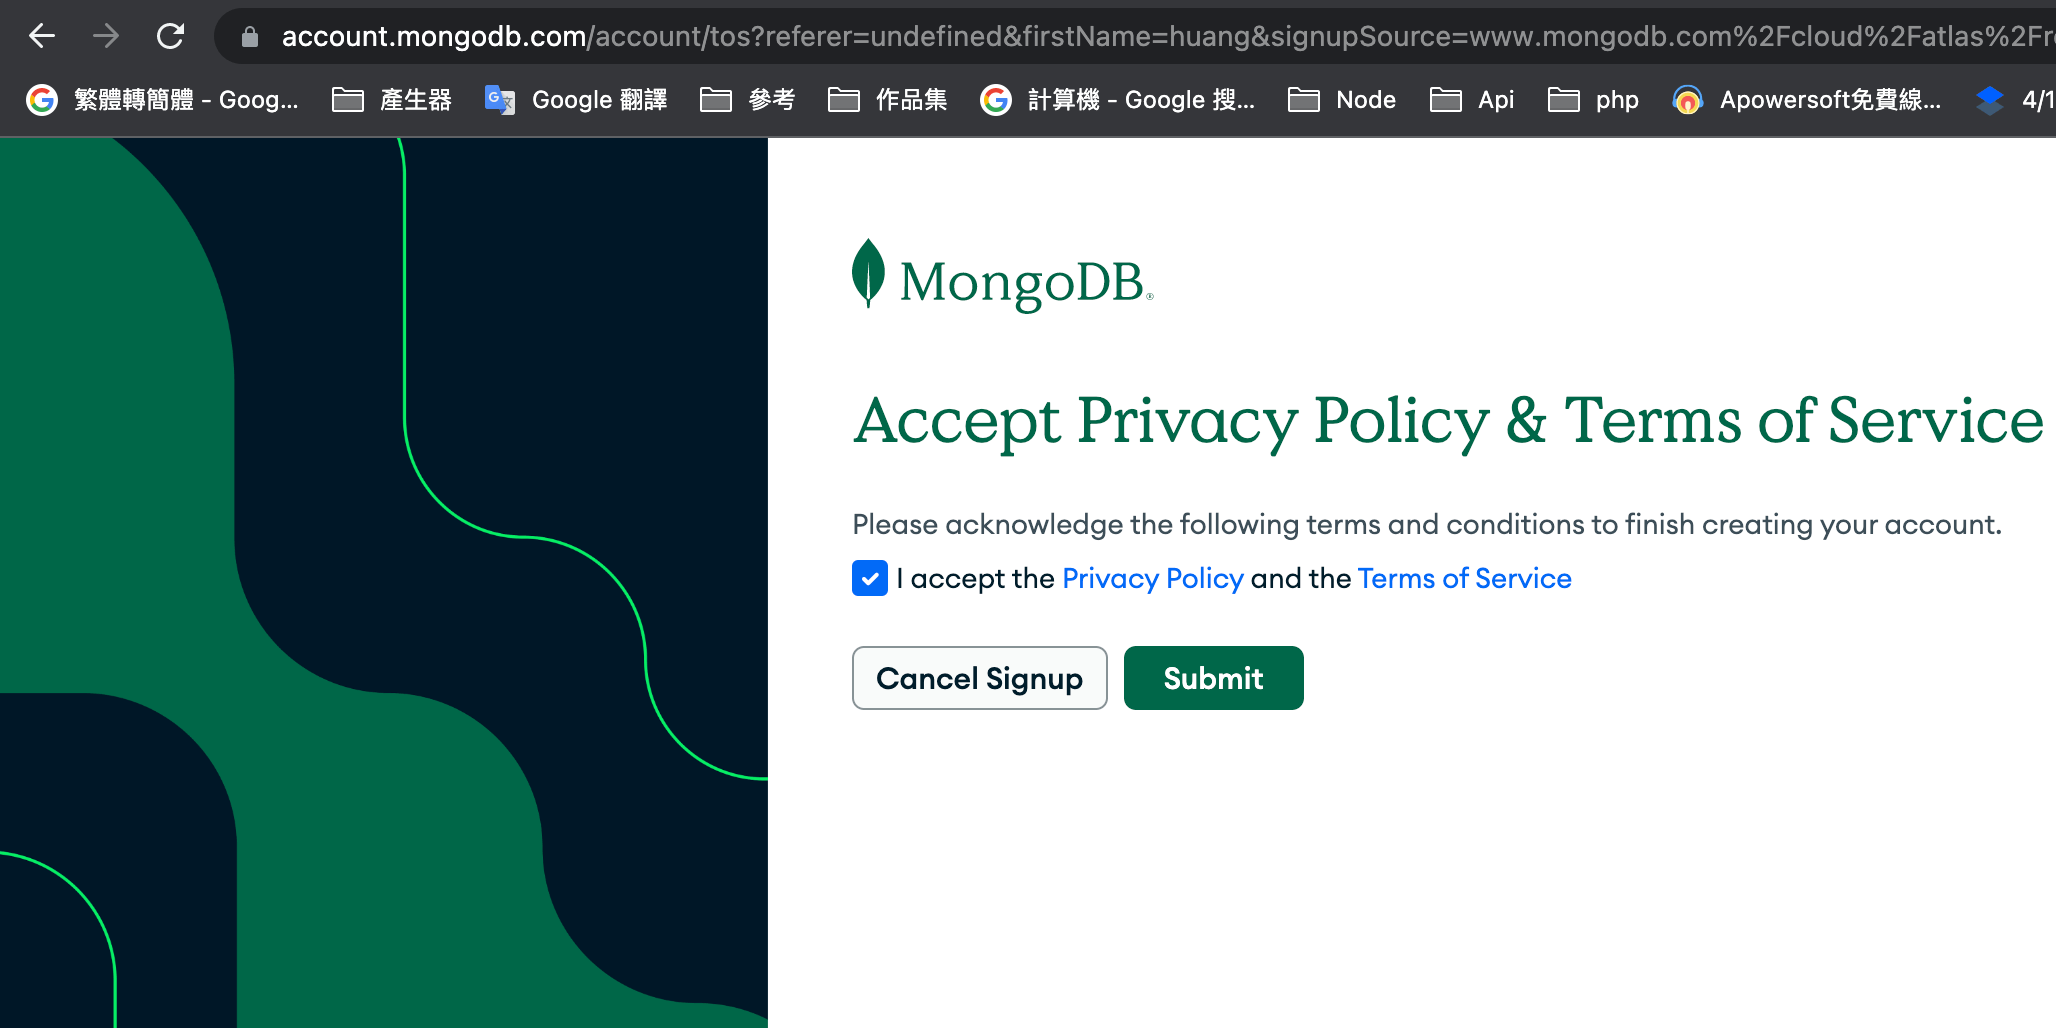
Accept Privacy Policy & Teams of Service
譯:接受隱私政策和服務條款
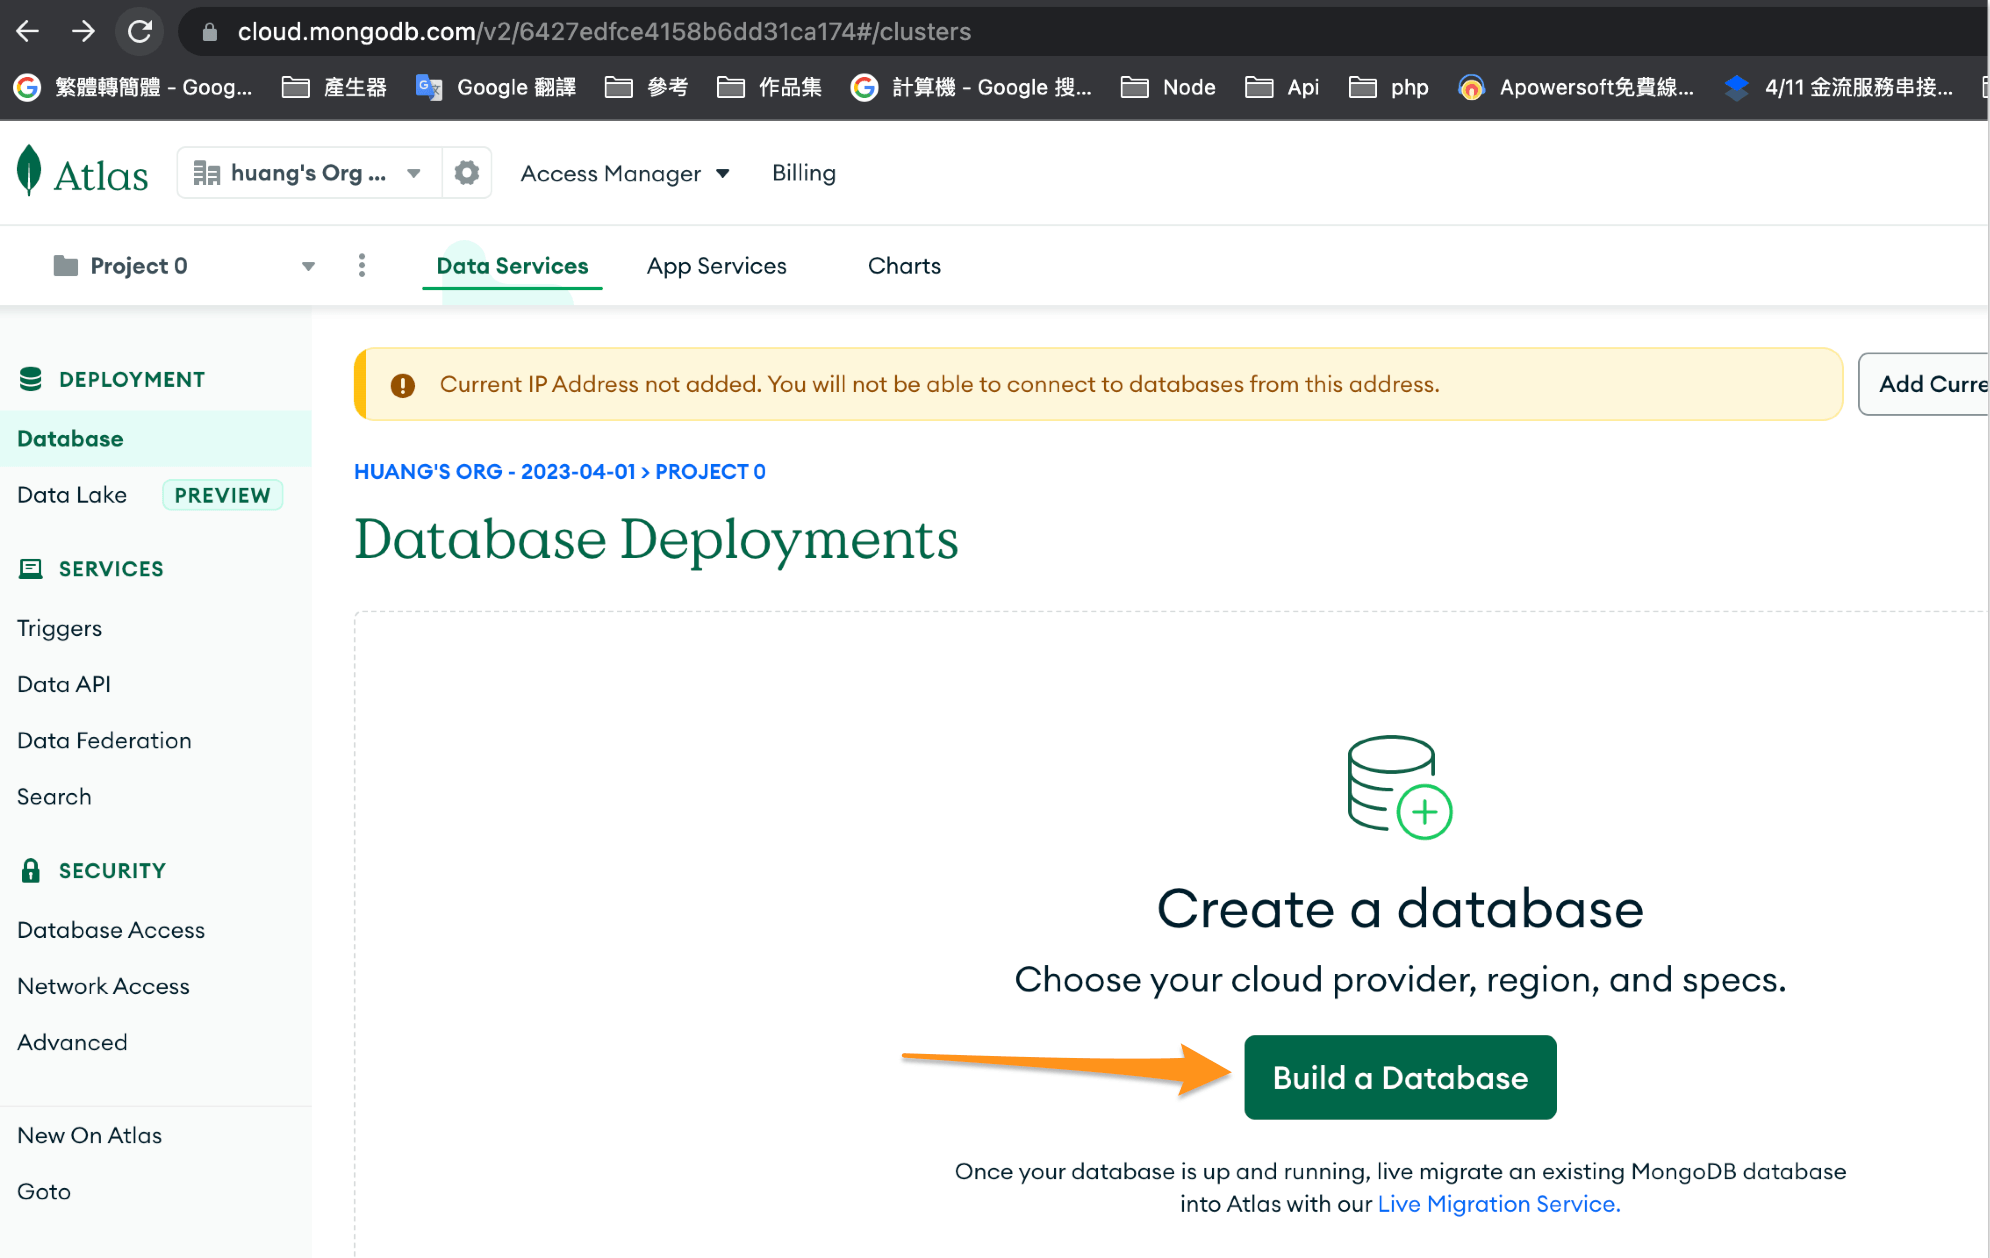
點選
點選建立資料庫Build the DataBase
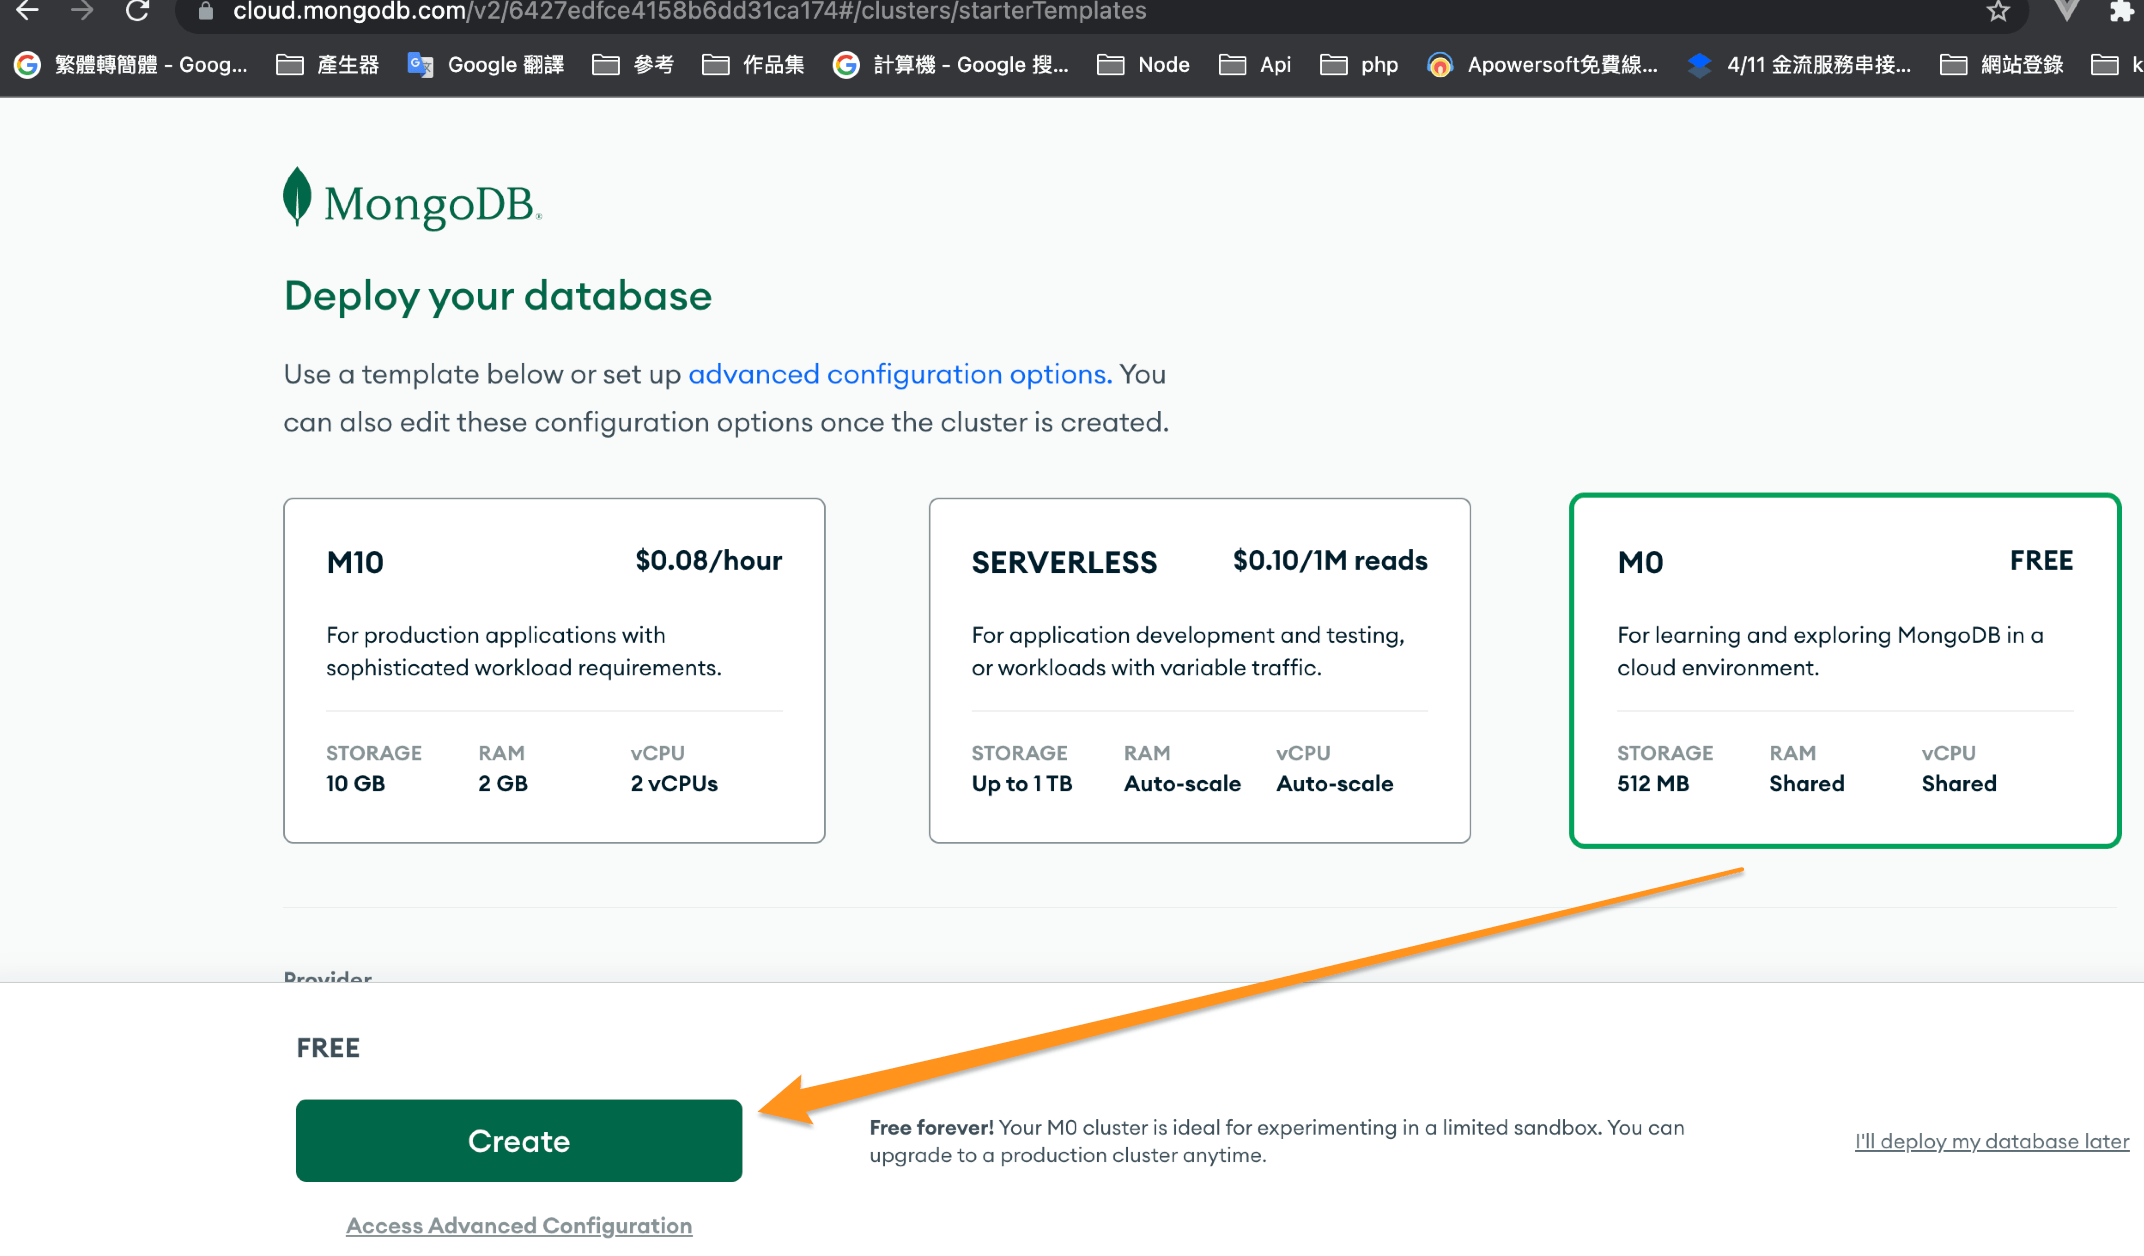
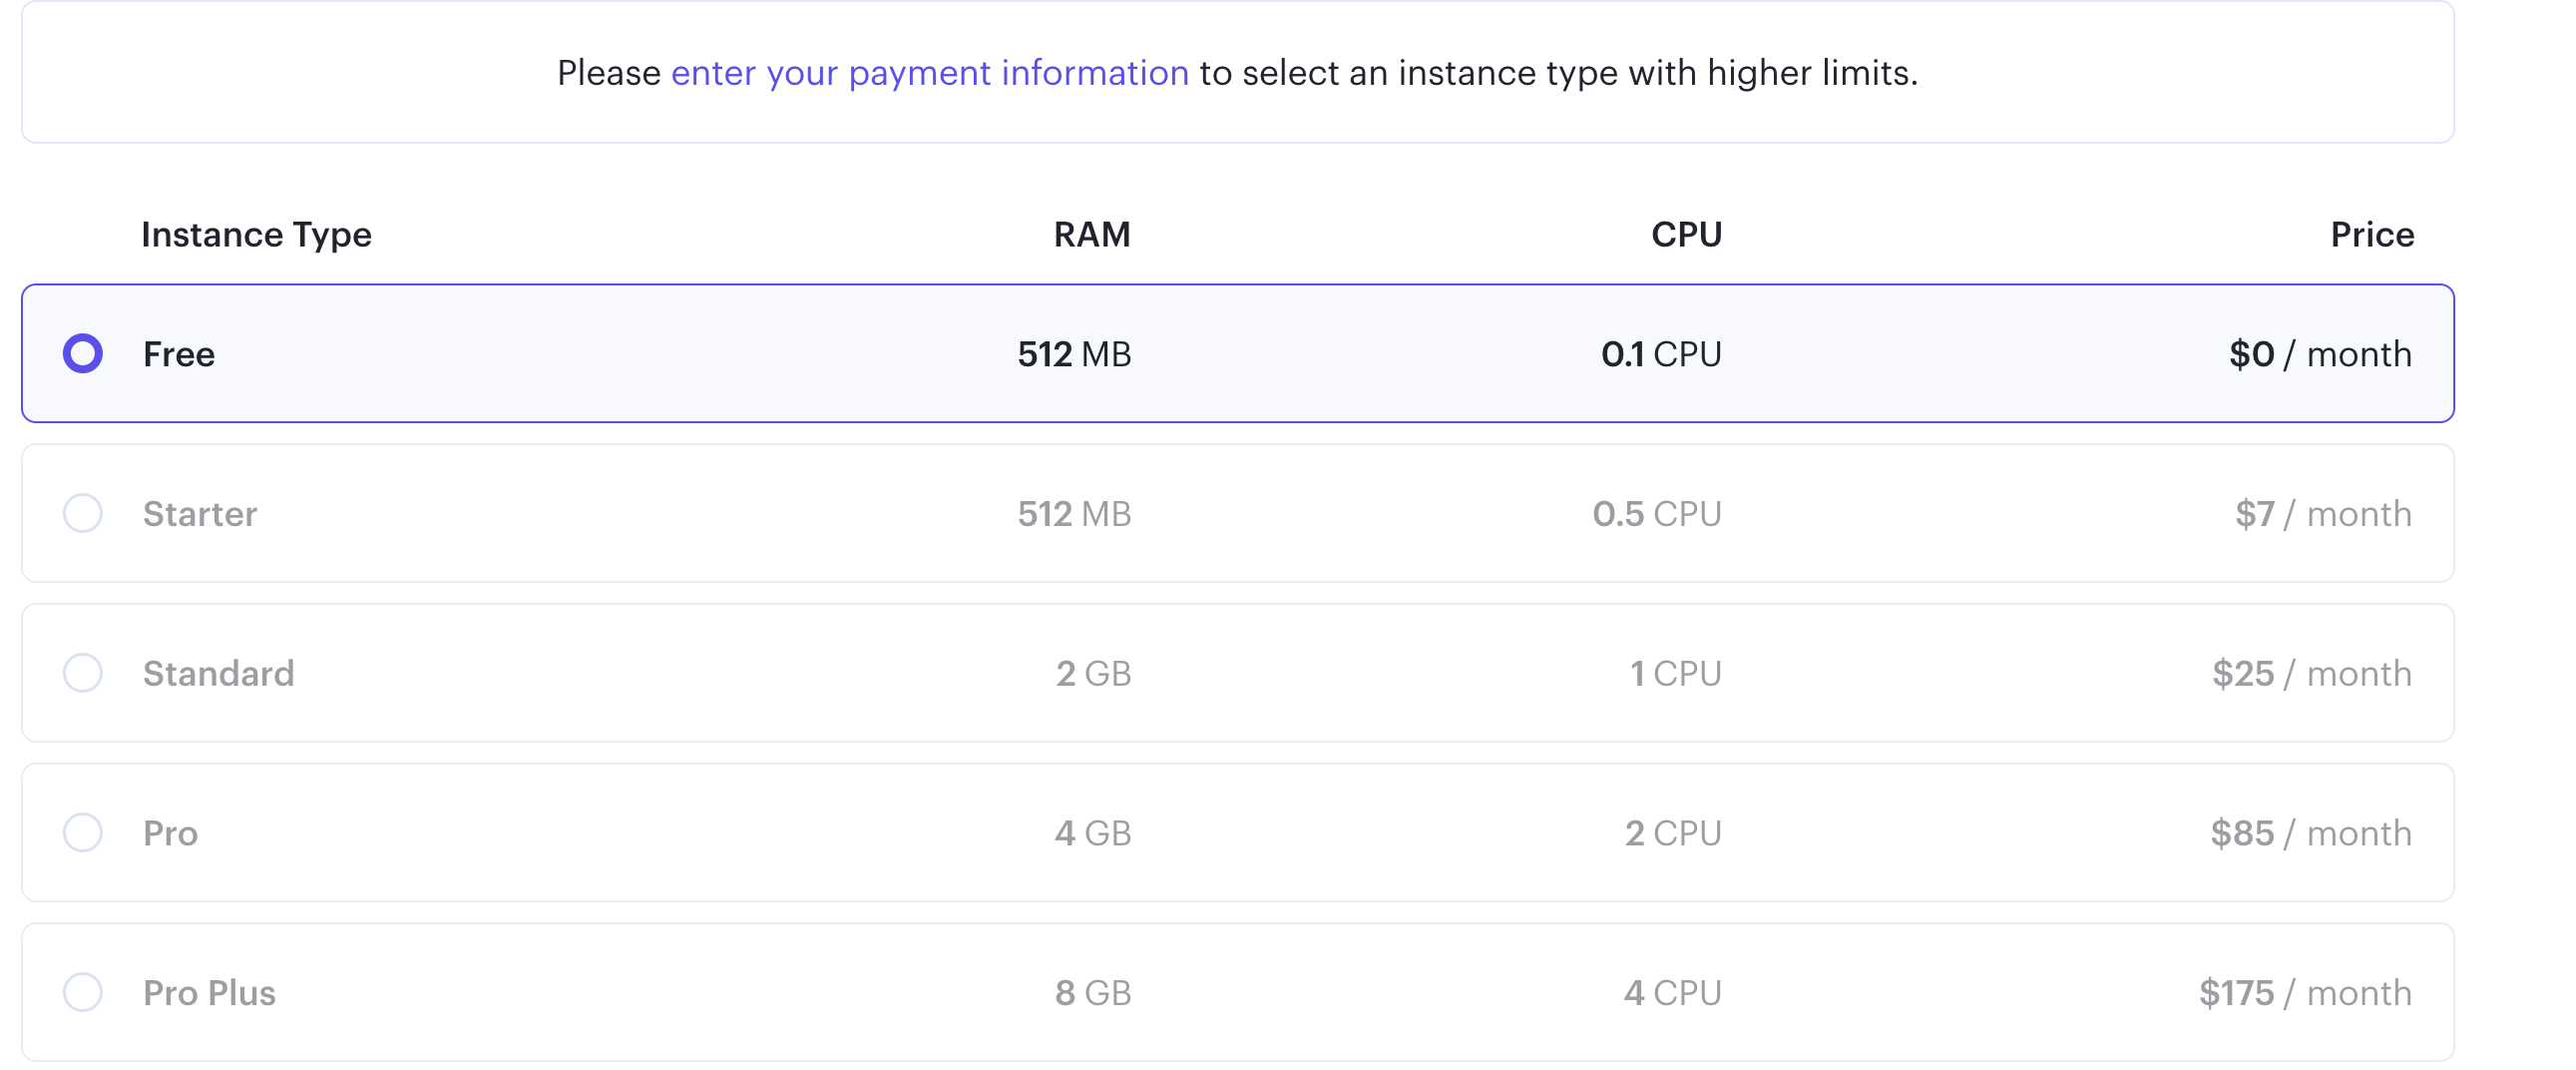
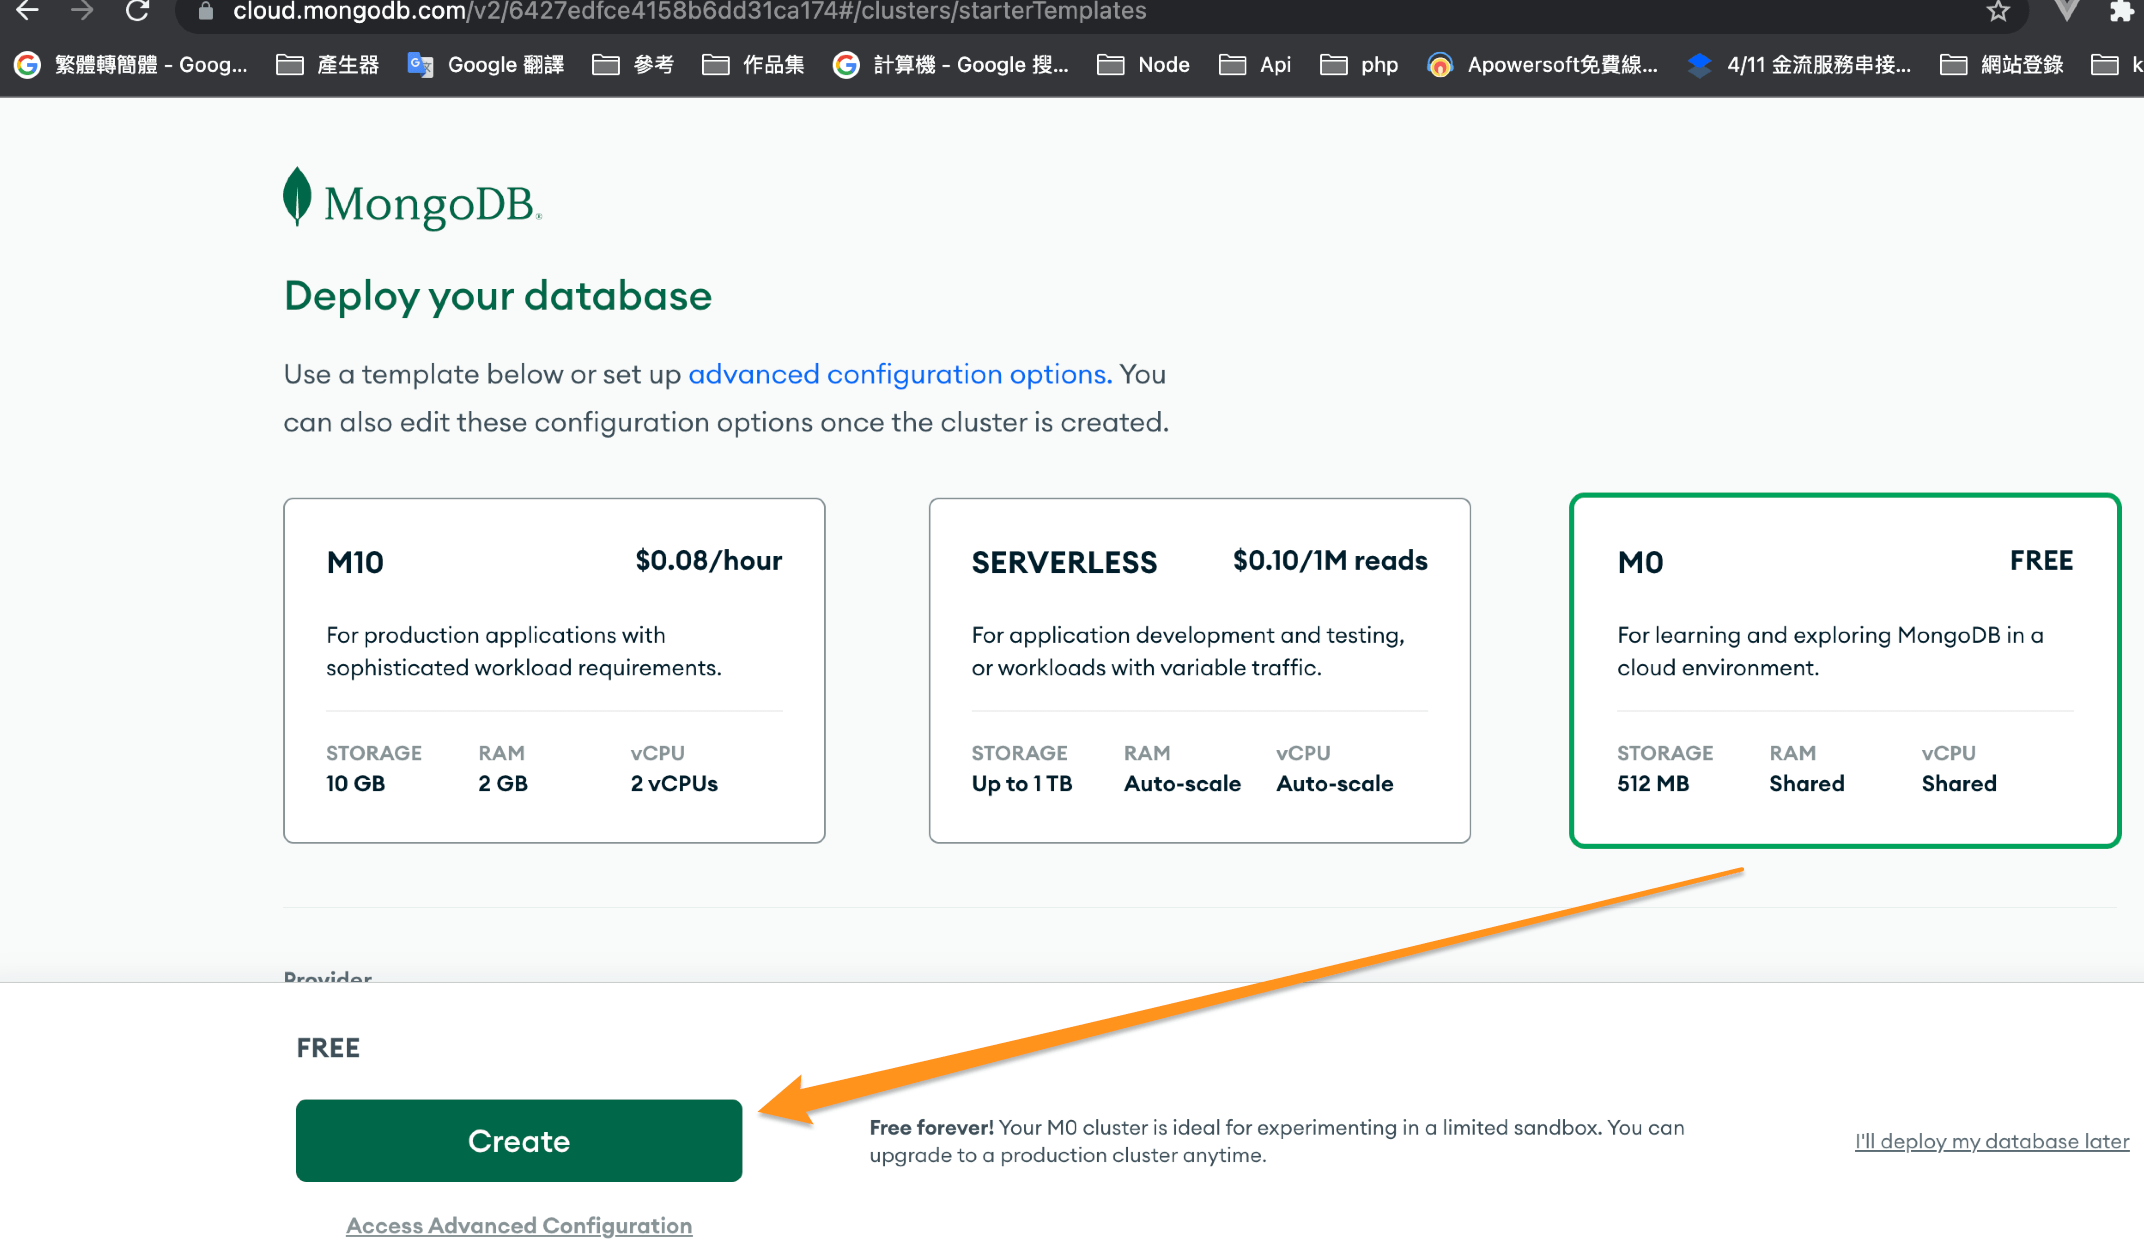
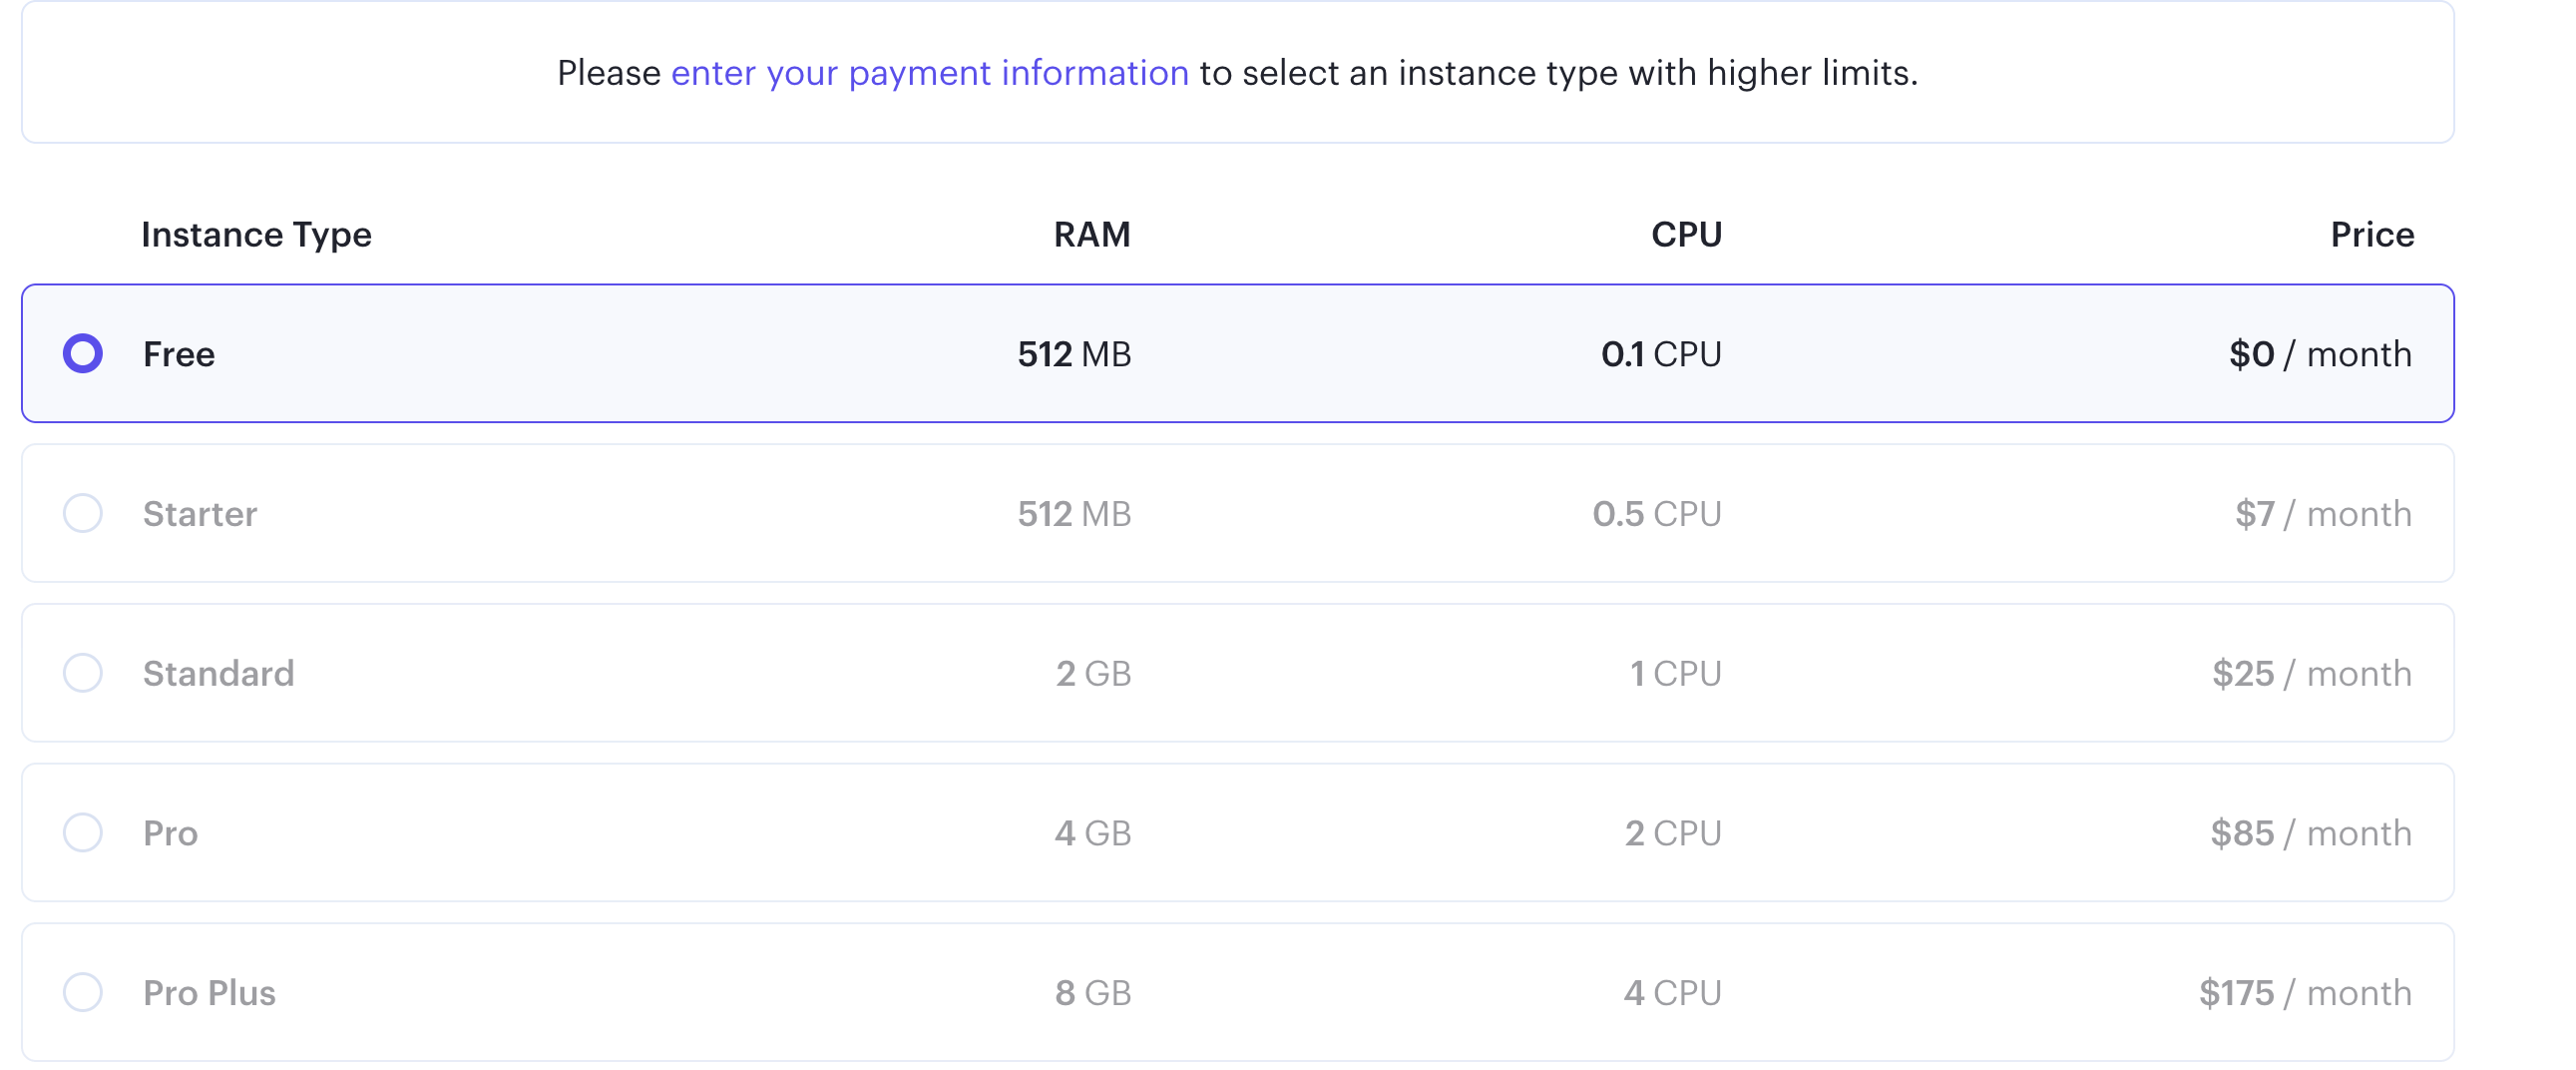
選擇Free 免費,選擇地區並創建
取得使用者帳號與密碼
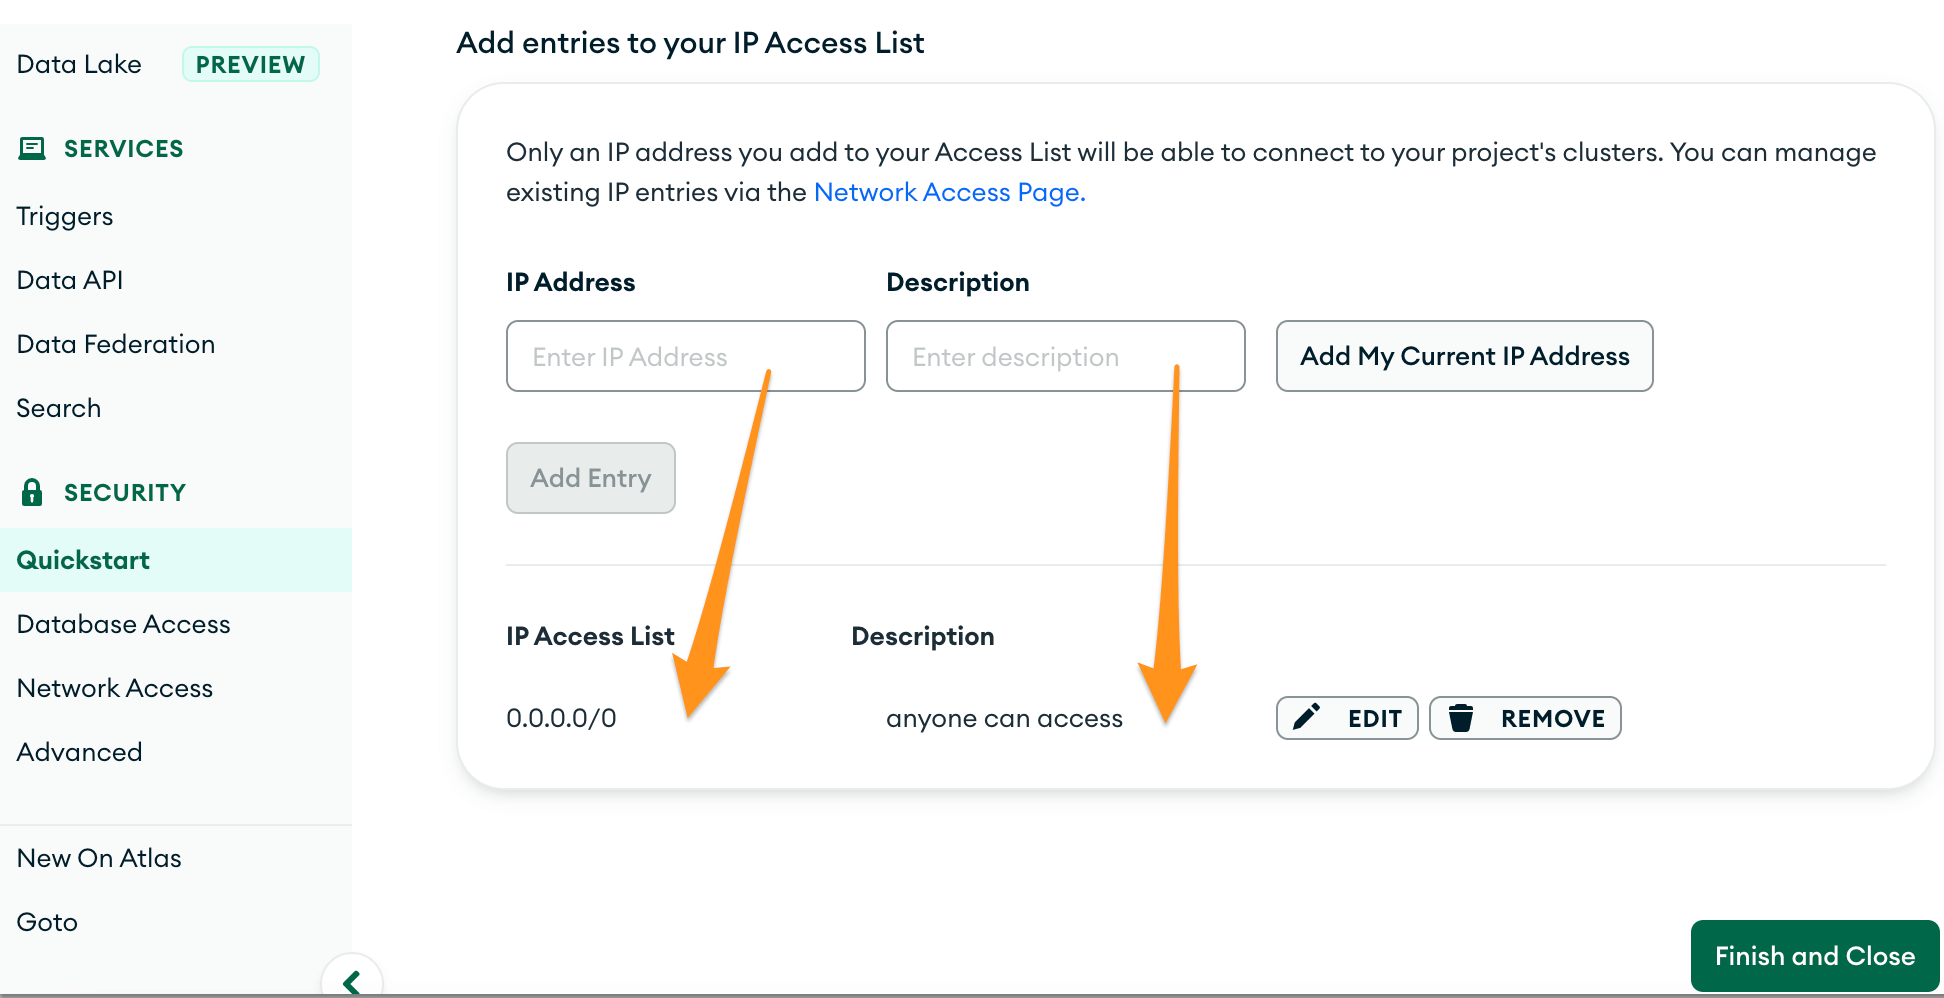
你想從哪裡連接?
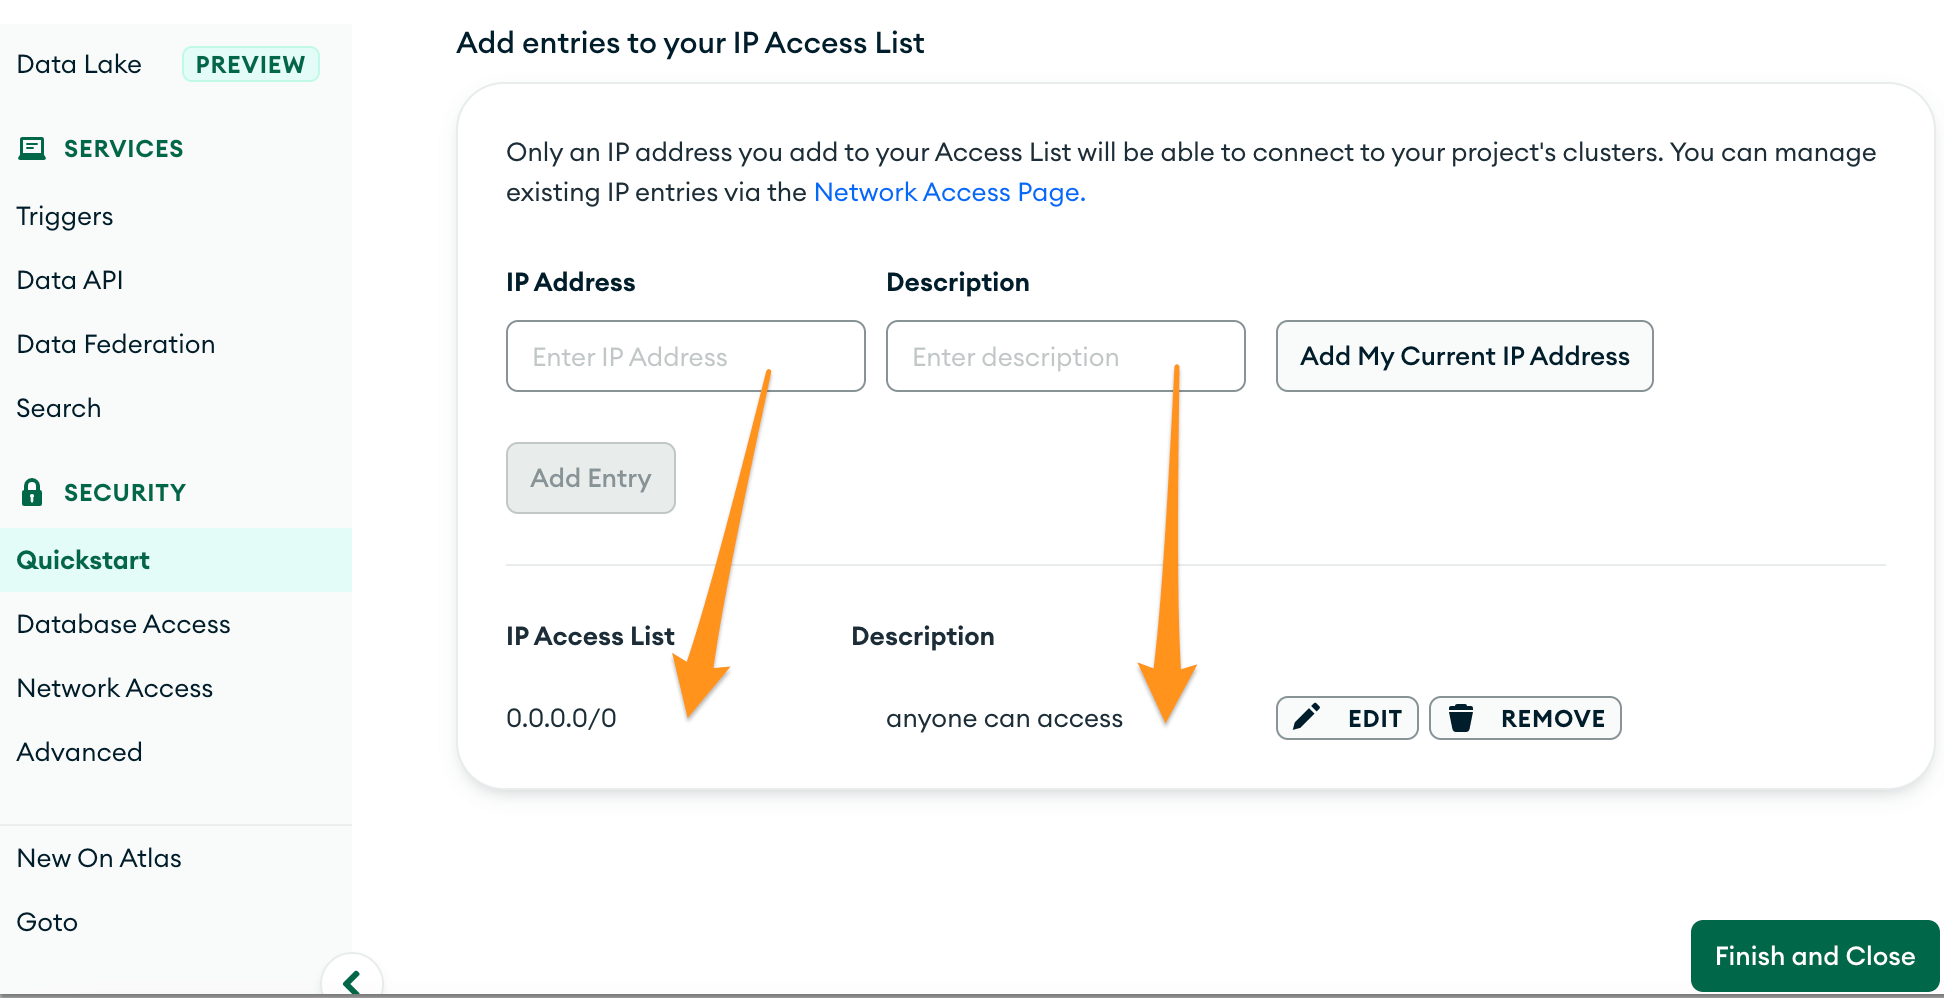
將條目添加到您的 IP 訪問列表
IP地址 / 描述 0.0.0.0/0 / anyone can access
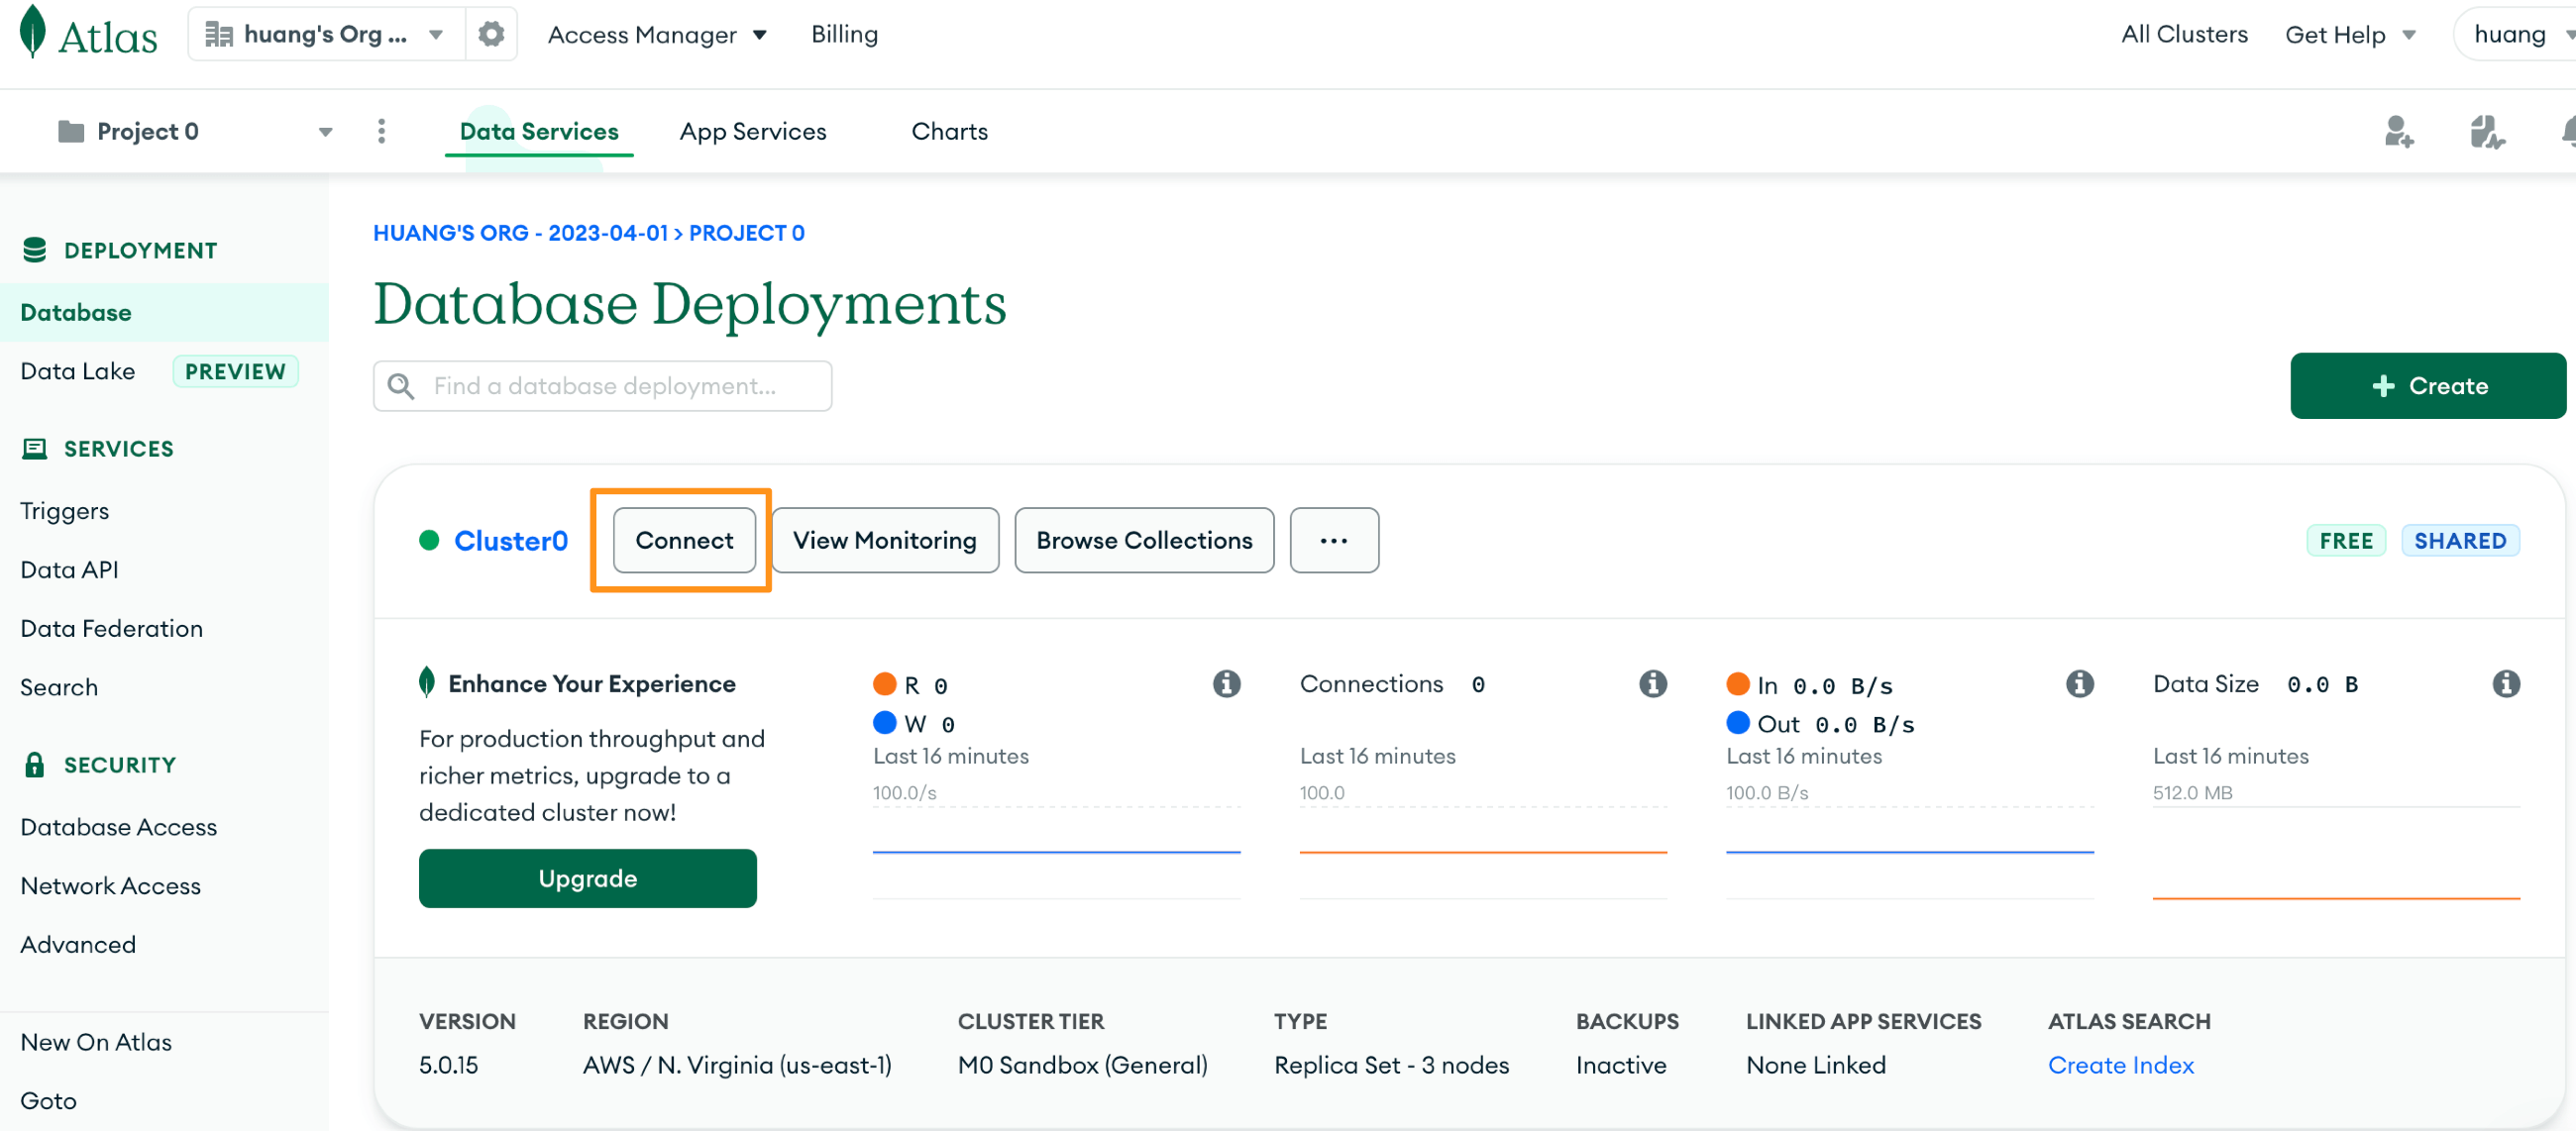
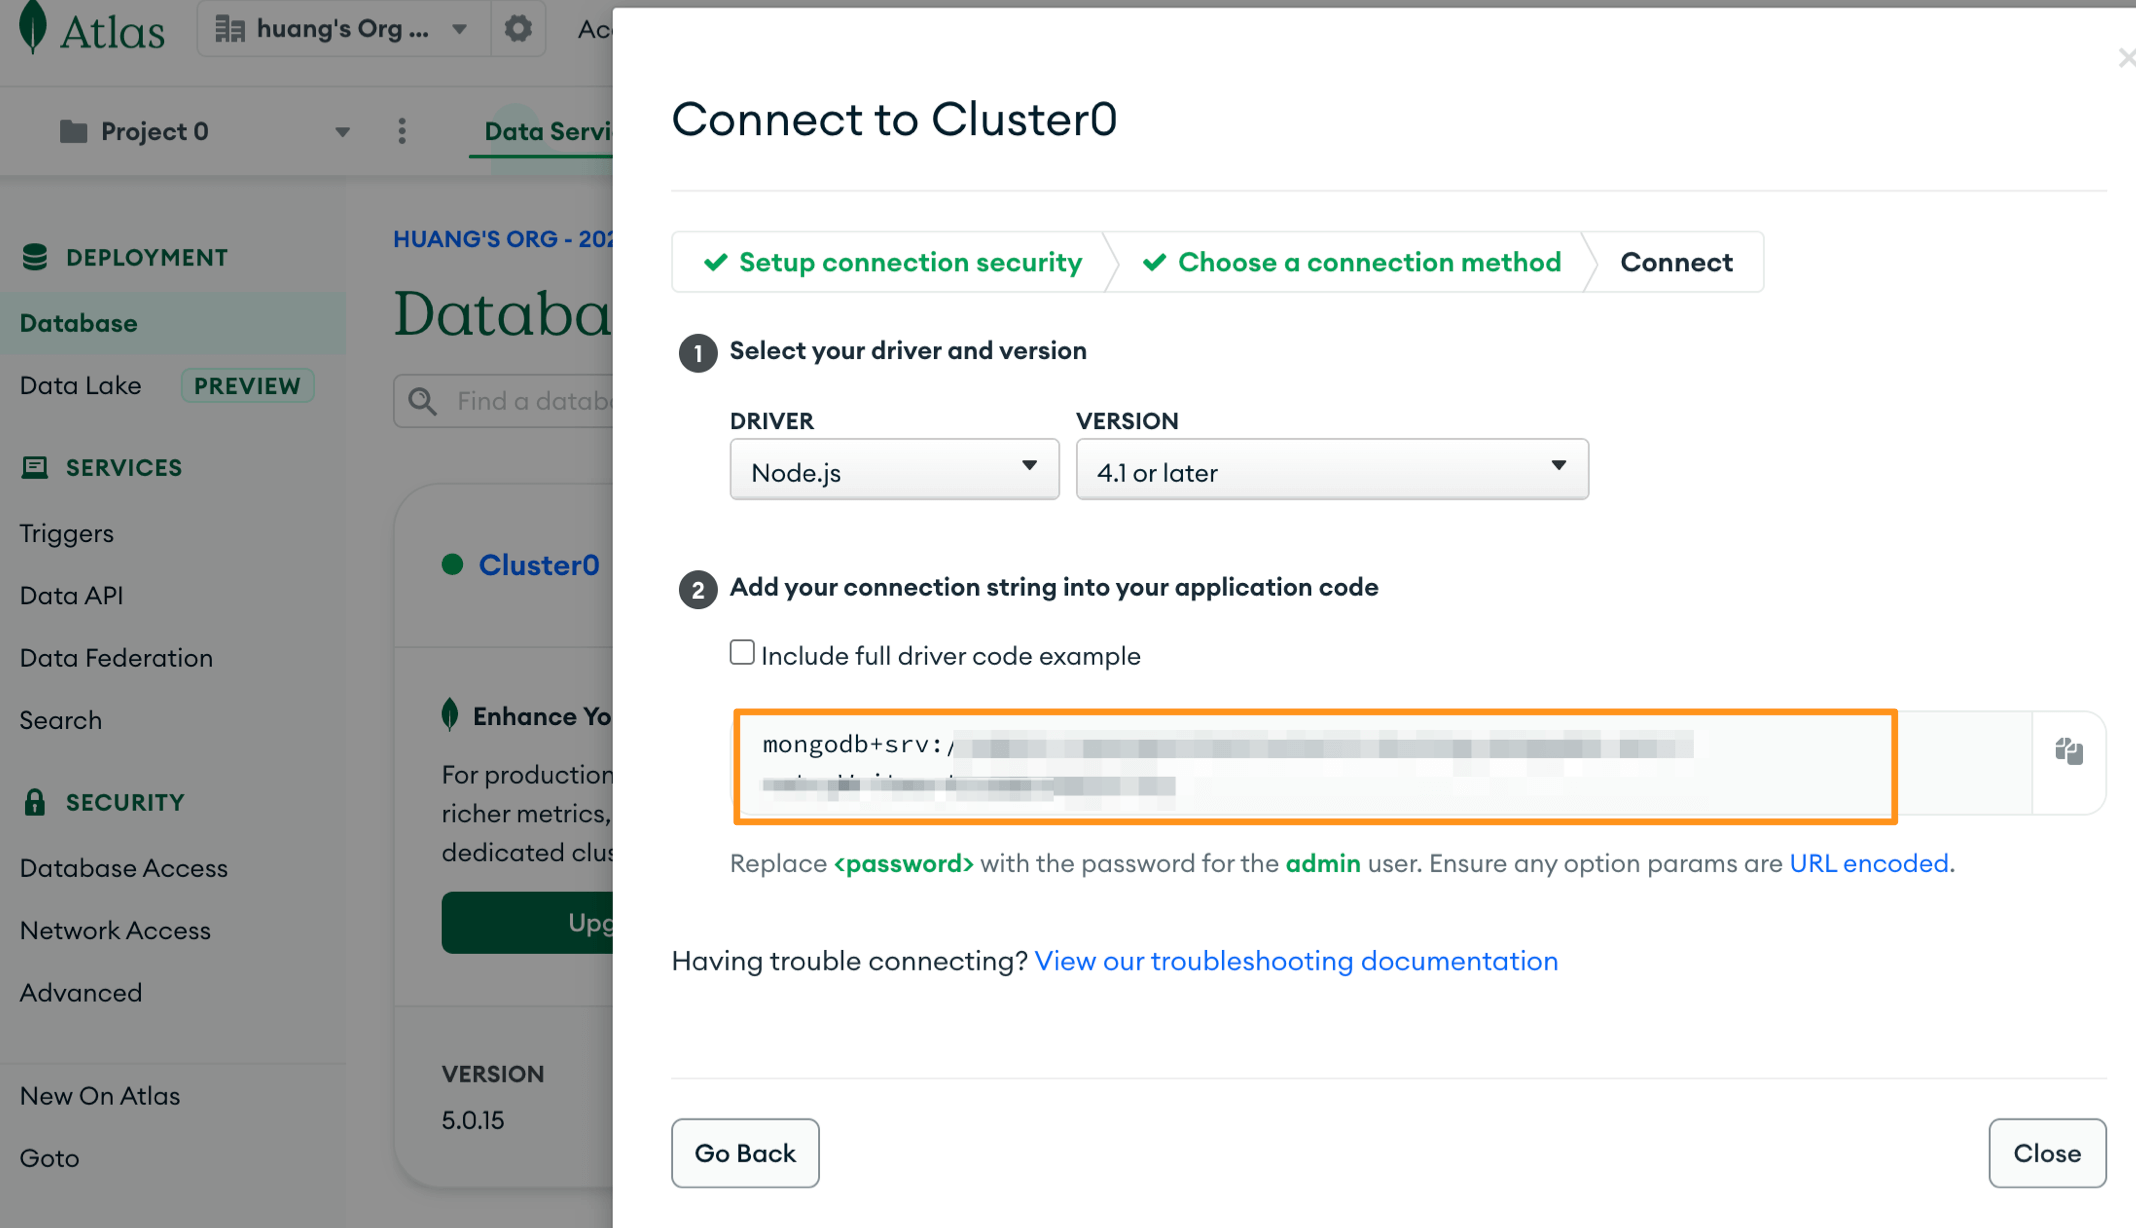
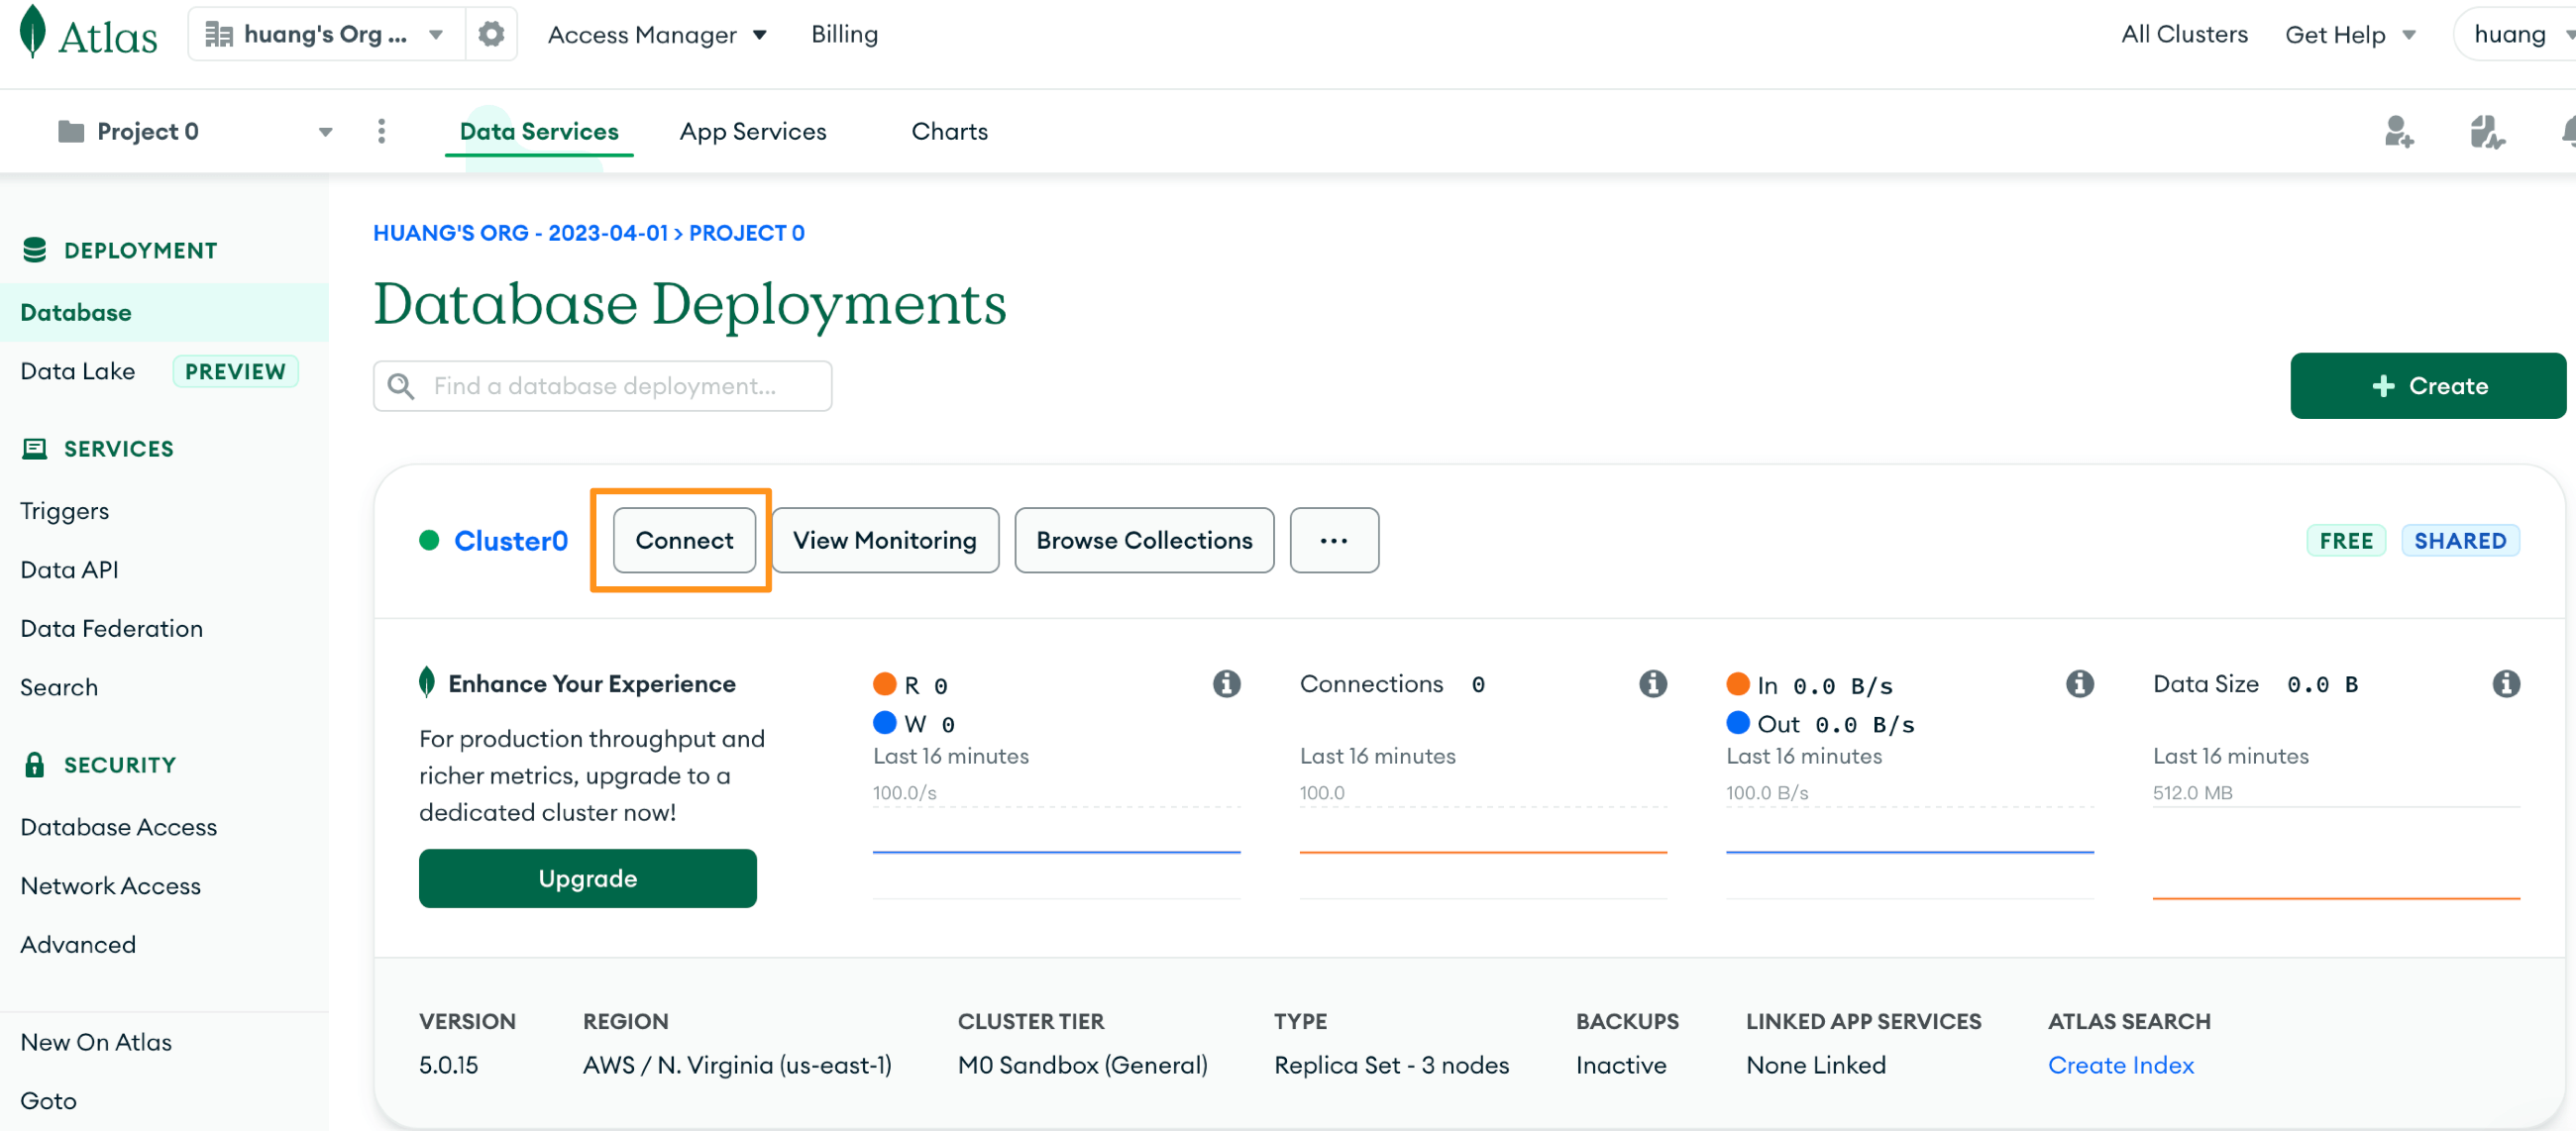
Connect DataBase 連接資料庫
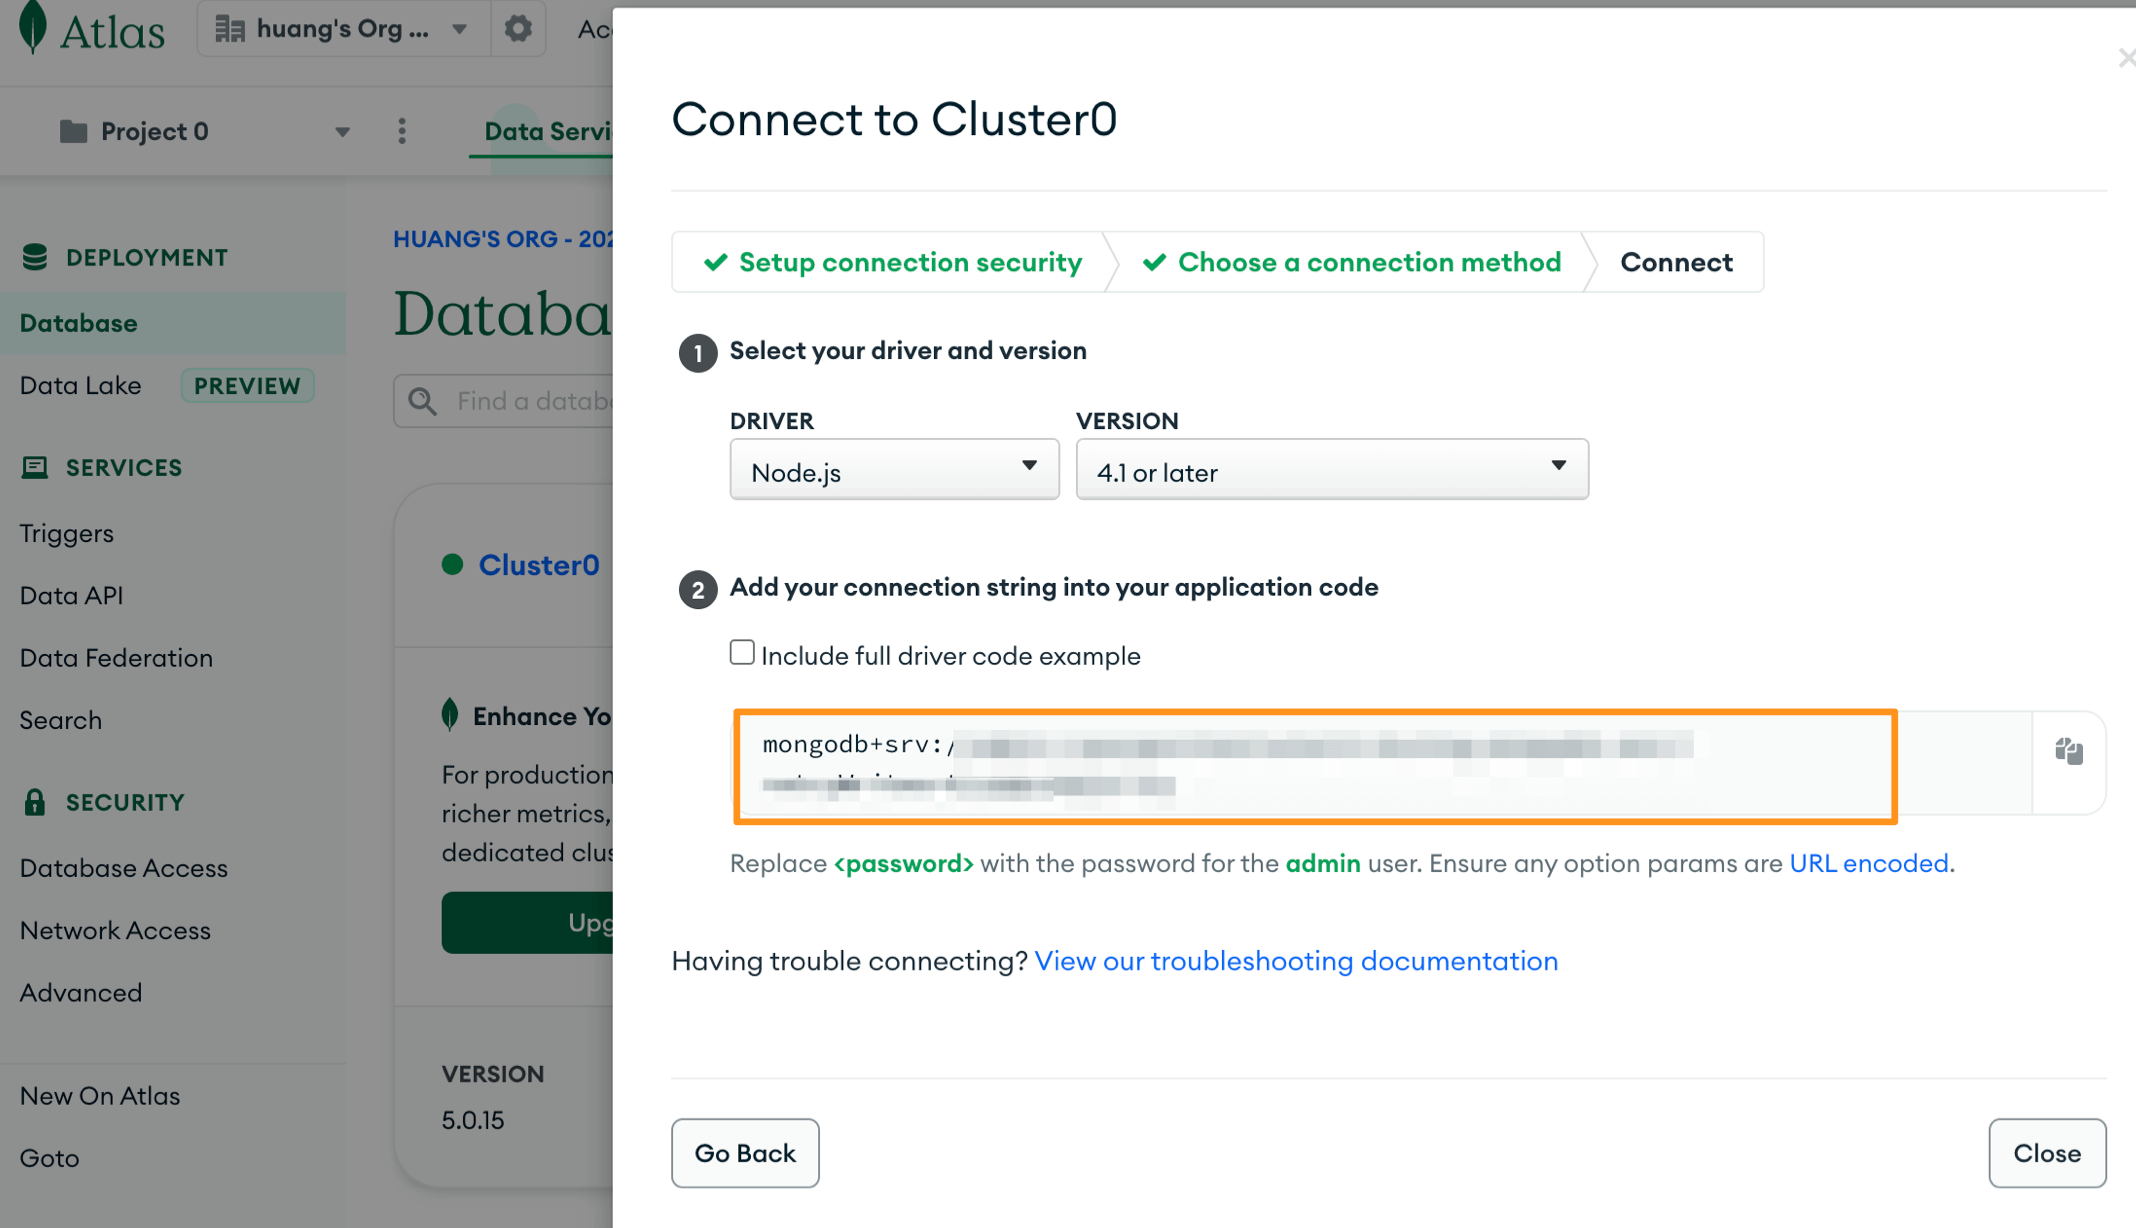
選取Drivers
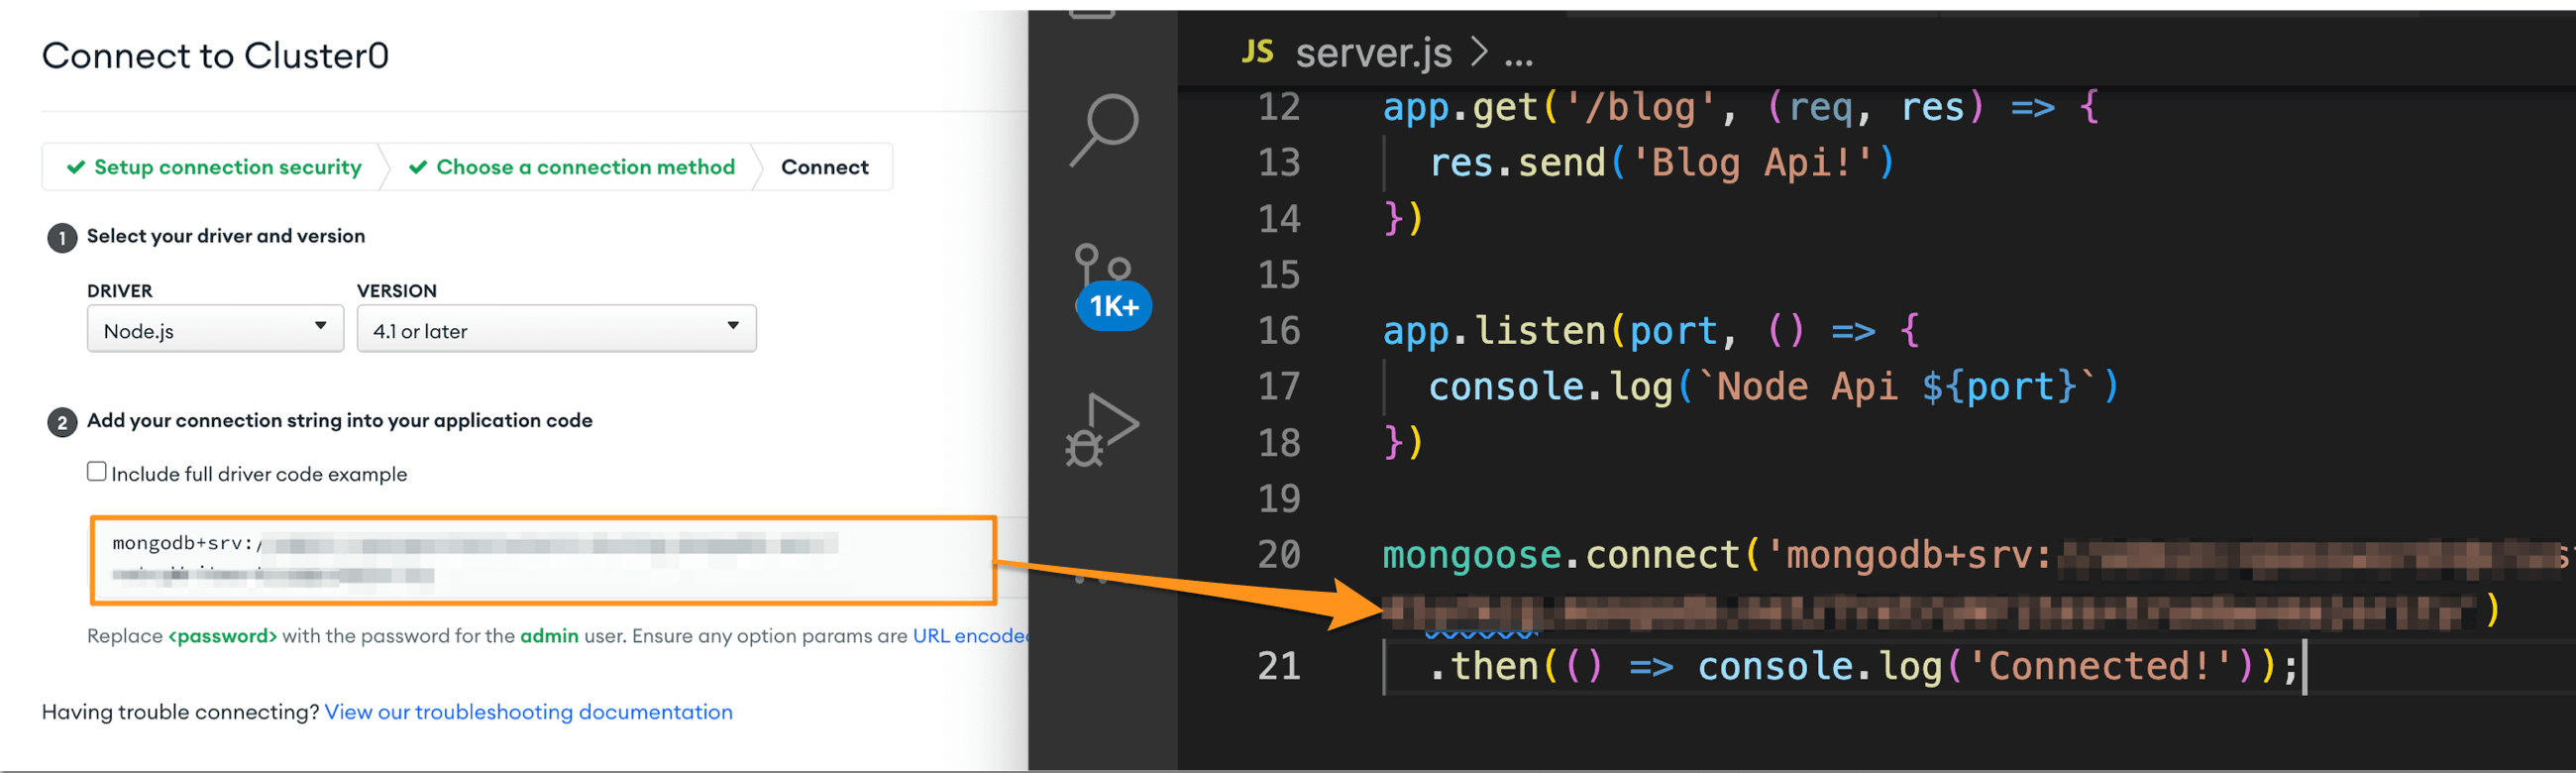
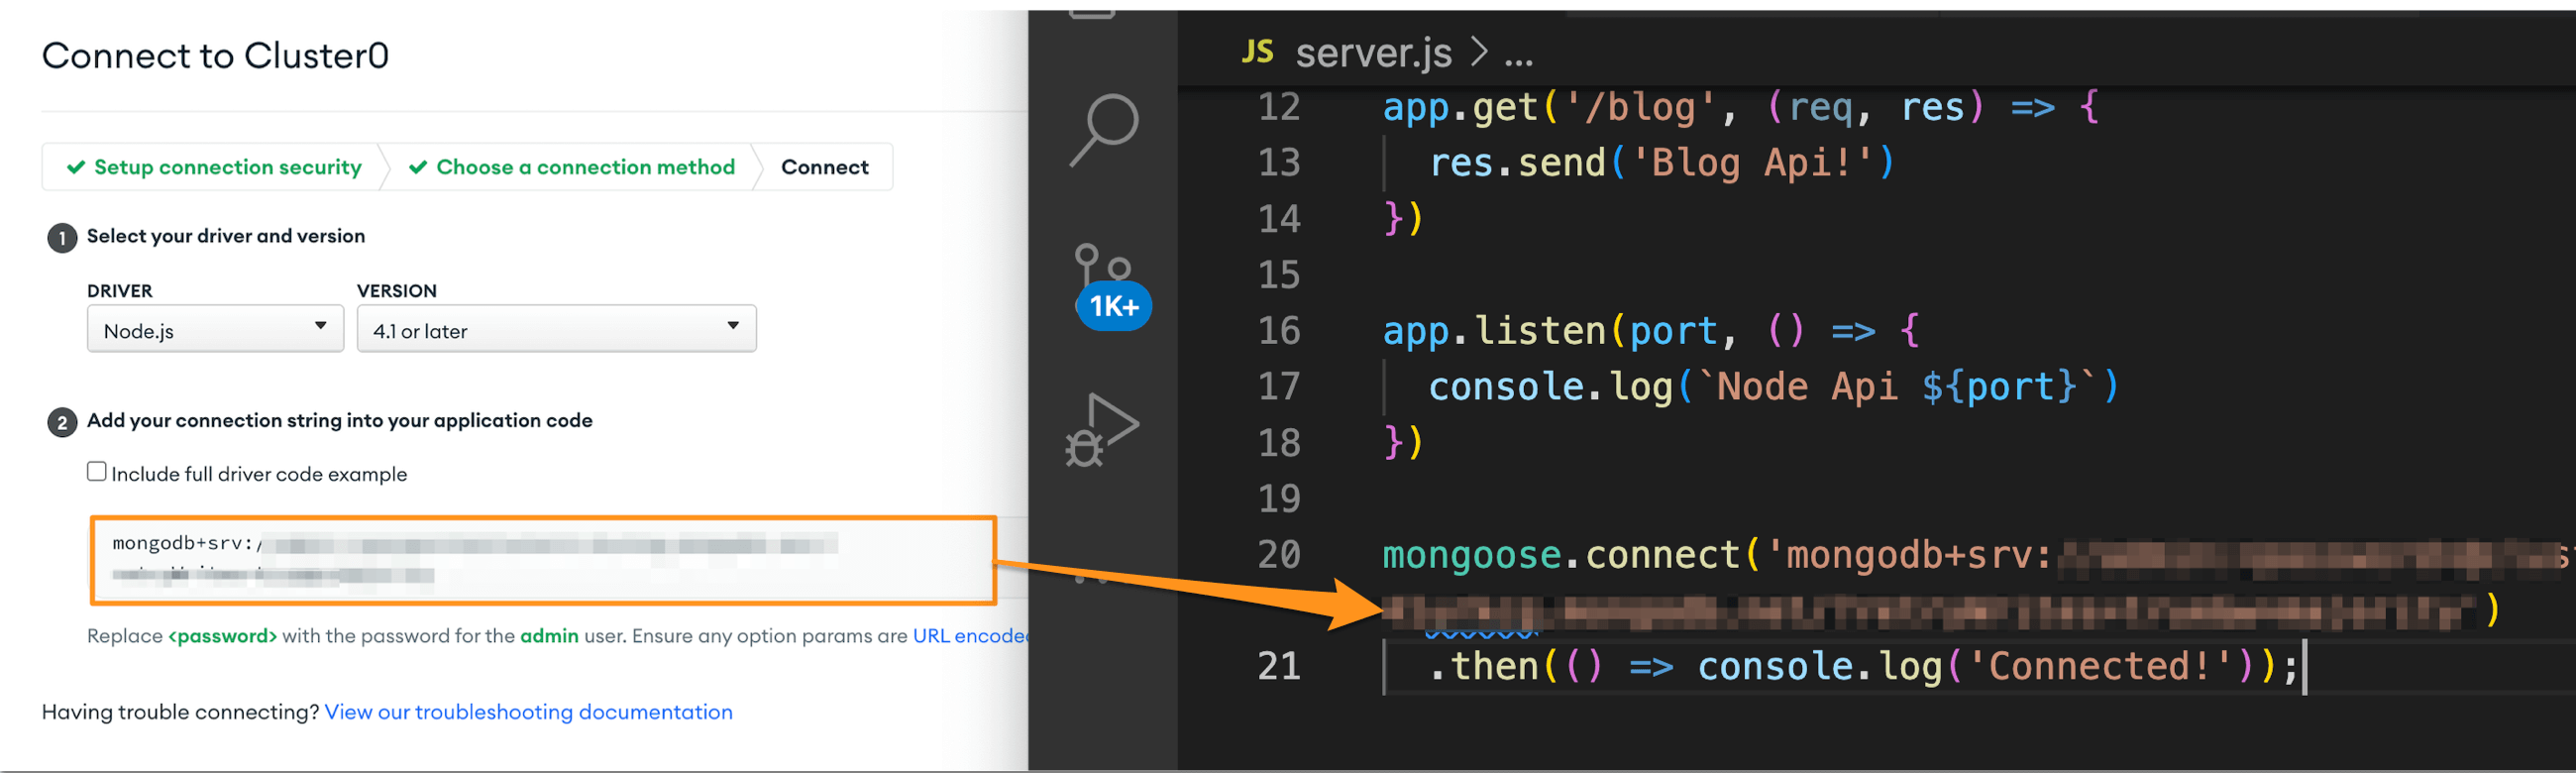
取得資料庫連結網址:
mongodb+srv://使用者帳號:此專案密碼@網址/?retryWrites=true&w=majority

安裝dotenv與環境變數設定

dotenv
建立 .env 檔 (不要加入 git)

1
npm install dotenv --save

新增 .env 檔,全大寫

1
2
3
4
5
DB_USER=user
DB_PASS=xxxxxxx
DB_HOST=xxxxxxxx.xxxxxxx.mongodb.net
MONGO_PROJECT=xxxxxxx
MONGO_RETRY_WRITES=true

環境變數:在程式剛啟動時,就可以載入require(‘dotenv’).config();

新增db/mongoDb.js

1
2
3
4
5
6
7
8
9
10
11
12
13
14
15
16
17
const mongoose = require('mongoose')

require('dotenv').config()
const user = process.env.DB_USER;
const password = process.env.DB_PASS;
const host = process.env.DB_HOST;
const project = process.env.MONGO_PROJECT;
const retryWrites = process.env.MONGO_RETRY_WRITES;
const connectionString = `mongodb+srv://${user}:${password}@${host}/${project}?retryWrites=${retryWrites}&w=majority`;
mongoose.set("strictQuery", false)
mongoose.connect(connectionString,{serverSelectionTimeoutMS: 5000})
.then(() => {
console.log('連結mongoose');
})
.catch((err) => {
console.log(err.message);
});

server.js

1
2
3
4
5
6
7
8
9
10
11
12
13
14
15
16
17
18
19
20
21
22
23
24
25
26
27
28
29
30
31
32
33
34
35
36
37
//express
const express = require('express')

// 引入資料庫
require('./db/mongoDb')

const app = express()

app.all('/*',function(req,res,next){
res.header('Access-Control-Allow-Origin','*');
res.header('Access-COntrol-Allow-Headers','X-Requested-With');
next();
});

app.use(express.json())
// express 網址編碼 中內置的一種方法,用於將傳入的 Request Object 識別為strings 或 arrays; extended=>廣大的。

app.use(express.urlencoded({ extended: false }))


const api = require('./routes/api')
app.use('/api', api)

const auth = require('./routes/auth')
app.use('/auth', auth)


app.get('/', (req, res) => {
res.send('Hello Node Api!')
})

const PORT = process.env.PORT || 8080;


app.listen(PORT, () => console.log(`server port ${PORT}`));

module.exports = app;

Node Express.js MongoDB CRUD

一.新增models/newModel.js

Mongoose對MongoDB的操作涉及三個層面:Schema, Model與Entity

定義Schema

Schema是資料文件的骨架,本身不影響資料庫,用來產生Model
Schema主要用於定義MongoDB中集合Collection里文檔document的結構,可以理解為mongoose對錶結構的定義(不僅僅可以定義文檔的結構和屬性,還可以定義文檔的實例方法、靜態模型方法、複合索引等 ),每個schema會對應到mongodb中的一個collection,schema不具備操作資料庫的能力

Schema 類型
類型 解釋名詞
String 字符串
Number 數字
Date 日期
Buffer二進位
Boolean布林值
Mixed 混合型
ObjectId對象id
Array數組

<<注意>> 建立Schema物件時,聲明欄位類型有兩種方法,一種是首字母大寫的欄位類型,另一種是引號包含的小寫欄位類型
//Model是用Schema產生的模型。
//Entity是用Model創建的實作。
//Model與Entity的操作會影響資料庫。

1
2
3
4
5
6
7
8
9
10
11
12
13
14
15
16
17
18
19
20
21
22
23
24
25
26
27
28
29
30
31
32
33
34
35
36
37
38
39
40
41
42
const mongoose = require('mongoose')
const newSchema = mongoose.Schema(
{
subject: {
type: String,
match: [
/^.{2,30}$/,
'Please add a valid subject 2~30',
],
required: [true, "請輸入姓名"],
trim: true,
},
image: {
type: String,
required: false,
},
content: {
type: String,
match: [
/^.{4,500}$/,
'Please add a valid content 4~500',
],
required: [true, "請輸入內容"],
trim: true,
},
createdTime: {
type: String,
},
updatedTime: {
type: String,
}

},
/* {
timestamps: true
}*/
)


const New = mongoose.model('News', newSchema);

module.exports = New;

二.index.js,載入newModel

1
2
3
4
5
6
7
8
9
10
11
12
13
14
15
16
17
18
19
20
21
22
23
24
25
26
27
28
29
30
31
32
33
34
35
36
37
38
39
40
41
42
43
44
45
46
47
48
49
50
51
52
53
54
55
56
57
58
59
60
61
62
63
64
65
66
67
68
69
70
71
72
73
74
75
76
77
78
79
80
81
82
83
84
85
86
87
88
89
90
const express = require('express')
const mongoose = require('mongoose')
const New = require('./models/newModel')
// 引入資料庫
require('./db/mongoDb')

const app = express()

app.all('/*',function(req,res,next){
res.header('Access-Control-Allow-Origin','*');
res.header('Access-COntrol-Allow-Headers','X-Requested-With');
next();
});

// Json格式
app.use(express.json())
// express 中內置的一種方法,用於將傳入的 Request Object 識別為strings 或 arrays。
app.use(express.urlencoded({extended: false}))


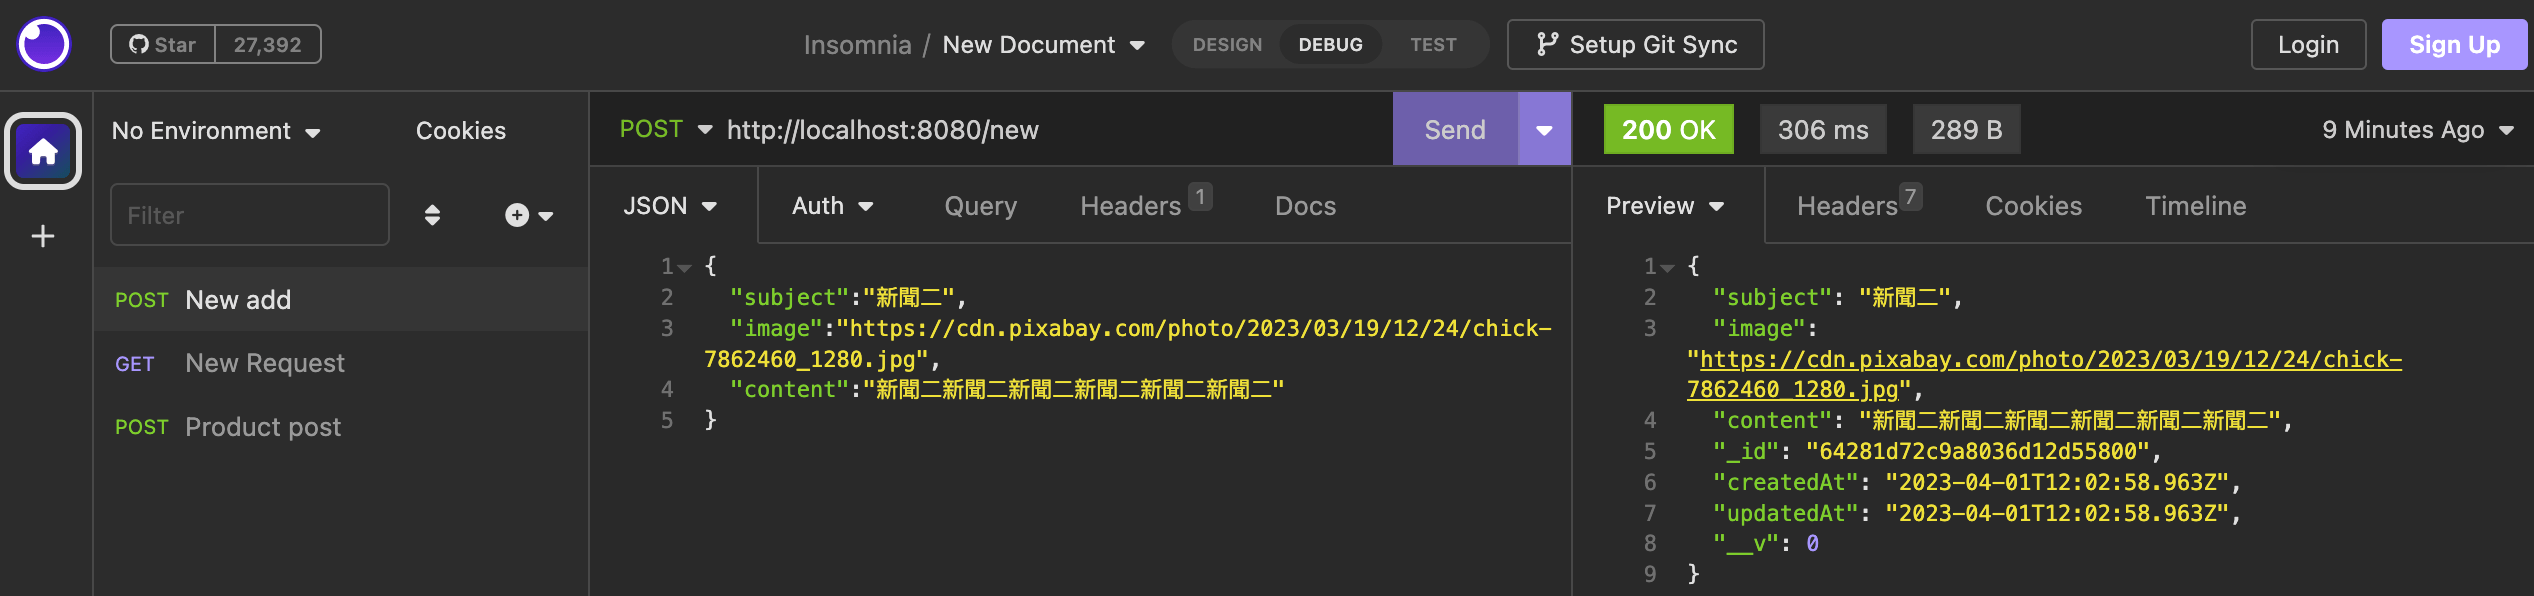
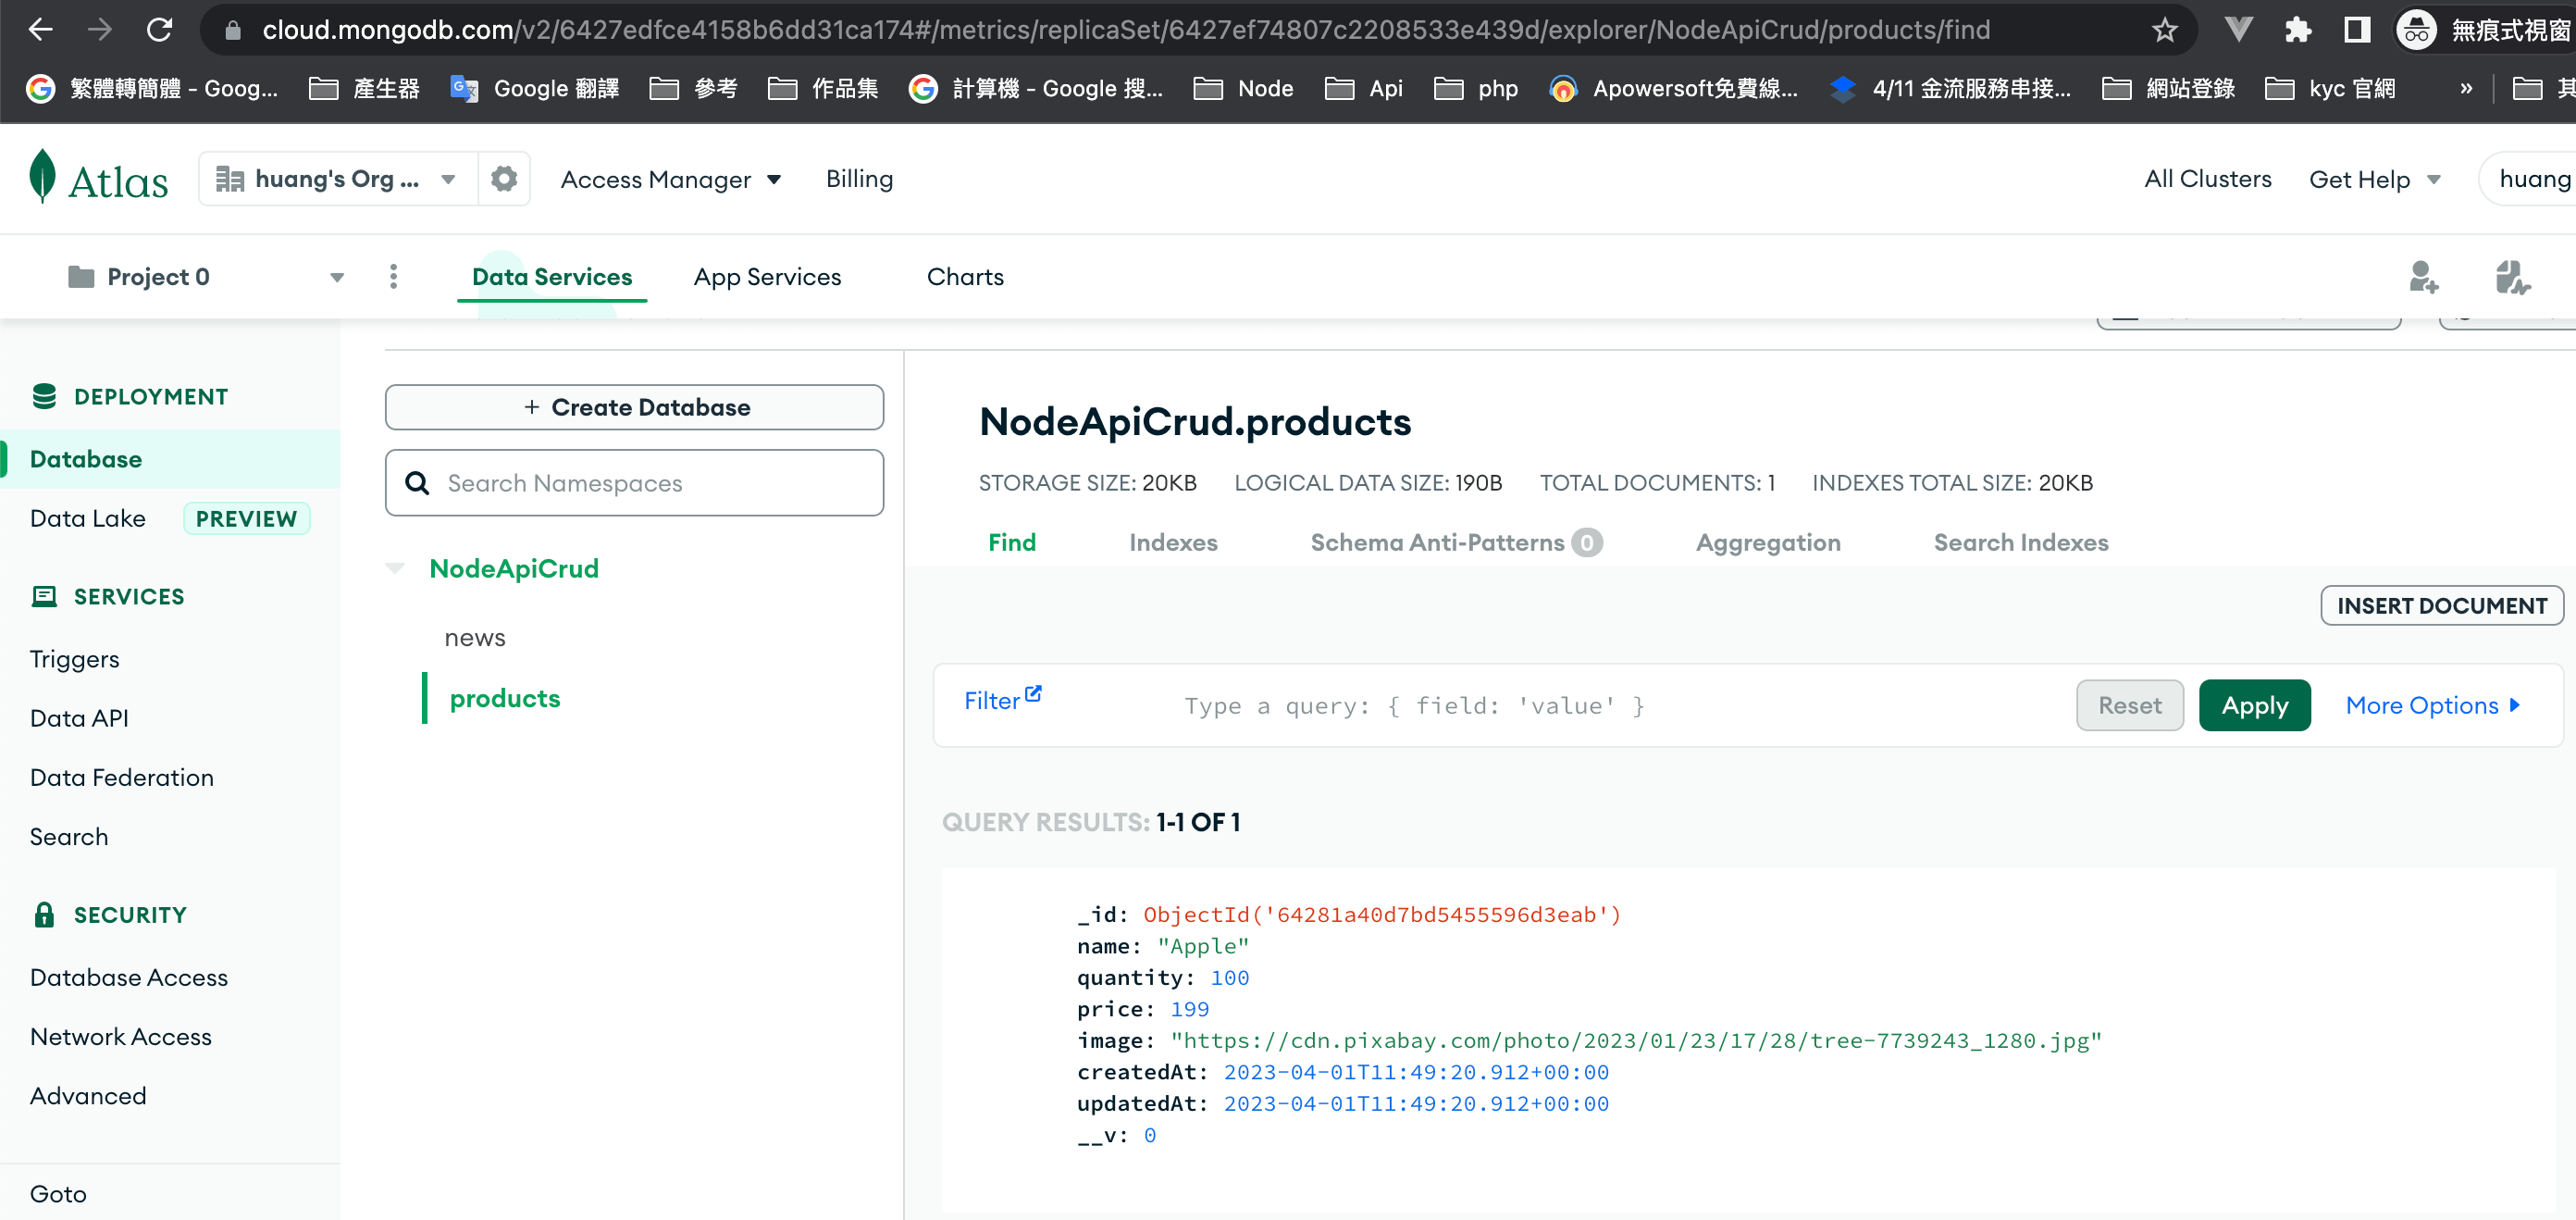
//建立Create =>New.create
app.post('/new', async(req, res) => {
try {
const news = await New.create(req.body)
res.status(200).json(news);

} catch (error) {
console.log(error.message);
res.status(500).json({message: error.message})
}
})
//Read news All =>New.find({})
app.get('/news', async(req, res) => {
try {
const news = await New.find({});
res.status(200).json(news);
} catch (error) {
res.status(500).json({message: error.message})
}
})
//Read news id=> New.findById(id)
app.get('/news/:id', async(req, res) =>{
try {
const {id} = req.params;
const news = await New.findById(id);
res.status(200).json(news);
} catch (error) {
res.status(500).json({message: error.message})
}
})

//updatedNews => New.findByIdAndUpdate(id, req.body)
app.put('/news/:id', async(req, res) => {
try {
const {id} = req.params;
const newR = await New.findByIdAndUpdate(id, req.body);
// we cannot find any news in database
if(!newR){
return res.status(404).json({message: `cannot find any news with ID ${id}`})
}
const updatedNews = await New.findById(id);
res.status(200).json(updatedNews);

} catch (error) {
res.status(500).json({message: error.message})
}
})

//Delete news id =>New.findByIdAndDelete(id)
app.delete('/news/:id', async(req, res) =>{
try {
const {id} = req.params;
const test = await New.findByIdAndDelete(id);
if(!test){
return res.status(404).json({message: `沒有發現任何 News ID ${id}`})
}
res.status(200).json(test);

} catch (error) {
res.status(500).json({message: error.message})
}
})

const PORT = process.env.PORT || 8080;


app.listen(PORT, () => console.log(`服務器正在監聽端口 ${PORT}`));

module.exports = app;

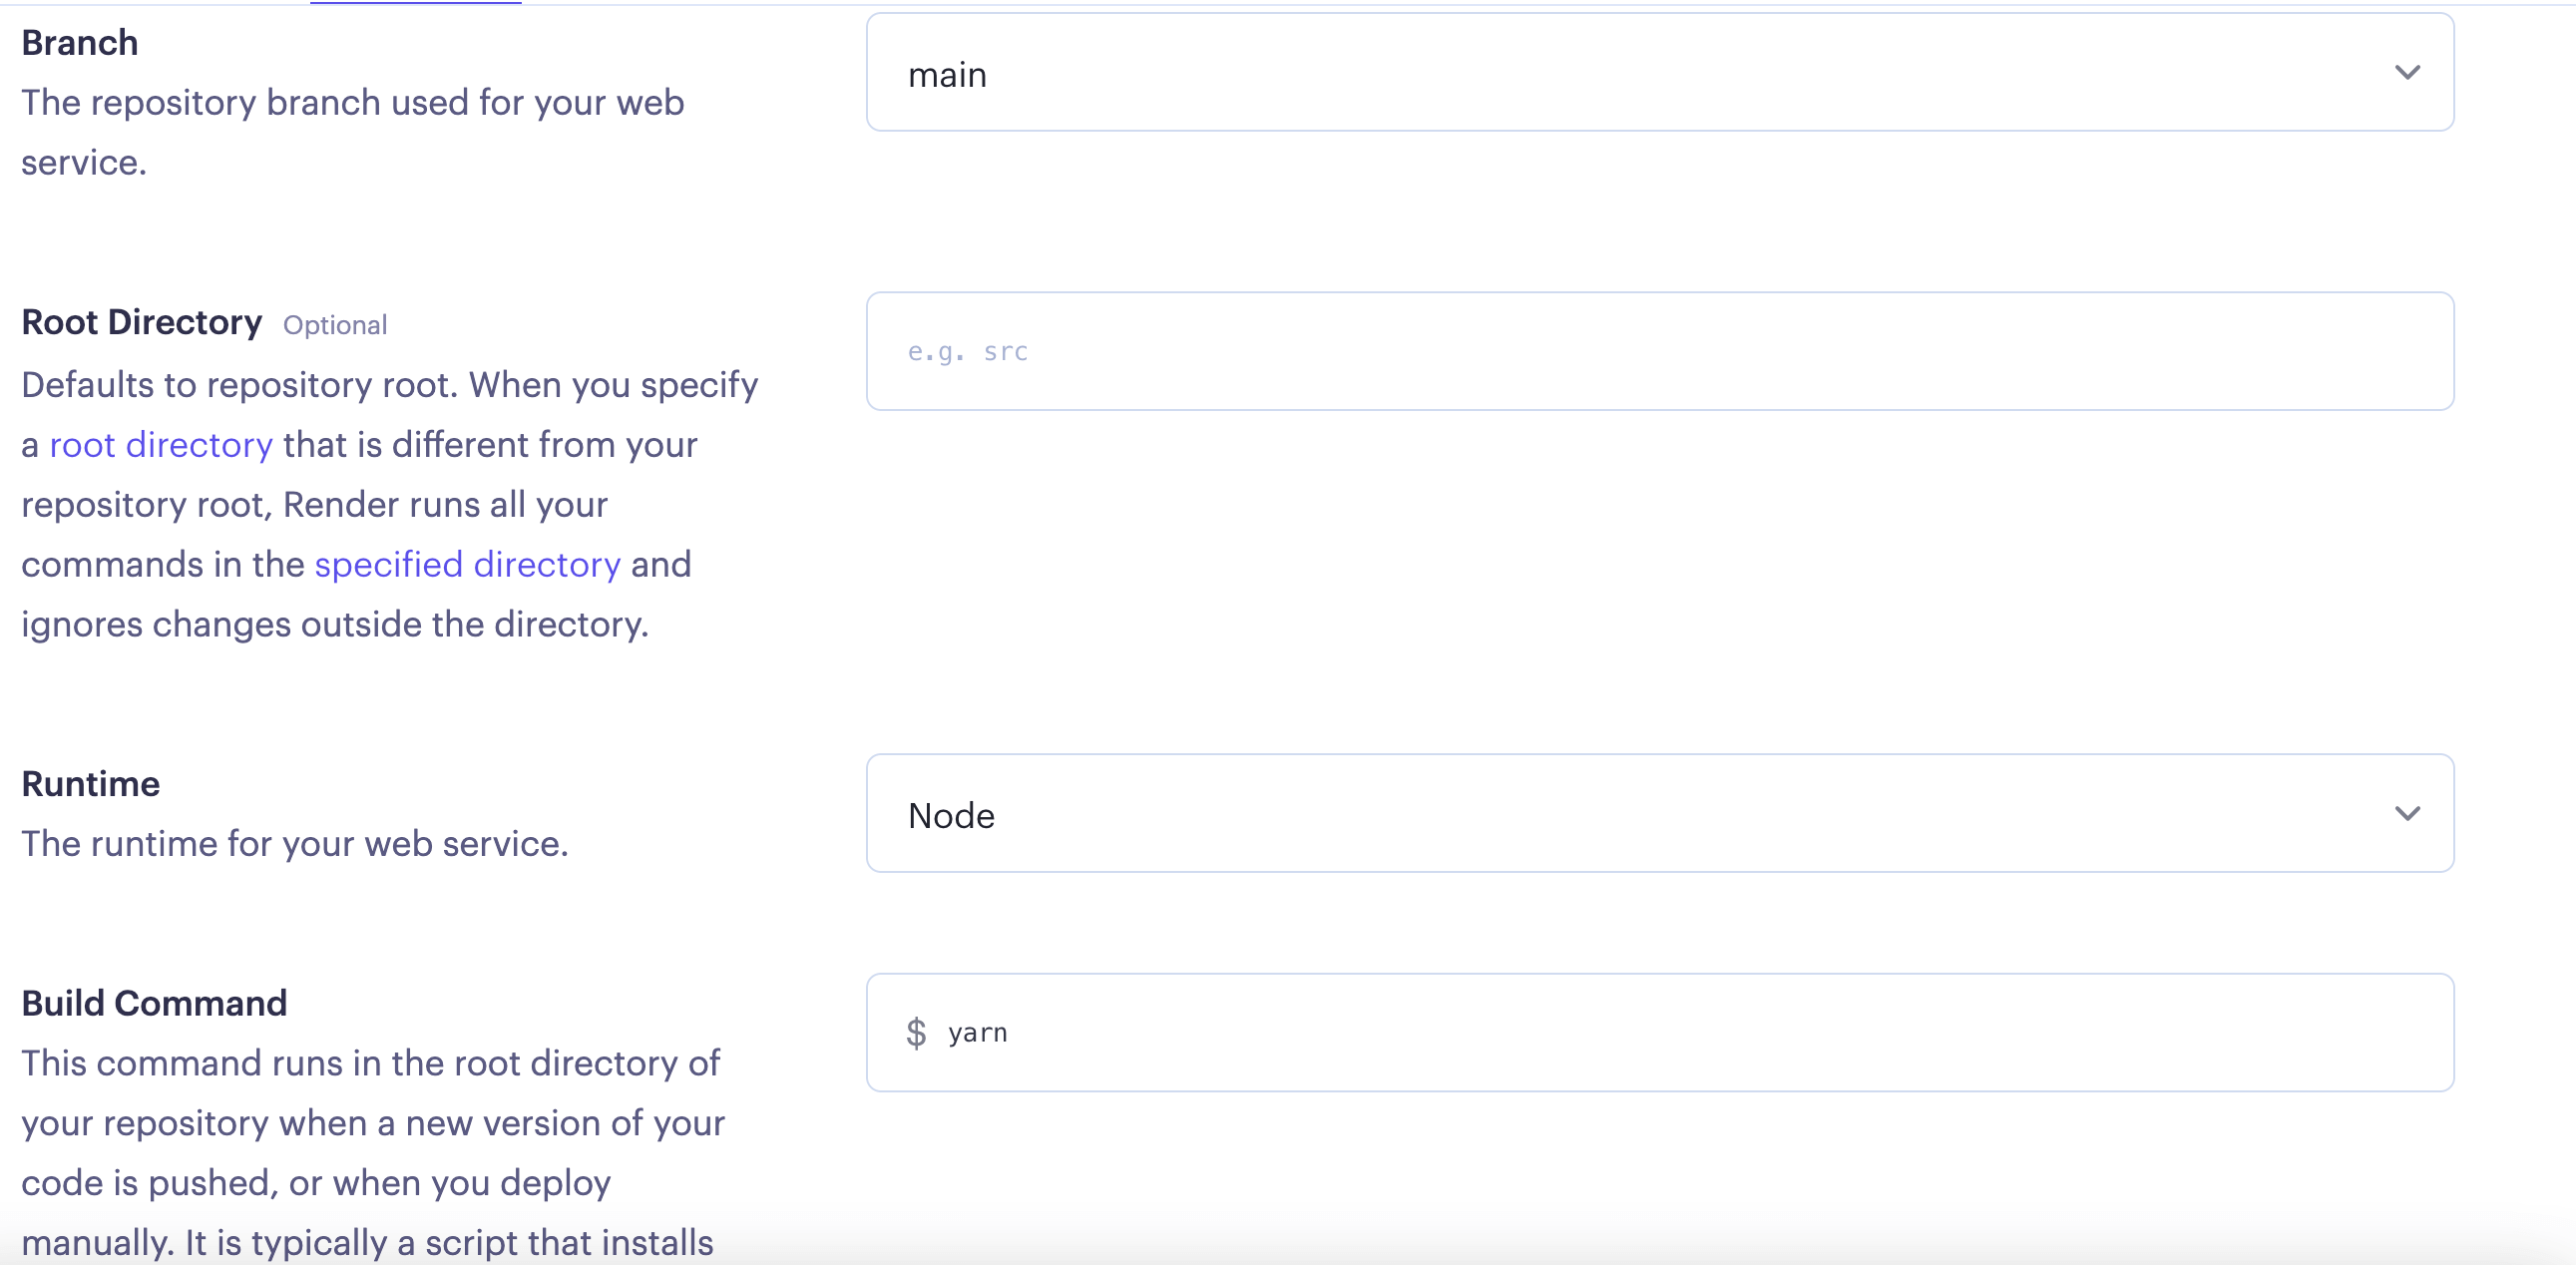
Render部署

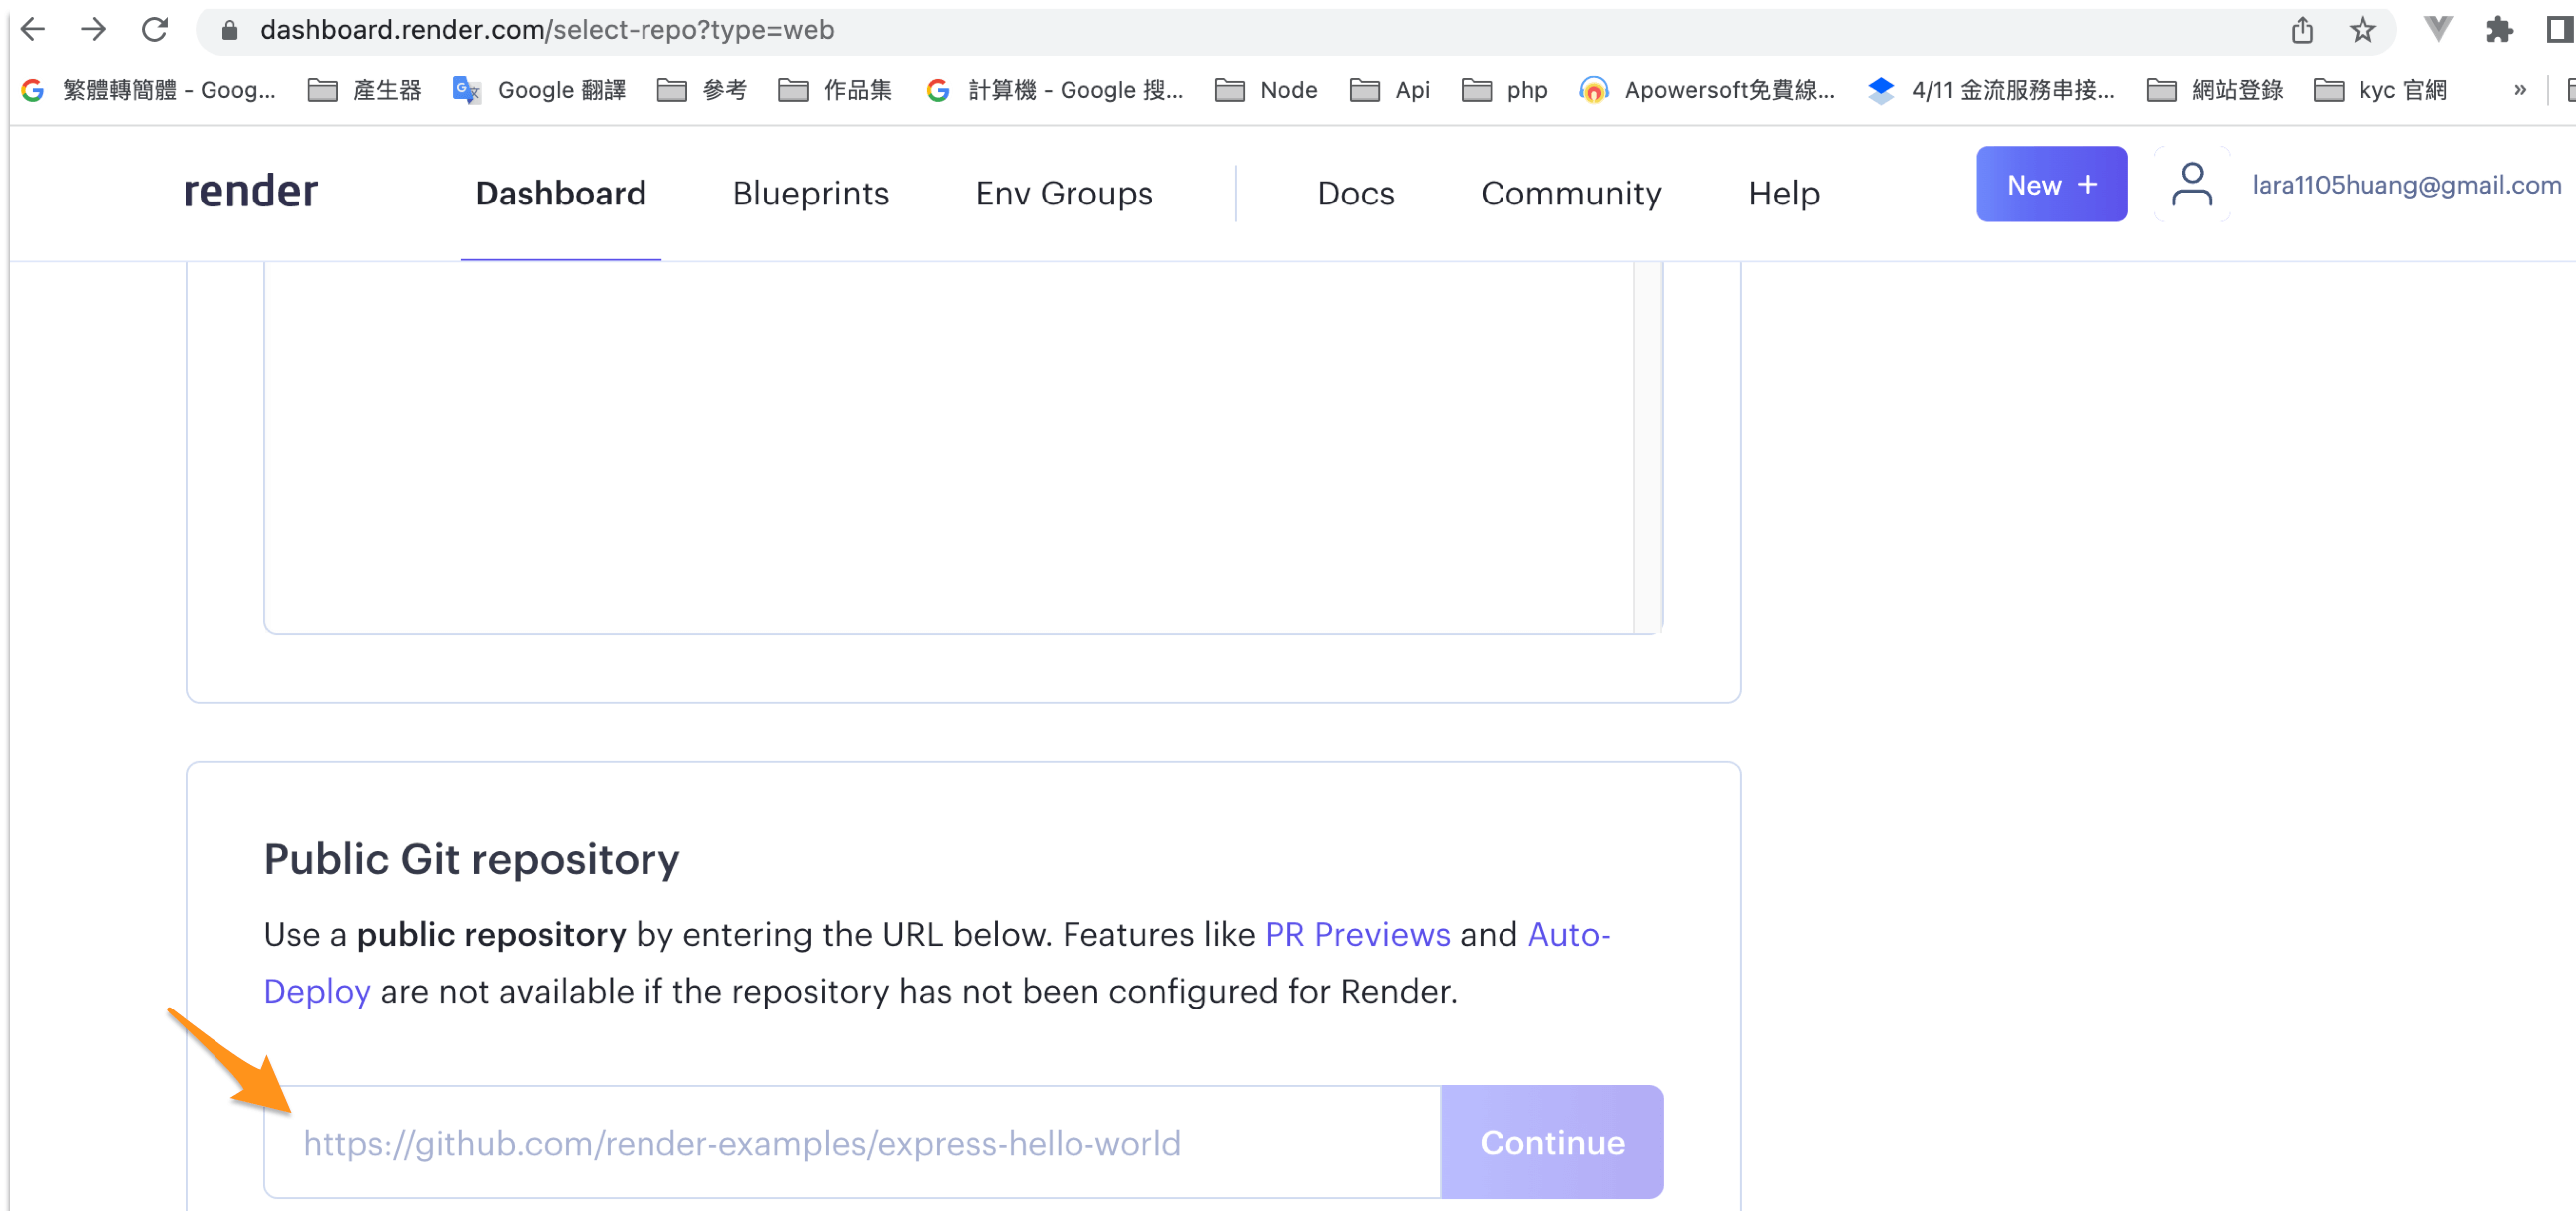
Render
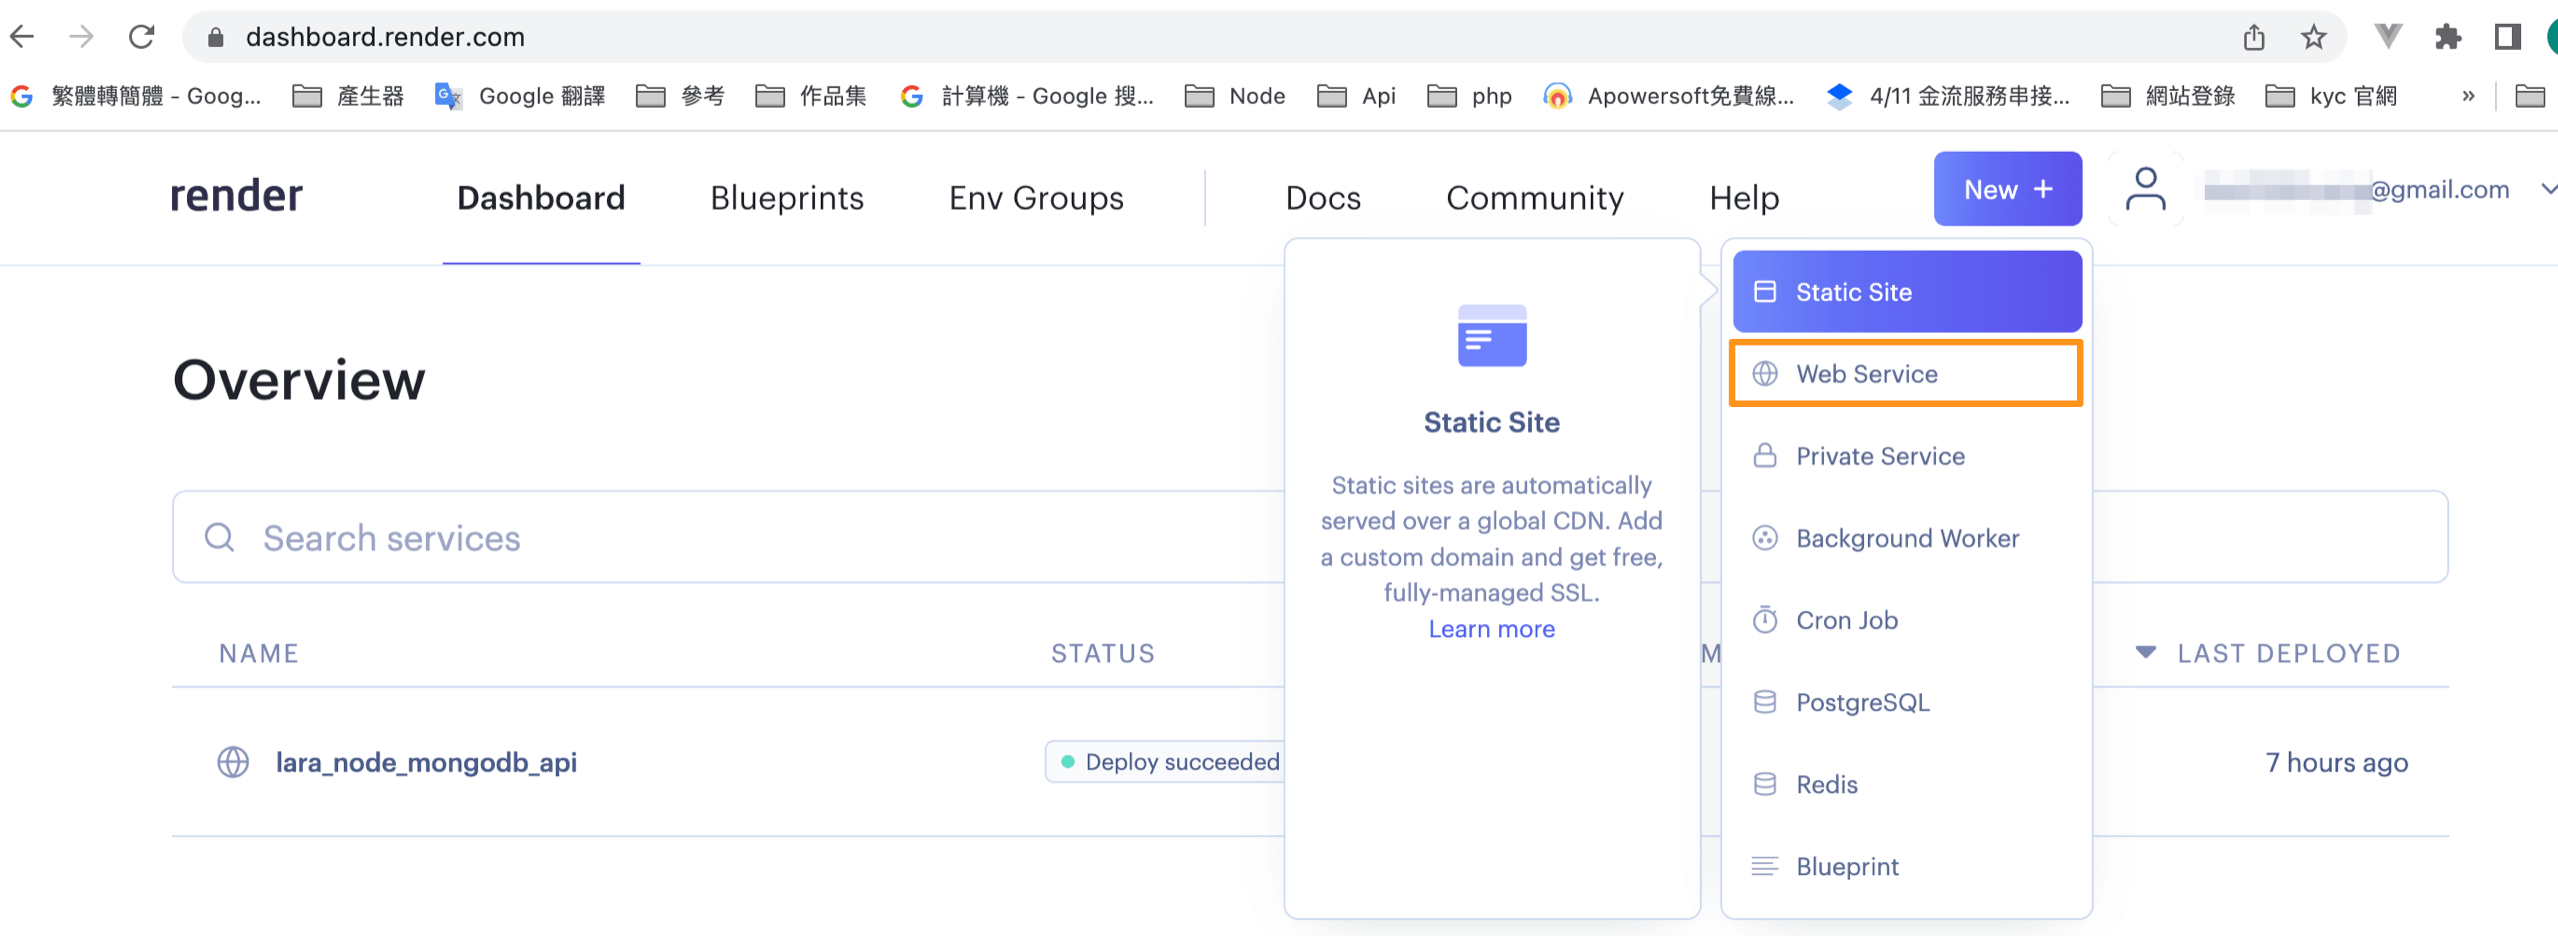
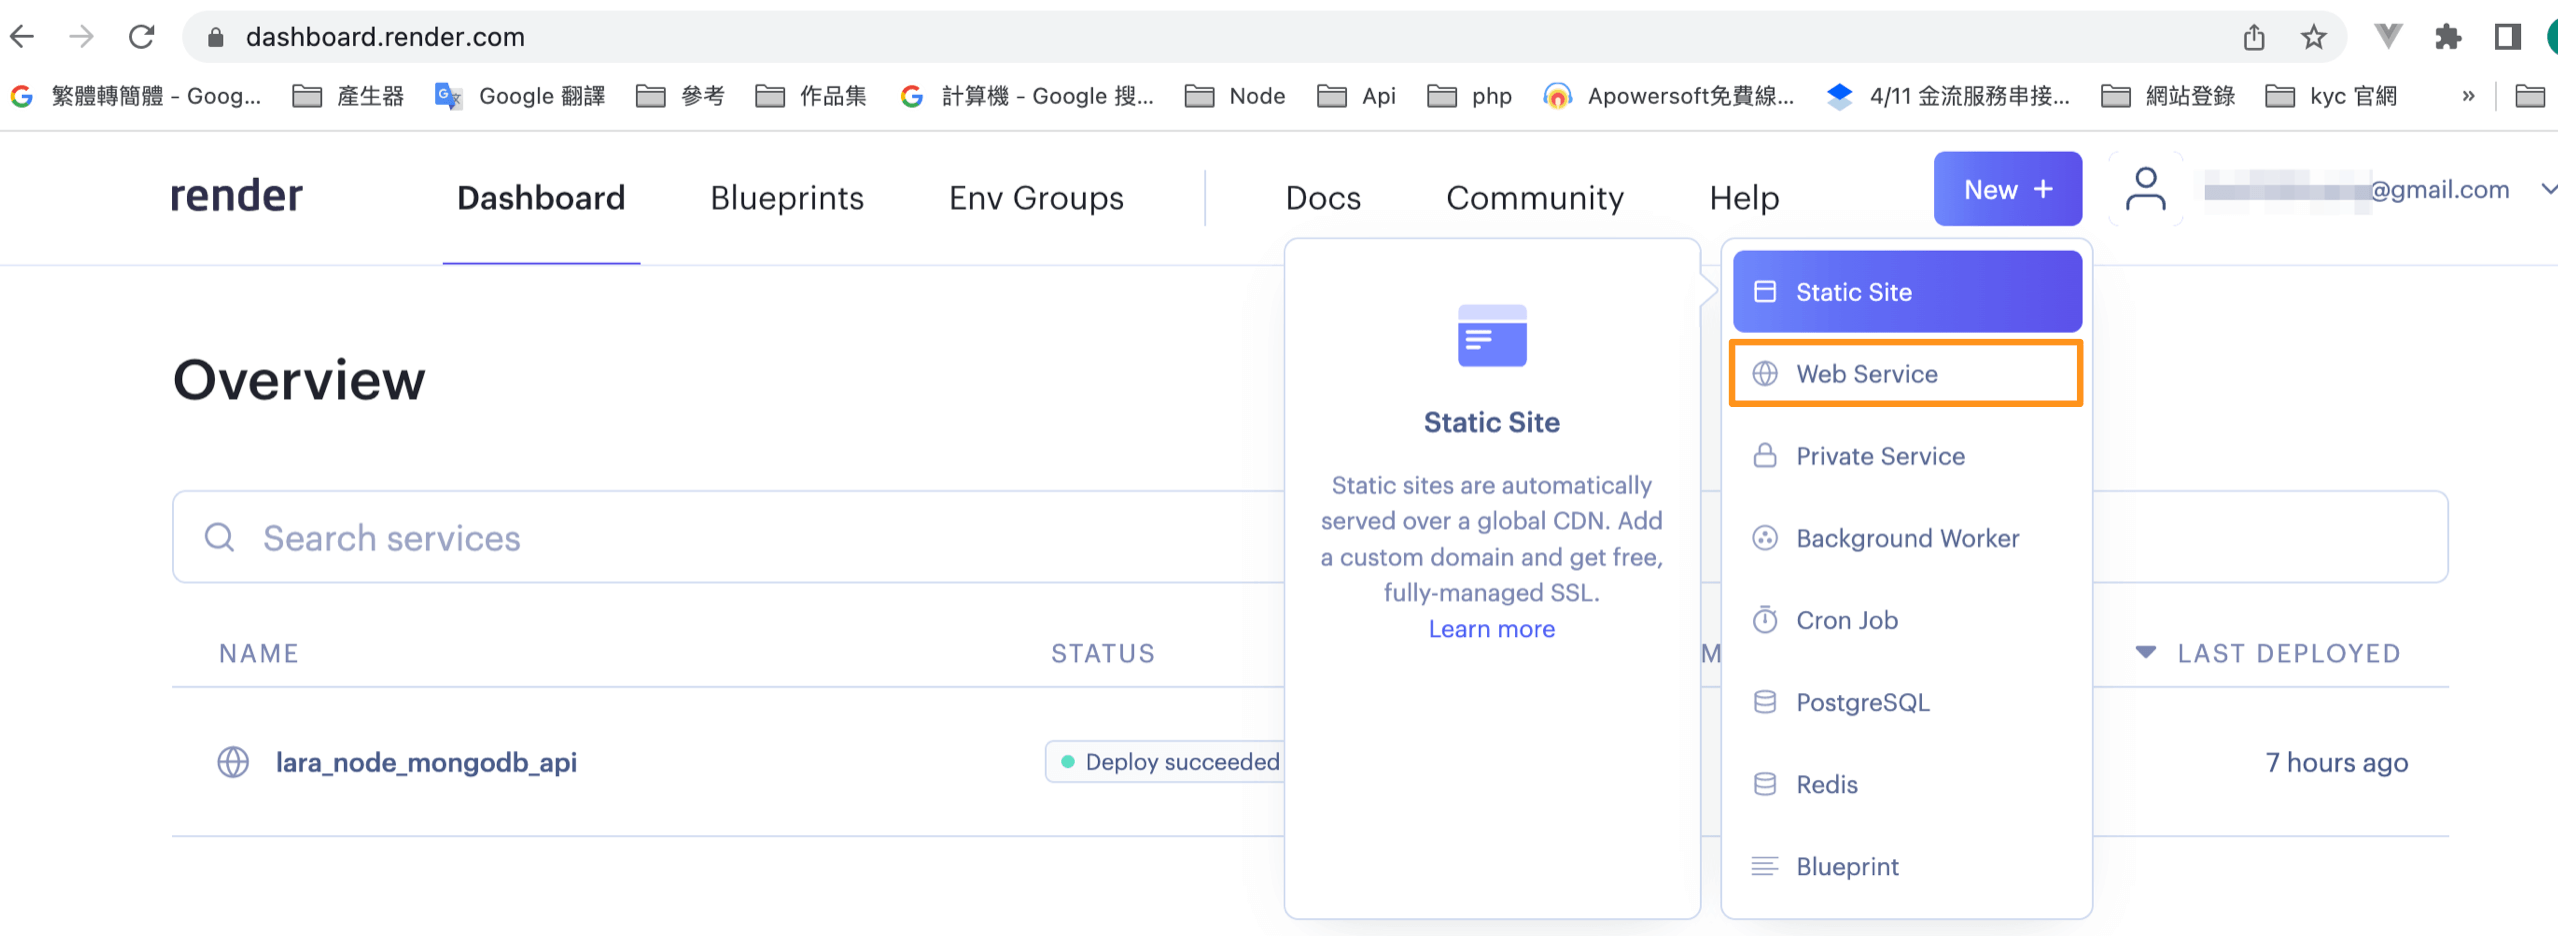
選取WebServer

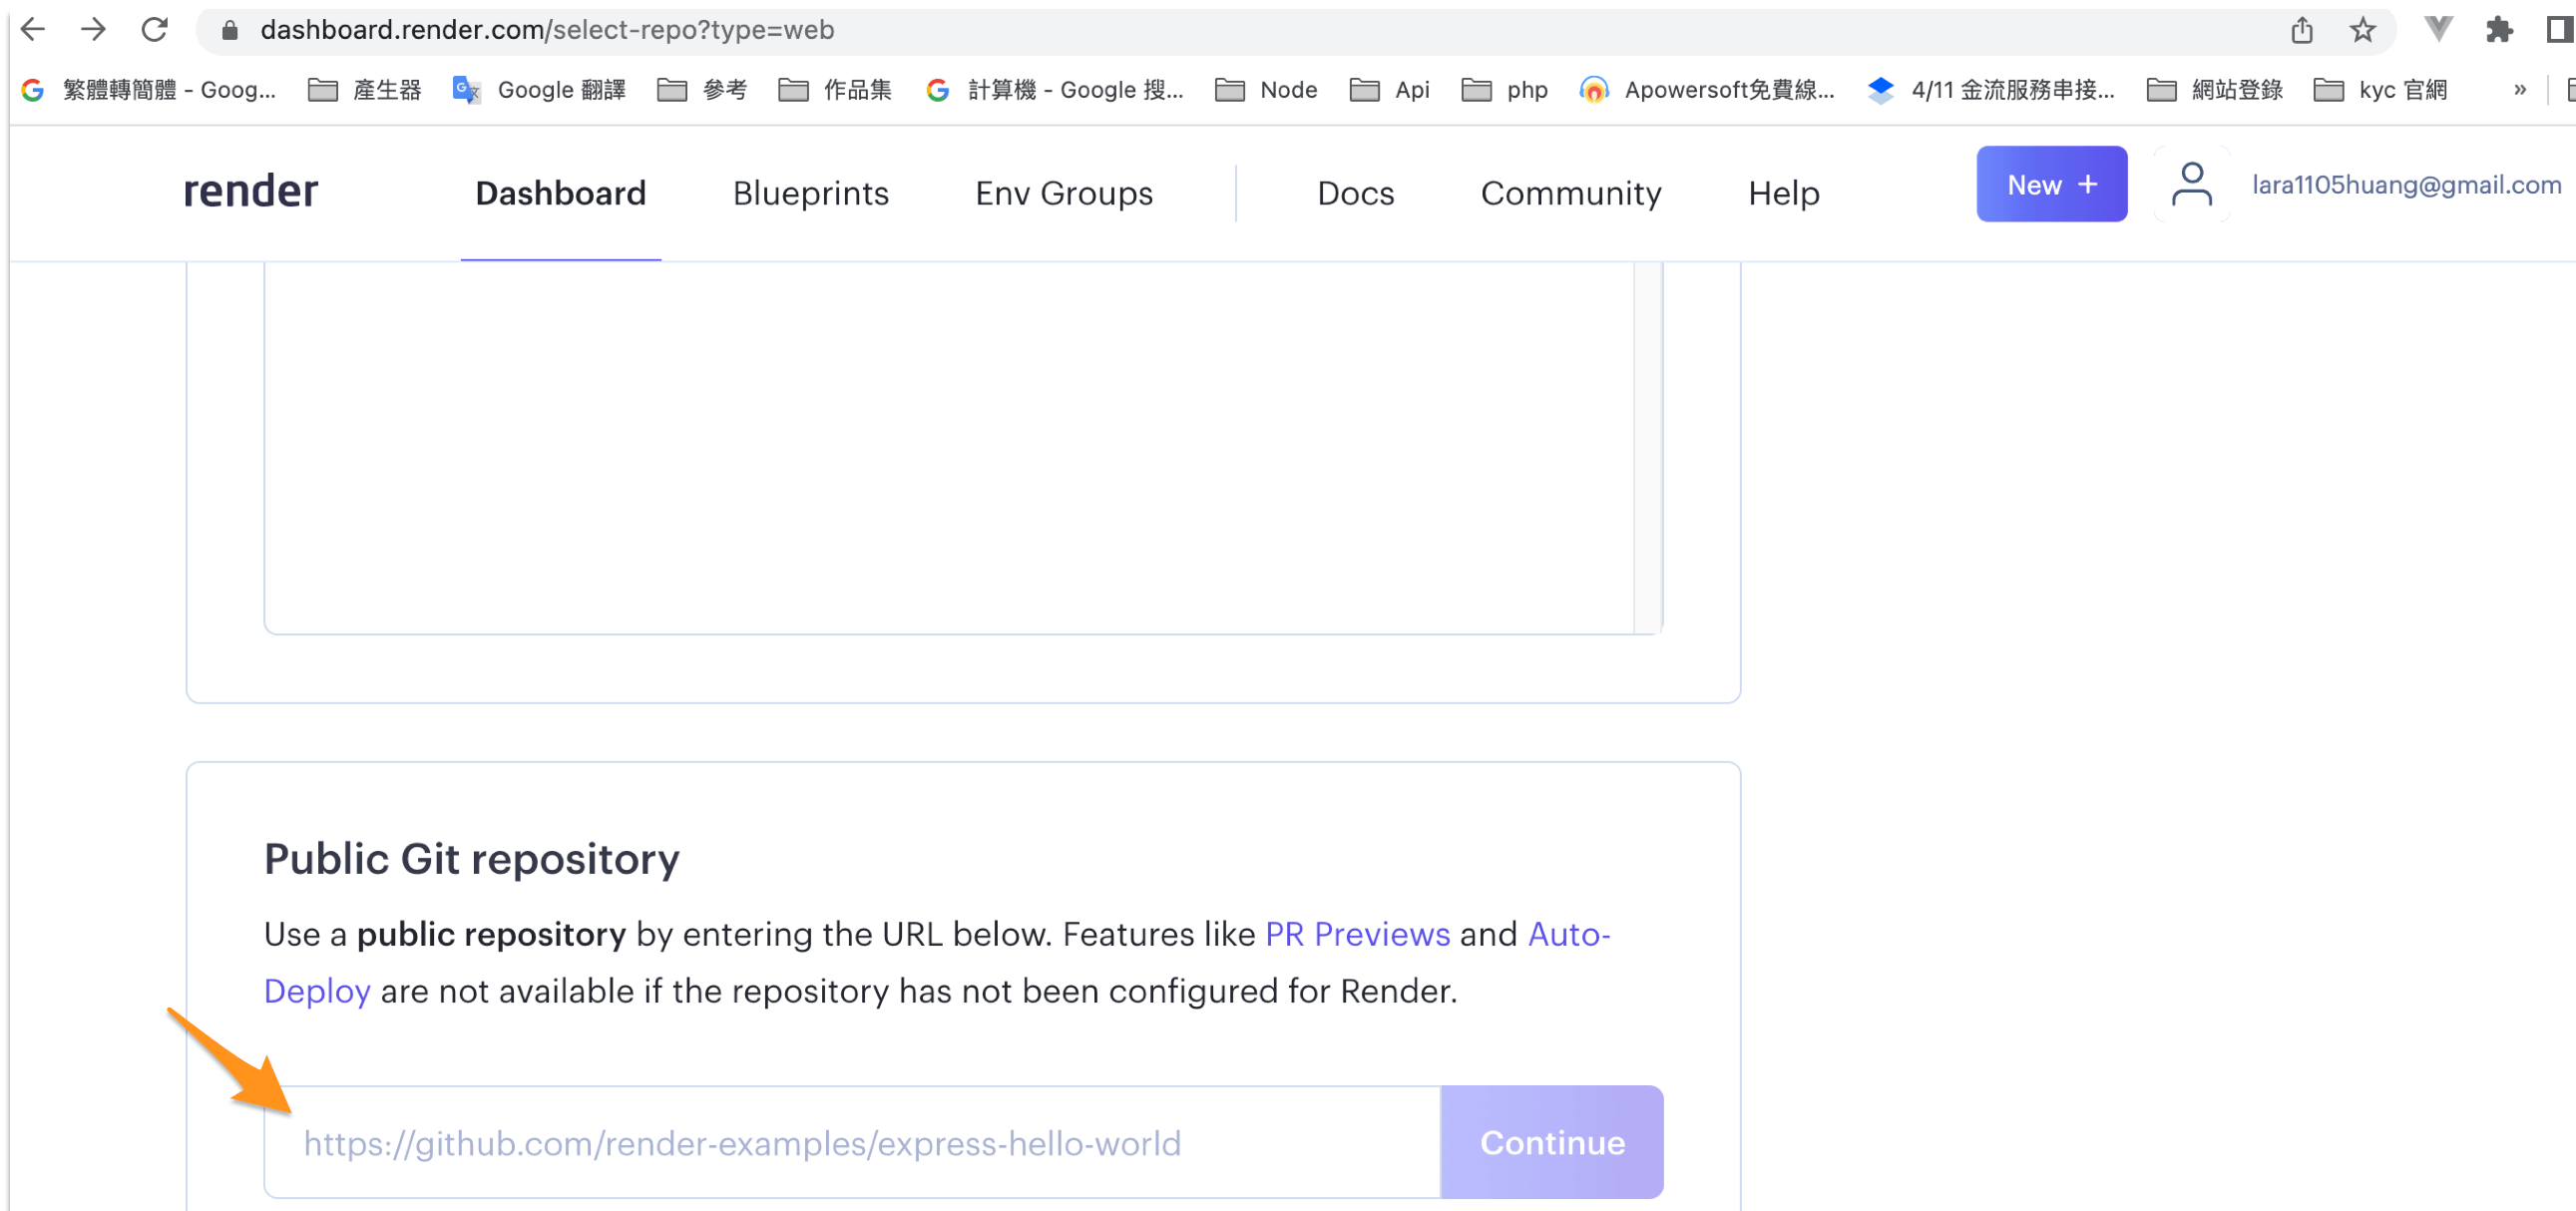
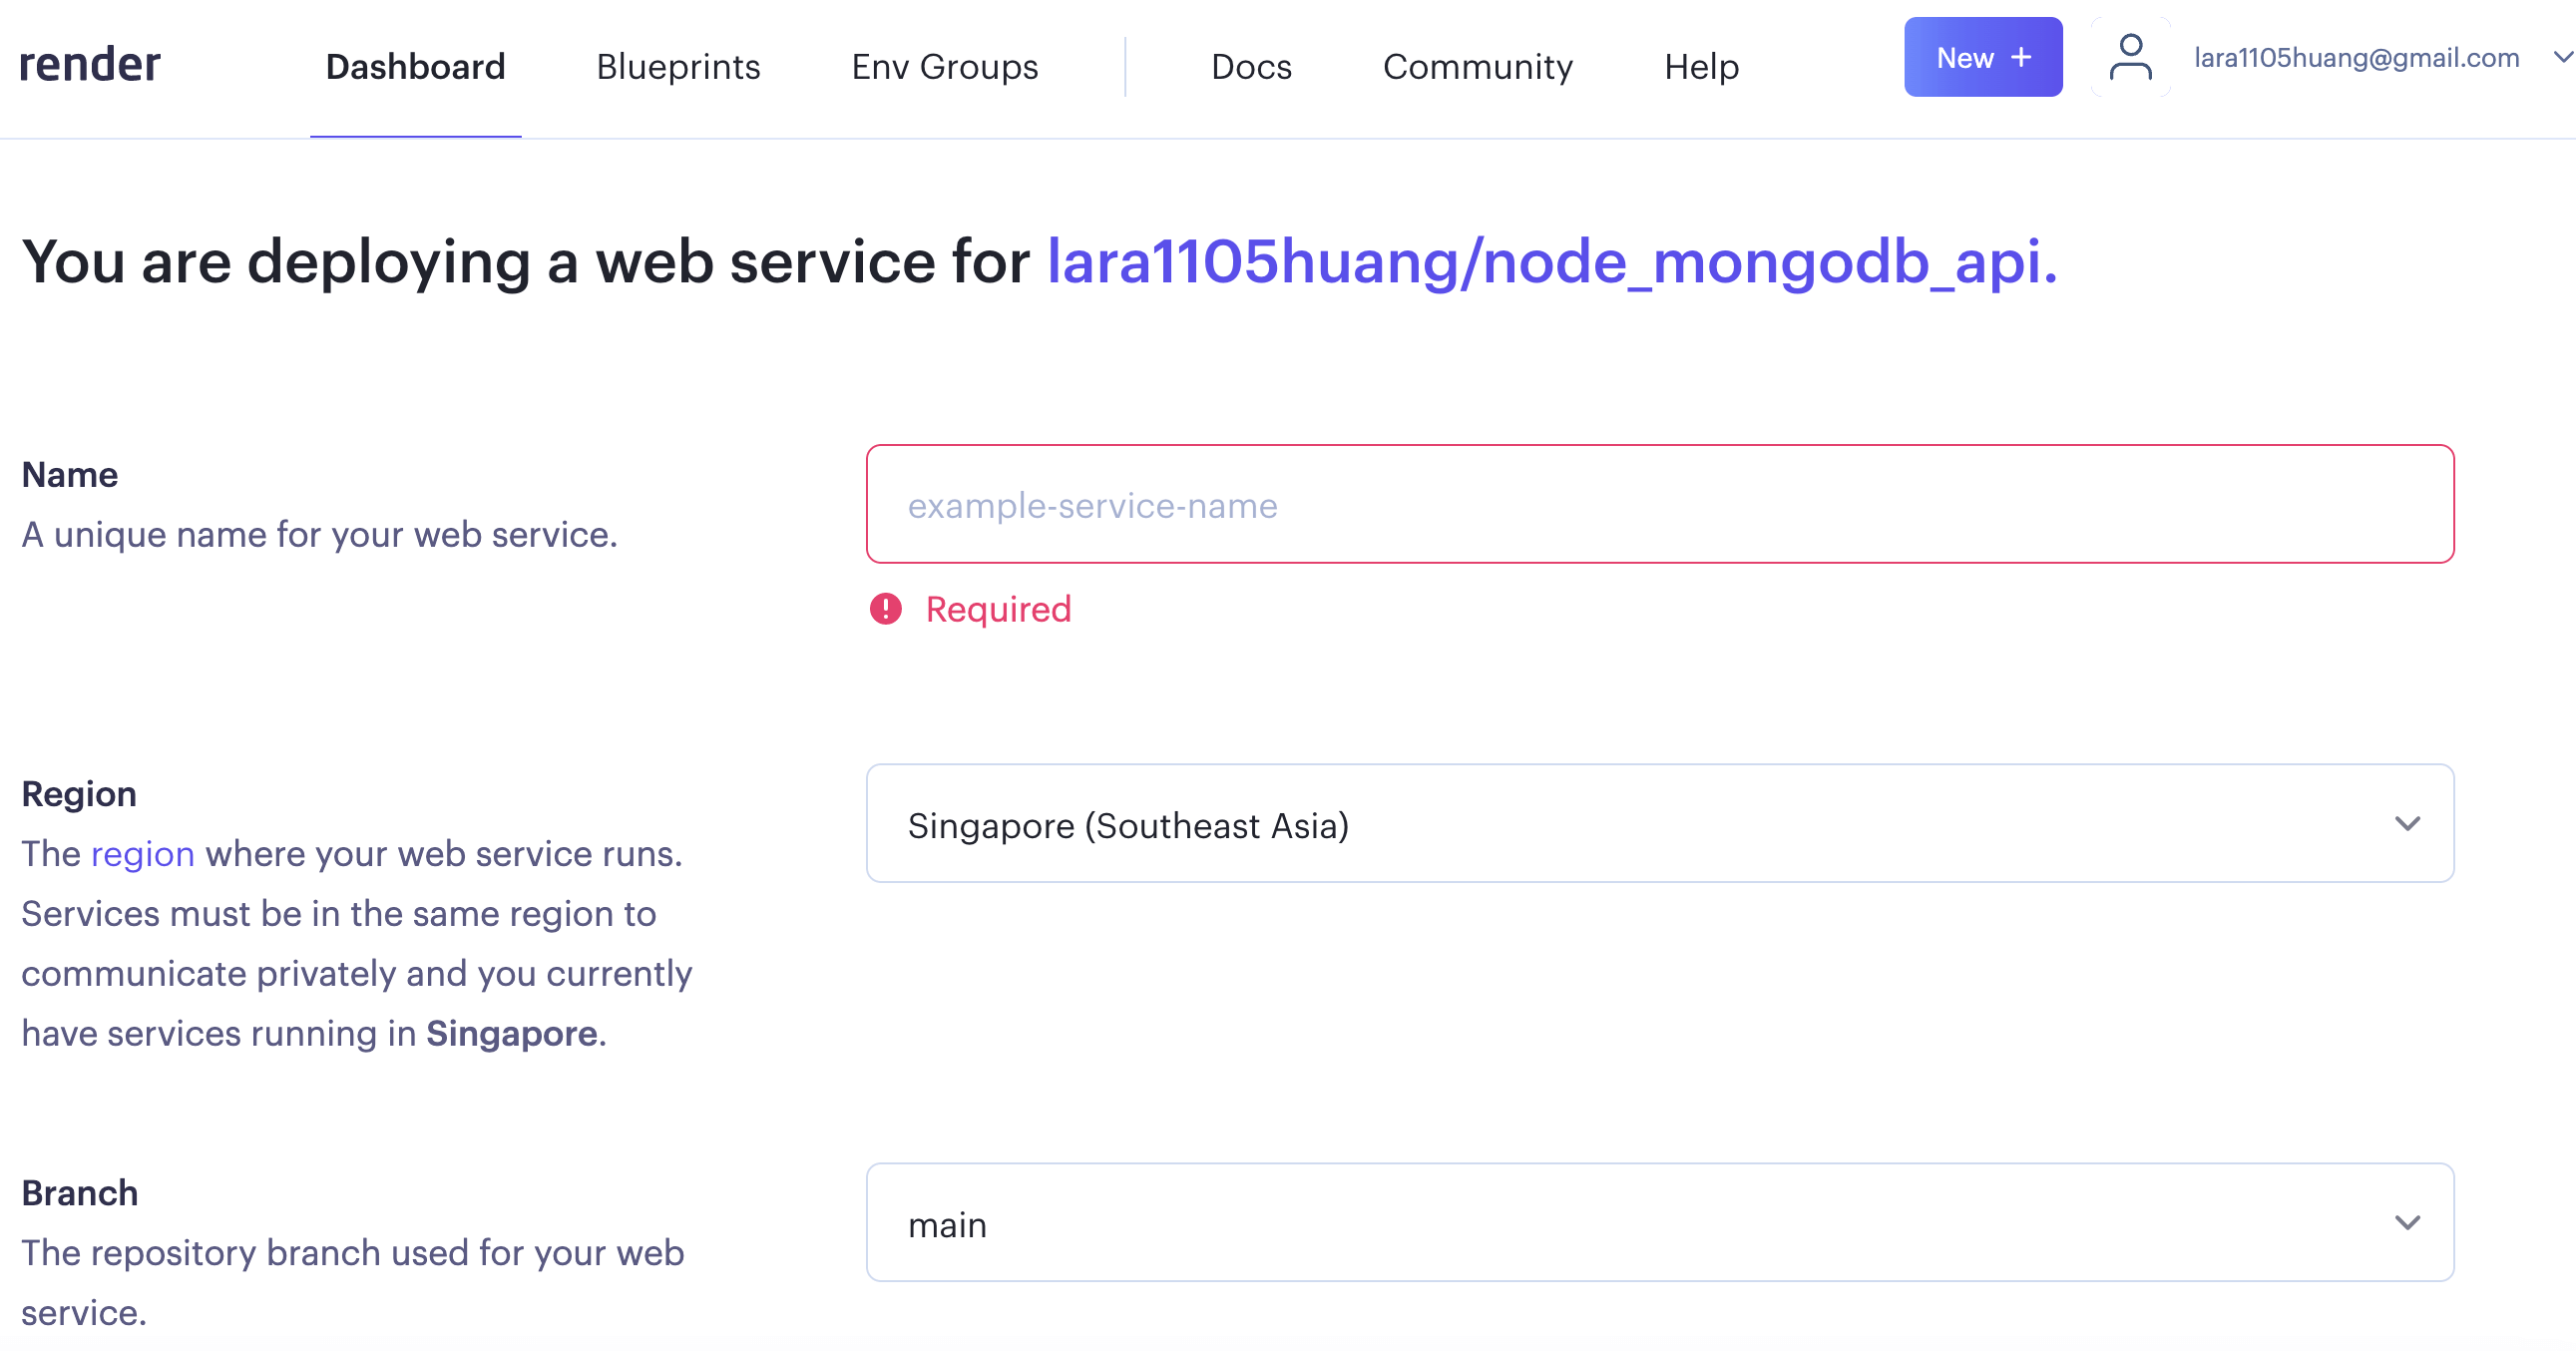
箭頭內貼入Git庫網址

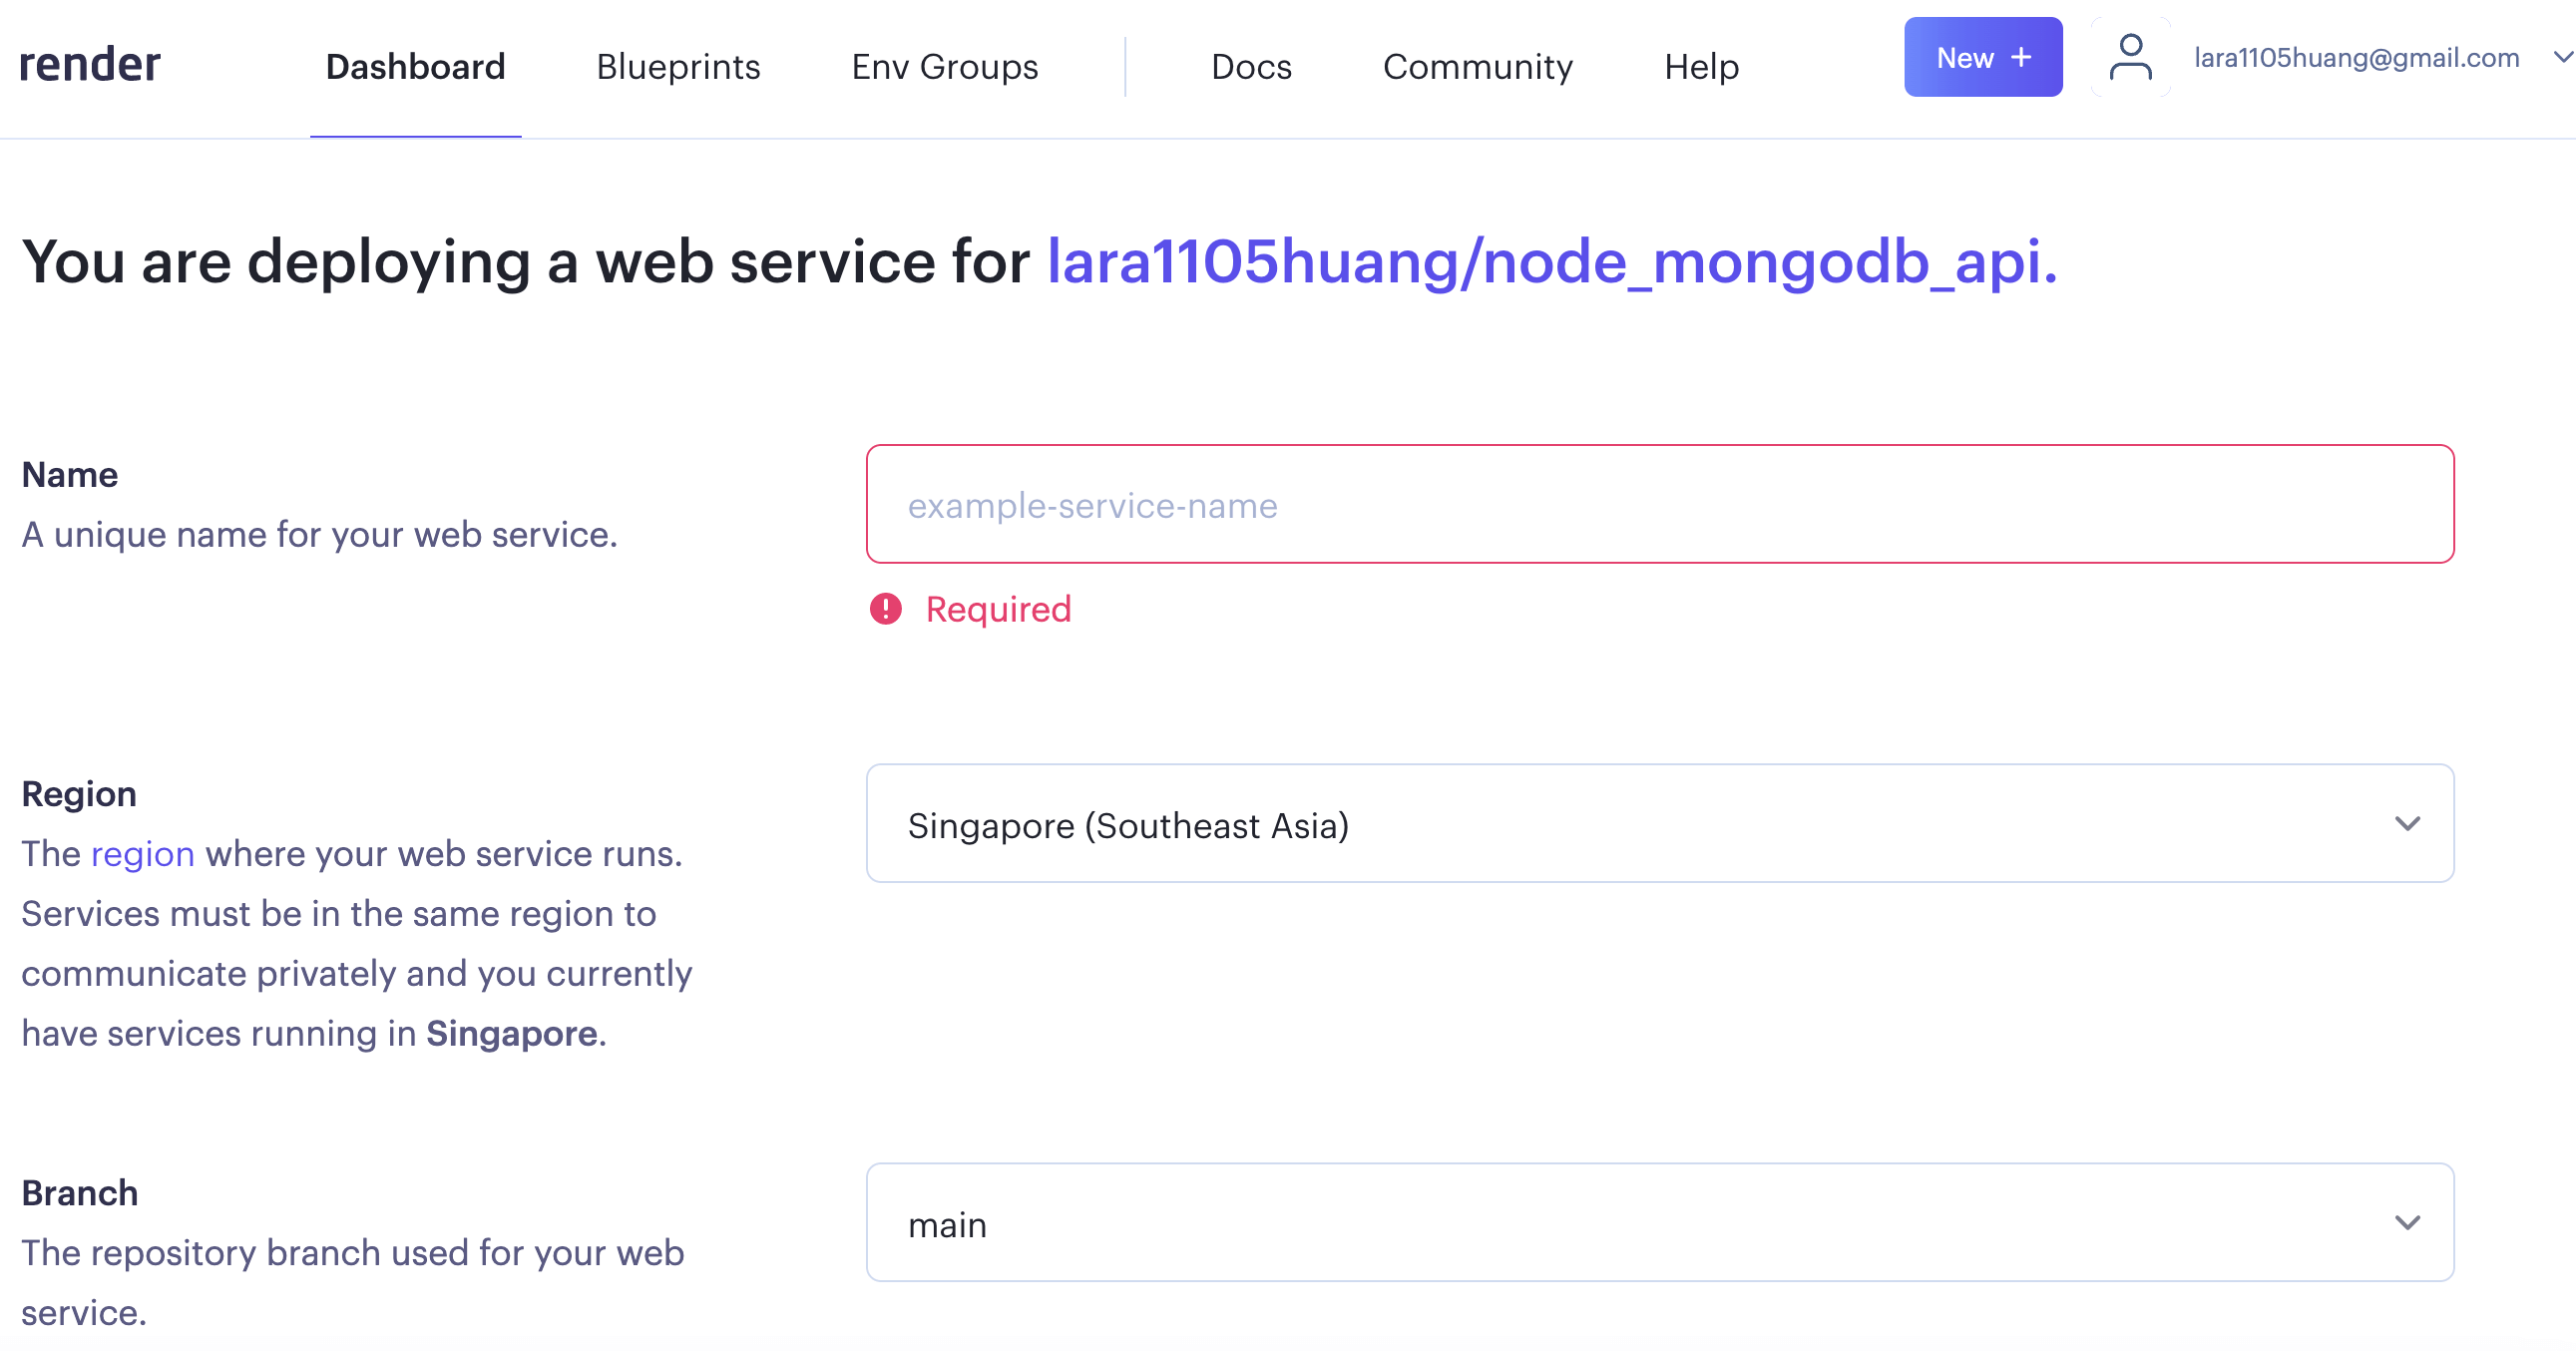
在Name框中,輸入一個簡短的名字來標識你的網站。


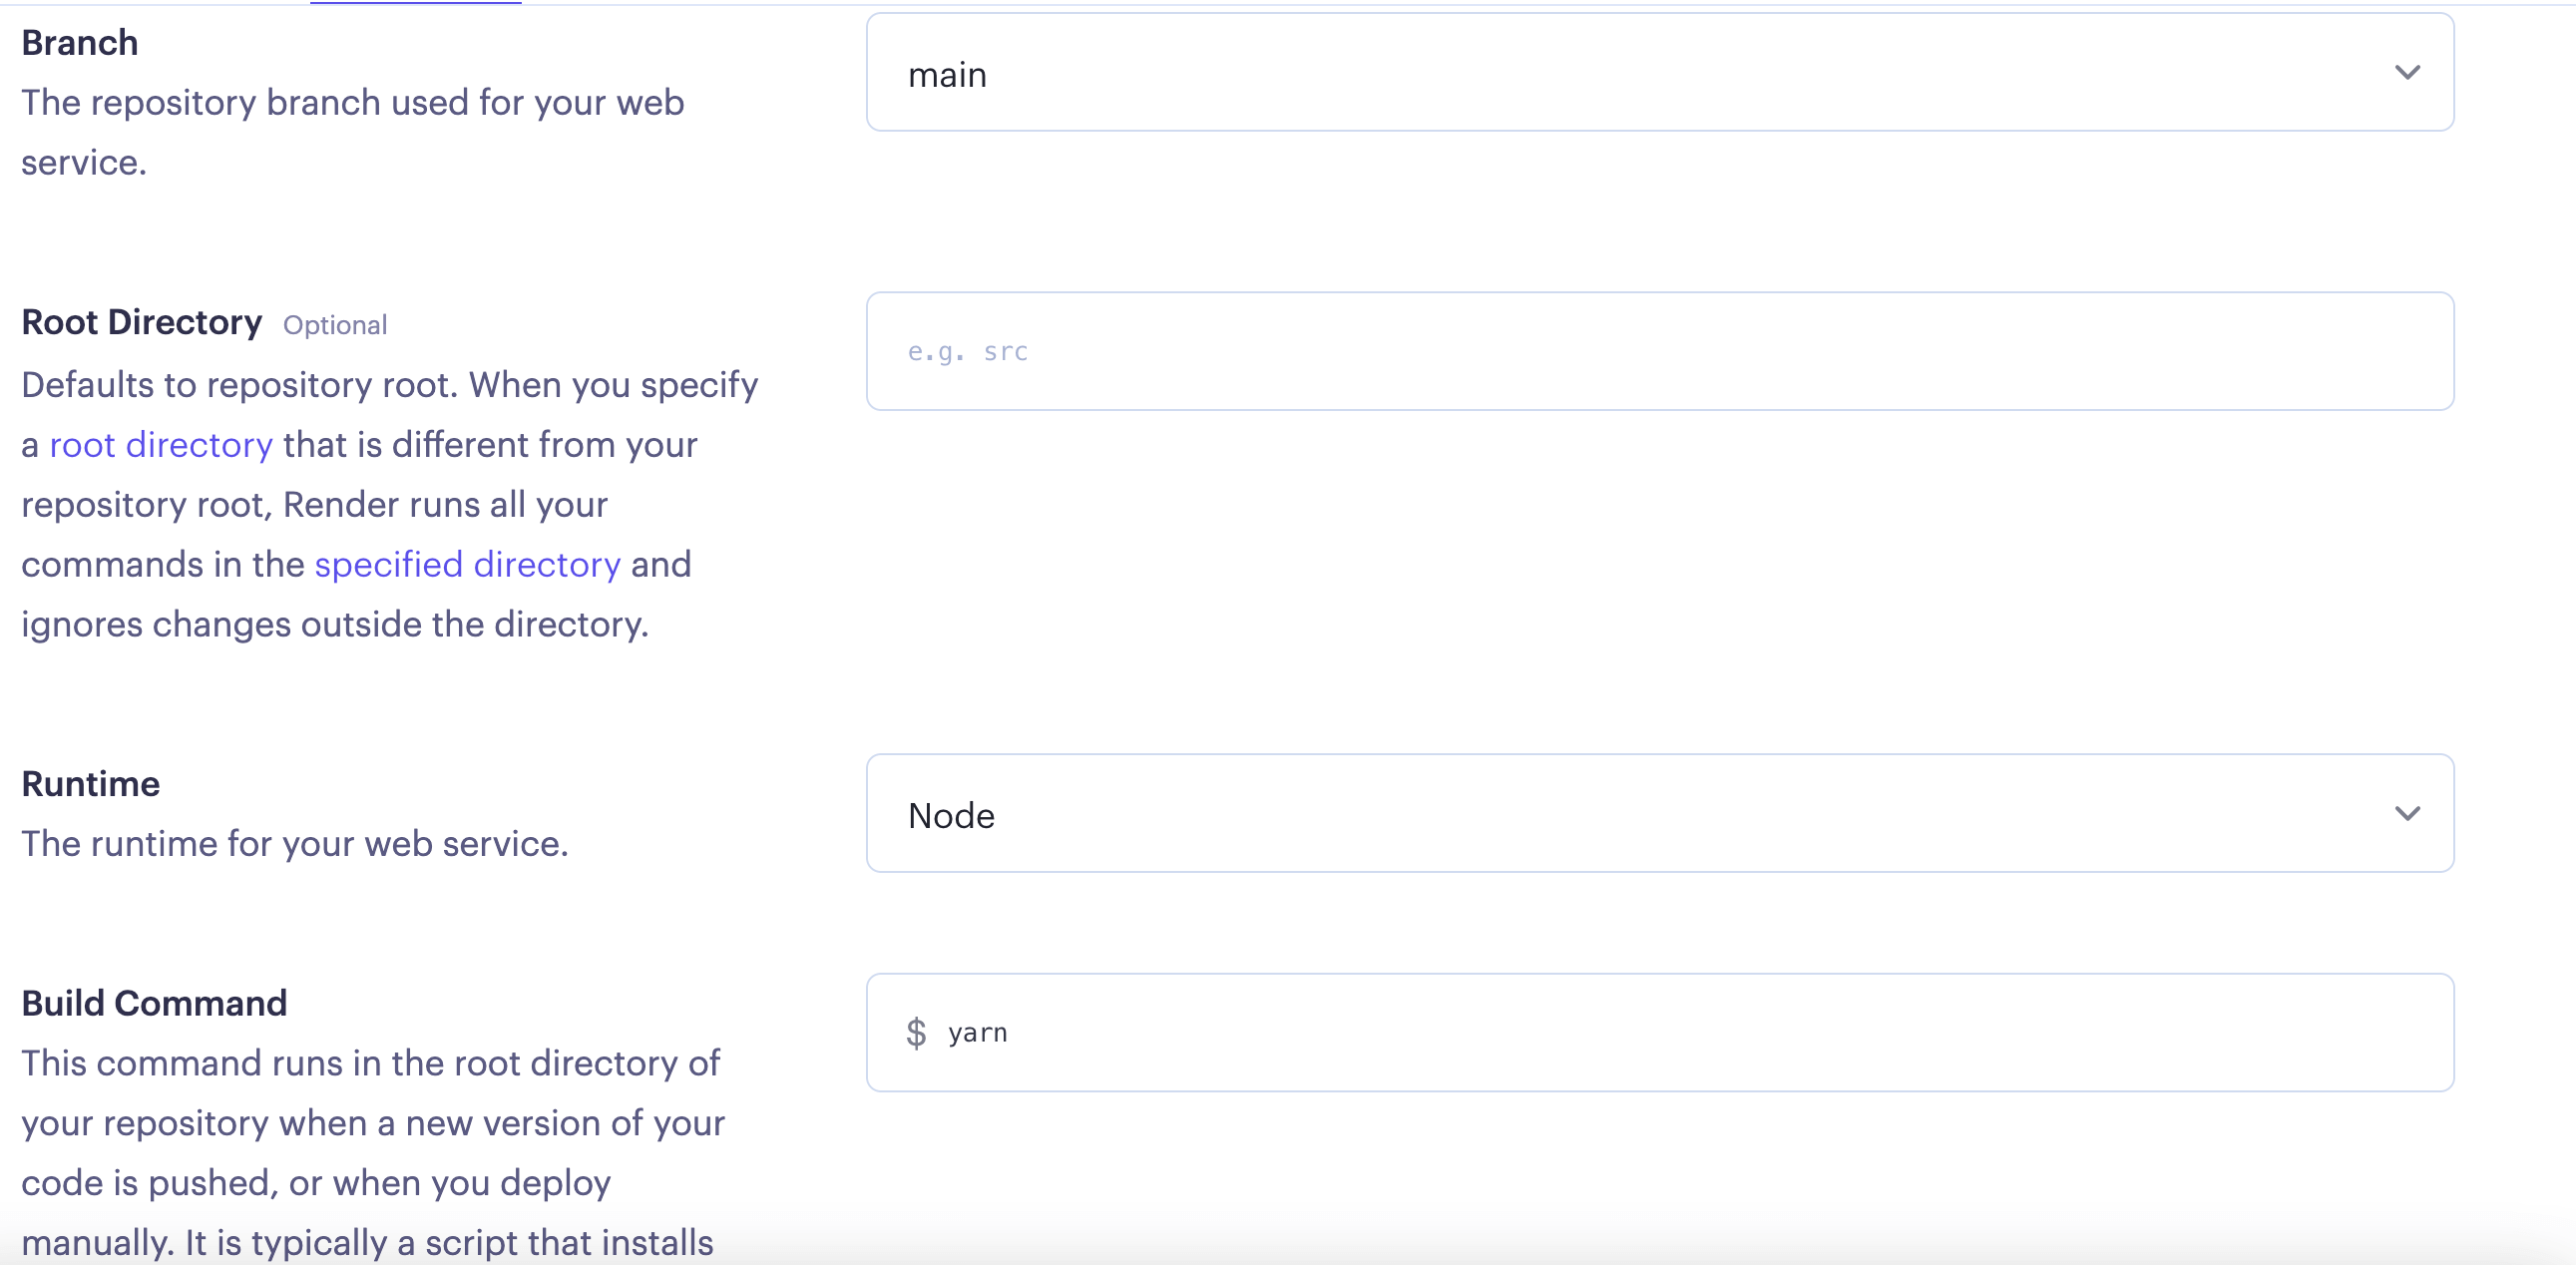
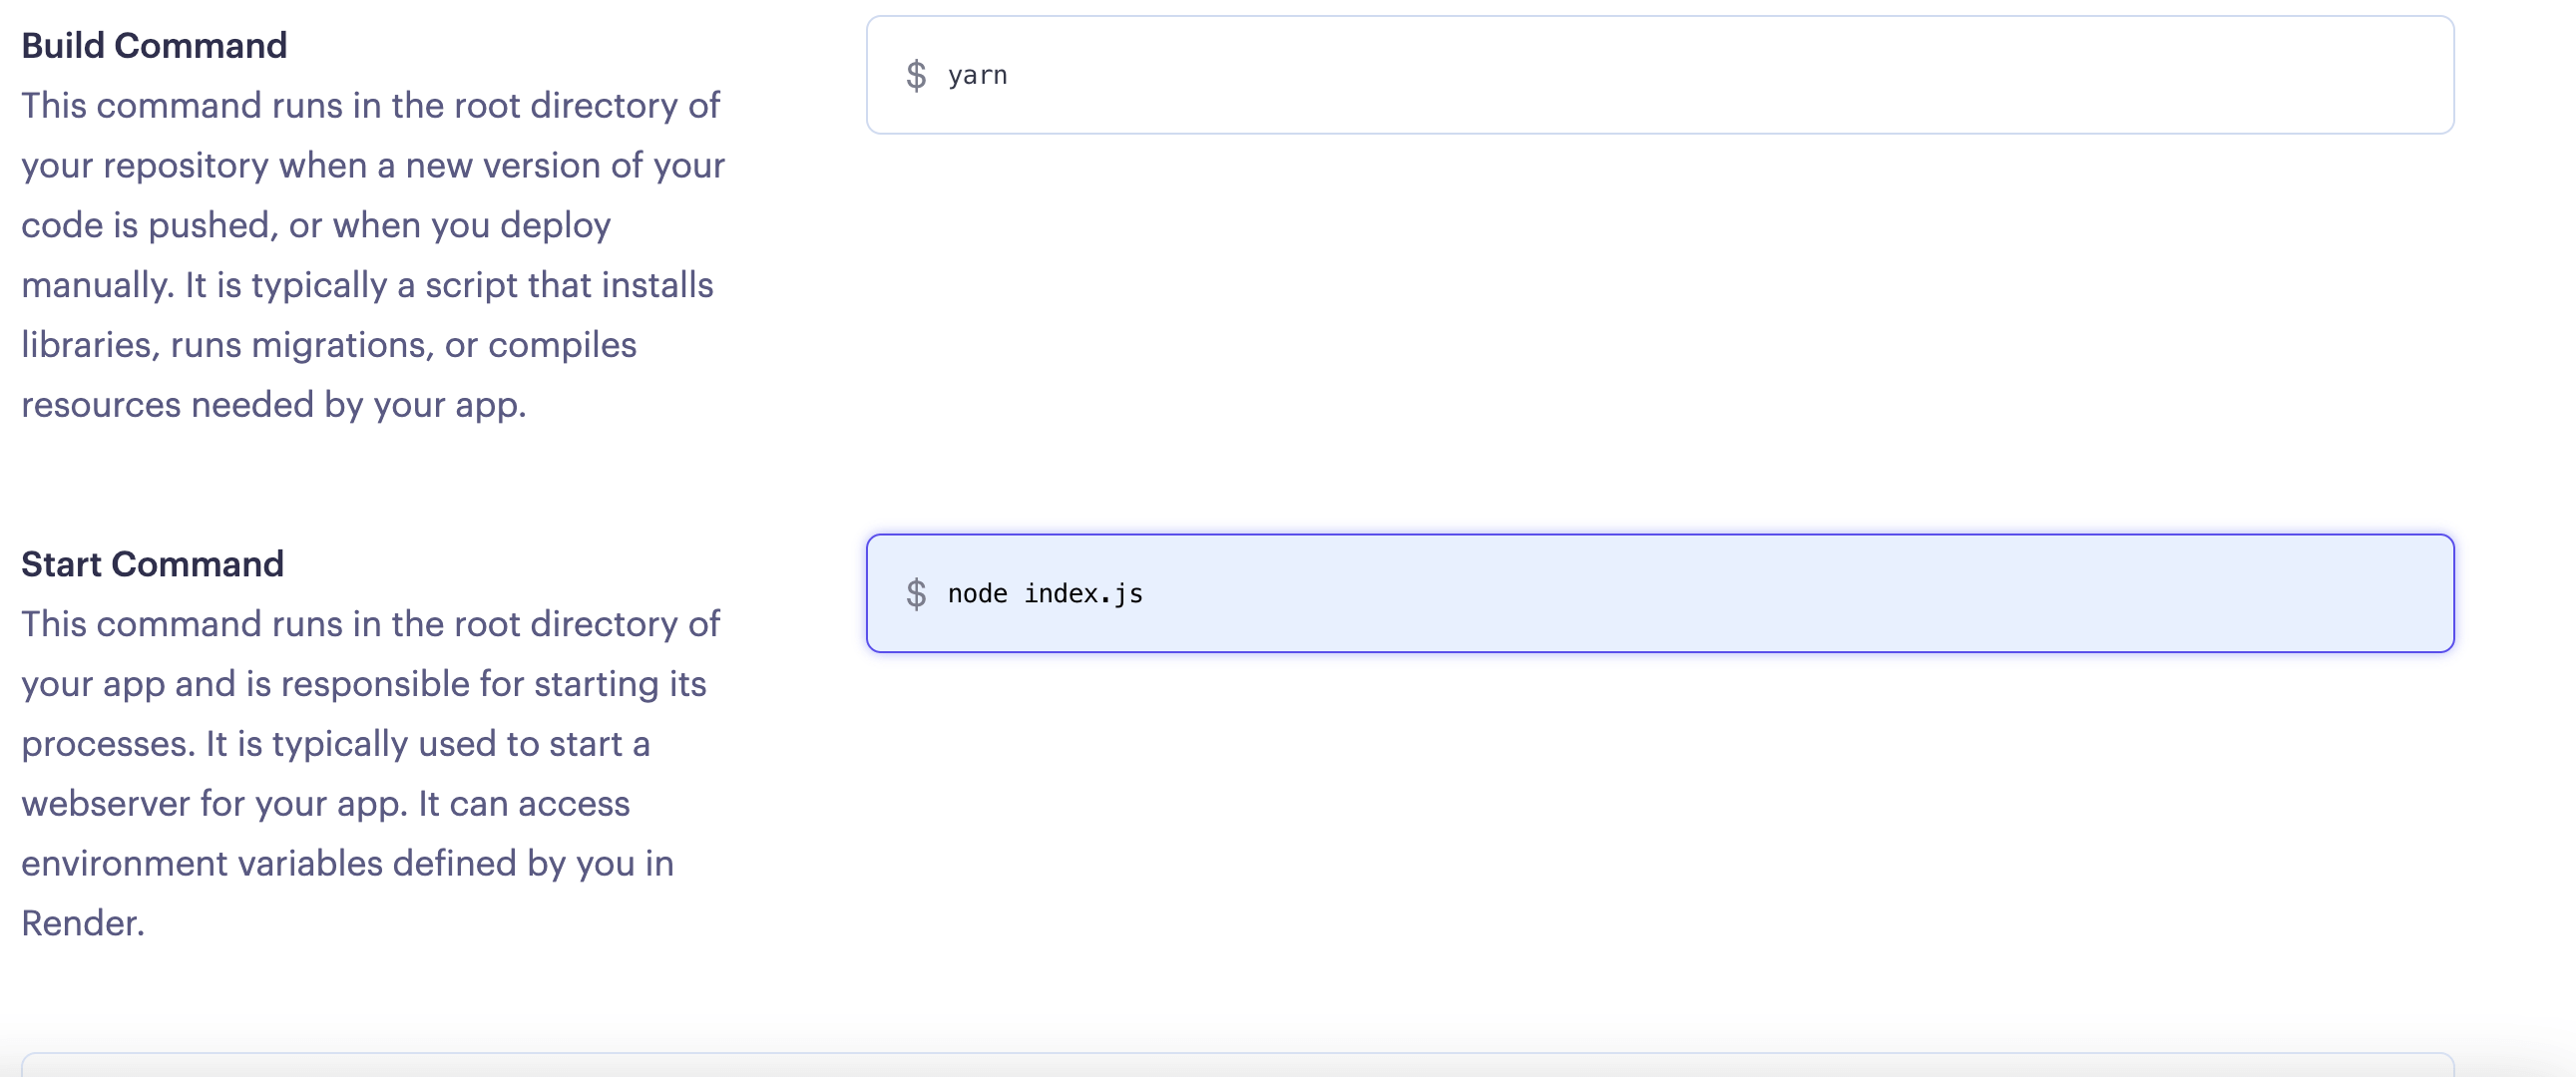
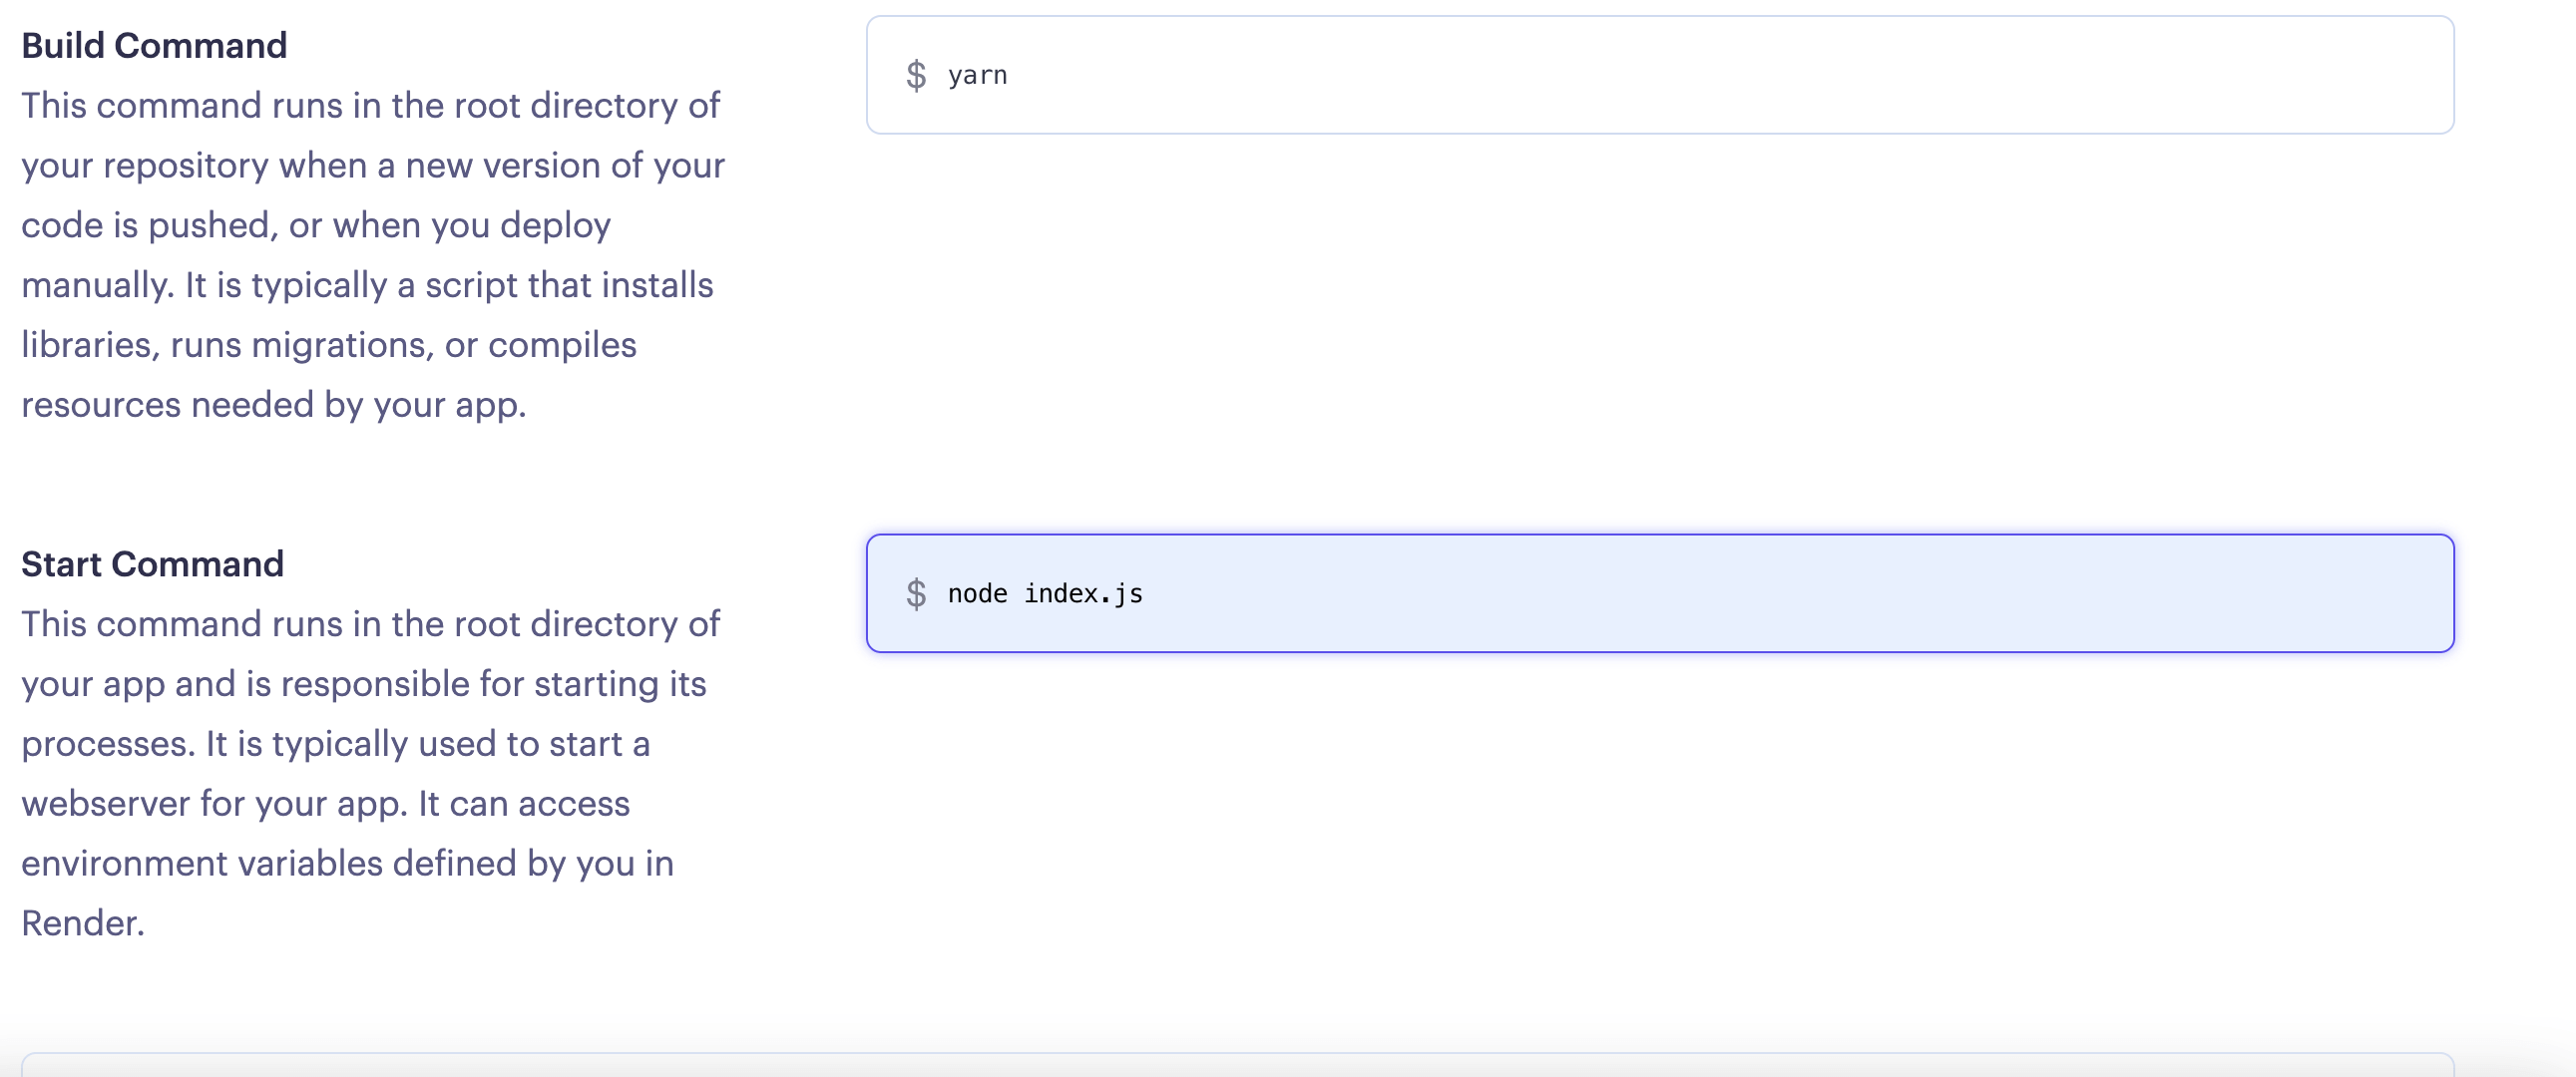
如果你的入口文件是 index.js,在Start Command中填寫node index.js。
如果你的入口是 server.js,在Start Command中填寫node server.js

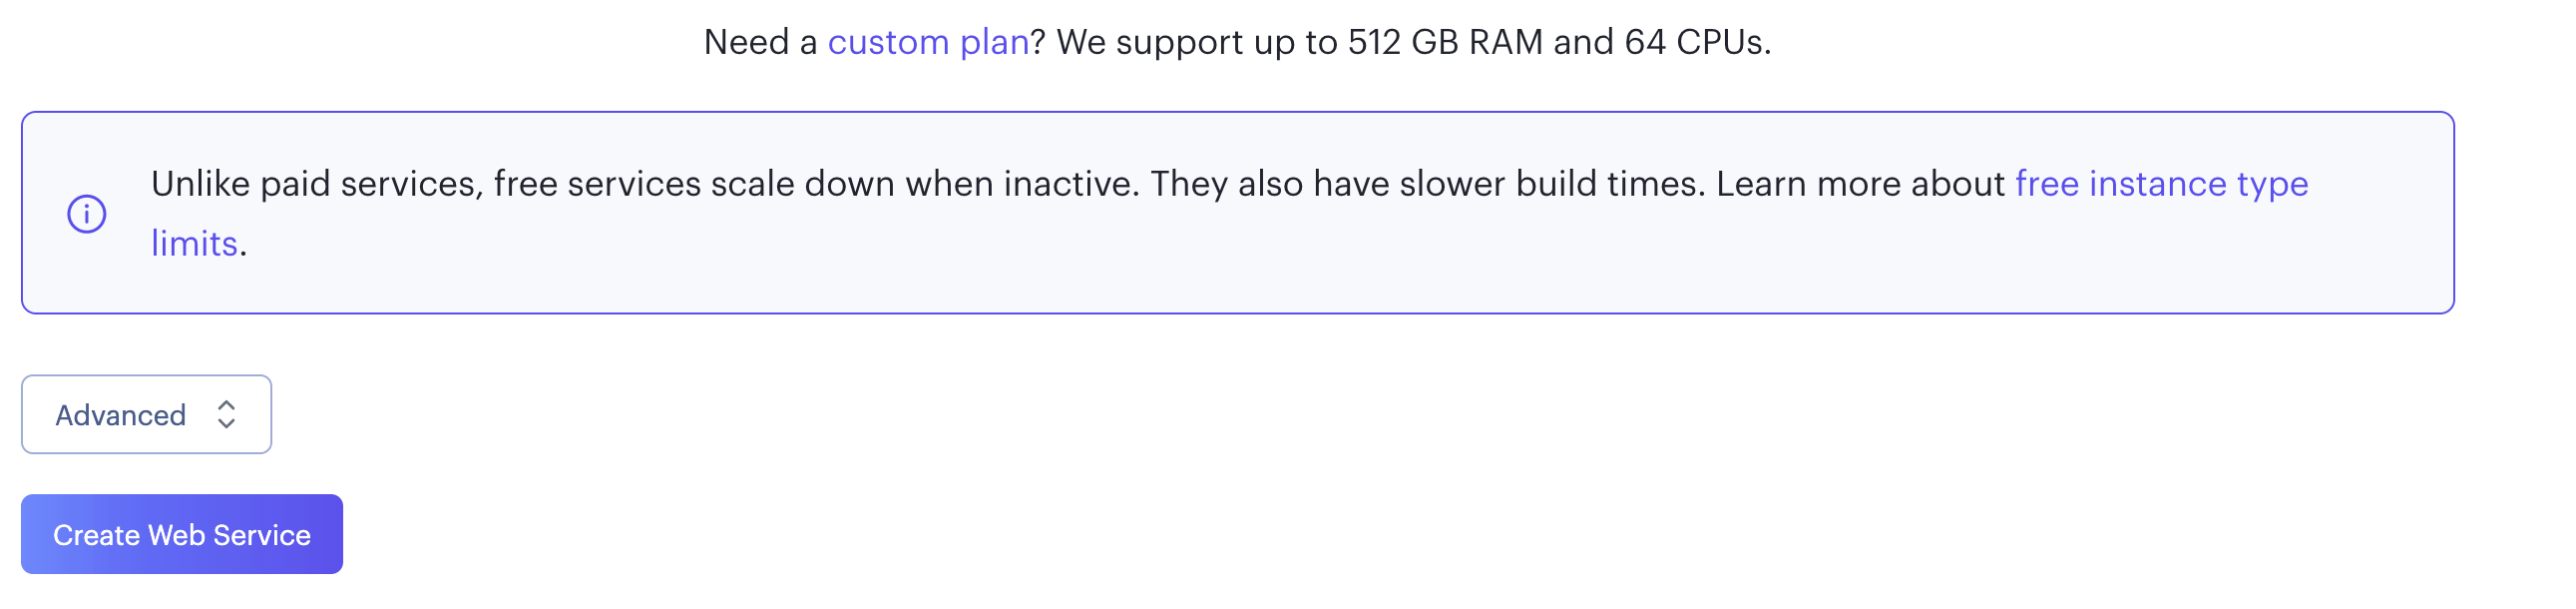
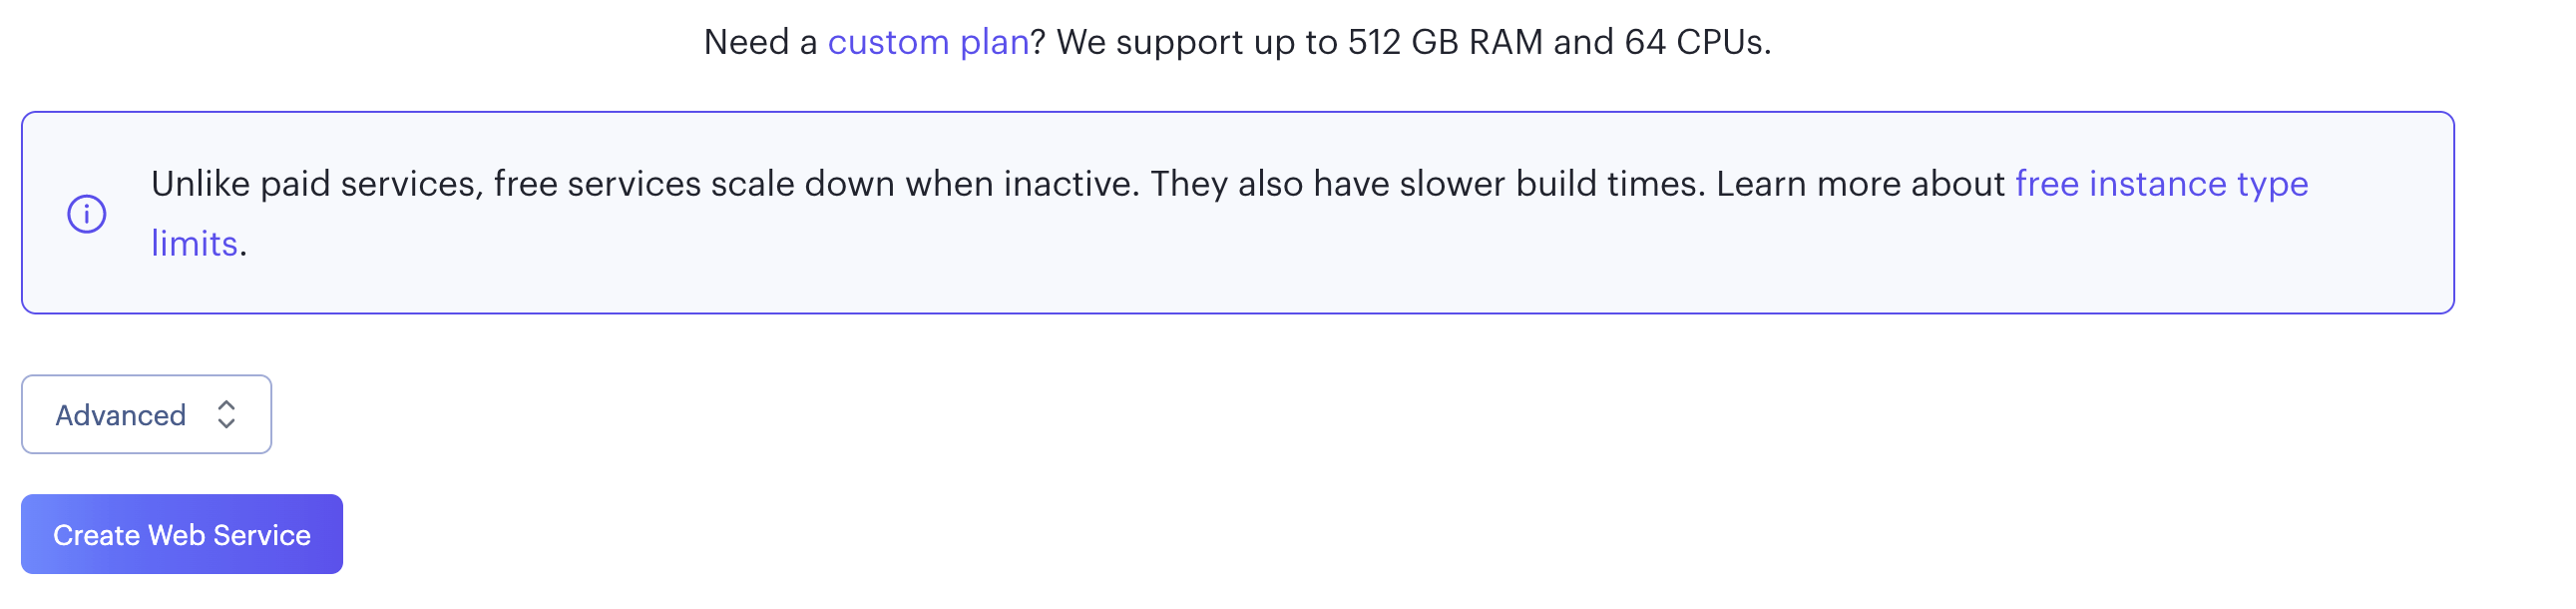
再向下滑動頁面會看到Advanced按鈕

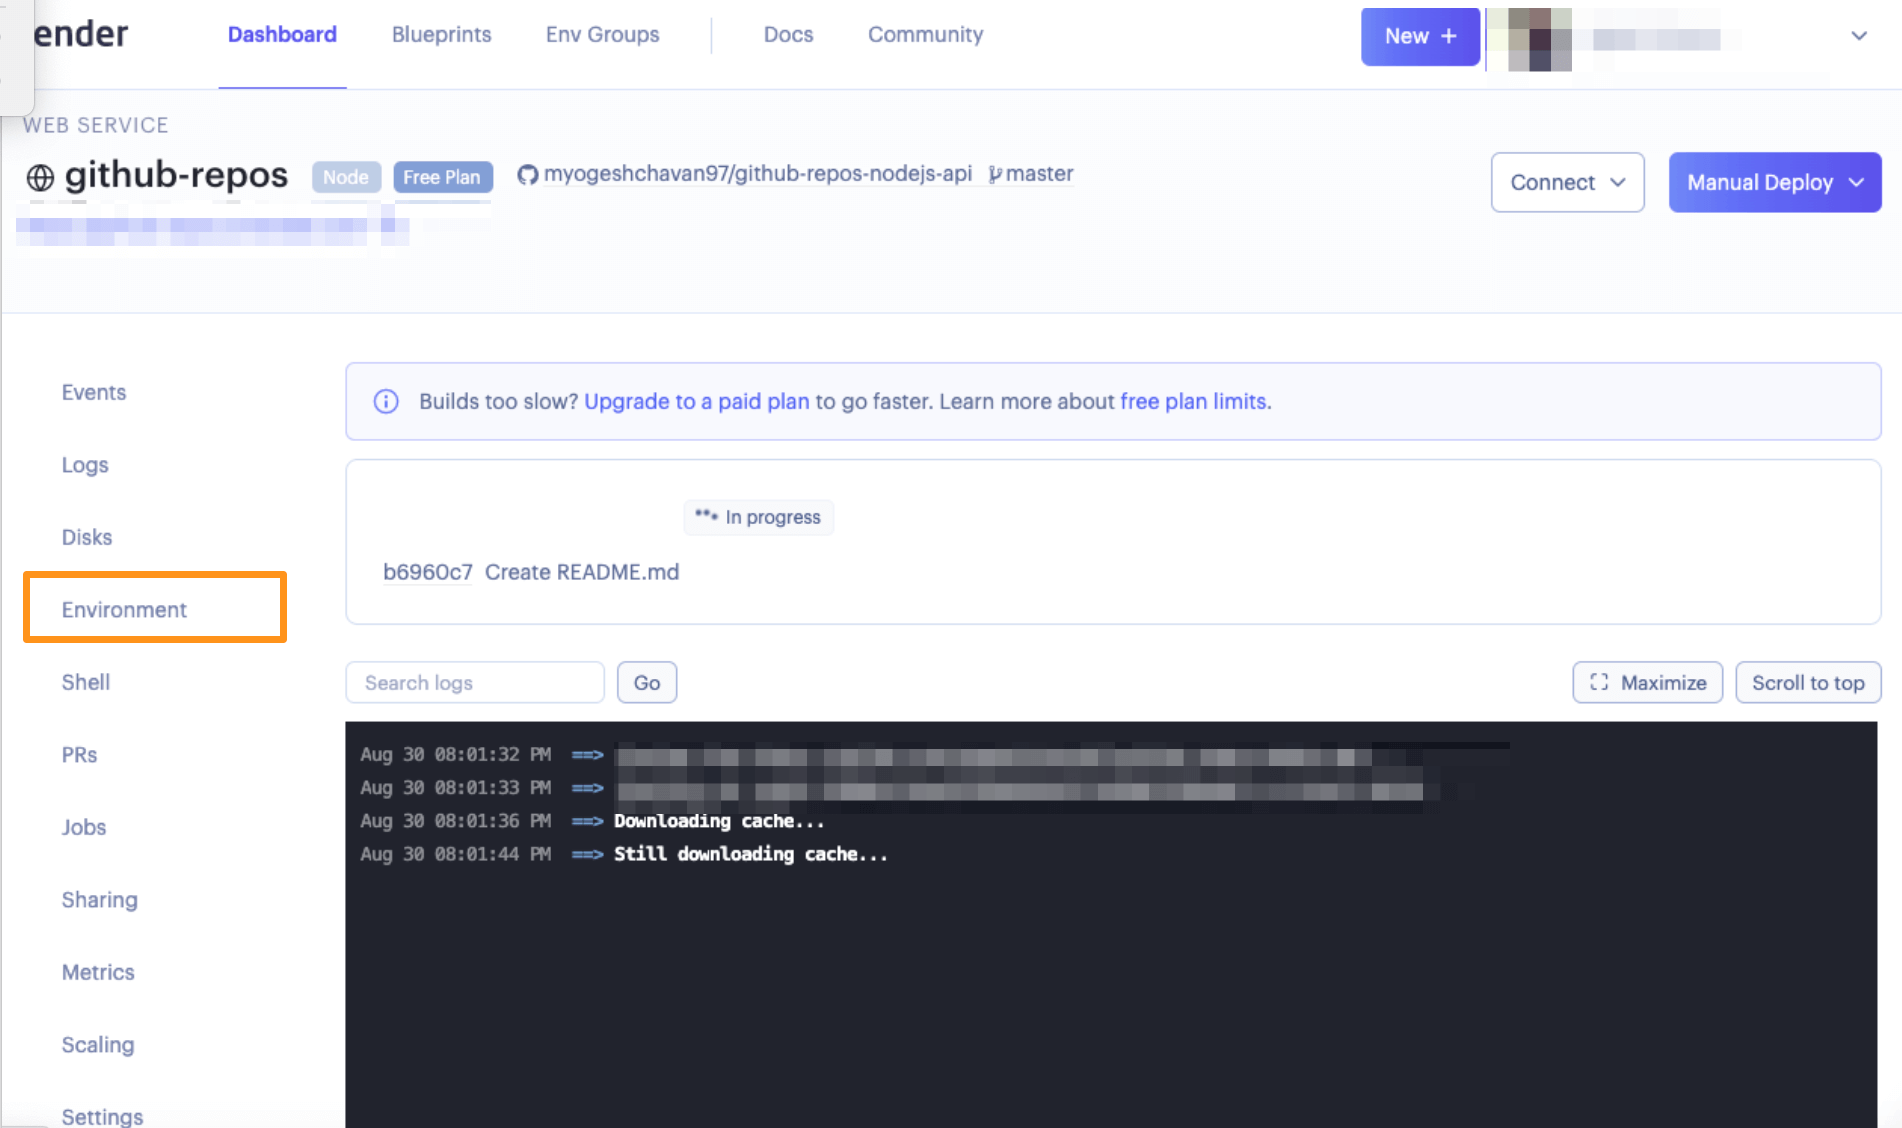
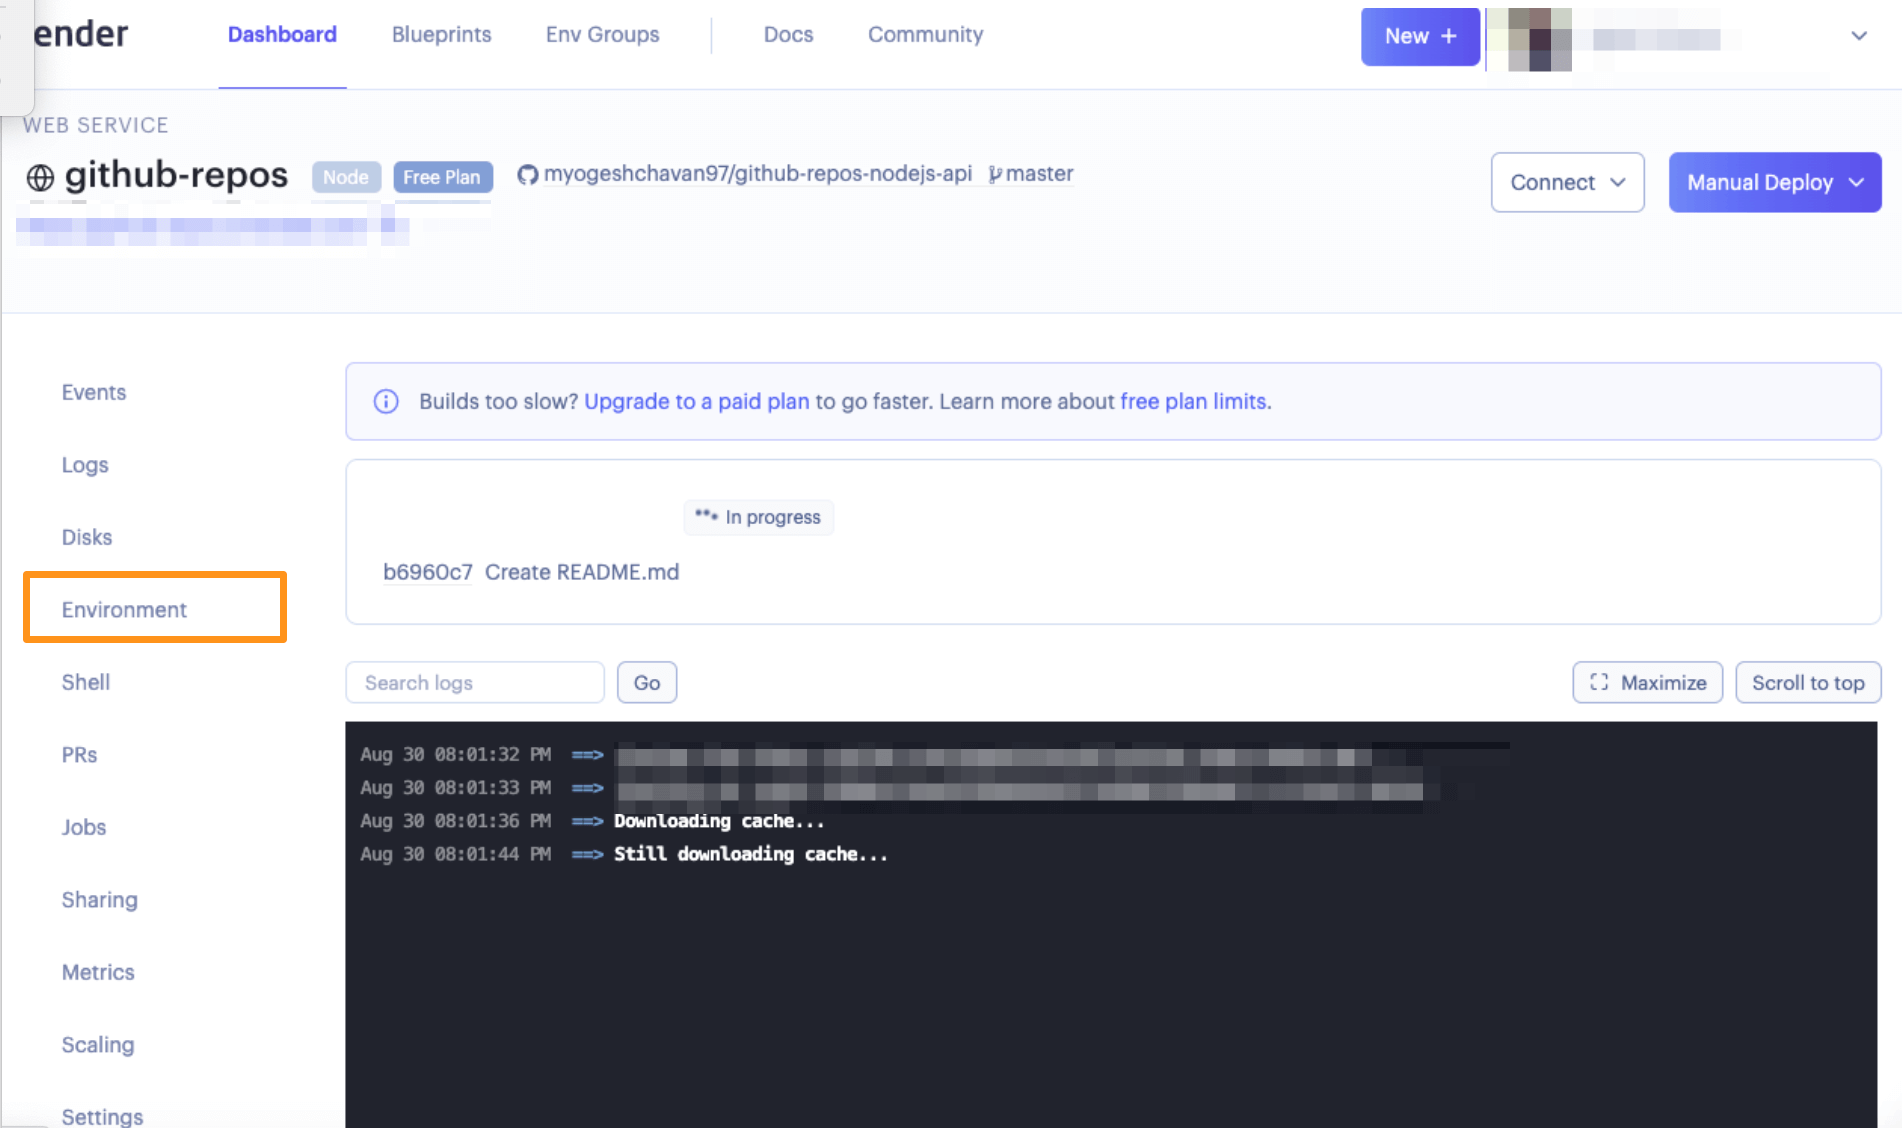
如果你的應用使用了環境變量,你可以在Advanced設置中輸入。也可以在這裡添加 .env文件,這樣就不用你手動一個一個地添加。

處理Bug

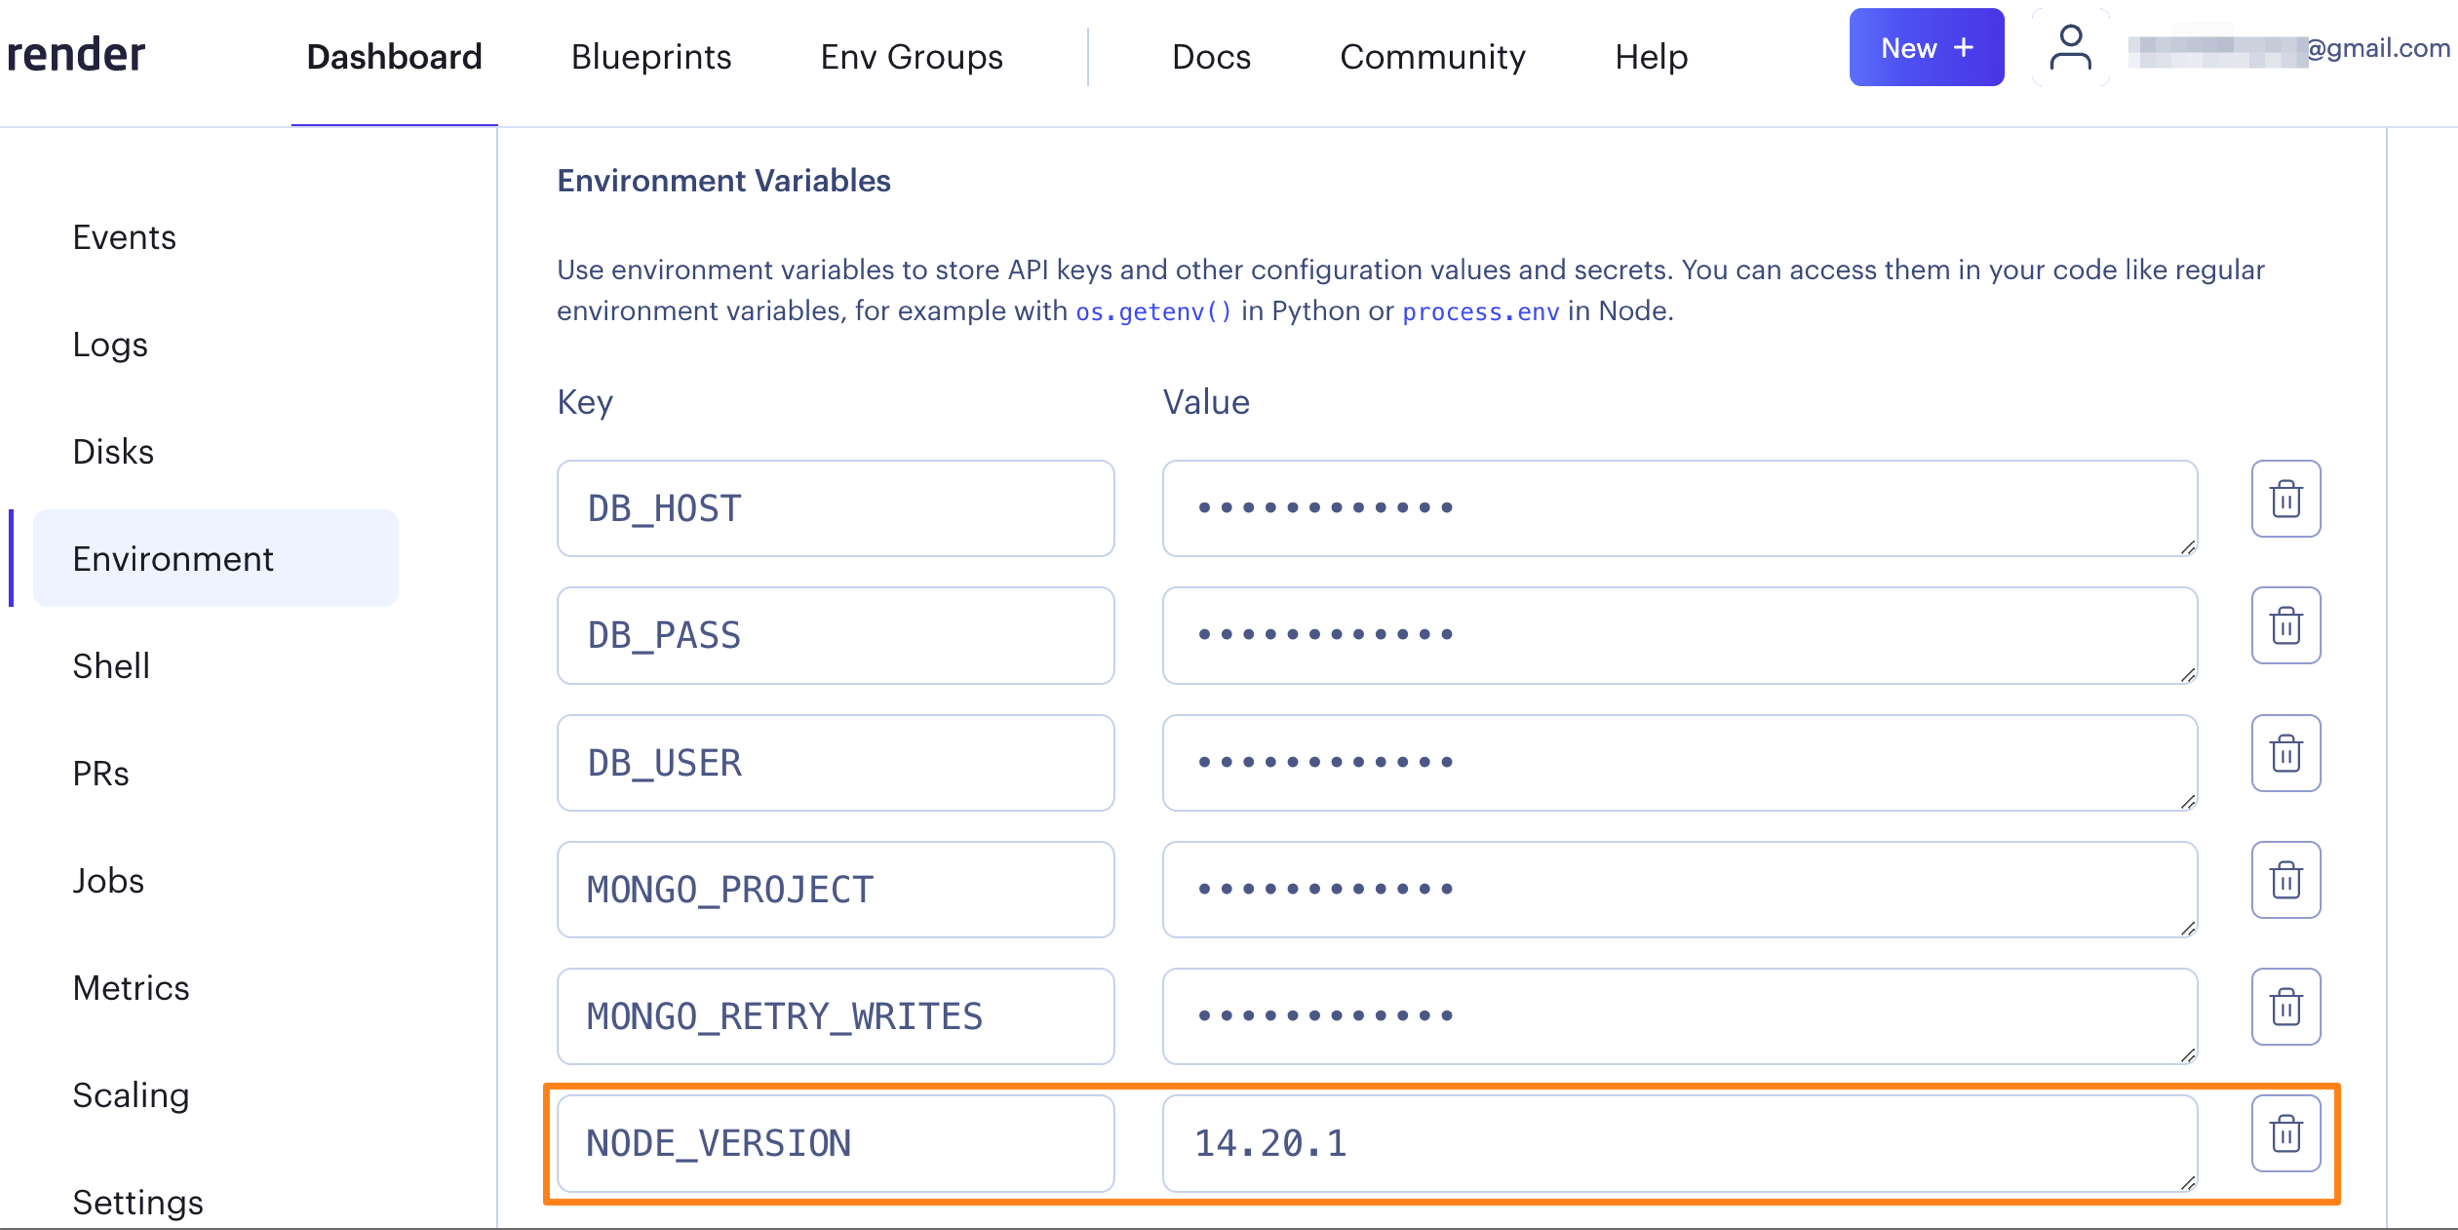
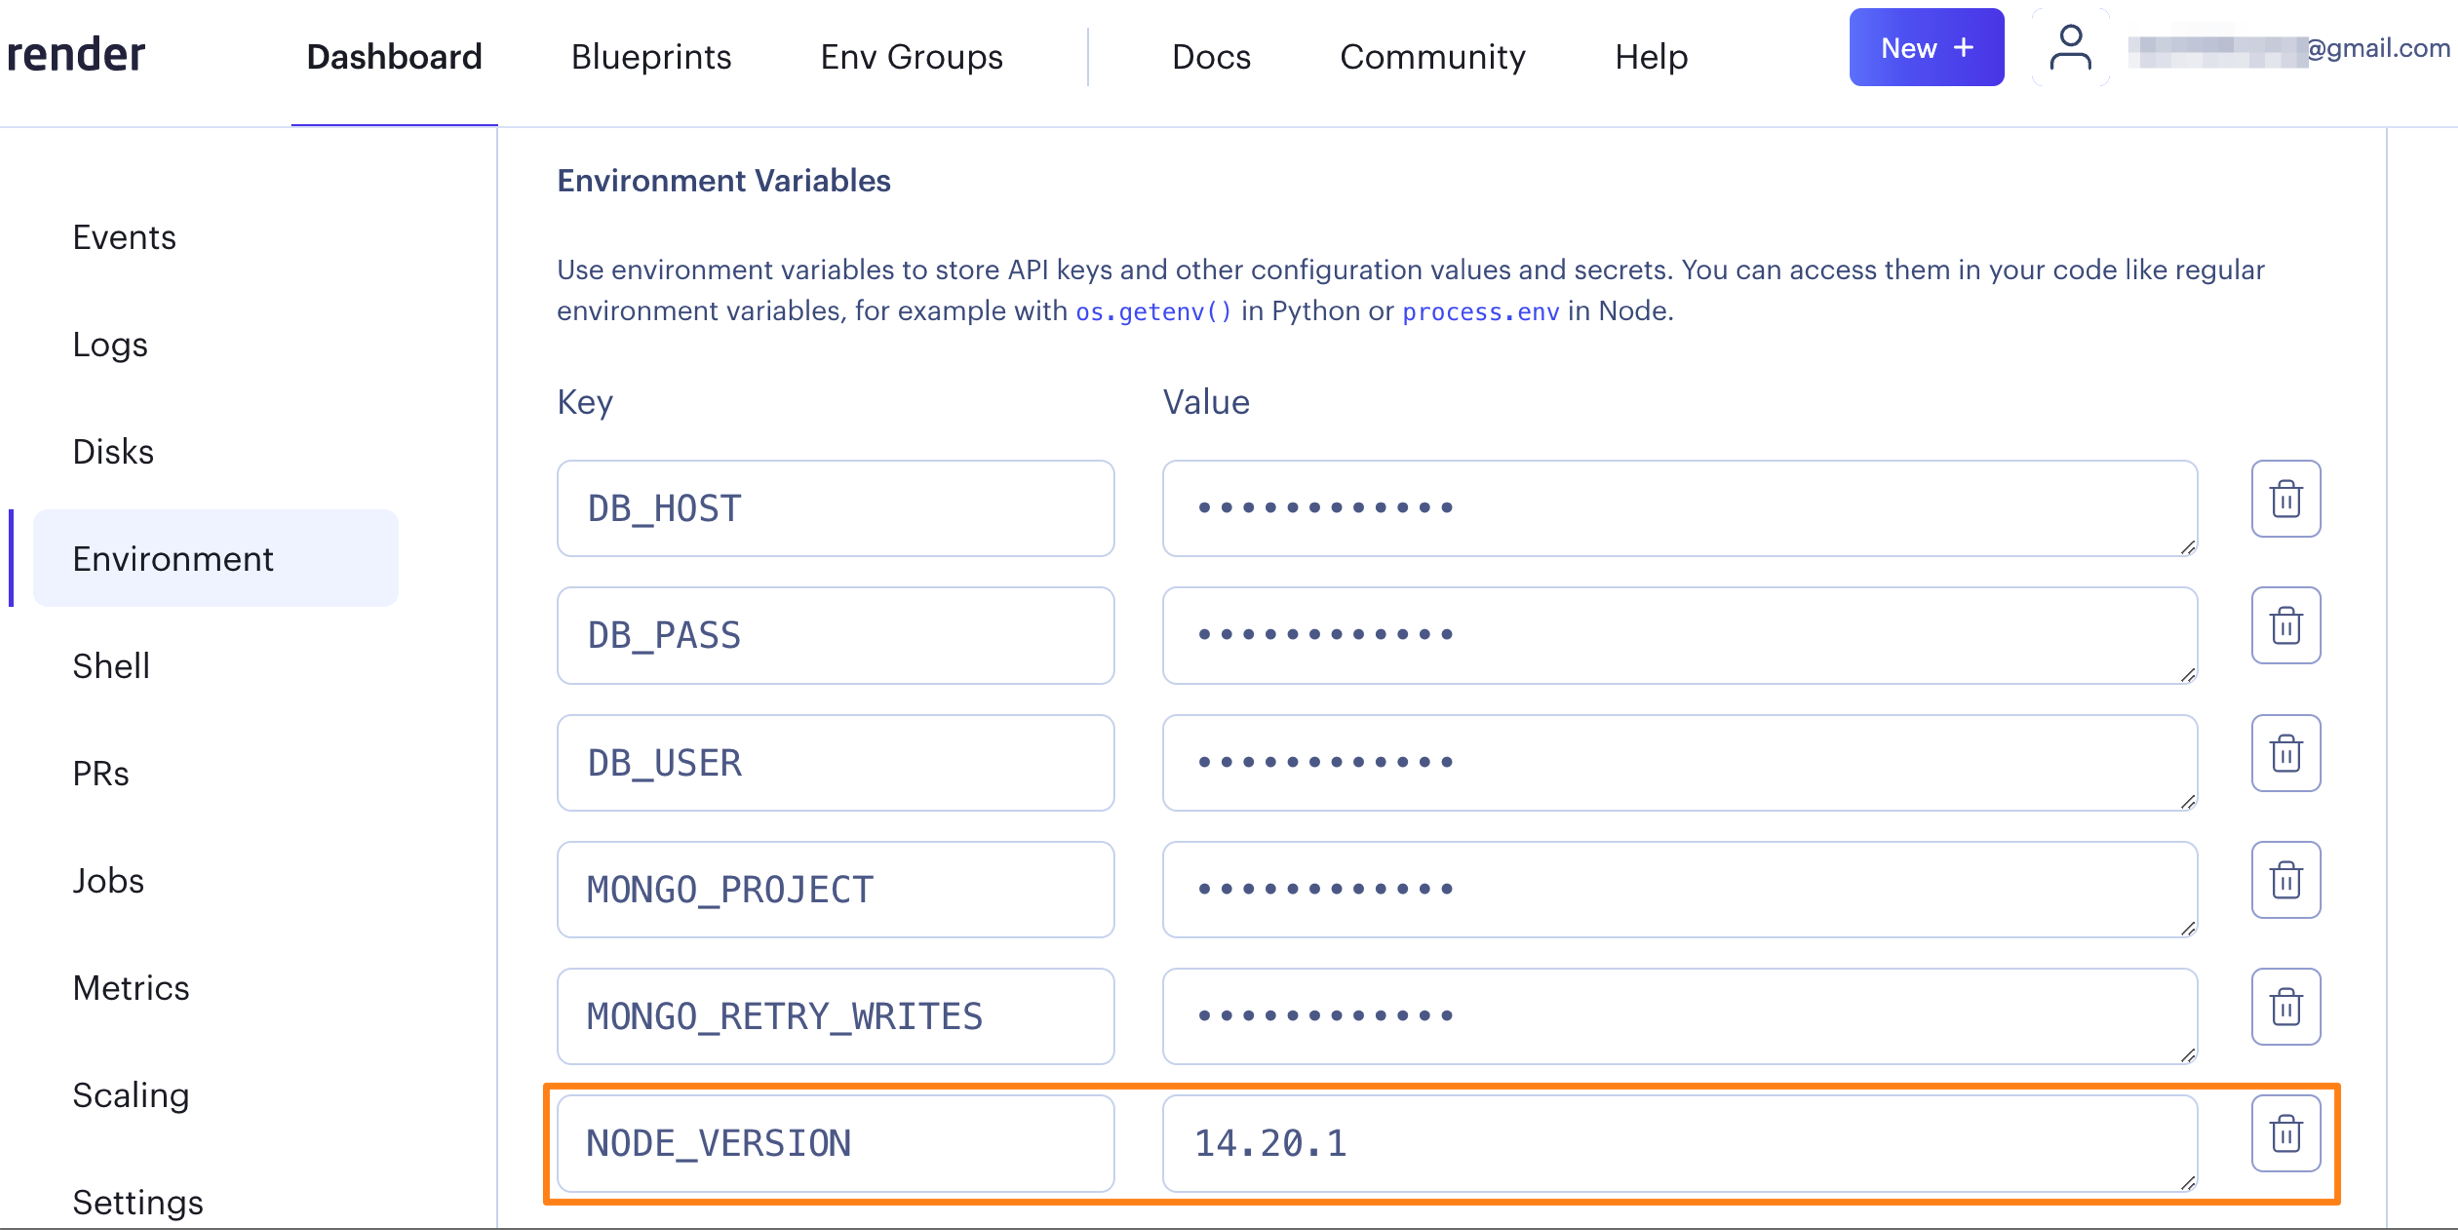
環境變數內新增

NODE_VERSION 14.20.1

Node express mongeoseDb crud 參考資料
Node express mongeoseDb Content & Create save()
Node express mongeoseDb Create create() & insertMany()


使用 create() 和 insertMany() 儲存文件 - NodeJS、Express、Mongoose 和 MongoDB
Node express mongeoseDb Create
Node express mongeoseDb crud

三考
三考

Math.random():隨機取得亂數

Math.random():隨機取得亂數

const oneMathRandom=Math.random();
console.log(oneMathRandom);
//0.5852392367031296

Math.floor():取得整數

const twoMathFloorRandom= Math.floor(Math.random() * 5);
console.log(twoMathFloorRandom);
//4

Math.ceil()無條件進位

Math.ceil(Math.random()*10);
// 獲取從 1 到 10 的隨機整數,取 0 的概率極小。

1
2
3
4
5
Math.ceil(Math.random()*10);  
console.log(Math.ceil(Math.random()*10))
//2
//1
//9

Math.round():四捨五入

Math.round(Math.random());

1
2
// 可均衡獲取 0 到 1 的隨機整數。
console.log(Math.round(Math.random()); )
1
2
//Math.floor(Math.random()*10); 
//可均衡獲取 0 到 9 的隨機整數。

javascript(ES6)擴展運算子 Spread Operator

讀出第一層數據

1
2
3
4
const number=["1","2","3"];
let names = [...number];
console.log(names)
//(3) ['1', '2', '3']
1
2
3
4
const data={name:'lara',age:3};
let newdata = { ...data };
console.log(newdata)
//{name: 'lara', age: 3}

合併:等同於concat

1
2
3
4
5
var number1=[1,2,3];
var number2=[4,5,6];
let newnumber = [...number1,...number2];
console.log(newnumber)
//(6) [1, 2, 3, 4, 5, 6]

合併复制数组或对象内部数据:等同於concat

1
2
3
4
5
6
7
8
9
10
var data1={name:'Test'};
var data2={age:5};
let newData3 = {...data1,...data2};
console.log(newData3)
//{name: 'Test', age: 5}

const parts = ['shoulders', 'knees'];
const lyrics = ['head', ...parts, 'and', 'toes'];
console.log(lyrics)
(5) ['head', 'shoulders', 'knees', 'and', 'toes']

字符串轉字符数组 =>類似于 split() 方法

1
2
3
4
5
6
7
8
var one='Hello Word';
var array1 =[...one]
console.log('字符串轉字符数组',array1)
//(10) ['H', 'e', 'l', 'l', 'o', ' ', 'W', 'o', 'r', 'd']

let text = [...'Hello'];
console.log(text);
//(5) ['H', 'e', 'l', 'l', 'o']

當你有一個接受數字的函數,並且你將這些數字作為數組的元素時,以前的实现是使用 apply()相同

1
2
3
4
5
6
let scores = [12, 33, 6]
const addAll = (a, b, c) => {
console.log(a + b + c);
};
addAll(...scores);
//51

使用在陣列的 push 方法上

1
2
3
4
let list = [1, 2];
list.push(...[3, 4]);
console.log(list)
//(4) [1, 2, 3, 4]

Base64 encode & decode(加密與解密)

安裝: Javascript base64

1
2
3
4
5
6
7
//若要對UTF-8字串base64編碼改用js-base64套件來進行base64編碼及解碼
//加密
let base64EncodedString = window.btoa("hello world");
console.log(base64EncodedString); // aGVsbG8gd29ybGQ=
//解密
let base64DecodedString = window.atob(base64EncodedString);
console.log(base64DecodedString); // hello world

安裝: npm install –save js-base64

1
npm install --save js-base64

頁面使用

引入
import { Base64 } from ‘js-base64’;

加密:Base64.encode(‘值’)

1
2
3
const Chinese = Base64.encode('中文')
console.log(Chinese)
// "5Lit5paH"

解密:Base64.decode(‘值’)

1
2
3
const ChineseDecode = Base64.decode('5Lit5paH')
console.log(ChineseDecode)
// '中文'

React map()

//map() Key 綁定

1
2
3
4
5
6
7
8
9
10
11
12
13
14
const list=[1,2,3,4,5,6,7]

const arrayList=list.map((list,index)=>{
return (
<li key={index}>
{list}
</li>
)
})


const root = ReactDOM.createRoot(document.getElementById('root'));

root.render( <ul>{arrayList}</ul>);

React props

React props

1
2
3
4
5
6
7
8
9
10
11
12
13
14
15
16
17
18
19
20
21
22
23
24
25
26
27
html

<div id="app"></div>


//js Babel
/*props{
name:'Lara',
age:3,
}*/
//函式元件要大寫
function HelloMessage ( props ) {
return(
<div>
<h1>我是 { props.name } !</h1>
<p>我今年 { props.age } 歲</p>
</div>
)
}
const element = <HelloMessage name="Lara" age="3"/>;
const root = ReactDOM.createRoot(document.getElementById('root'));
//Rendar 只一次
root.render( element );


//return <div></div>包裹
//map() Key 綁定
1
2
3
4
5
6
7
8
9
10
11
12
13
14
15
16
17
18
function Welcome (props){
return <h1>{props.name},{props.age}</h1>
}


function App (){
return (
<div>
<Welcome name="lara" age="2"></Welcome>
<Welcome name="Tom" age="2"></Welcome>
</div>
)

}


const root = ReactDOM.createRoot(document.getElementById('root'));
root.render(<App/>);