yarn 安裝指令
前置作業node 版本為14.20.1
1 | nvm ls |
全局安裝
1 | npm install --global yarn |
檢查安裝
通過運行檢查是否安裝了 Yarn:
1 | yarn --version |
1.22.19
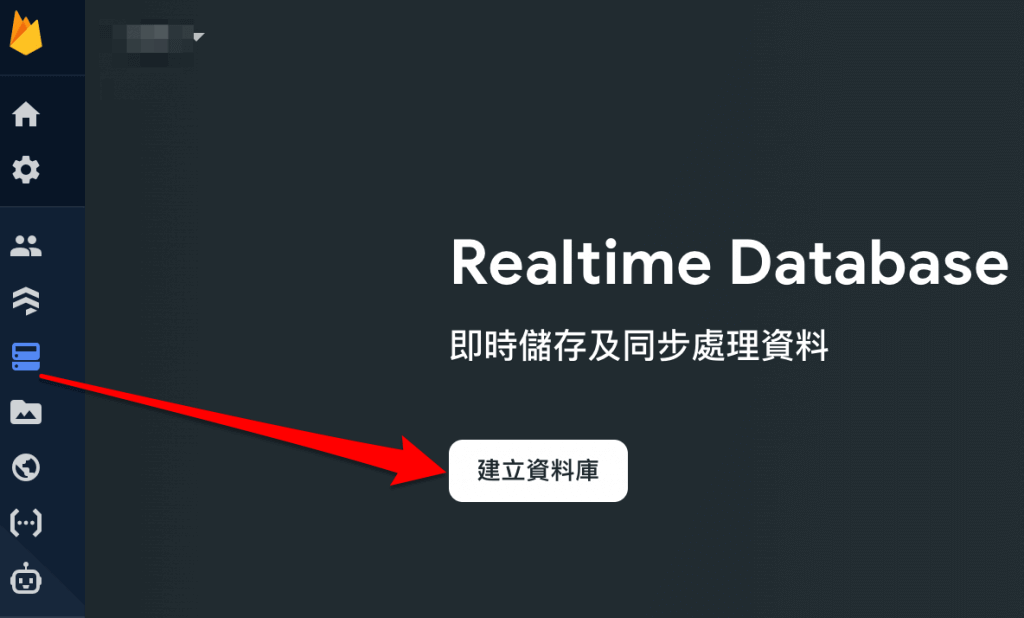
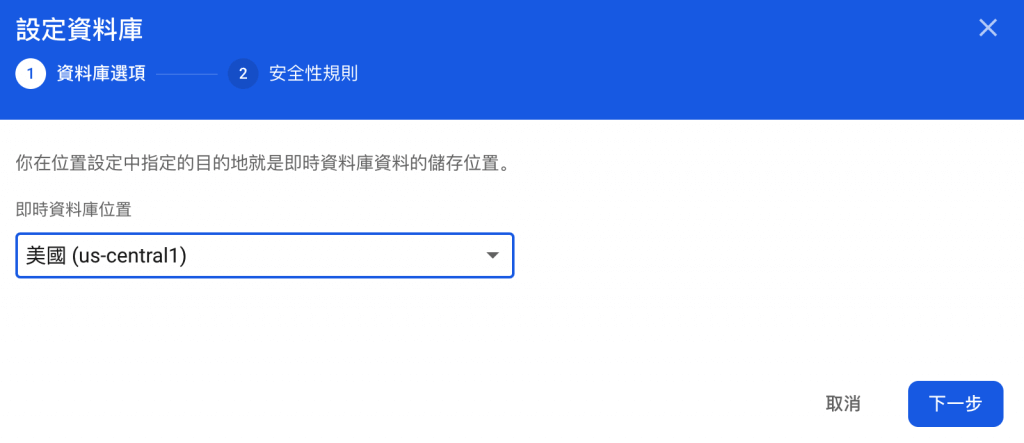
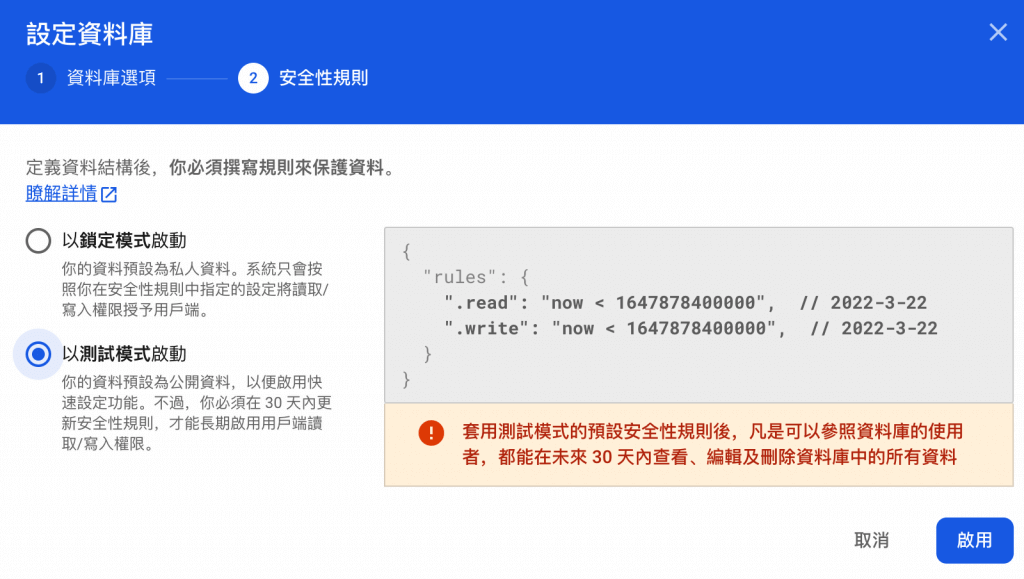
1 | 導入資料庫 |
1 | <!–訊息表單新增–> |
1 | <template> |
ref():尋找資料庫路徑
set():新增資料
on(隨時監聽)
push – 新增資料
child 子路徑
remove 移除
1 | .onclick{ |
1 | .menu { |
1 | scss |
Scss
1 | $font-stack: Helvetica, sans-serif; |
變數編譯後Css
1 | body { |
Scss
1 | nav { |
巢狀編譯後Css
1 | nav ul { |
Scss
1 | // 經常重複使用的樣式 |
混入 Mixins編譯後Css
1 | .box { |
Scss
1 | /* This CSS will print because %message-shared is extended. */ |
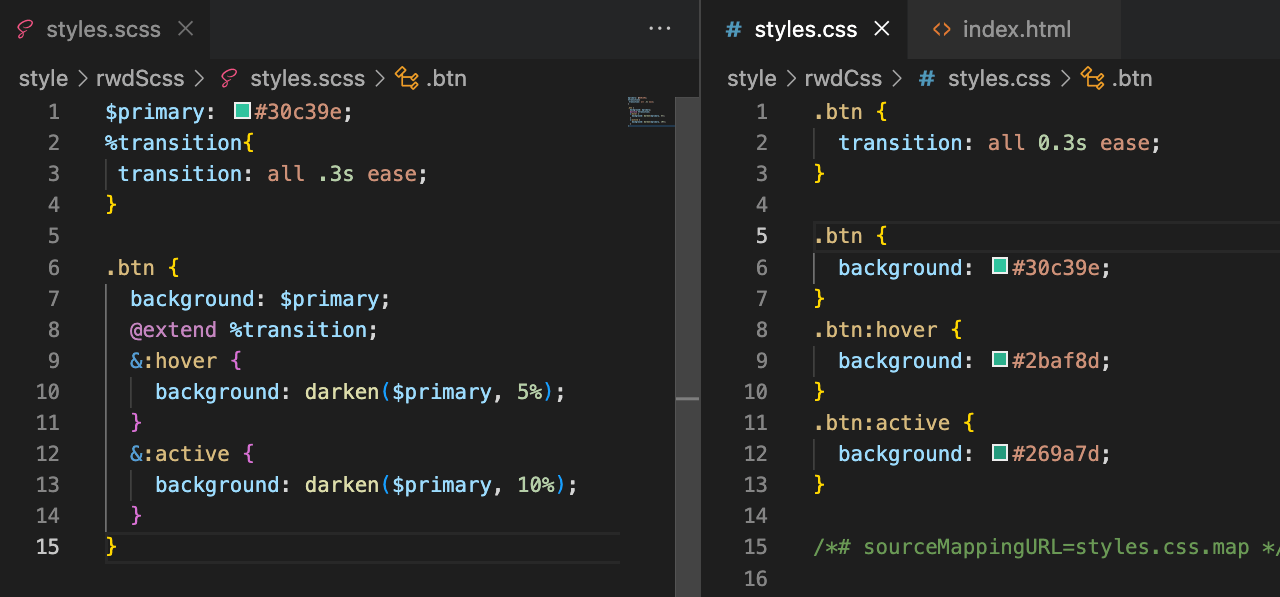
混繼承 Extent編譯後Css
1 | /* This CSS will print because %message-shared is extended. */ |
@mixin 的好處:減少重複撰寫樣式,卻也可能造成編譯後的 CSS 樣式大量重複,使檔案異常肥大。
是否需傳遞參數
是否需考慮編譯後 CSS 大小
編譯前 SCSS:要作為模組載入的 SCSS 檔案,名稱必須帶有底線,例如 _base.scss。
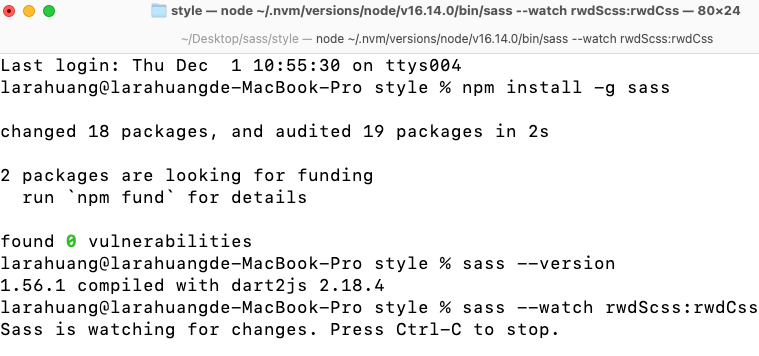
1 | npm install -g sass |
1 | sass --version |
參考資料
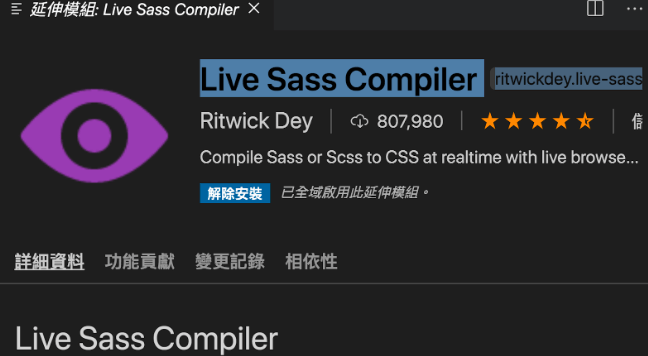
sass 安裝
 # 新增styles.scss
1 | $primary: #30c39e; |
1 | //window |
喜好設定->設定打開Setting .json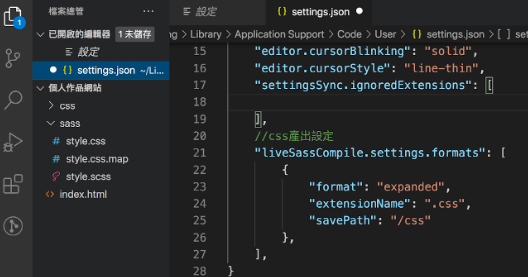
設置參數放工作區設定的大括弧內
1 | //css產出設定 |
內有scss/style.scss
視窗下方藍色區域是否出現了一個小小的按鈕寫著Watch Sass,按下執行
畫面會新增 style.css.map
畫面會新增 style.css
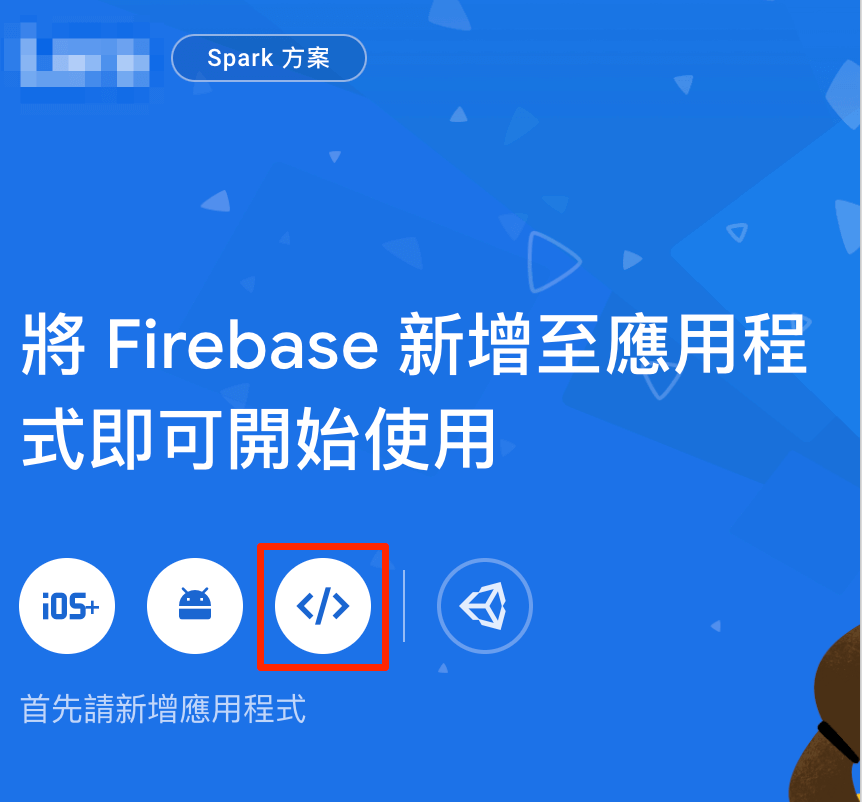
Step1.新增專案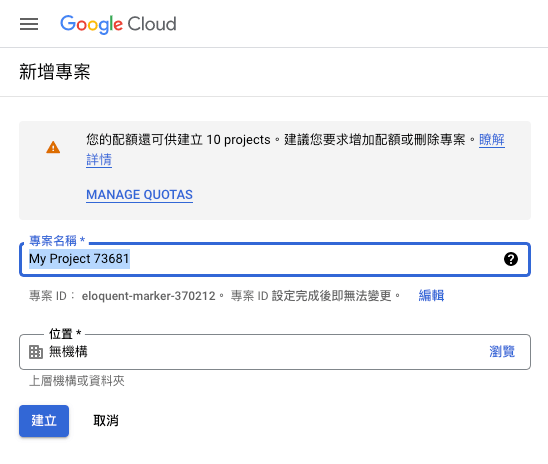
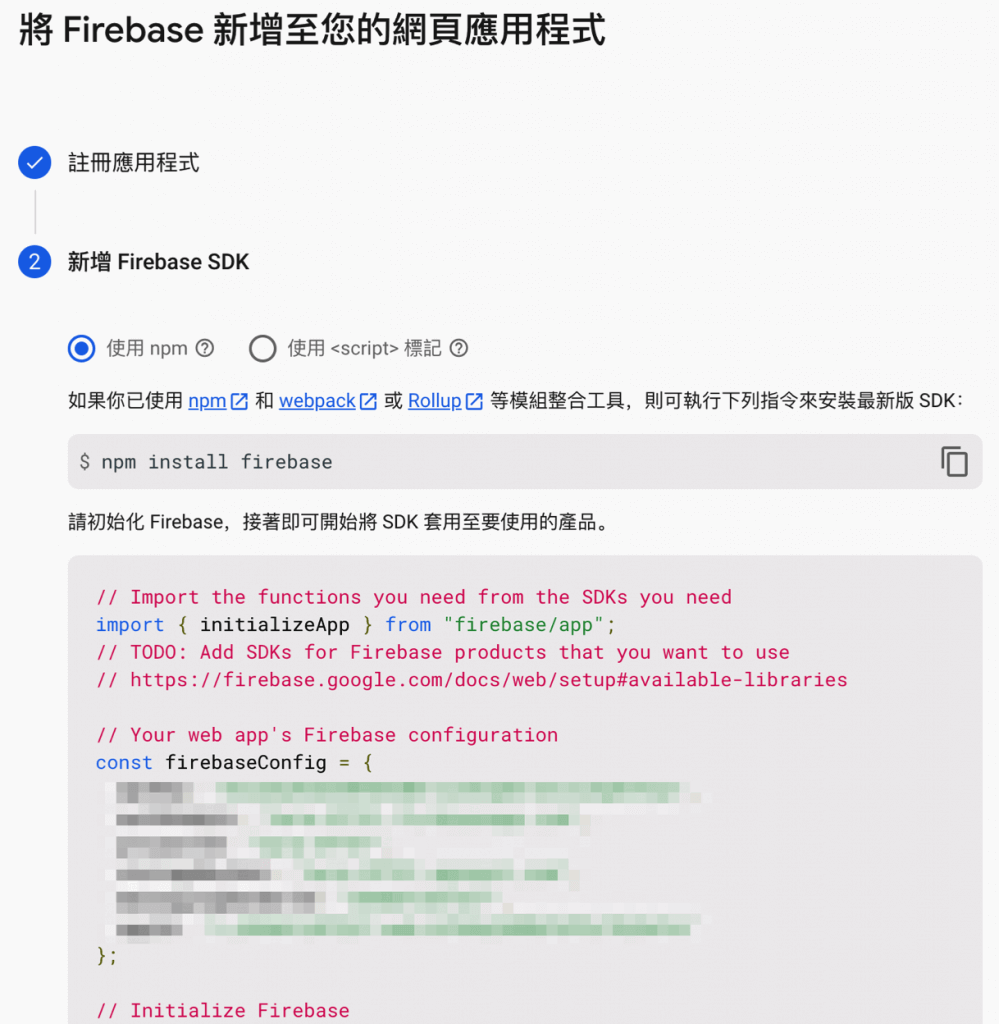
Step2.啟用Api服務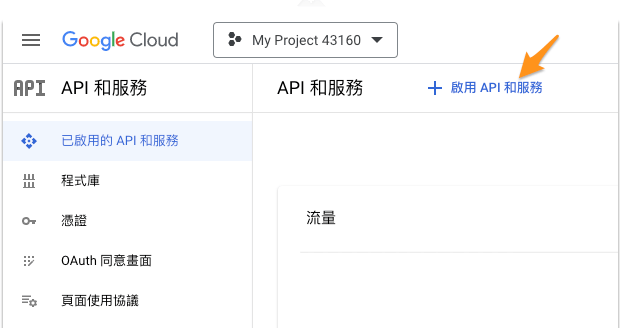
搜尋Google Sheet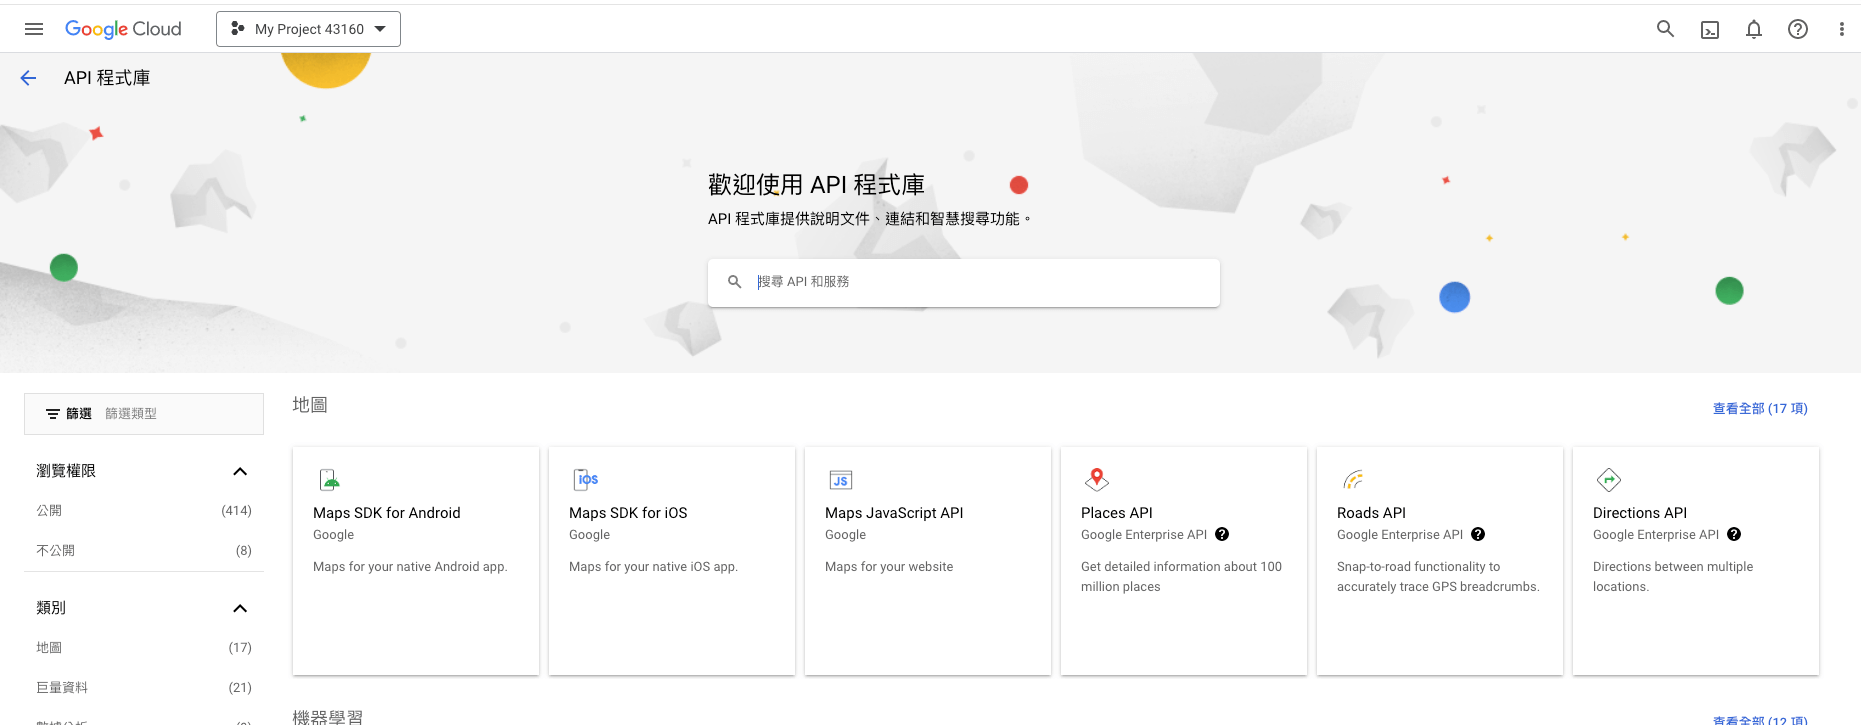
啟用Google Sheet服務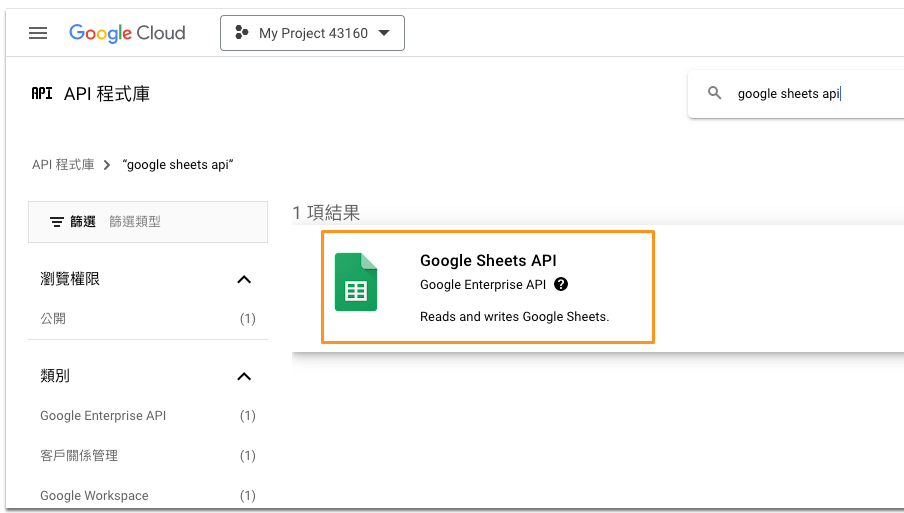
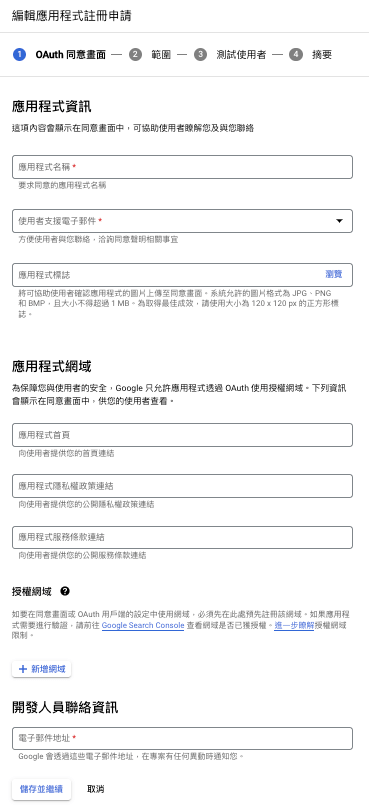
Step3.建立憑證(api金鑰 /Oauth /服務帳戶)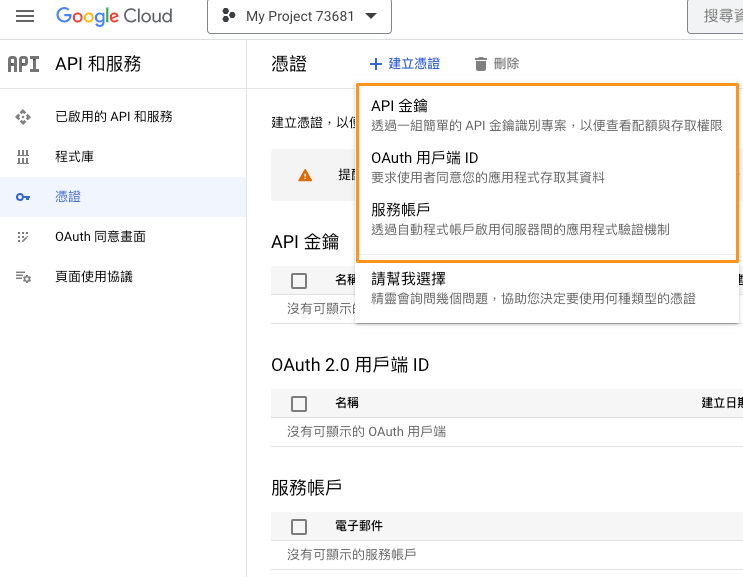
api金鑰:key=API_KEY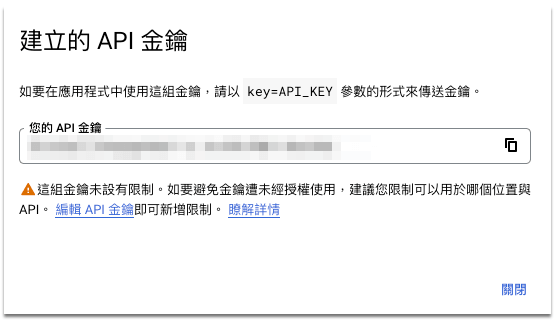
憑證=>點選API金鑰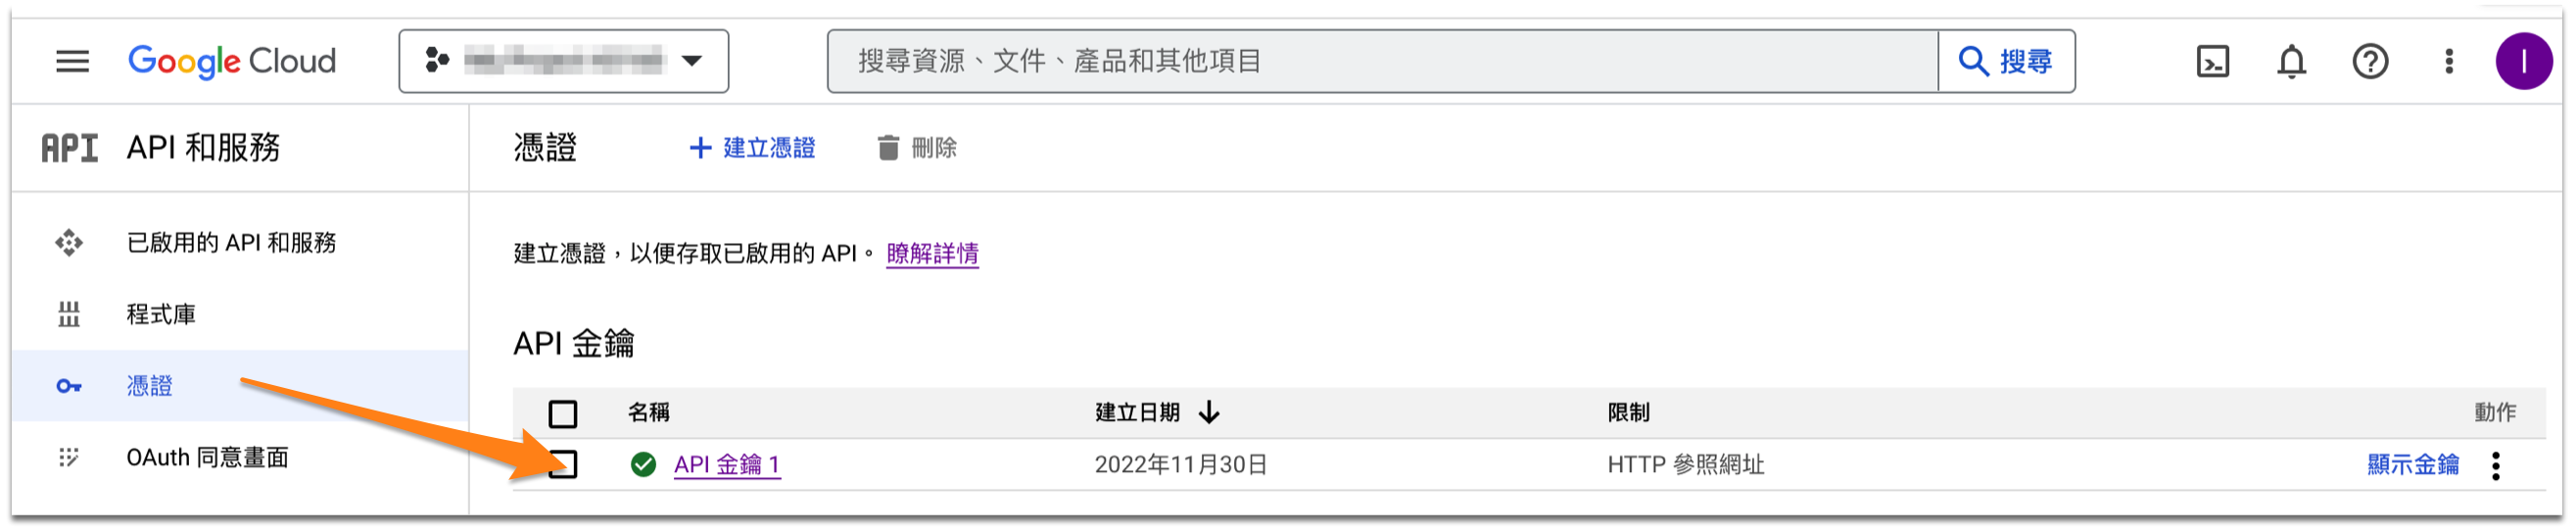
=>金鑰限制 => 應用程式限制 =>HTTP 參照網址 (網站)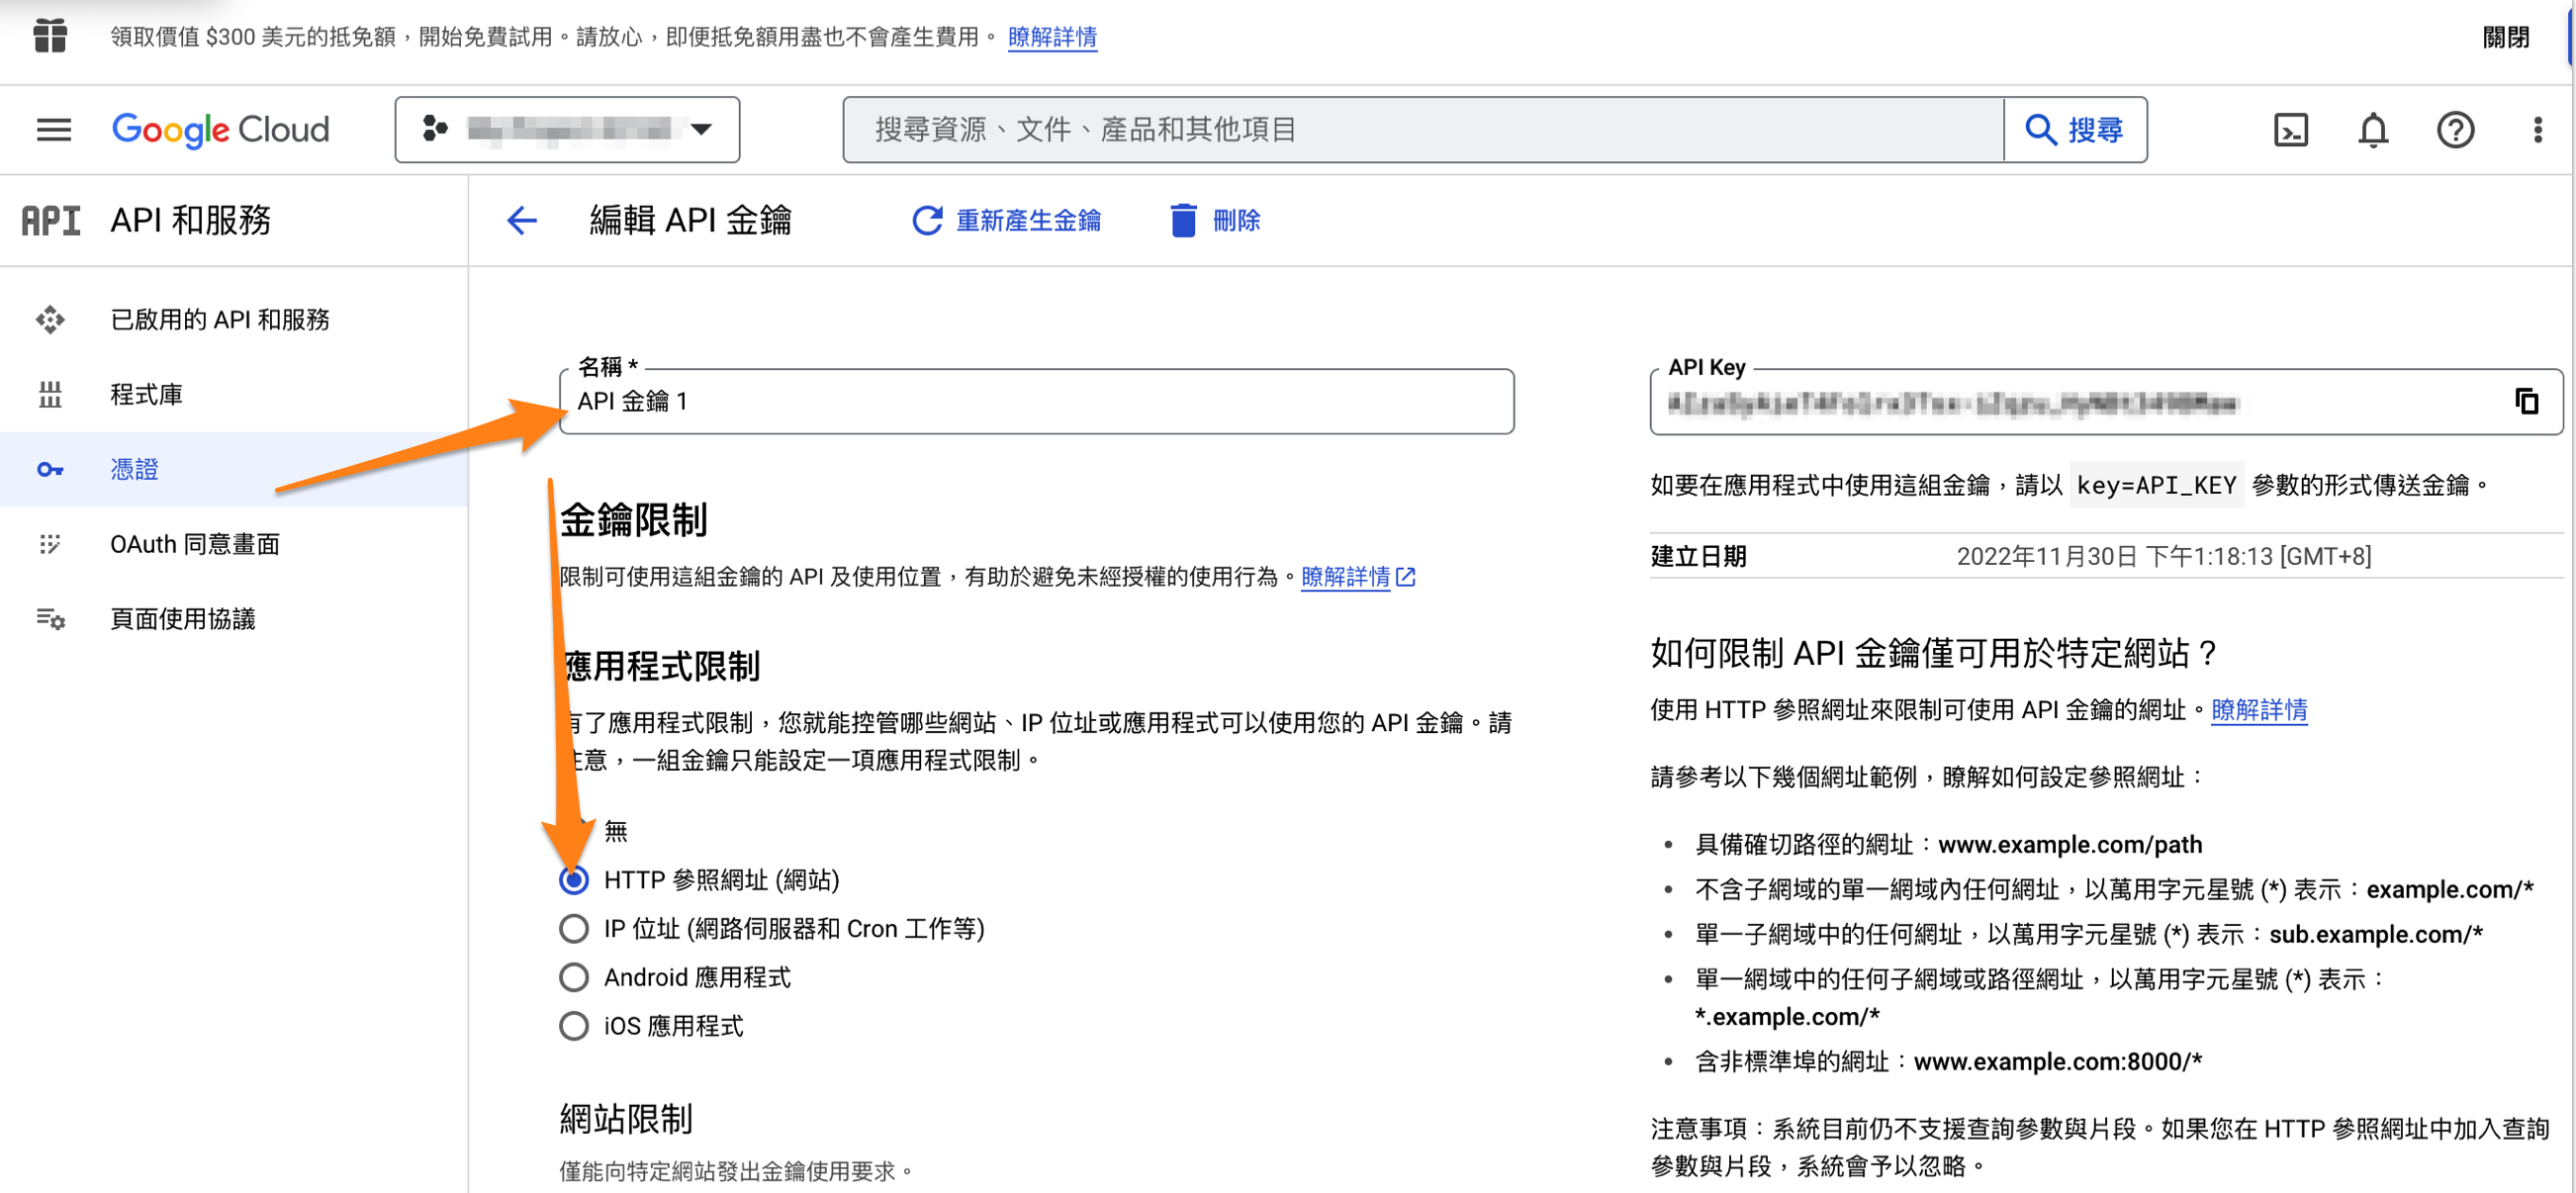
=>網站限制 =>點選新增:新增網址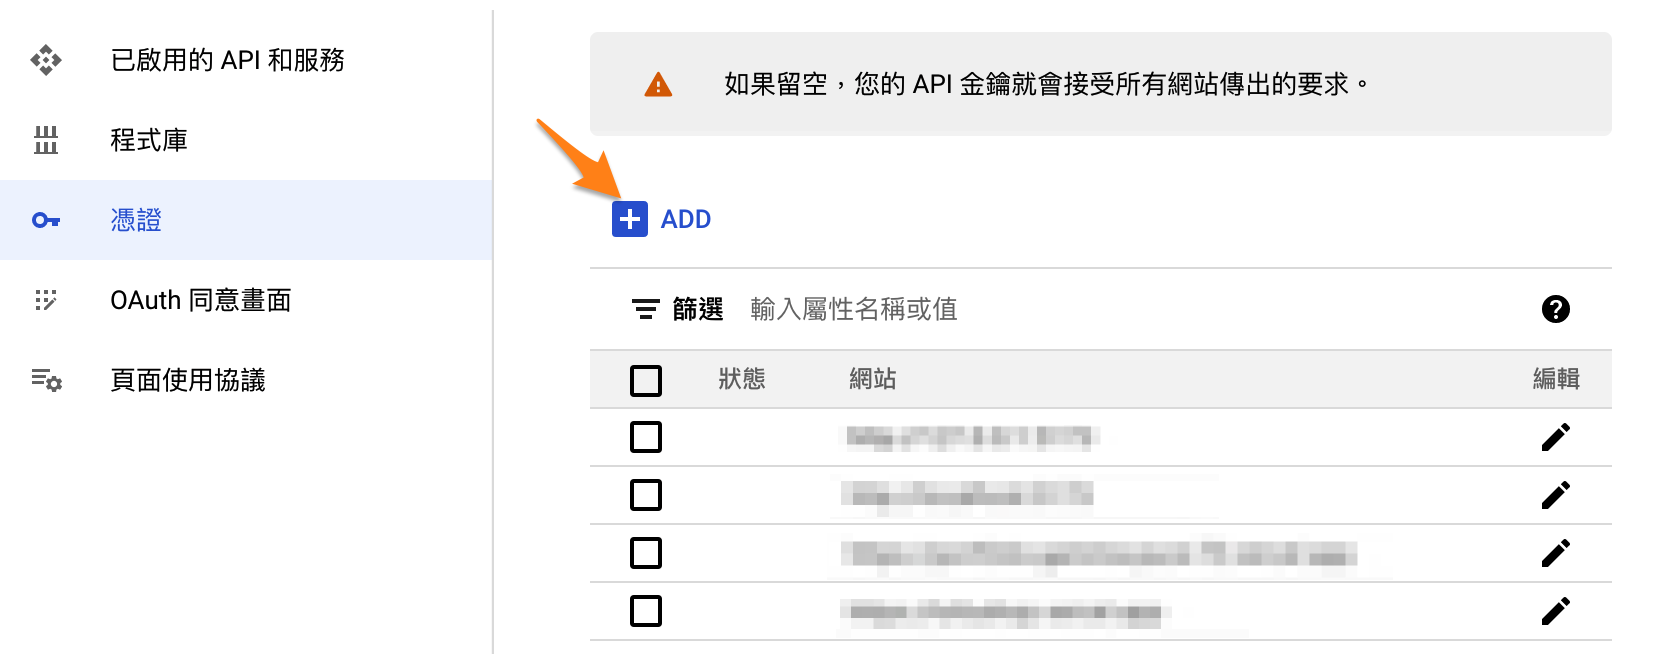
=>API 限制:不限制金鑰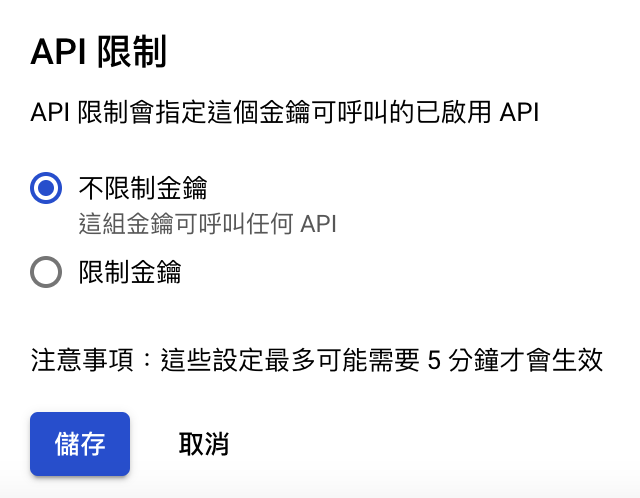
如果只是使用Google Sheet 以下(Oauth,服務帳戶)非必要
Oauth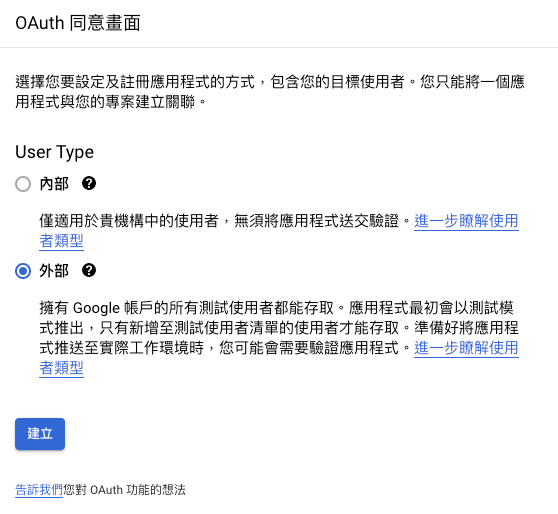
服務帳戶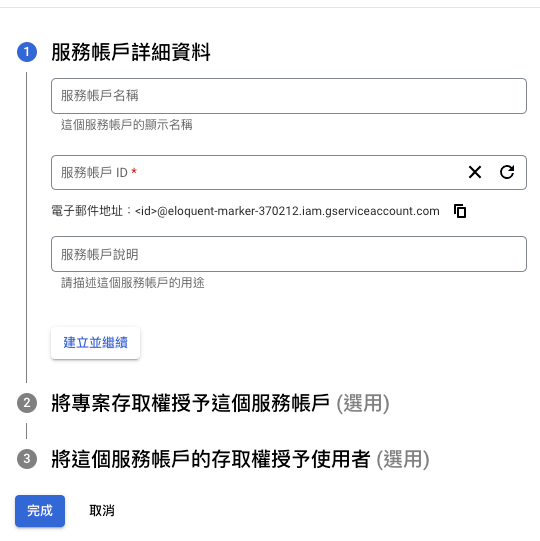
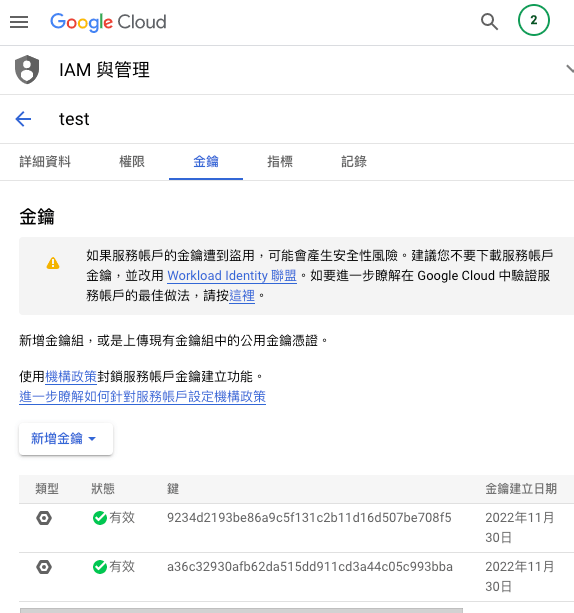
Api金鑰(憑證Api金鑰)等下串接會用到
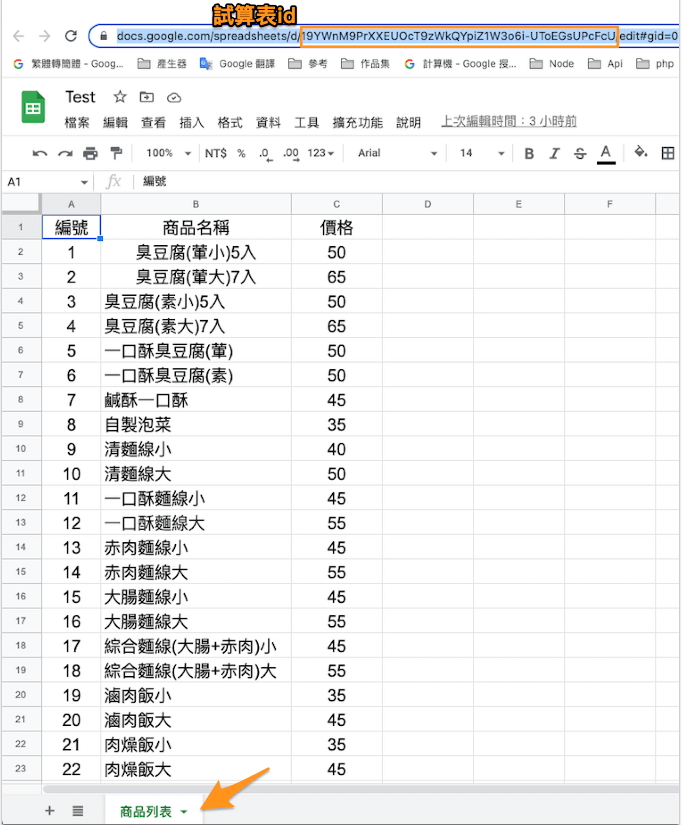
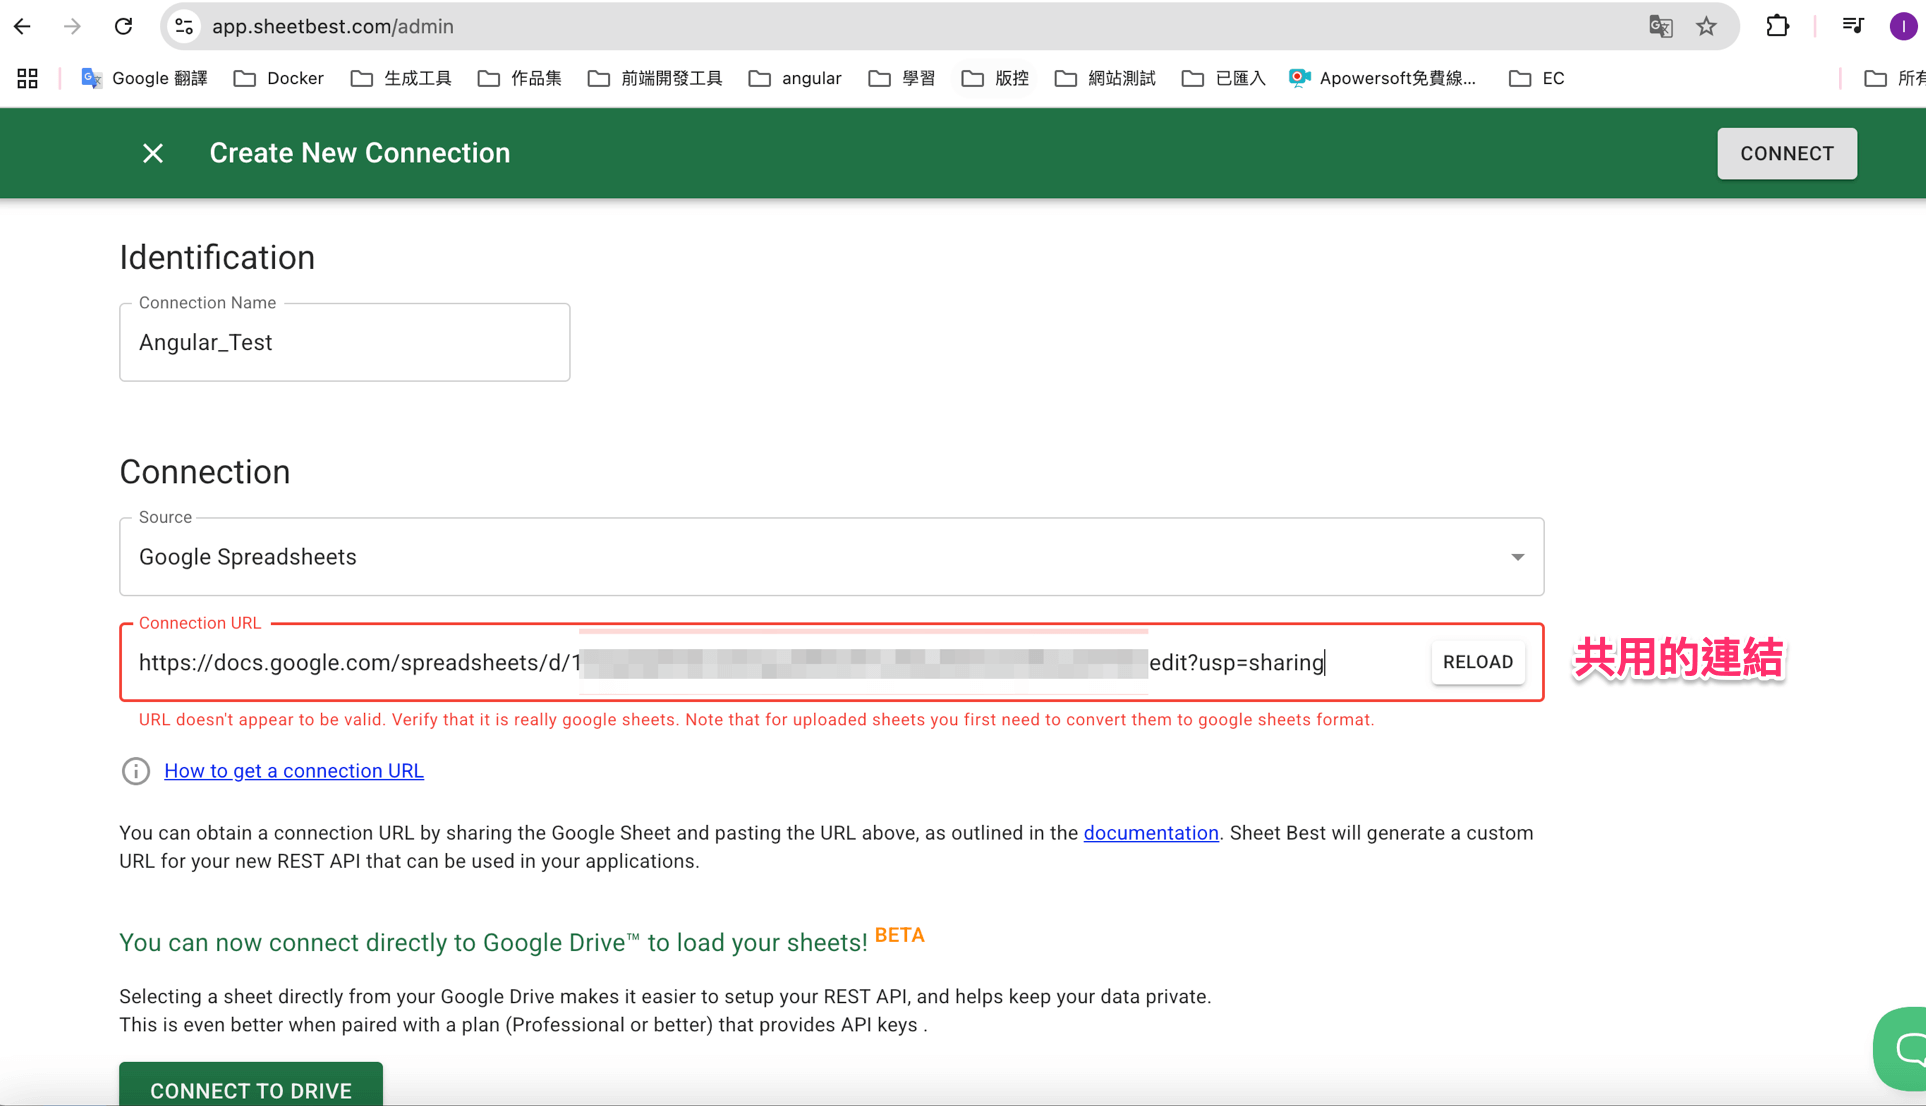
二.新增Sheet試算表 粗字體是docId
https://docs.google.com/spreadsheets/d/19YWnM9PrXXEUOcT9zWkQYpiZ1W3o6i-UToEGsUPcFcU/edit#gid=0
1
2
3
4
5
6
7
8
9
10
11
12
13
14
15
16
17
18
19
20
21
22
23
24
25
26
27
28
29
30
31
32
33
34
35
36
37
38
39
40
41
42
43<template>
<div class="hello">
<table class="Lists" align="center">
<tr v-for="item in lists" :key="item">
<td v-for="j in item" :key="j">{{ j }}</td><td><i class="fa-solid fa-circle-plus"></i></td>
</tr>
</table>
</div>
</template>
<script setup lang="ts">
import { ref, onMounted } from 'vue'
import axios from 'axios';
const lists = ref<any>();
const getData = async () => {
//docId=>文件id
const docId = '憑證Api金鑰';
const apiKey = '試算表的ID';
const api = `https://sheets.googleapis.com/v4/spreadsheets/${docId}/values/商品列表?alt=json&key=${apiKey}`;
await axios
.get(api)
.then(res => {
lists.value = res.data.values;
console.log(res.data);
for (var i = 0; i <= lists.value.length; i++) {
// title
var title = lists.value[0];
var objTitle = {};
for (var j = 0; j <= title.length; j++) {
objTitle = title[j]
}
}
});
}
onMounted(() => {
getData();
});
</script>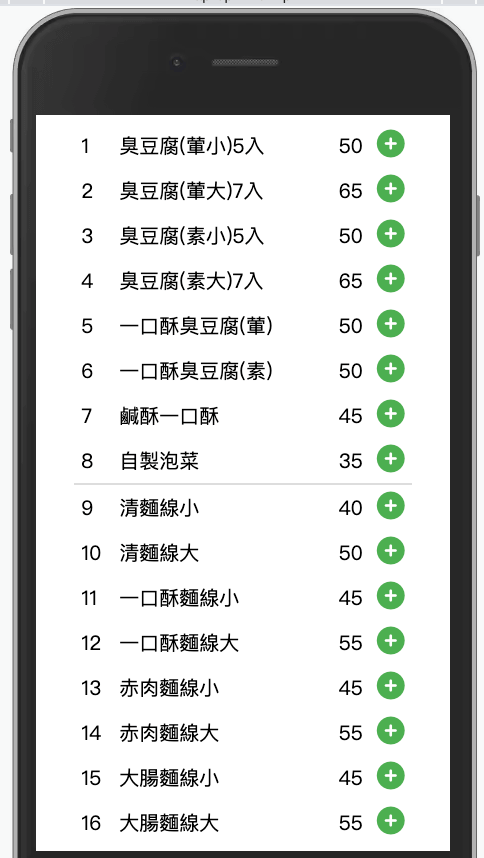
 處理方式:=>網站限制 =>點選新增:新增網址 =>API 設置為不限制
=>金鑰限制 => 應用程式限制 =>HTTP 參照網址 (網站)
=>網站限制 =>點選新增:新增網址
=>API 限制:不限制金鑰
處理方式:=>網站限制 =>點選新增:新增網址 =>API 設置為不限制
=>金鑰限制 => 應用程式限制 =>HTTP 參照網址 (網站)
=>網站限制 =>點選新增:新增網址
=>API 限制:不限制金鑰
Requests from referer \u003cempty\u003e are blocked.
處理方式:API 設置為不限制
=>API 限制:不限制金鑰
permissionPERMISSION DENIED
處理方式:
命名工作區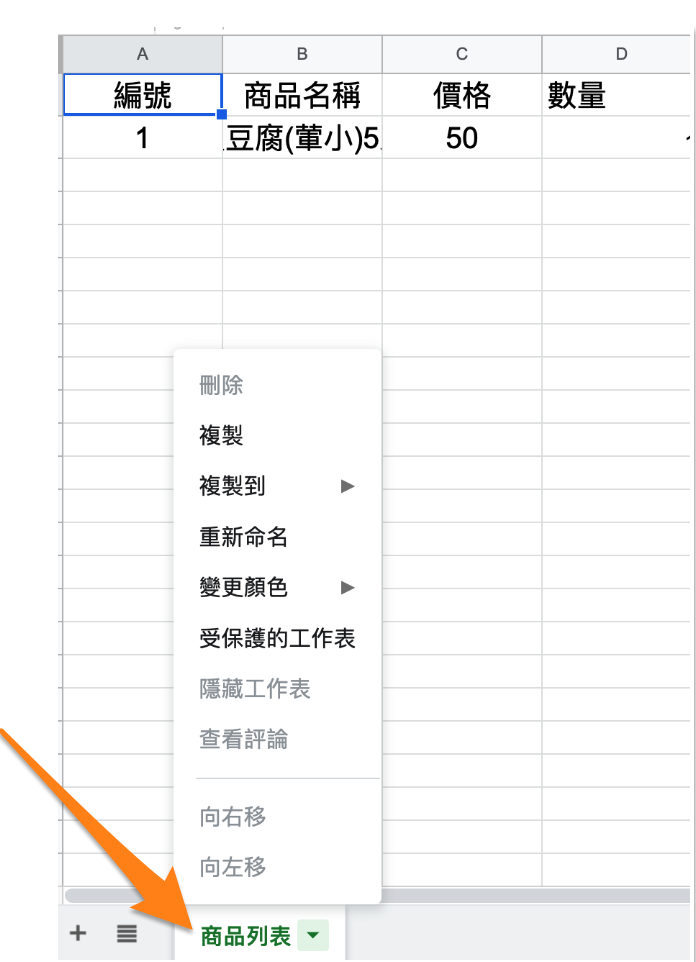
將Google Sheet 改為共用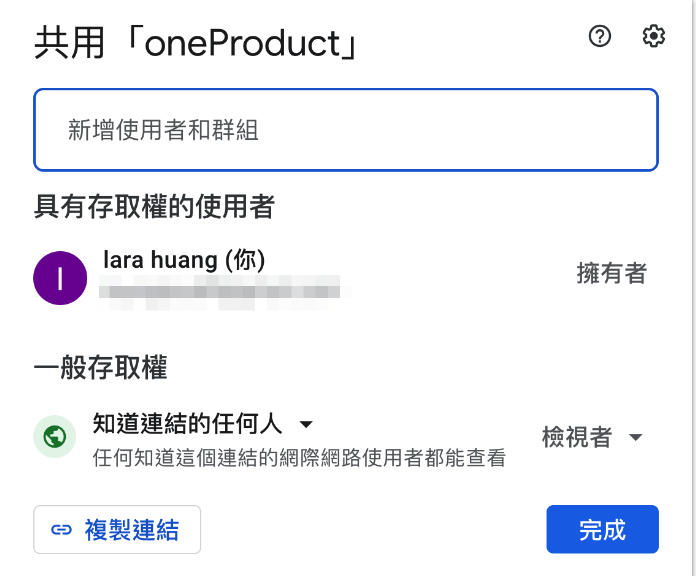
新增stores / googlesheet.js
1 | import { defineStore } from 'pinia'; |
#專案內:.env.development,.env.production,.env.staging
新增
1 | VITE_API_GOOGLE_KEY = GOOGLE_KEY |
#頁面使用goolgesheet 數據
//引入{ storeToRefs } from ‘pinia’=>
1 | <template> |
選擇登入
OpenWeatherMap
建立一個帳號,建立一個金鑰
https://openweathermap.org/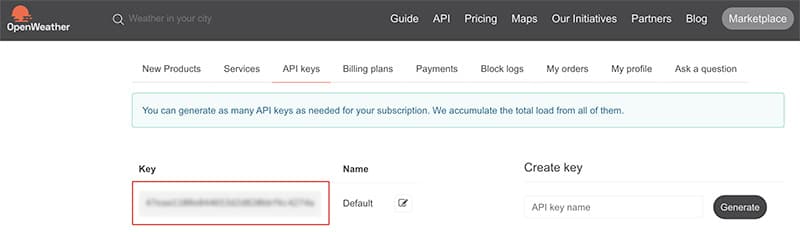
#使用fetch
${ import.meta.env.VITE_API_URL },${ import.meta.env.VITE_API_KEY }為環境變數
請參閱
1 | <script setup lang="ts"> |
1 | npm install axios --save |
1 | <script setup lang="ts"> |
Vite 6安裝
node 20.15.1
gitHub上的說明(vite ^6.0.1”)
相容性說明
Vite 需要 Node.js 版本 18+。 20+。 但是,某些模板需要更高的 Node.js 版本才能運作,如果您的套件管理器發出警告,請升級。
1 | npm create vite@latest 資料名 |
1 |
|
1 | cd vite-project |
安裝完成
gitHub上的說明
gitHub上的說明(vite ^5.1.0”)
修改vite.config.js 檔案,加入以下
1 | import { fileURLToPath, URL } from 'node:url'; |
當從命令列執行 vite 時,Vite 會自動嘗試解析專案根目錄中名為 vite.config.js 的設定檔(也支援其他 JS 和 TS 擴充功能)。
最基本的設定檔如下所示:
官網說明
完整檔案
1 | import { defineConfig } from 'vite' |
1 | npm install --save-dev @types/node |
**在專案內加入env資料夾資料夾內新增:.env.development,.env.production,.env.staging
開發端環境.env.development
1 | VITE_API_URL = '開發端環境Api網址' |
正式主機位置.env.production
1 | VITE_API_URL = '正式主機位置Api網址' |
測試環境.env.staging
1 | # QA測試環境 |
在頁面中使用環境變數
如果在開發中會得到開發中的變數,正式環境就得到正式環境中的變數,測試環境以此類推
環境變數的命名都大寫搭配底斜線如=>VITE_API_URL=’https://xxx.tw‘
使用import.meta.env.VITE_API_URL
1 | import.meta.env.VITE_API_URL |
gitHub上的說明-新增環境變數
gitHub上的說明 頁面的使用import.meta.env.VITE_API_BASIC_URL
環境變數
在 src 目錄下建立 env.d.ts
增加 ImportMetaEnv
1 | /// <reference types="vite/client" /> |
當執行npm install指令的時候,會根據package.json檔案中的設定自動下載所需的模組
紀錄這個專案的各種模組,以及專案的設定資訊(例如名稱、版本、授權等)
必須小於等於214個字符,不能以.或_開頭,不能有大寫字母,因為名稱最終成為URL的一部分因此不能包含任何非URL安全字符。
名稱和版本一起構成一個標識符,該標識符被認為是完全唯一的
是一個字串組成的數組,有助於人們在npm庫中搜尋的時候發現你的模組
如果這個屬性被設定為true,npm將拒絕發布它,這是為了防止一個私有模組被無意間發佈出去
項目的主頁地址
用於專案問題的回饋issue地址或一個郵箱。
是目前專案的協議,讓使用者知道他們有何權限來使用你的模組,以及使用該模組有哪些限制。
author是具體一個人,contributors表示一群人,他們都表示當前專案的共享者。同時每個人都是一個物件。具有name欄位和可選的url及email欄位。
執行腳本指令的npm命令列縮寫,例如start指定了執行npm run start時,所要執行的命令。
當安裝依賴的時候使用–save參數表示將該模組寫入dependencies屬性
–save-dev表示將該模組寫入devDependencies屬性。
例如Node或npm的某個版本或瀏覽器。
1 | { |
參考資料
package.json文件