Angular Directive(指示)

Angular Directive(指示)

Angular中的Directive 直接翻譯是指令、指示,
我個人比較喜歡指示、指引的翻譯,代表Angular看到這個特別的詞,要去做對應的事情或動作。
指令比較像在Terminal上做的輸入。

Angular中的Directive分成以下三種:

  • 元件型 Component Directive
  • 屬性型 Attribute Directive
  • 結構型 Structure Directive

元件型指示 Component Directive

什麼是元件型指示?
指的就是元件啦!

ex: < app-root >、< app-component >
含有樣板的指示,以標籤(tag)形式呈現

屬性型 Attribute Directive

屬性、樣式
屬性型指令有以下三種:

  • ngStyle
  • ngClass
  • ngModel
ngStyle

app.component.html 檔案內
[ngStyle]="{'font-size': 26 + counter + 'px'}"

1
2
3
4
<div class="container">
<h1 [ngStyle]="{'font-size': 26 + counter + 'px'}">{{counter}}</h1>
<input type="button" value="計數器+按了會變大" (click)="count()">
</div>

app.component.ts中設定屬性變數
(click)="count()"

1
2
3
4
5
6
7
8
9
import { Component } from '@angular/core';

export class AppComponent {
counter = 0;
count(){
this.counter++;
}
}

另一種寫法

ngStyle app.component.html 檔案內 [ngStyle]="getStyle()"
1
2
3
4
<div class="container">
<h1 [ngStyle]="getStyle()">{{counter}}</h1>
<input type="button" value="計數器+按了會變大" (click)="count()">
</div>
app.component.ts中設定屬性變數 (click)="count()"
1
2
3
4
5
6
7
8
9
10
11
12
import { Component } from '@angular/core';

export class AppComponent {
counter = 0;
count(){
this.counter++;
}
getStyle(){
return {('font-size': 26 + this.counter) + 'px'};
}
}

[style.font-size] 綁定style
[style.color]綁定style
[ngClass]綁定class
app.component.html 檔案內
1
2
3
4
5
<div class="container">
<h1 [style.font-size]="(26+counter)+'px'" [style.color]='"green"'>{{counter}}</h1>
<input type="button" value="計數器+按了會變大" (click)="count()">
<p [ngClass]="{highlight: counter % 2 == 0}">偶數時會有螢光背景</p>
</div>

css

1
2
3
.highlight{
background: yellow;
}

也可以改成簡短一點

1
<p [class.highlight]="counter % 2 == 0">偶數時會有螢光背景</p>

全部

1
2
3
4
5
<div class="container">
<h1 [style.font-size]="(26+counter)+'px'" [style.color]='"green"'>{{counter}}</h1>
<input type="button" value="計數器+按了會變大" (click)="count()">
<p [class.highlight]="counter % 2 == 0">偶數時會有螢光背景</p>
</div>

結構型 Structure Directive:會影響到程式流的指令

  • ngIf
  • ngSwitch
  • ngFor
ngIf
符合條件時會動態新增DOM、不符條件時動態移除(是移除而非隱藏) 若該元素被移除,若元素裡面有其他的tag或directive 也會一併被移除。 斬草除根。 app.component.html 檔案內=>HTML
1
<p *ngIf="counter % 2 == 0">偶數時整個DOM會被移除</p>
ngSwitch
app.component.html 檔案內=>HTML
1
2
3
4
5
6
7
8
9
10
<div class="container">
<h1 [style.font-size]="(26+counter)+'px'" [style.color]='"green"'>{{counter}}</h1>
<input type="button" value="計數器+按了會變大" (click)="count()">

<div [ngSwitch]="counter % 3">
<div *ngSwitchCase="1"><p>3N+1</p></div>
<div *ngSwitchCase="2"><p>3N+2</p></div>
<div *ngSwitchDefault><p>Default 三的倍數</p></div>
</div>
</div>
ngFor
*ngFor="let item of list" app.component.ts中設定屬性變數 Ts
1
2
3
4
5
6
7
8
9
10
export class AppComponent {
data = [
{SID: 'S001', name: '王大明', score: 80, 'image-url': 'https://picsum.photos/id/10/200/300', 'self-intro': '<div>大家好,我是王大明。</div>'},
{SID: 'S002', name: '林一二', score: 99, 'image-url': 'https://picsum.photos/id/20/200/300', 'self-intro': '<div>大家好,我是林一二<br>請各位多多指教。</div>'},
{SID: 'S003', name: '黃阿道', score: 54, 'image-url': 'https://picsum.photos/id/30/200/300', 'self-intro': '<div>大家好,我是黃阿道<br>我成績不太好<br>請大家多包涵。</div>'},
];


set = new Set([1, 1, 2, 3, 4, 5, 5, 5]);
}
app.component.html 檔案內=>HTML
1
2
3
4
5
6
7
8
9
10
11
12
<div class="container" *ngFor="let item of set;">
<p>{{item}}</p>
</div>
<div class="container d-flex">
<div class="student border border-dark m-5" id="student0" *ngFor="let item of data">
<p>學號: {{item.SID}}</p>
<p>姓名: {{item.name}}</p>
<img [src]="item['image-url']" alt="大頭照">
<p>分數: {{item.score}}</p>
<p class="self-intro" [innerHTML]="item['self-intro']"></p>
</div>
</div>

參考資料

Angular Binding (綁定)

內嵌繫結

app.component.ts中設定屬性變數

1
2
3
4
5
export class AppComponent {
title = 'My Website';
link = '前往Google';
url = 'https://google.com';
}

app.component.html 檔案內使用雙括號將變數宣染
{{}} 繃定

1
2
3
4
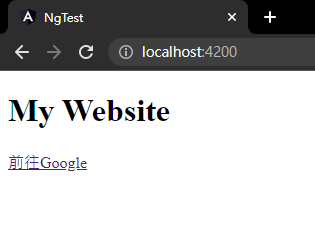
<div class="container my-5">
<h1>{{title}}</h1>
<a href="{{url}}">{{link}}</a>
</div>
app.component.ts中設定屬性變數
1
2
3
4
export class AppComponent {
a = 10;
b = 50;
}
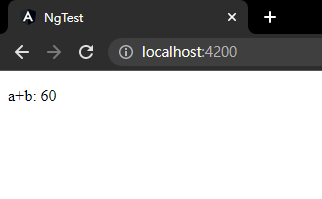
app.component.html 檔案內直接在樣板做運算 {{算數}} 繃定

1
<p>a+b: {{a + b}}</p>

屬性繫結 property binding

[property] = ‘statement’
app.component.html 檔案內
a標籤 [routerLink] 必須引入RouterLink 在 from ‘@angular/router’
[欄位參數]繫結

1
2
3
4
<div class="container my-5">
<h1>標題</h1>
<a [routerLink]="欄位參數">Google連結</a>
</div>

Class動態樣式 [ngClass] 綁定方是等於布林值是或否 ? ‘active’ : ‘’”
綁定自定義的attribute?
app.component.html 檔案內
[attr.data-title]繫結

1
<h1 [attr.data-title]=title>標題</h1>

事件繫結 event binding

app.component.html 檔案內
(click)事件繫結函式

1
2
3
4
<div class="container my-5">
<input type="button" value="更換標題" (click)="changeTitle()">
<h1>{{title}}</h1>
</div>

app.component.ts中設定屬性變數
點擊函式改變title

1
2
3
4
5
6
export class AppComponent {
title = 'My Website';
changeTitle(){
this.title = '更換後的標題';
}
}

傳入事件參數$event

app.component.html 檔案內
點擊函式傳入參數$event

1
2
3
4
5
6
<div class="container my-5">
<input type="button"
value="更換標題"
(click)="changeTest($event)">
<h1>{{title}}</h1>
</div>

app.component.ts中設定屬性變數

1
2
3
4
5
6
7
export class AppComponent {
title = 'My Website';
changeTest($event: any) {
console.log($event)
this.title = 'Lara換後的標題';
}
}

雙向繫結 two-way binding

[(ngModel)] = ‘property’

雙向繫結能同時做到屬性繫結()以及事件繫結[],所以符號是[()]用他來繫結某個property
app.component.html 檔案內
表單[()] 綁定

1
2
3
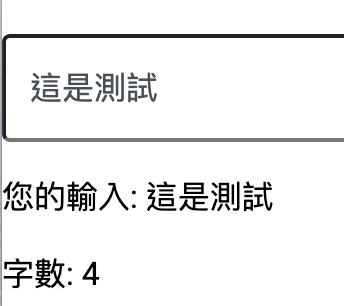
<input type="text" value="" placeholder="請輸入點什麼吧" [(ngModel)]="text">
<p>您的輸入: <span>{{text}}</span></p>
<p>字數: <span>{{text.length}}</span></p>

app.component.ts中設定屬性變數

1
2
3
4
5
6
7
8
9
10
11
12
13
import { Component } from '@angular/core';
+ import { FormsModule } from '@angular/forms';
@Component({
selector: 'app-root',
imports: [
+ FormsModule
],
templateUrl: './app.component.html',
styleUrl: './app.component.scss'
})
export class AppComponent {
+ text="text"
}

Angular Pipe 管道元件

  • AsyncPipe:從非同步原語中解開一個值。
  • CurrencyPipe:將數字轉換為貨幣字串,並根據確定群組大小和分隔符號、小數點字元和其他特定於區域設定的配置的區域設定規則進行格式化。
  • DatePipe:根據區域設定規則格式化日期值。
  • DecimalPipe:根據數字選項和區域設定規則格式化值。區域設定決定群組大小和分隔符號、小數點字元以及其他特定於區域設定的配置。
  • JsonPipe:將值轉換為 JSON 格式的表示形式。對於調試很有用。
  • KeyValuePipe:將物件或映射轉換為鍵值對的陣列。
  • LowerCasePipe:將文字轉換為全部小寫。
  • PercentPipe:將數字轉換為百分比字串,並根據確定群組大小和分隔符號、小數點字元和其他特定於語言環境的配置的語言環境規則進行格式化。
  • SlicePipe:建立一個包含元素子集(切片)的新陣列或字串。
  • TitleCasePipe:將文字轉換為標題大小寫。將每個單字的首字母大寫,並將其餘部分轉換為小寫。單字由任何空白字元(如空格、製表符或換行符)分隔。
  • UpperCasePipe:將文字轉換為全部大寫。

AsyncPip從非同步原語中解開一個值。

非同步管道訂閱 ObservablePromise 並傳回其發出的最新值。當發出新值時,非同步管道會標記要檢查變更的元件。當組件被銷毀時,非同步管道會自動取消訂閱以避免潛在的記憶體洩漏。當表達式的參考發生變化時,非同步管道會自動取消訂閱舊的 Observable 或 Promise,並訂閱新的。
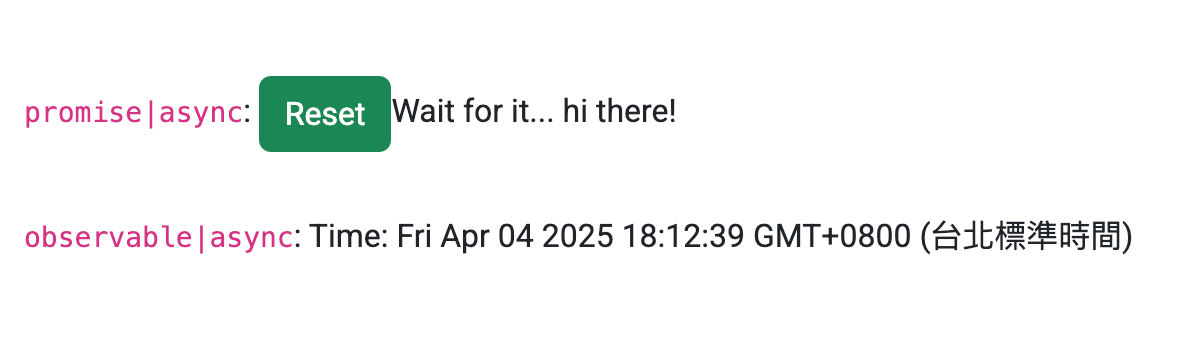
This example binds a Promise to the view. Clicking the Resolve button resolves the promise.
此範例將 Promise 綁定到視圖。點擊“解決”按鈕即可解決該承諾。
參考AsyncPipe官網

引入AsyncPipe

1
{{ obj_expression | async }}

example

1
2
3
4
5
6
7
8
9
10
11
12
13
14
15
16
17
18
19
20
21
22
23
24
25
26
27
28
29
30
31
32
33
34
35
36
import { AsyncPipe } from '@angular/common';
@Component({
selector: 'async-promise-pipe',
template: `<div>
<code>promise|async</code>:
<button (click)="clicked()">{{ arrived ? 'Reset' : 'Resolve' }}</button>
<span>Wait for it... {{ greeting | async }}</span>
</div>`,
})
export class AsyncPromisePipeComponent {
greeting: Promise<string> | null = null;
arrived: boolean = false;

private resolve: Function | null = null;

constructor() {
this.reset();
}

reset() {
this.arrived = false;
this.greeting = new Promise<string>((resolve, reject) => {
this.resolve = resolve;
});
}

clicked() {
if (this.arrived) {
this.reset();
} else {
this.resolve!('hi there!');
this.arrived = true;
}
}
}

也可以將非同步與 Observable 一起使用。下面的範例將時間 Observable 綁定到視圖。 Observable 使用目前時間不斷更新視圖。

1
2
3
4
5
6
7
8
9
10
11
12
13
import { AsyncPipe } from '@angular/common';
import { Observable, Observer } from 'rxjs';

@Component({
selector: 'async-observable-pipe',
template: '<div><code>observable|async</code>: Time: {{ time | async }}</div>',
})

export class AsyncObservablePipeComponent {
time = new Observable<string>((observer: Observer<string>) => {
setInterval(() => observer.next(new Date().toString()), 1000);
});
}

大寫 DatePipe:uppercase,小寫 LowerCasePipe:lowercase,首字大寫 TitleCasePipe:titlecase

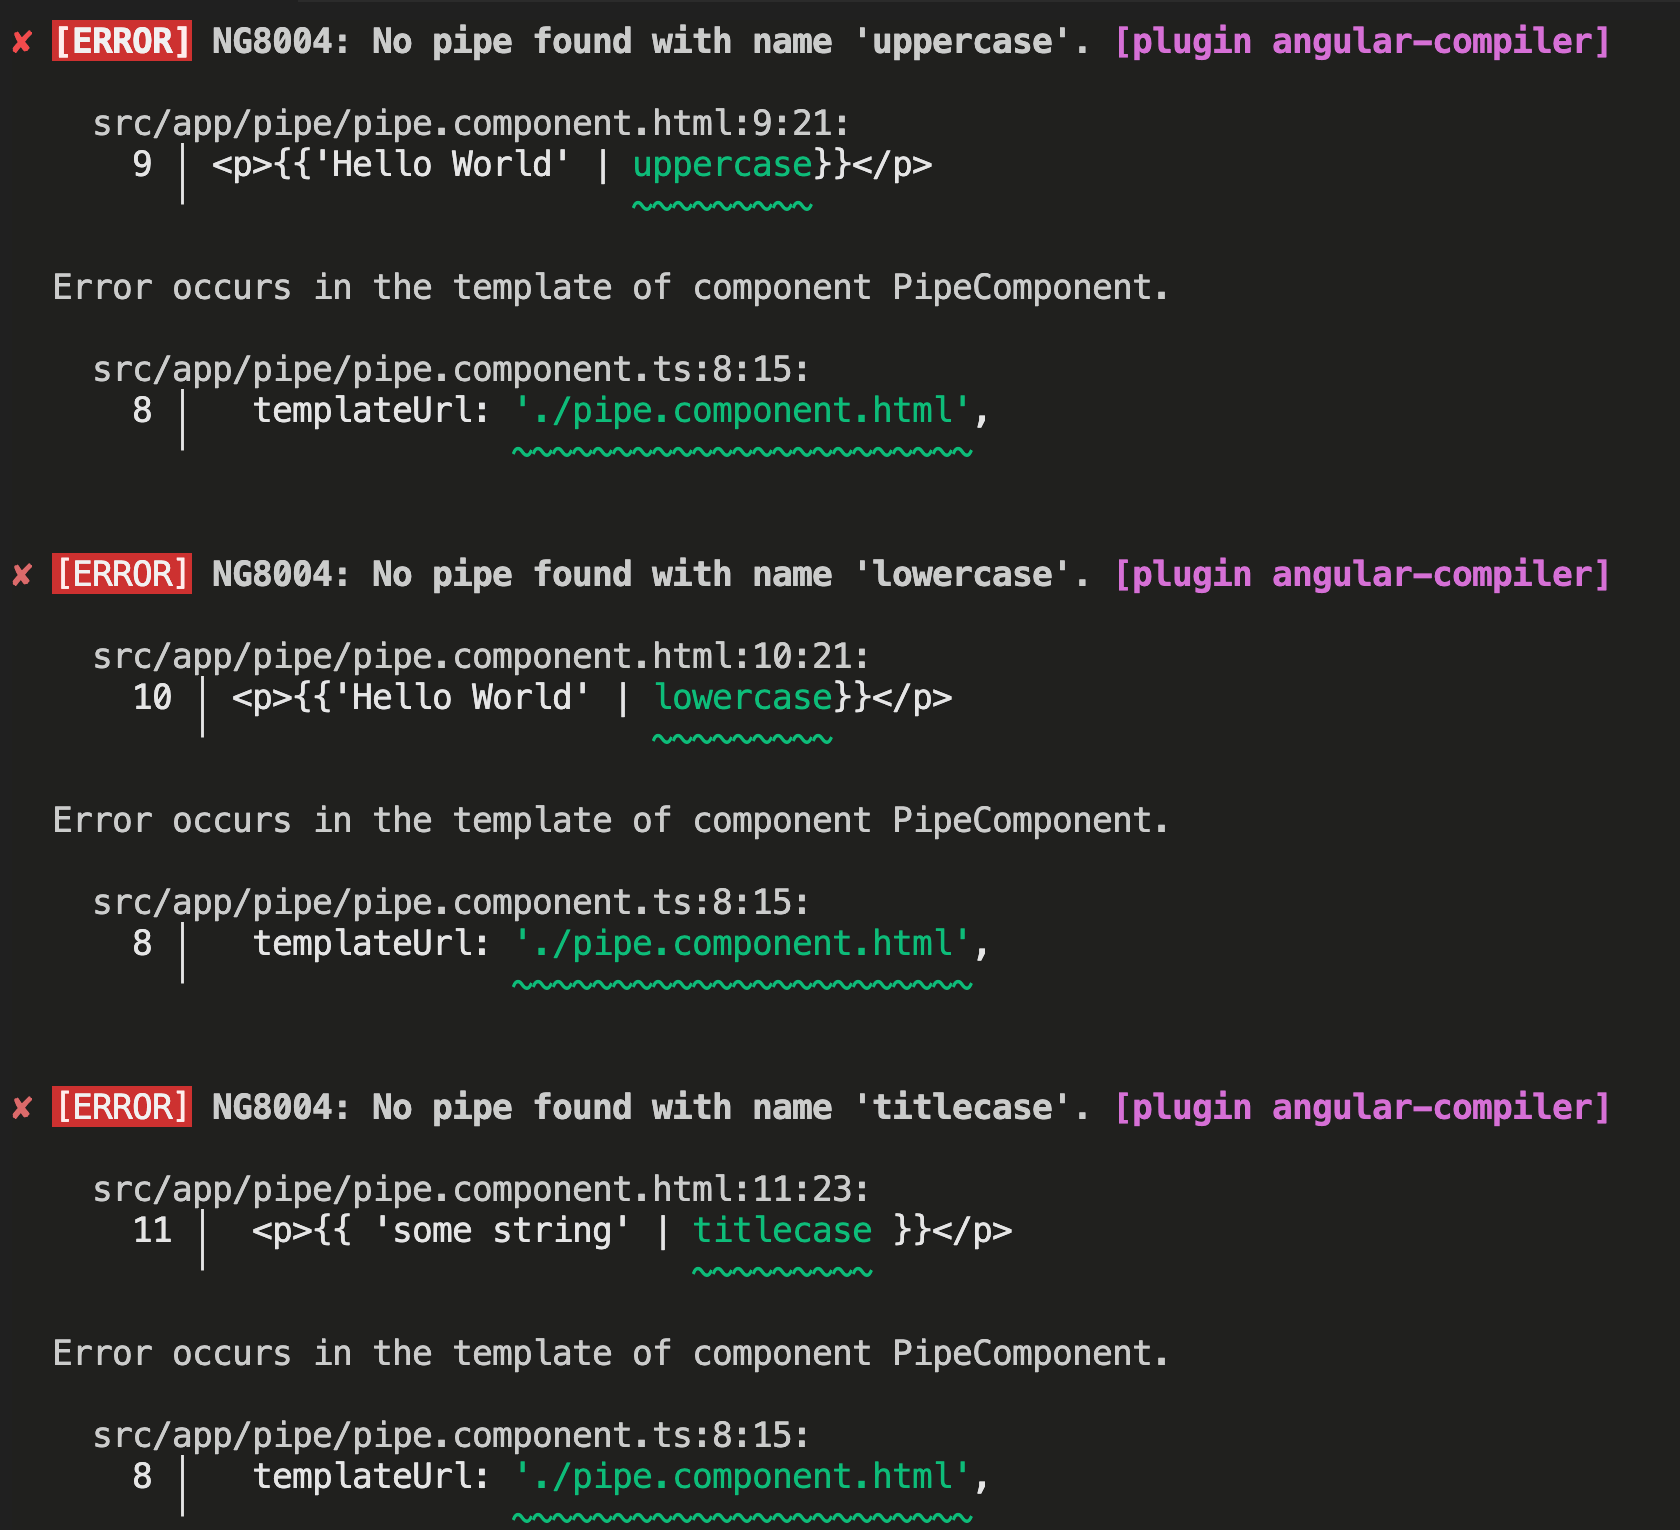
大寫 引入UpperCasePipe import { UpperCasePipe } from '@angular/common';
1
2
3
// html
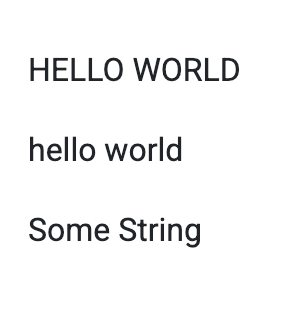
<p>{{'Hello World' | uppercase}}</p>

HELLO WORLD

小寫
引入LowerCasePipe
import { LowerCasePipe } from ‘@angular/common’;

1
2
3
// html
<p>{{'Hello World' | lowercase}}</p>

hello world
首字大寫
引入TitleCasePipe
import { TitleCasePipe } from ‘@angular/common’;

1
<p>{{ 'some string' | titlecase }}</p>

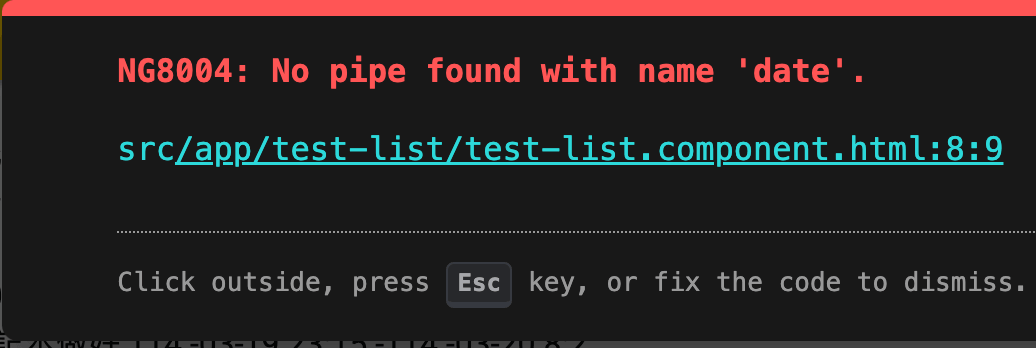
日期 DatePipe

根據區域設定規則格式化日期值。

參考DatePipePipe官網

引入UpperCasePipe
import { DatePipe } from ‘@angular/common’;

1
{{ value_expression | date [ : format [ : timezone [ : locale ] ] ] }}

ts檔案中新增以下設定

1
2
3
4
5
6
7
8
9
10
11
+ import { DatePipe} from '@angular/common';

@Component({
selector: 'app-test-list',
+ imports: [DatePipe],
templateUrl: './test-list.component.html',
styleUrl: './test-list.component.scss'
})
export class TestListComponent implements OnInit {
now :number= Date.now();
}
| date
html
1
<td>{{now  | date  }} </td> 
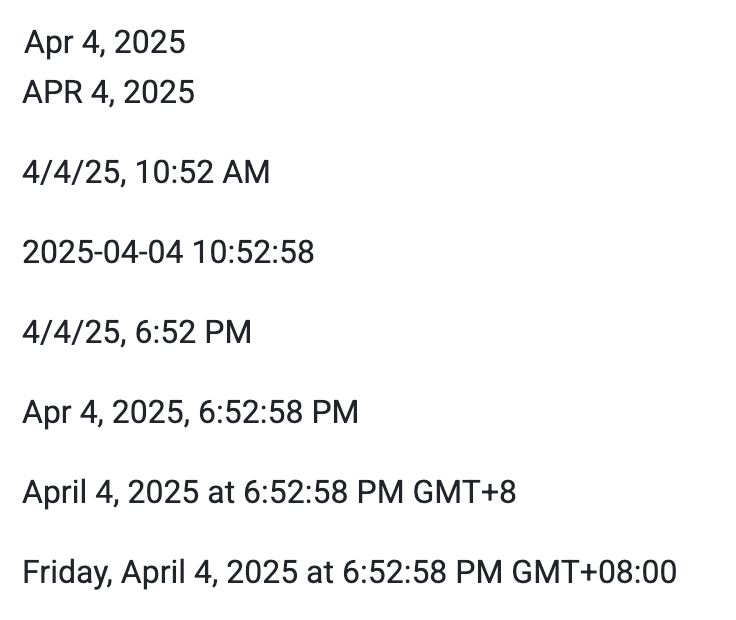
顯示:Apr 4, 2025
| date | uppercase
1
<p>{{now | date | uppercase }}</p> 
顯示:APR 4, 2025
| date: 'short':'+0000'
1
<p> {{now | date: 'short':'+0000' }}</p> 
顯示:4/4/25, 6:35 AM
| date:'yyyy-MM-dd HH:mm:ss'
1
<p> {{now |  date:'yyyy-MM-dd HH:mm:ss' }}</p> 
顯示:2025-04-04 06:35:34
| date: 'short'
1
<p> {{now | date: 'short' }}</p> 
顯示:4/4/25, 2:35 PM
| date: 'medium'
1
<p> {{now | date: 'medium' }}</p> 
顯示:Apr 4, 2025, 2:35:34 PM
| date: 'long'
1
<p> {{now | date: 'long' }}</p> 
顯示:April 4, 2025 at 2:35:34 PM GMT+8
| date: 'full'
1
<p> {{now | date: 'full' }}</p> 
顯示:Friday, April 4, 2025 at 2:35:34 PM GMT+08:00

貨幣 (CurrencyPipe)

將數字轉換為貨幣字串,並根據確定群組大小和分隔符號、小數點字元和其他特定於區域設定的配置的區域設定規則進行格式化。
CurrencyPipe公式

1
{{ value_expression | currency [ : currencyCode [ : display [ : digitsInfo [ : locale ] ] ] ] }}
引入UpperCasePipe import { CurrencyPipe } from '@angular/common';
1
2
3
4
5
6
7
8
9
10
11
+ import {  CurrencyPip} from '@angular/common';

@Component({
selector: 'app-test-list',
+ imports: [ CurrencyPip],
templateUrl: './test-list.component.html',
styleUrl: './test-list.component.scss'
})
export class TestListComponent implements OnInit {
}

| currency
html
1
<p> {{50000 | currency}}</p>
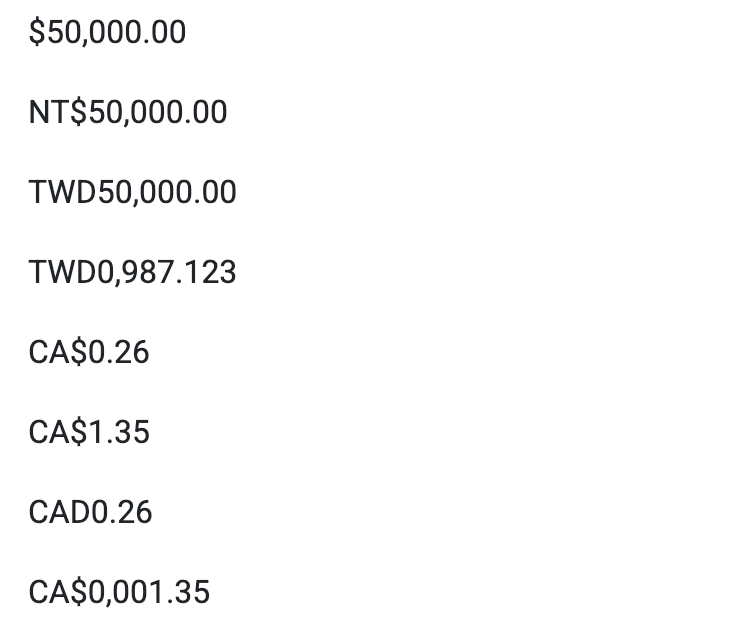
顯示:$50,000.00
| currency:'TWD':true
html
1
<p> {{50000 | currency:'TWD':true}}</p> 
顯示:NT$50,000.00
| currency:'TWD':'TWD'
html
1
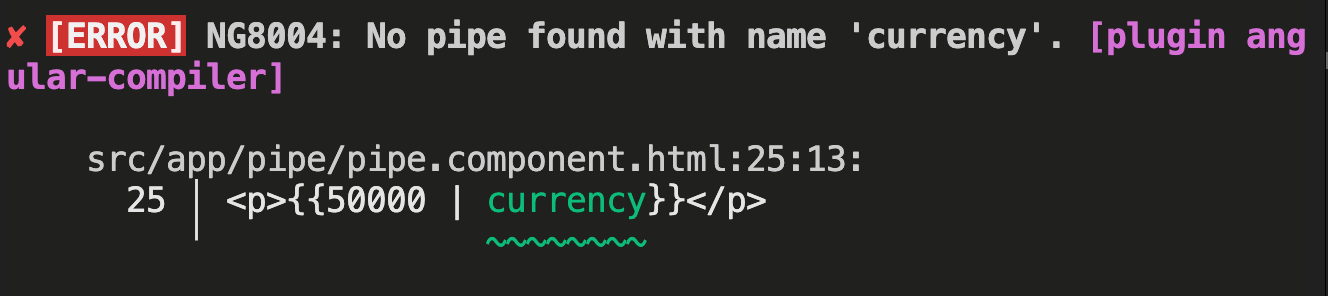
<p> {{50000 | TWD50,000.00}}</p> 
顯示:TWD50,000.00
| currency:'TWD':'TWD':'4.1-3'
digitsInfo:數字顯示方式 (String)
  • minIntegerDigits:小數點前的最小整數位數。默認值為1
  • minFractionDigits:小數點後的最少位數。默認值為2
  • maxFractionDigits:小數點後的最大位數。默認值為2
html
1
<p>{{987.1234 | currency:'TWD':'TWD':'4.1-3'}}</p>
顯示:TWD0,987.123
1
2
3
4
<p>{{ 0.259 | currency: 'CAD' }}</p>
<p>{{ 1.3495 | currency: 'CAD' }}</p>
<p> {{ 0.259 | currency: 'CAD' : 'code' }}</p>
<p> {{ 1.3495| currency: 'CAD' : 'symbol' : '4.2-2' }}</p>

SlicePip

建立一個包含元素子集(切片)的新陣列或字串。
參考官網SlicePip資料

引入SlicePipe
import { SlicePipe } from ‘@angular/common’;

1
2
3
4
5
6
7
8
9
10
+ import {SlicePipe} from '@angular/common';
@Component({
selector: 'app-test-list',
+ imports: [ SlicePipe],
templateUrl: './test-list.component.html',
styleUrl: './test-list.component.scss'
})
export class TestListComponent implements OnInit {
collection: string[] = ['a', 'b', 'c', 'd'];
}

使用公式

1
{{ value_expression | slice : start [ : end ] }}

html

1
2
3
<ul>
<li *ngFor="let i of collection | slice: 1 : 3">{{ i }}</li>
</ul>

顯示:

  • b
  • c

DecimalPipe

根據數字選項和區域設定規則格式化值。區域設定決定群組大小和分隔符號、小數點字元以及其他特定於區域設定的配置

參考官網DecimalPipe資料

1
2
3
4
5
6
7
8
9
10
+ import {DecimalPipe} from '@angular/common';
@Component({
selector: 'app-test-list',
+ imports: [DecimalPipe],
templateUrl: './test-list.component.html',
styleUrl: './test-list.component.scss'
})
export class TestListComponent implements OnInit {
testNumber:number=3.14159;
}

html

1
<p>{{ testNumber| number  }}</p>

顯示:3.141

小數點建議定義參數後 .toFixed(5)

1
2
3
testNumber:number=3.14159;

{{ testNumber.toFixed(5) }}

自定義 Pipe

  • 新增pipe 功能ts名稱
    • 引入:Pipe, PipeTransform
    • @Pipe({名稱:功能})
    • export class FormatTaiwanYearPipe implements PipeTransform
    • transform(date: number | any) {.... return ....}
ˊ

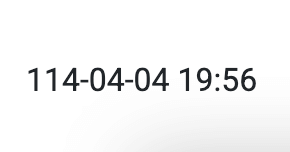
範例:民國年

1
2
3
4
5
6
7
8
9
10
11
12
13
14
15
16
17
18
19
import { Pipe, PipeTransform } from '@angular/core';

@Pipe({
name: 'TaiwanYear'
})

export class FormatTaiwanYearPipe implements PipeTransform {
transform(date: number | any) {
let d = new Date(date),
year = d.getFullYear() - 1911,
month = (d.getMonth()+1 < 10 ? '0'+(d.getMonth()+1) : d.getMonth()+1) ,
day = (d.getDate()< 10 ?'0'+d.getDate():d.getDate()),
hour=(d.getHours()<10?'0'+d.getHours():d.getHours()) ,
minutes = (d.getMinutes()<10?'0'+d.getMinutes():d.getMinutes())

return [year, month, day].join('-')+' '+ [hour,minutes].join(':');
}
}

頁面使用

  • 引入類名稱
1
2
3
4
5
6
7
8
9
import { FormatTaiwanYearPipe } from '存放位址';

@Component({
imports: [FormatTaiwanYearPipe],
})

export class TestListComponent implements OnInit {
nowTimeStamp:number =Date.now()
}
1
2
3
4
<p >
{{ nowTimeStamp | TaiwanYear }}
</p>

github
Angular 元件執行順序 & 生命週期

ng cli產出的元件,底下都會有以下兩個方法(Method)

  • constructor Typescript的構建物件函式
  • ngOnInit Angular元件初始化時執行
執行結果
  • constructor 構建一個物件首先執行的函式,在這裡引入物件所需用到的服務
  • ngOnInit 生命週期 元件初始化,進入此元件做的事情,此時畫面尚未生成完畢
  • ngAfterViewInit 生命週期 當畫面(View)渲染完畢才做的事 例如抓取頁面上的某個節點,若在畫面出現之前執行的話會抓不到元素而變成undefined
  • ngOnDestroy 生命週期 離開、結束此元件時做的事情 刷新頁面或離開頁面都不會觸發效果 因為是這兩件事情主導權不在Angular手上,而是由瀏覽器銷毀 在未來提及Rouing切換頁面元件時可以看到效果

以人類的生命週期來對應的話,分別是

  • 受精階段: constructor 建構胚胎卵,注入所需要的養分服務,以幫助未來成長
  • 胎兒階段: ngOnInit 元件在媽媽的肚子裡面長好了
  • 嬰兒階段: ngAfterViewInit 畫面生出來了,我們肉眼看的見四肢了
  • 死亡階段: destroy 生命離開肉體軀殼,被大自然回收了

Vue3 錄音與播放套件 js-audio-recorder

安装js-audio-recorder

1
npm install js-audio-recorder --save

獲取數據

1
2
3
4
5
// 獲取錄音數據 buffer
recorder.getRecordAnalyseData()

// 獲取播放數據 buffer
recorder.getPlayAnalyseData()

錄音方法

1
2
3
4
5
6
7
8
9
10
11
// 錄音
recorder.start()

// 暫停
recorder.pause()

// 繼續
recorder.resume()

// 結束
recorder.stop()

播放

1
2
3
4
5
6
7
8
9
10
11
// 播放
recorder.play()

// 暫停
recorder.pausePlay()

// 繼續
recorder.resumePlay()

// 結束
recorder.stopPlay()

下载方法

1
2
3
4
5
// 下载 pcm 文件
recorder.downloadPCM()

// 下载 wam 文件
recorder.downloadWAV()

銷毀

1
2
// 銷毀
recorder.destroy()

參數配置

1
2
3
4
5
6
7
8
9
10
11
 let query = {
// 取樣位數,支援 8 或 16,預設是 16
sampleBits: 16,
// 取樣率,支援11025、16000、22050、24000、44100、48000,依瀏覽器預設值
sampleRate: 48000,
// 聲道,支援1或2,預設是1
numChannels: 1,
// 是否記錄邊,預設是false
compiling: false
}
new Recorder(query)

常用属性 attrs duration

1
2
// 時長
recorder.duration

文件大小 fileSize

1
recorder.fileSize
1
2
3
4
5
6
7
8
9
10
11
12
13
14
15
16
17
18
19
20
21
22
23
24
25
26
27
28
29
30
31
32
33
34
35
36
37
38
39
40
41
42
43
44
45
46
47
48
49
50
51
52
53
54
55
56
57
58
59
60
61
62
63
64
65
66
67
68
69
70
71
72
73
74
75
76
77
78
79
80
81
82
83
84
85
86
87
88
89
90
91
92
93
94
95
96
97
98
99
100
101
102
103
104
105
106
107
108
109
110
111
112
113
114
115
116
117
118
119
120
121
122
123
124
125
126
127
128
129
130
131
132
133
134
135
136
137
138
139
140
141
142
143
144
145
146
147
148
149
150
151
152
153
154
155
156
157
158
159
160
161
162
163
164
165
166
167
168
169
170
171
172
173
174
175
176
177
178
179
180
181
182
183
184
185
186
187
188
189
190
191
192
193
194
195
196
197
198
199
200
201
202
203
204
<template>
<div class="BaseRecorder">
<div class="BaseRecorder-record">
<i @click="startRecorder()" title="開始錄音" class="fa-solid fa-microphone"></i>
<i @click="resumeRecorder()" title="继续錄音" class="fa-solid fa-microphone-lines"></i>
<i @click="pauseRecorder()" title="暂停錄音" class="fa-solid fa-microphone-lines-slash"></i>
<i @click="stopRecorder()" title="停止錄音" class="fa-solid fa-microphone-slash"></i>
</div>
<div class="BaseRecorder-play">
<i @click="playRecorder()" class="fa-solid fa-volume-high"></i>
<i @click="pausePlayRecorder()" class="fa-solid fa-volume-xmark"></i>

<button @click="resumePlayRecorder()">恢复錄音播放</button>
<button @click="stopPlayRecorder()">停止錄音播放</button>
</div>
<div class="BaseRecorder-download">
<i @click="downPCM()" title="下载PCM" class="fa-solid fa-cloud-arrow-down"></i>
<i @click="downWAV()" title="下载WAV" class="fa-solid fa-cloud-arrow-down"></i>

</div>
<div class="BaseRecorder-destroy">
<button @click="destroyRecorder()">销毁錄音</button>

</div>
<div class="BaseRecorder-wave">
<canvas ref="record"></canvas>
<canvas ref="play"></canvas>
</div>
</div>

</template>

<script setup lang="ts">
import Recorder from 'js-audio-recorder'
import { ref, computed,onMounted} from 'vue'
const recorder = ref<any>(null)
//波浪图-录音
const drawRecordId = ref<any>(null)
//波浪图-播放
const drawPlayId = ref<any>(null)
const init = () => {
let query = {
// 取樣位數,支援 8 或 16,預設是 16
sampleBits: 16,
// 取樣率,支援11025、16000、22050、24000、44100、48000,依瀏覽器預設值
sampleRate: 48000,
// 聲道,支援1或2,預設是1
numChannels: 1,
// 是否記錄邊,預設是false
compiling: false
}
recorder.value = new Recorder(query)
// console.log('recorder.value',recorder.value)
}

//開始錄音
const startRecorder =() =>{
recorder.value.start()
.then(
() => {
drawRecord()
},
error => {
// 出错了
console.log(`${error.name} : ${error.message}`)
}
)
}
//ref="record" =>this.$refs.record
const record = ref<any>()
//繪製記錄
const drawRecord = () => {
//**方法通知瀏覽器我們想要產生動畫,並且要求瀏覽器在下次重繪畫面前呼叫特定函數更新動畫。這個方法接受一個引數作為下次重繪前調用的回呼函數。
let query = {
canvas: record.value,
dataArray: recorder.value.getRecordAnalyseData(),
bgcolor: 'rgb(50 65 150)',
lineWidth: 2,
lineColor: 'rgb(255, 255, 255)'
}
drawRecordId.value = requestAnimationFrame(drawRecord)
drawWave(query)
console.log('query', query)
console.log('drawRecordId.value', drawRecordId.value)
}
//畫波
const drawWave = ({
canvas,
dataArray,
bgcolor = 'rgb(200, 200, 200)',
lineWidth = 2,
lineColor = 'rgb(0, 0, 0)'
}) => {
if (!canvas) return
const ctx = record.value.getContext('2d')
const bufferLength = dataArray.length
// 一個點佔多少位置,每個bufferLength個點要控制
const sliceWidth = canvas.width / bufferLength
// 受傷點的x軸位
let x = 0

// 填充背景色
ctx.fillStyle = bgcolor
ctx.fillRect(0, 0, canvas.width, canvas.height)

// 設定,設計顏色
ctx.lineWidth = lineWidth
ctx.strokeStyle = lineColor

ctx.beginPath()

for (let i = 0; i < bufferLength; i++) {
const v = dataArray[i] / 128
const y = (v * canvas.height) / 2

if (i === 0) {
// 第一个点
ctx.moveTo(x, y)
} else {
// 剩余的点
ctx.lineTo(x, y)
}
// 依次平移,绘制所有点
x += sliceWidth
}

// 最后一个点
ctx.lineTo(canvas.width, canvas.height / 2)
ctx.stroke()
}
// 继续錄音
const resumeRecorder = () => {
recorder.value.resume();
}
//暂停錄音
const pauseRecorder = () => {
recorder.value.pause();
//cancelAnimationFrame:是一種JavaScript實作動畫的技巧,它解決了傳統計時器(setTimeout和setInterval)在處理動畫時的一些問題,特別是與瀏覽器重繪
drawRecordId.value && cancelAnimationFrame(drawRecordId.value)
drawRecordId.value = null
}
// 停止錄音
const stopRecorder = () => {
recorder.value.stop();
drawRecordId.value && cancelAnimationFrame(drawRecordId.value)
drawRecordId.value = null
}
//录音播放
const playRecorder = () => {
recorder.value.play()
drawPlay()
}
/**
* 绘制波浪图-播放
* */
const play = ref<any>(null)
//
const drawPlay = () => {
drawPlayId.value = requestAnimationFrame(drawPlay)
drawWave({
canvas: play,
dataArray: recorder.value.getPlayAnalyseData()
})
console.log('recorder.value.getPlayAnalyseData()', recorder.value.getPlayAnalyseData())
}
//暂停录音播放
const pausePlayRecorder = () => {
recorder.value.pausePlay()
}
//恢复录音播放
const resumePlayRecorder = () => {
recorder.value.resumePlay()
drawPlay() // 绘制波浪图
}
//
const stopPlayRecorder = () => {
recorder.value.stopPlay();

}

const downPCM = () => {
recorder.value.downloadPCM('新文件');
console.log(recorder.value.downloadPCM('新文件'))
}
const downWAV = () => {
recorder.value.downloadWAV('新文件');
console.log(recorder.value.downloadWAV('新文件'))
}
const destroyRecorder = () => {
recorder.value.destroy().then(function () {
drawRecordId.value && cancelAnimationFrame(drawRecordId.value)
drawRecordId.value = null

drawPlayId.value && cancelAnimationFrame(drawPlayId.value)
drawPlayId.value = null
recorder.value = null
})
}


onMounted(() => {
init();
})
</script>

參考
前端工程師
API串接常見問題 - CORS - 概念篇 (1)
API串接常見問題 - CORS - 概念篇 (2)

使用 MediaStream 錄製 API

MediaStream 錄製 API

About Time

new Date():現在時間(字符)

1
new Date();

console.log(Wed Jan 04 2023 15:14:33 GMT+0800 (台北標準時間))

1
2
3
4
5
6
7
8
9
10
const dateObject = new Date() 
const year = new Date().getFullYear() //年
const month = new Date().getMonth() //月+1
const day = new Date().getDay() //星期幾
const date = new Date().getDate() //日期
const hour = new Date().getHours() //0-24 小時
const minute = new Date().getMinutes() //0-59 分鐘
const second = new Date().getSeconds() //0-59 秒
const ms = new Date().getMilliseconds() //0-999
const timestamp = new Date().getTime(); //時間搓

TimeStamp 時間搓

1
Date.now();

console.log(‘TimeStamp’,1672816660300)

UTC(Universal Time Coordinated : 世界統一時間、世界標準時間

GMT(格林威治標準時間),格林威治標準時間(也稱為格林威治時間)

Unix 时间戳:這是基於 UTC 1970.01.01 00:00:00 到現在的總秒數,所以這個總秒數全世界都是這樣的,也就是說 Unix 的時間戳和時區無關

timezone時區

1
2
3
const timezoneByMins = new Date().getTimezoneOffset() //-480
//除以60後正負相轉才是時區
const timezone = -(new Date().getTimezoneOffset()/60) //-8

台灣時間 UTC +8

1
2
3
4
5
const date = new Date()

console.log(date.toLocaleString()) //2023/01/04 下午4:33:41
console.log(date.toLocaleDateString()) //2023/01/04
console.log(date.toLocaleTimeString()) //下午4:33:41

日期字串格式

這個 ISO 8601 Extended Format 格式大概長這樣:

1
YYYY-MM-DDTHH:mm:ss.sssZ

表單type 取得的 time 為 ‘10:00’這種格式如何改為時間搓

邏輯:獲得現在時間 =>切割時間與分鐘 => 設定時間與分鐘 =>獲得的時間字符getTime()

1
2
3
4
5
6
7
8
9
10
11
12
let now = new Date();
//表單type 取得的 time 為 '10:00'
const hourMinute = '10:00';
//split() 方法可以用來根據你指定的分隔符號,將字串切割成一個字串陣列。
var [hour, minute] = hourMinute.split(':');
now.setHours(hour) ;//setHours()方法依據本地時間來設定日期物件中的小時
now.setMinutes(minute);//setMinutes()方法依據本地時間來設定日期物件中的分鐘
now.setSeconds(0);
now.setMilliseconds(0);

console.log('現在時間',now) // Sat Apr 20 2024 10:00:00 GMT+0800 (台北標準時間);
console.log('時間搓',now.getTime()) // now.getTime()

控制時間與製作計時器的函式

setTimeout:延遲了某段時間後,才去執行的指定的程式碼,只會執行一次就結束

1
2
3
4
5
6
7
//一秒後執行
setTimeout(
()=>{
alert("Hello!");
}
,1000)

時鐘setInterval:設定時間的間隔

//無限次的設置定時器執行

1
2
3
4
5
6
7
8
9
10
11
12
13
14
15
16
17
18
19
20
<template>
<div>
<div class="today">{{ today }}</div>
<div class="time">{{ time }}</div>
</div>
</template>
<script setup lang="ts">
import { ref, onMounted } from 'vue';
//moment時間套件
import moment from 'moment';

const today = ref<any>(moment(new Date()).format("yyyy MM DD"));
const time = ref<any>();
onMounted(()=>{
setInterval(()=>{
time.value = new Date().getHours() + ':' + new Date().getMinutes() + ':' + new Date().getSeconds();
},1000)
})
</script>

clearInterval():取消setInterval()設的定時器

Vue3 動態 Web title

Vue 動態 Title

每個網頁都會有WebTitle ,在Vue 的專案內必須要全局中才能獲取到,
在App.vue 內必須使用

當打開網頁Home時塞入localStorage.setItem(‘pageClass’,’pageHome’),
綁定body document.querySelector(‘body’) => 將 localStorage.getItem(‘pageClass’)設定屬性setAttribute 到body的Class,且將網頁主題名稱塞入titleTag

  • Pinia全局綁定title 與 切換時改變title
  • 綁定body 設定屬性 setAttribute class 改變body class
  • 監控 watchEffect 改變
  • 1
    2
    3
    4
    5
    6
    7
    8
    9
    10
    11
    12
    13
    14
    15
    16
    17
    18
    19
    20
    21
    22
    23
    24
    25
    26
    27
    import { defineStore } from 'pinia';

    export const usePageStore = defineStore('page', () => {

    const setPageClass = (pageClass:string) => {
    document.querySelector('body')?.setAttribute('class', pageClass);
    }
    const getPageClass=()=>{
    let pageClass:any | string =localStorage.getItem('pageClass');
    switch (pageClass) {
    case pageClass:
    document.querySelector('body')?.setAttribute('class', pageClass);
    break
    }
    }
    const changeTitleTag = (title: string) => {
    const titleTag = document.querySelector('title');

    if (titleTag != null) {
    titleTag.innerText = '採購系統'+' | '+title;
    }
    }

    return{
    setPageClass,getPageClass,changeTitleTag
    }
    })

    引入頁面
    首頁頁面

    1
    2
    3
    4
    5
    6
    7
    8
    9
    10
    11
    12
    13
    14
    15
    16
    17
    18
    19
    20
    <template>
    <div>{{ title }}</div>
    </template>

    <script setup lang="ts">
    import { ref, onMounted,watchEffect } from 'vue'
    import { usePageStore } from '../stores/titleTag'

    const storePageTag = usePageStore()
    const {getPageClass,changeTitleTag,setPageClass} = storePageTag
    const title = ref<string>('首頁')
    const pageClass = ref<string>('homePage')
    watchEffect(() => {
    getPageClass();
    setPageClass(pageClass.value)
    })
    onMounted(() => {
    changeTitleTag(title.value);
    });
    </script>

    登入頁面

    1
    2
    3
    4
    5
    6
    7
    8
    9
    10
    11
    12
    13
    14
    15
    16
    17
    18
    19
    20
    <template>
    <div>{{ title }}</div>
    </template>

    <script setup lang="ts">
    import { ref, onMounted,watchEffect } from 'vue'
    import { usePageStore } from '../stores/titleTag'
    const storePageTag = usePageStore()
    const {getPageClass,changeTitleTag,setPageClass} = storePageTag
    const title = ref<string>('請先登入')
    const pageClass = ref<string>('loginPage')
    watchEffect(() => {
    getPageClass();
    setPageClass(pageClass.value)
    })
    onMounted(() => {
    changeTitleTag(title.value);

    });
    </script>

    Node express 權限管理

    權限管理

    資料表設計
    • 使用者資料表: `users` 使用者,上面綁角色role_id,每個使用者都有一種角色
    • 角色資料表: `roles` 角色,用來設定權限用
    • 模組資料表: `module_permissions` 模組權限,用來綁定底下功能權限
    • 功能資料表: `func_permissions` 功能權限,用來綁底層的權限
    • 權限資料表: `permissions` 用來綁func_permissions與permission_types的表
    • 權限型別資料表: `permission_types` 權限分類,可自行定義分類,如:查看、新增、編輯、刪除…等
    使用者 => (一對多) 角色 => (一對多) 模組 => (一對多) 功能 => (一對多) 權限 => (多對一) 權限型別

    根據使用者角色獲得頁面檢視權限

    1
    2
    3
    4
    SELECT users.id, users.uId, users.userName, users.userEmail, users.userPassword, users.userPhone, users.roleId, users.token ,modulePermissions.modulePermissionId,modulePermissions.modulePermissionName,modulePermissions.pageLink 
    FROM `users`
    INNER JOIN `modulePermissions`
    ON users.uId=modulePermissions.roleId WHERE users.userName =?