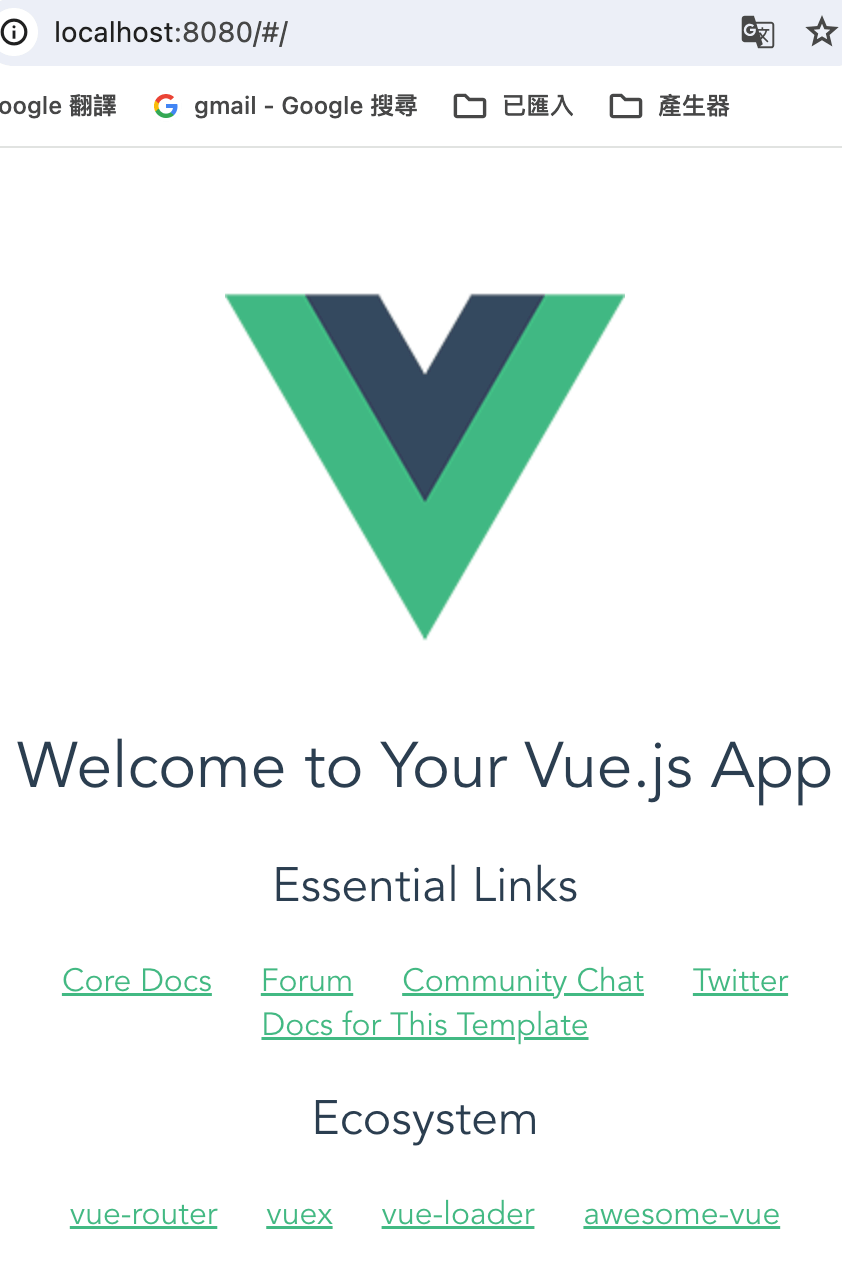
Vue 菜單active

Vue Cdn 菜單active

點擊 獲取 Menu index索引後 讓 menuActive=index時;
判斷 menuActive == index時 li 塞入isActive;
isActive 是Class 的樣式

1
2
3
4
5
6
7
8
9
10
11
12
13
14
15
16
17
18
19
20
21
22
23
24
25
26
27
28
29
30
31
32
33
34
35
36
37
38
39
40
41
42
43
44
45
//Html
<div id="app">
<ul>
<li
v-for="(item,index,id) in menus"
:key="id"
:class="menuActive == index ? 'isActive' : ''"
@click="menuClickActive(index)"
>
{{ item.title }}
</li>
</ul>
</div>


//Style
var app = new Vue({
el: '#app',
data: {
menus: [
{ id:'',title: '首頁' },
{ id:'',title: '關於我們' },
{ id:'',title: '聯絡我們' }
],
menuActive:0,
},
methods: {
menuClickActive : function (index) {
const vm =this;
vm.menuActive =index;
}
}
})
//Style
ul{
display:flex;
li{
display:flex;
margin:auto 10px;
&.isActive{
border-bottom:1px solid #333;
}
}
}

Swiper

swiper 安裝

swiper官網

1
npm install swiper --save

swiper 版本11.0.7

main.ts 引入swiper-bundle.css

官網css說明

  • swiper-bundle.css - 所有 Swiper 樣式,包括所有模組樣式(如導覽、分頁等)
  • swiper-bundle.min.css 壓縮的全部Swiper 樣式
檔案node_modules/swiper/swiper-bundle.css另存到@/assets/swiper-bundle.css 並且到main.ts全局加入
1
import '@/assets/swiper-bundle.css';

SwiperSlide props

  • 是 Swiper 幻燈片內部組件的另一個鉤子,用於獲取幻燈片資料(與 SwiperSlide 插槽道具中的資料相同)
    is one more hook for components inside of Swiper slides to get the slide data (same data as in SwiperSlide slot props)
  • - 元素將會被加入到 swiper-container 的開頭
    - element will be added to the beginning of swiper-container
  • -(預設)- 元素將添加到 swiper-container 的末尾
    (default) - element will be added to the end of swiper-container
  • - 元素將會被加入到 swiper-wrapper 的開頭
    - element will be added to the beginning of swiper-wrapper
  • - 元素將會被加入到 swiper-wrapper 的末尾
    - element will be added to the end of swiper-wrapper
1
2
3
4
5
6
7
8
9
10
11
12
13
14
15
16
17
18
19
20
21
22
23
24
25
26
27
28
29
30
31
32
33
34
35
36
37
38
39
40
41
42
43
<template>
<swiper
:modules="modules"
:slides-per-view="1"
:space-between="50"
:spaceBetween="30"
:effect="'fade'"
:loop="true"
:autoplay="{ delay: 4000, disableOnInteraction: false }"

@swiper="onSwiper"
@slideChange="onSlideChange"
:pagination="pagination"
>
<swiper-slide>Slide 1

</swiper-slide>
<swiper-slide>Slide 2</swiper-slide>
<template v-slot:container-start><span>Start</span></template>
<template v-slot:container-end><span>End</span></template>
<template v-slot:wrapper-start><span>One</span></template>
<template v-slot:wrapper-end><span>Two</span></template>
</swiper>
</template>

<script setup lang="ts">
import { Swiper, SwiperSlide } from 'swiper/vue';
import { Autoplay, Pagination, Navigation, Scrollbar }from 'swiper/modules';

const modules = [Autoplay, Pagination, Navigation, Scrollbar];
const pagination ={
clickable: true,
renderBullet: function (index:any, className:any) {
return '<span class="' + className + '">' + (index + 1) + '</span>';
},
}
const onSwiper = (swiper:any) => {
console.log(swiper);
};
const onSlideChange = () => {
console.log('slide change');
};
</script>

swiper參數

swiper參數

參數解釋備註
Pagination控制是否可以點選圓點指示器切換輪播分頁
Navigation 定義左右切換箭頭
Autoplay是否自動輪播{delay: 5000}
loop是否循環播放
slides-per-view 控制一次顯示幾張輪播圖
space-between 輪播圖之間的距離
allya11y 參數或布林值 true 的對象
allowSlideNext設定為 false 以停用滑動到下一個投影片方向(向右或底部) 預設是true
allowTouchMove如果為 false,則切換投影片的唯一方法是使用外部 API 函數,例如 SlidePrev 或 SlideNext預設是true
autoHeight設定為 true ,滑桿包裝器將調整其高度以適應目前活動投影片的高度預設是false
breakpoints允許為不同的響應斷點(螢幕尺寸)設定不同的參數。 並非所有參數都可以在斷點中更改,只有那些不需要不同佈局和邏輯的參數才可以更改,例如slidesPerView、slidesPerGroup、spaceBetween、grid.rows。 諸如loop和effect之類的參數將不起作用 object,
1
2
3
4
5
6
7
8
9
10
11
12
13
14
breakpoints: {
320: {
slidesPerView: 2,
spaceBetween: 20
},
480: {
slidesPerView: 3,
spaceBetween: 30
},
640: {
slidesPerView: 4,
spaceBetween: 40
}
}
cardsEffect允許為不同的響應斷點(螢幕尺寸)設定不同的參數。 並非所有參數都可以在斷點中更改,只有那些不需要不同佈局和邏輯的參數才可以更改,例如slidesPerView、slidesPerGroup、spaceBetween、grid.rows。 諸如loop和effect之類的參數將不起作用 具有卡片效果參數的對象
1
2
3
4
effect: 'cards',
cardsEffect: {
// ...
},
breakpointsBase ase 斷點(測試版)。 可以是窗戶或容器。 如果設定為視窗(預設),則斷點鍵表示視窗寬度。 如果設定為容器,則斷點鍵被視為滑動器容器寬度
centerInsufficientSlides 啟用後,如果幻燈片數量少於slidesPerView,它會將幻燈片居中。 不適合用於循環模式和 grid.rows 預設為false
centeredSlides 如果為 true,則活動投影片將居中,而不是始終位於左側。 預設為false
centeredSlidesBounds 如果為 true,則活動投影片將會居中,而不是在滑桿的開頭和結尾加上間隙。 必需的 centeredSlides:true。 不適合與循環或分頁一起使用 預設為false
containerModifierClass 修飾符CSS類別的開頭,可以根據不同的參數添加到swiper容器中 'swiper-'
controller 具有控制器參數的物件或布林 true 以使用預設設定啟用 控制器
1
2
3
controller: {
inverse: true,
},
coverflowEffect 具有 Coverflow 效果參數的物件。
1
2
3
4
5
effect: 'coverflow',
coverflowEffect: {
rotate: 30,
slideShadows: false,
},
createElements 啟用後,Swiper 將自動使用 swiper-wrapper 元素包裹投影片,並將建立啟用的導覽、分頁和捲軸所需的元素(使用各自的 params 物件或布林值 true)) 預設false
creativeEffect
1
2
3
4
5
6
7
8
9
10
11
effect: 'creative',
creativeEffect: {
prev: {
// will set `translateZ(-400px)` on previous slides
translate: [0, 0, -400],
},
next: {
// will set `translateX(100%)` on next slides
translate: ['100%', 0, 0],
},
},
cssMode 預設false 啟用後,它將使用現代 CSS Scroll Snap API。 它不支援 Swiper 的所有功能,但可能會在簡單的配置中帶來更好的效能。 這是啟用時不支援的:
立方體效果
速度參數可能沒有作用 所有與過渡開始/結束相關的事件(請改用slideChange) SlidesPerGroup 的支援有限 模擬觸控沒有效果,用滑鼠「拖曳」不起作用 抵抗沒有任何影響 允許投影片上一頁/下一頁 滑動處理程序 如果您將其與其他效果(尤其是 3D 效果)一起使用,則需要使用
元素包裹投影片的內容。 如果您在投影片上使用任何自訂樣式(例如背景顏色、邊框半徑、邊框等),則應在 swiper-slide-transform 元素上設定它們。
1
2
3
4
5
6
7
8
9
10
11
12
13
14
15
16
17
<div class="swiper">
<div class="swiper-wrapper">
<div class="swiper-slide">
<!-- wrap slide content with transform element -->
<div class="swiper-slide-transform">
... slide content ...
</div>
</div>
...
</div>
</div>
<script>
const swiper = new Swiper('.swiper', {
effect: 'flip',
cssMode: true,
});
</script>
cubeEffect 具有立方體效果參數的對象
1
2
3
4
effect: 'cube',
cubeEffect: {
slideShadows: false,
},
direction 可以是“水平”或“垂直”(對於垂直滑塊)。
1
'horizontal' | 'vertical'
edgeSwipeDetection string | boolean 預設是false 啟用釋放 Swiper 事件以在應用程式中進行回掃工作。 如果設定為“阻止”,那麼它將阻止系統向後滑動導航。 此功能僅適用於「觸控」事件(而不是指標事件),因此它適用於 iOS/Android 設備,不適用於具有指標(觸控)事件的 Windows 裝置。
edgeSwipeThreshold number:20 從螢幕左邊緣開始釋放觸控事件以便在應用程式中向後滑動的區域(以像素為單位)
effect 過渡效應:'slide', 'fade', 'cube', 'coverflow', 'flip' or 'creative'

Axios封裝

新增axios 資料夾新增一個檔案 service.ts

请求攔截&響應攔截 判斷
1
2
3
4
5
6
7
8
9
10
11
12
13
14
15
16
17
18
19
20
21
22
23
24
25
26
27
28
29
30
31
32
33
34
35
36
37
38
39
40
41
42
43
44
45
46
47
48
49
50
51
52
53
54
55
56
57
58
59
60
61
62
63
64
65
66
67
68
69
70
71
72
73
74
75
76
import axios, { InternalAxiosRequestConfig, AxiosResponse } from 'axios'
import {storeToRefs} from 'pinia';
import { useVerifyFormStore } from '../stores/verify';
//創建Axios_service
const service = axios.create({
baseURL: import.meta.env.VITE_API_URL,
timeout: 50000,
headers: { 'Content-Type': 'application/json;charset=utf-8' }
})

// 请求攔截
service.interceptors.request.use((config: any) => {
const storeVerify = useVerifyFormStore();
const { token } = storeToRefs(storeVerify);
if (token.value.trim()) {
config.headers.Authorization = token.value;
console.log(config.headers.Authorization)
}
return config
}, error => {
return Promise.reject(error)
})

// 響應攔截
service.interceptors.response.use((response:any) =>{
// const { code, msg } = response.data;
if (response.status === 200) {
console.log(response)
return response;
}
// console.log(code)
// return Promise.reject(new Error(msg || 'Error'));
},
error => {
if(error.response&&error.response.status){
const status = error.response.status
switch (status) {
case 400:
alert('请求錯誤');
break;
case 401:
alert('请求錯誤');
break;
case 404:
alert('请求錯誤地址出錯');
break;
case 408:
alert('请求超時');
break;
case 500:
alert('服務器內部錯誤');
break;
case 501:
alert('服務沒實現');
break;
case 502:
alert('網路錯誤');
break;
case 503:
alert('網路不可用');
break;
case 504:
alert('網頁超時');
break;
case 505:

alert('HTTP版本不受支持');
break;
default:
alert('請求失敗');
}
return Promise.reject(error);
}
return Promise.reject(error);
})
export default service;

新增一個request.ts

判斷 axios method
1
2
3
4
5
6
7
8
9
10
11
12
13
14
15
16
17
18
19
20
21
22
23
24
import instance from "./service.ts"

const axios = ({method,url,data,config}) => {
method = method.toLowerCase();
if (method == 'post') {
return instance.post(url, data, {...config})
} else if (method == 'get') {
return instance.get(url, {
params: data,
...config
})
} else if (method == 'delete') {
return instance.delete(url, {
params: data,
...config
}, )
} else if (method == 'put') {
return instance.put(url, data,{...config})
} else {
console.error('未知的method' + method)
return false
}
}
export default axios
src資料夾下新增一個 api 資料夾 統一管理Api

//登入

1
2
3
4
5
6
7
8
9
10
11
12
13
14
15
16
17
18
19
20
import axios from '../axios/request'


interface formType{
email?:string | null | undefined,
password?:string | null | undefined,
checkpassword?:string | null | undefined,
}

export const Login = (data:formType) => {
return axios({
url: import.meta.env.VITE_API_URL + '/auth/login',
method: 'post',
data,
config: {
timeout: 10000
}
})
}

//登入

1
2
3
4
5
6
7
8
9
10
11
12
13
14
15
16
17
18
19
20
21
22
23
24
25
26
27
28
29
30
31
32
33
34
35
36
37
38
39
40
41
42
43
44
45
46
47
48
49
50
51
52
53
54
55
import axios from '../axios/request'

// 出勤設定
export const getSetCheckModesApi = (data:object) => {
return axios({
url: import.meta.env.VITE_API_URL + '/api/setCheckModes',
method: "get",
data,
config: {
timeout: 10000
}
})
}

export const getSetCheckModeApi = (_id:string,data:object) => {
return axios({
url: import.meta.env.VITE_API_URL + '/api/setCheckModes/'+`${_id}`,
method: "get",
data,
config: {
timeout: 10000
}
})
}
export const addSetCheckModeApi = (data:object) => {
return axios({
url: import.meta.env.VITE_API_URL + '/api/setCheckMode',
method: "post",
data,
config: {
timeout: 10000
}
})
}
export const editSetCheckModeApi = (_id:string,data:object) => {
return axios({
url: import.meta.env.VITE_API_URL + '/api/setCheckModes/'+`${_id}`,
method: "put",
data,
config: {
timeout: 10000
}
})
}
export const removeSetCheckModeApi = (_id:string,data:object) => {
return axios({
url: import.meta.env.VITE_API_URL + '/api/setCheckModes/'+`${_id}`,
method: "delete",
data,
config: {
timeout: 10000
}
})
}


參考資料

安裝router自動生成與設置

Vite 安裝router自動生成與設置

Vite版本必須小於Vite6,

1
npm create vite@5

安裝router自動生成

1
npm install -D vue-router vite-plugin-pages vite-plugin-vue-layouts

router.ts

在src新增router資料夾,新增router.ts

1
2
3
4
5
6
7
8
9
import { Router,createRouter, createWebHistory } from 'vue-router'
import { setupLayouts } from 'virtual:generated-layouts'
import generatedRoutes from 'virtual:generated-pages'
const options= {
history: createWebHistory(),
routes: setupLayouts(generatedRoutes)
}
const router: Router = createRouter(options);
export default router

Ssr 專案 router.ts

改為 createMemoryHistory
history: createMemoryHistory(),

1
2
3
4
5
6
7
8
9
import { Router,createRouter, createMemoryHistory } from 'vue-router'
import { setupLayouts } from 'virtual:generated-layouts'
import generatedRoutes from 'virtual:generated-pages'
const options= {
history: createMemoryHistory(),
routes: setupLayouts(generatedRoutes)
}
const router: Router = createRouter(options);
export default router
錯誤訊息:找不到模組 'virtual:generated-layouts' 或其對應的型別宣告。ts(2307)

處理方式:tsconfig.json檔案內compilerOptions加入以下
1
2
3
4
"types": [
"vite-plugin-pages/client",
"vite-plugin-vue-layouts/client"
]

tsconfig.json

1
2
3
4
5
6
7
8
9
10
11
12
13
14
15
16
17
18
19
20
21
22
23
24
25
26
27
28
29
30
{
"compilerOptions": {
"target": "ESNext",
"useDefineForClassFields": true,
"module": "ESNext",
"lib": ["ESNext", "DOM"],
"skipLibCheck": true,

/* Bundler mode */
"moduleResolution": "node",
"allowImportingTsExtensions": true,
"resolveJsonModule": true,
"isolatedModules": true,
"noEmit": true,
"jsx": "preserve",

/* Linting */
"strict": true,
"noUnusedLocals": false,
"noUnusedParameters": true,
"noFallthroughCasesInSwitch": true,
"types": [
"vite-plugin-pages/client",
"vite-plugin-vue-layouts/client"
]
},
"include": ["src/**/*.ts", "src/**/*.tsx", "src/**/*.vue"],
"references": [{ "path": "./tsconfig.node.json" }]
}

全局設置於main.ts

1
2
3
4
5
6
7
8
9
import { createApp } from 'vue'

import App from './App.vue'
+ import router from "./router/router"


+ const app = createApp(App);
+ app.use(router);
+ app.mount("#app");

全局設置於main.ts

Ssr 專案 全局設置於main.t

1
2
3
4
5
6
7
8
9
10
11
12
13
import { createSSRApp } from 'vue'
import { createPinia } from 'pinia'
import App from './App.vue'
const pinia = createPinia()
+ import router from "./router/router.ts"

export function createApp() {
const app = createSSRApp(App);
app.use(pinia)
+ app.use(router);
return { app }
}

vite.config.ts 設置

1
2
3
4
5
6
7
8
9
10
11
12
13
14
+ import Pages from 'vite-plugin-pages'
+ import Layouts from 'vite-plugin-vue-layouts'
export default defineConfig({
plugins: [
vue(),
+ Pages({
+ dirs: [
+ { dir: 'src/views/frontdesk/', baseRoute: '/' },//前台
+ // { dir: 'src/views/admin/', baseRoute: 'admin' },
+ ]
+ }),
+ Layouts(),
]
})

vite.config.ts 設置

App.vue 新增router-view

1
2
3
4
5
<template>
<main class="main">
<router-view></router-view>
</main>
</template>

設置layouts
新增layouts資料夾內新增
frontLayout.vue,
LayoutBack.vue,
Layout404.vue
layouts資料夾內容

按前後台設置layout:
views/index.vue 內容
前台必須重新導向到/frontdesk/index;

1
2
3
4
5
6
7
<route lang="yaml">
path: "/",
redirect: "/frontdesk/index",
meta:
layout: frontLayout
</route>

新增frontdesk資料夾(這是前台的內頁檔案),
新增index.vue,
aboutme.vue;

1
2
3
4
<route lang="yaml">
meta:
layout: frontLayout
</route>

佈局頁面的製作

src/layouts/內有兩個frontLayout.vue,Layout404.vue
frontLayout.vue

1
2
3
4
5
6
7
8
9
10
11
12
13
14
15
16
17
18
19
//frontLayout.vue
<template>
<Nav :navLists="navLists" ></Nav>
<router-view />
</template>

<script setup lang="ts">
import { ref, onMounted } from 'vue'
import Nav from '../components/Nav.vue'
interface navListType {
id?: number,
name?: string,
href?: string,
}
const navLists = ref<navListType[]>([
{ id: 0, name: '首頁', href: '/' },
{ id: 2, name: '關於', href: '/about' },
])
</script>

Layout404.vue

1
2
3
4
5
6
<template>
<router-view></router-view>
</template>

<script setup lang="ts">
</script>

404頁面
新增[…all].vue
route lang=”yaml” =>meta:layout: Layout404

1
2
3
4
5
6
7
8
9
10
11
12
13
14
15
//這個檔案要注意別命名錯誤[...all].vue
<template>
<main class="flex flex-col items-center space-y-3">
<span class="text-2xl">
404
</span>
<router-link class="text-xl border p-1" to="/">回首頁</router-link>
</main>
</template>

<route lang="yaml">
meta:
layout: Layout404
</route>

動態router

新增user資料夾與資料夾內新增[id].vue
例如:edit[id].vue,
獲取動態id => route.params.id

1
2
3
4
5
6
7
8
9
10
11
12
13
14
15
16
17
18
19
20
21
22
23
24
25
26
27
<template>
<div>
{{title}}
</div>
</template>

<route>
{
path: '/user/:id',
name: 'User',
meta: {
layout: 'frontLayout',
}
}
</route>

<script setup lang="ts">
import {ref,onMounted} from 'vue'
import { useRoute, useRouter } from 'vue-router';
const route = useRoute();
const router = useRouter()
const title =ref<string>('ID');
onMounted(() => {
const id = route.params.id;
console.log('讀取動態參數id',id)
})
</script>
router params
1
2
3
4
5
6
7
8
9
<route>
{
path: '/user/:userId',
name: 'User',
meta: {
layout: 'frontLayout',
}
}
</route>

要連結到一個命名的路由,可以傳遞一個物件到 router-link 元件的 to 屬性:

1
2
3
<router-link :to="{ name: 'User', params: { userId: 'erina' }}">
User
</router-link>

這跟程式碼呼叫 router.push() 是一樣:

1
router.push({ name: 'user', params: { userId: 'erina' } })
router 重定向
1
2
3
4
5
6
7
8
9
10
11
<route>
{
path: '/user/:userId',
name: 'User',
redirect: '/'
//redirect: { name: 'homepage' }
meta: {
layout: 'frontLayout',
}
}
</route>

Vercel 404錯誤

Vercel 平台出現404頁面無法導到正確位置
新增vercel.json在根目錄 加入以下代碼

1
2
3
4
5
6
vercel.json
{
"rewrites": [
{"source": "/(.*)", "destination": "/"}
]
}

參考資料:
Vite Vecel 404

github

Object.assign()列舉自身屬性從一個或多個來源物件複製到目標物件

從一個或多個物件複製到目標物件。

1
2
3
4
5
6
7
8
9
10
11
12
13
14
15
16
17
18
// 建立目標對象
const person1 = {
firstName: "John",
lastName: "Doe",
age: 50,
eyeColor: "blue"
};

// 建立來源物件
const person2 = {firstName: "Anne",lastName: "Smith"};

// 將來源分配給目標
Object.assign(person1, person2);
console.log(person1)
// 顯示目標
let text = Object.entries(person1);

document.getElementById("demo").innerHTML = text;

參考資料

Vue Slot

Slot: Web組件占位符

通過插槽,妥展組件

默認Slot

1
2
3
4
5
6
7
8
9
10
11
12
13
//父元件
<template>
<my-component>
<p>Slot爸爸</p>
</my-component>
</template>

//子元件
<template>
<div>
<slot></slot>
</div>
</template>

默認Slot

Vite 導出Excel 使用SheetJs Part 1 (語法糖)

開發EIP系統時需要將數據導出Excel ,所以使用了 Sheetjs套件,
在剛開始的測試階段全部都定義全部都導出設定,

一 安裝Sheetjs
二 引入 xlsx
三 寫導出功能

遍歷=>使用函式utils.json_to_sheet(數據)=>utils.book_new() =>附加 utils.book_append_sheet(workbook, worksheet, "Dates")=>寫檔XLSX writeFileXLSX(workbook, "出勤列表.xlsx")就導出了出勤列表.xlsx

四 點擊綁定@click="exportExcel"

sheetjs官網

一 Vite 安裝 Sheetjs

1
2
3
4
5
6
7
// npm
npm i --save https://cdn.sheetjs.com/xlsx-0.20.0/xlsx-0.20.0.tgz
// pnpm
pnpm install https://cdn.sheetjs.com/xlsx-0.20.0/xlsx-0.20.0.tgz
// yarn
yarn add https://cdn.sheetjs.com/xlsx-0.20.0/xlsx-0.20.0.tgz

二 在使用中的組件引入 xlsx
三 寫導出功能exportExcel 函式 參閱Sheet Export Tutorial
1
2
3
4
5
6
7
8
9
10
11
12
13
14
15
16
17
18
19
20
21
22
23
24
25
26
27
28
29
30
31
32
33
34
35
36
37
38
39
40
41
42
43
44
45
46
47
48
49
50
51
52
53
54
55
56
57
58
59
<template>
<!----點擊導出Excel-->
<el-button @click="exportExcel" type="primary">導出Excel</el-button>
</template>

<script setup lang="ts">
import { ref, onMounted } from "vue";
import { utils, writeFileXLSX } from "xlsx"; // 引入導出 Excel 套件
interface listType {
UID?: string;
version?: string;
category?: string;
comment?: string;
descriptionFilterHtml?: string;
editModifyDate?: string;
hitRate?: number;
imageUrl?: string;
masterUnit?: object;
title?: string | any;
sourceWebName?: string | any;
startDate?: string | any;
discountInfo?: string | any;
}
// 輸出 Excel的內容
const excelXlsContent = ref<any[]>([]);
// 三 寫導出功能 輸出 現有表格數據
const exportExcel = () => {
// 設定Excel Header
excelXlsContent.value= lists.value.map((row: listType, index:number) => (
{
'項目': Number(index + 1),
'主題': row.title,
'來源': row.sourceWebName,
'開始': row.startDate,
'地點': row.discountInfo,
}
));

const worksheet = utils.json_to_sheet(excelXlsContent.value);
const workbook = utils.book_new();
utils.book_append_sheet(workbook, worksheet, "Dates");
writeFileXLSX(workbook, "出勤列表.xlsx");
}
const getItems = async () => {
try {
const api = 'https://cloud.culture.tw/frontsite/trans/SearchShowAction.do?method=doFindTypeJ&category=200';
const res = await axios.get(api);
console.log('culture', res.data, typeof res.data[0].masterUnit
);
lists.value = res.data;
}
catch (err) {
console.log('err', err);
}
}
onMounted(() => {
getItems()
})
</script>

讓使用者可以選擇要輸出的項目

要有表單讓使用選擇
使用跳出框,下期補件

Vite element-plus ts Dialog父子間的通訊

Vite element-plus ts Dialog 父傳子

父組件

v-model 的參數語法不會直接修改 props 的值 , 如何修改=>使用父組件 showDialog 父傳給子,@update:showDialog="showDialog = $event", 當 el-dialog 组件觸發 update:showDialog 事件時,子組件会觸發 update:showDialog 的自定義事件,並將新值作為参数傳遞給父組件

1
2
3
4
5
6
7
8
9
10
11
12
13
14
<template>
<!--點擊打開Dialog跳出框-->
<el-button @click="showDialog = true" type="primary">導出Excel</el-button>
<!--父組件 showDialogt父傳給子,@update:showDialog="showDialog = $event" -->
<Dialog
:showDialog="showDialog" @update:showDialog="showDialog = $event"/>
</template>

<script setup lang="ts">
import { ref, onMounted, computed } from 'vue';
const showDialog = ref(false);

</script>

子組件

子組件 :model-value="showDialog" @update:model-value="$emit('update:showDialog', $event)"

設定子組件關閉Dialog =>40 並需使用 let localShowDialog = ref(props.showDialog);
1
2
3
4
5
6
7
8
9
10
11
12
13
14
15
16
17
18
19
20
21
22
23
24
25
26
27
28
29
30
31
32
33
34
35
36
37
38
39
40
41
42
43
44
45
46
47
48
49
50
51
52
53
54
55
56
57
58
59
<template>
<!--子組件 :model-value="showDialog" @update:model-value="$emit('update:showDialog', $event)"-->
<el-dialog
:model-value="showDialog"
@update:model-value="$emit('update:showDialog', $event)"
title="Notice"
width="30%"
destroy-on-close
center
>
<span>
Notice: before dialog gets opened for the first time this node and the one
bellow will not be rendered
</span>
<div>
<strong>Extra content (Not rendered)</strong>
</div>
<template #footer>
<span class="dialog-footer">
<!----試過這個方式可以註解A-->
<el-button @click="cancel">Cancel</el-button>
<el-button type="primary" @click="update">
Confirm
</el-button>
</span>
</template>
</el-dialog>
</template>


<script setup lang="ts">
import { ref, watch } from "vue";
interface showDialogType {
readonly showDialog: boolean;
}
const props: showDialogType = defineProps({
showDialog: {
type: Boolean,
default: false,
},
})

// 設定子組件關閉Dialog
let localShowDialog = ref(props.showDialog);
//監控
watch(() => props.showDialog, (newVal:boolean) => {
console.log('newVal',newVal)
localShowDialog.value = newVal;
})
// 子對父傳值
const emits = defineEmits(['update:showDialog']);
const update = () => {
emits('update:showDialog', false)
}
const cancel = () => {
localShowDialog.value = false;
emits('update:showDialog', false)
}
</script>