維基百科這樣說:Node.js 是能夠在伺服器端運行 JavaScript 的開放原始碼、跨平台執行環境。
開發環境
常用 NVM 指令參考資料
- Node.js 官網
- Node.js 維基百科
- Node.js 教程
維基百科這樣說:Node.js 是能夠在伺服器端運行 JavaScript 的開放原始碼、跨平台執行環境。
Vue 3 的 API 的自動載入
特定的目錄 components、composables、layouts、plugin 添加檔案時,Nuxt 3 會自動載入這些元件
自動載入函數:useAsyncData,$fetch,ref、computed
Nuxt 自動載入的元件:參考官方文件
1 | <NuxtWelcome /> |
修改專案目錄nuxt.config.ts
1 | export default defineNuxtConfig({ |
1 | npx nuxi init nuxt-app |
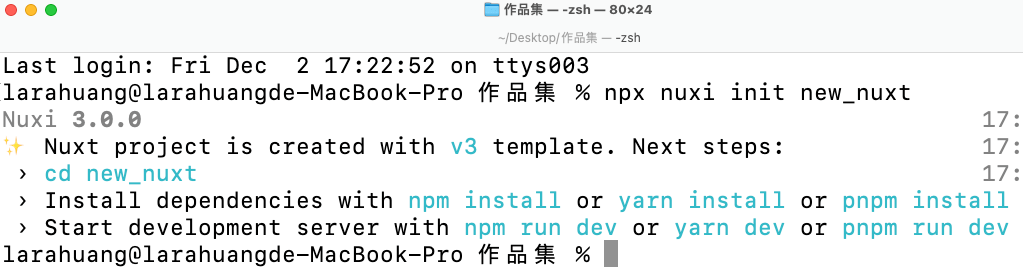
1 | cd 專案 |

1 | app.vue檔案內有個<NuxtWelcome />是 Nuxt 框架自帶的一個元件 |
1 | npx nuxi init[dir] //初始化一個 Nuxt 專案 |
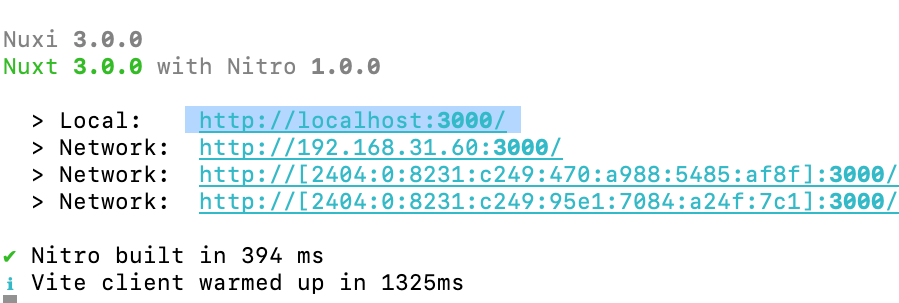
Nuxt專案安裝之後,
1 | $ npm install --save @fullcalendar/vue3 |
創建plugins/full-calendar.client.ts
1 | import "@fullcalendar/core/vdom"; // solve problem with Vite |
1 | <style> |
在app.vue 使用
1 | <template> |
1 | <style> |
Nuxt專案安裝之後,
1 | # NPM |
創建plugins/element-plus.js
1 | import { defineNuxtPlugin } from '#app' |
 所以重新儲存element-plus css
並且更改 nuxt.config.ts
所以重新儲存element-plus css
並且更改 nuxt.config.ts
1 | export default defineNuxtConfig({ |
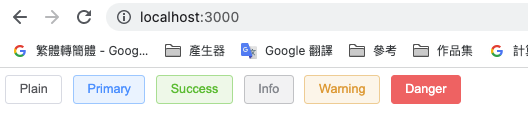
在app.vue 使用
1 | <template> |
新增 .gitignore 或是以下終端機語法
1 | touch .gitignore |
加入以下內容
1 | # Logs |
| # | 指令 | 解析 |
|---|---|---|
| 1 | $git config global user.name | 配置name |
| 2 | $git config global user.email | 配置email |
| 1-1查看配置 | $ git config --list | 列出目前設定的參數 |
| 1-2查看配置 | $ git config --global --list | 查看當前global用戶配置 |
| 1-2查看配置 | $ git config --local --list | 查看當前local用戶配置 |
| 3 | .gitignore | 忽略檔案,新增.gitignore 加入要忽略的檔案 | 4.1 | $ git init | 新增版控,初始化 |
| 4.2 | $ rm -r .git | 停止整個版本控制 |
| 4.3 | $ git add . | 放入暫存區 |
| 4.4 | $ git status | 時常檢查狀態 |
| 4.5 | $ git rm --cached |
取消追蹤 |
| 4.6 | $ git log |
檢視 commit 紀錄 |
| 4.7 | $ git log --oneline |
檢視 輸出更簡潔的 log |
| 4.8 | $ git log 檔案名稱 |
檢視 檔案名稱 |
| 4.9 | $ git rm 檔案名稱 |
刪除檔案 |
| 4.10 | $ $ git rm --cached welcome.html |
讓檔案不再受 git 版控(並不是刪除!) |
| 4.11 | $ git mv ex. $ git mv welcome.html hello.html |
變更檔名 |
| 4.12 | $ git checkout ex.切換到最新版本:$ git checkout master |
切換版本/分支 |
| 4.13 |
$ git diff
ex.比對工作目錄與暫存區(Stating Area)全部檔案的差異:$ git diff --cached
ex.比對當前文件與暫存區(Stating Area)全部檔案的差異:$ git diff filename
比對工作目錄(Working Directory)與指定 commit 之間的差異 :$ git diff commit-id
比對兩個 commit 之間的差異 $ git diff [commit-id][new commit-id]
比對兩個 branch 之間的差異 $ git diff branch1 branch2
|
比對工作目錄 |
| 4.14 | $ git reset $ git reset HEAD^ |
將暫存區(Stating Area) 恢復到 工作目錄(Working Directory) |
| 5 | $ git clone[url] | 抓遠端儲存庫下來 |
| 6 | $ git remote add (origin) (git@~.git) | 遠端連結 |
| 7 | $ git remote set-url (origin) (git@~.git) | 修改遠端連結 |
| 8 | $ git remote -v | 查詢遠端url |
| 9 | $ git push -u (origin) (master) | 推上並綁定 |
| 10 | $ rm -rf .git | 移除 Git | 11 | $ git status | 查看狀態 | 12 | $ git status -s | 狀態細節 | 13 | $ git add (file) | 狀態細節 | 14 | $ git add . | 新增 |
| 15 | $ git pull (远程主機名)(远程分支名)(本地分支名) | 拉取 |
| 16 | $ git clone -b (TOKEN)@github.com/xxxx/專案名稱.git | 全新版本必須加入token,clone單一分支 |
| 15 | $ git push -u (remote) (branch) | 上傳到分支 |
| 16 | $ git restore --staged (file) | 將暫存區的文件從暫存區側出 不會更改文件 |
| 17 | $ git branch (分支名稱) | 新增分支 |
| 18 | $ git branch -a | 查詢所有分支 |
| 19 | $ git checkout (分支名稱) | 到(分支名稱) |
| 20 | $ git log | 查看提交的歷史紀錄 |
| 21 | $ git push --set-upstream origin(分支名稱) | 只推倒分支名稱 |
| 22 | $ git commit | 將暫存區內容添加到倉庫中 |
| 23 | $ git diff[file] | 顯示暫存區和工作區的差異比較 |
| 24 | $ git reset | 回退版本 |
| 25 | $ git rm | 將文件在暫存區與工作區移除 |
| 26 | $ git mv | 移動或重新命名工作區 |
| 27 | $ git fetch | 從遠程獲取代碼庫 |
| 28 | $ git pull | 下載遠程代碼並合併 |
| 29 | $ git branch -d (branch) | 删除分支 |
| 30 | $ git push | 上傳遠程代碼並合併 |
| 31 | $ git blame (file) | 以列表形式查看文件的歷史修改紀錄 |
| 32 | $ git log --reverse --oneline | 以參數逆向顯示所有日誌修改紀錄 |
| 33 | $ git tag | 查看所有標籤 |
| 34 | $ git remote add [shortname] [url] | 添加遠程倉庫,指令一個名字 |
| 34 | $ git remote | 查看當前遠程庫 |
| 35 | $ git reset HEAD^ | 回退所有内容到上一个版本 |
| 36 | $ git reset --soft 参数 | 回退到某版本 |
| 37 | $ git remote -v | 顯示所有遠程倉庫 |
| 38 | $ git clone -b 「分支名」 「遠程庫」 | clone指定分支 |
assets 資產目錄
static 靜態目錄
nuxt-config.js nuxt 配置文件
pages 頁面目錄
plugins 插件目錄
middleware 中間件
layouts 頁面佈局
node_modules 依賴文件包,
package.json 腳本
在static檔案夾新增robots.txt
##robots.txt 文件有許多的規則,可以控制搜尋蜘蛛如何爬取你得網站。
請參閱
1 | User-agent: * |
Sitemap: https://xxx.xxx.xxx/sitemap.xml
1 | <!DOCTYPE html> |
新增default.vue
1 | <template> |
1 | <template> |
1 | <template> |
CSRF 跨站請求偽造,這是一個非常常見的攻擊手法
1 | npm install --save csurf |
1 | var csurf = require('csurf') |
1 | var cookieParser = require('cookie-parser') |
*注意若使用了 CSURF 之後 PostMan 就會無法動作唷
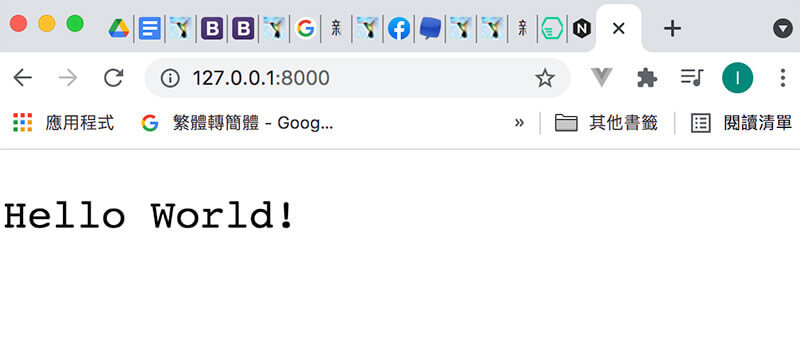
1 | // 載入 http 模組 |
終端機執行 node app.js , 開啟 http://127.0.0.1:8000